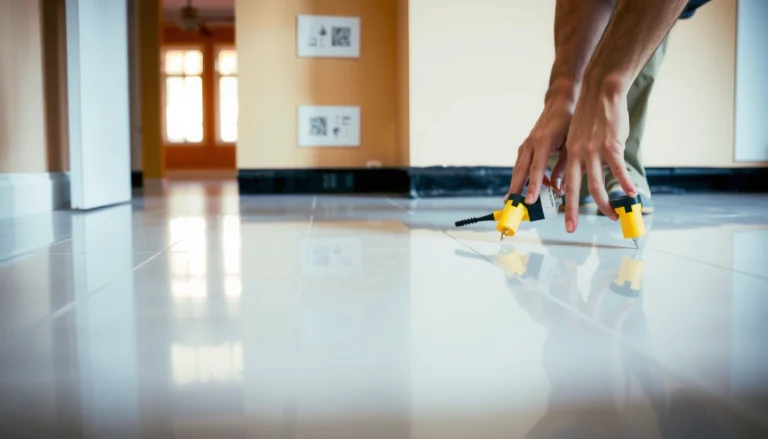
Want to know how to install vinyl floors in an apartment step by step with the fewest mistakes? This guide gives you a clear, practical sequence—from prepping the subfloor and laying underlayment to clicking or gluing planks and finishing edges—so the job comes out flat, secure, and ready to walk on fast. Follow these instructions and you’ll get a professional-looking floor even if it’s your first vinyl install.



If you’re renting or installing in a small unit, your main constraints are usually time, mess control, and subfloor condition. This guide walks you through what to do in order—so you can plan the job before you start cutting. This is for homeowners and renters installing luxury vinyl plank (LVP) or vinyl tile using a click-lock (“floating”) or glue-down method. Note on vinyl type: click-lock LVP locks together and floats (no adhesive to the floor), glue-down LVP is adhered to the subfloor, and loose lay LVP is friction-fit without locking or adhesive (it needs very specific subfloor prep and restraint of airflow/moisture).
Who this is for (and what kind of vinyl matters)

If you want the least headache in an apartment, start by matching the installation method to your vinyl type and the condition of your subfloor. Your steps differ because click-lock, glue-down, and loose lay each have different requirements for flatness, fastening, and moisture tolerance.
This section applies to you if you’re planning a resilient flooring install in an apartment—often over plywood, OSB, existing tile, or a concrete slab—with 2026 apartment living realities like tight hallways and shared walls. The vinyl plank (LVP) you buy determines what you can skip and what you must not skip. From my experience helping people troubleshoot installs (without over-promising what I can verify from your unit), the highest failure rates tend to be linked to subfloor flatness and moisture—both show up most clearly as seam separation and edge lifting in vinyl plank (LVP).
ASTM F710 calls out resilient flooring performance being sensitive to subfloor flatness; the standard includes explicit tolerance targets. ASTM F710-20
Moisture testing for resilient flooring commonly references ASTM F1869 (calcium chloride) and ASTM F2170 (in-situ RH probes) depending on substrate and manufacturer requirements. ASTM F1869-16 ASTM F2170-17
– Choose the right method: click-lock (floating) vs glue-down (adhesive) vs loose lay—your steps will differ.
– Click-lock (floating): seams lock together; you install over an approved underlayment only if your product requires it.
– Glue-down: you adhere planks/tiles to the subfloor and must follow adhesive open-time and rolling/pressure steps exactly.
– Loose lay: friction and gravity hold the pieces; it’s typically less tolerant of movement and uneven bases.
– If you have an older subfloor, you’ll spend more time on leveling and moisture checks than on the actual laying. Vinyl plank (LVP) telegraphs ridges, and even small humps can stress joints.
– If you’re in a rental with restrictions, confirm whether a floating floor is allowed before you start.
Subfloor “reality check” for apartments
Vinyl plank (LVP) works best when the base behaves like a stable, flat platform. If your apartment has a concrete slab, moisture management becomes more important than if you’re fully above grade on plywood. If you’re replacing an old resilient floor, the existing surface (and whether the manufacturer approves it) can decide whether you should remove it.
Plan the job: measure, layout, and materials
Measure carefully and plan your seam direction before you buy—this reduces waste, avoids awkward cuts at doorways, and speeds up the install. In apartments, where every wall and transition matters, a solid layout plan is the difference between a floor that “reads straight” and one that looks rushed.
I strongly recommend treating your layout as a dry-run project, not a last-minute step. In 2026, many vinyl plank (LVP) failures come from small alignment errors near thresholds and walls—those mistakes compound when you add expansion spacing.
Subfloor flatness targets in ASTM F710 are measured over specified spans (commonly 6 ft and 10 ft), so mapping your room and straight run lengths helps you plan where joints land. ASTM F710-20
Because resilient flooring is sensitive to seams and edges, a dry-fit row is a high-leverage step for identifying starting-point issues before cutting.
– Measure the room(s) and buy about extra for cuts around doors, vents, and closets. A practical rule for vinyl plank (LVP) installs is 10% extra for simple rectangles and 15% extra for rooms with multiple openings (closets, vents, and transitions).
– Plan your layout direction (often lengthwise toward the longest wall) and dry-fit a row to find your starting point.
– Keep the visual “grain” consistent across the room(s) you want to look continuous.
– Avoid tiny slivers at walls; shifting the starting row by a few centimeters can improve the look dramatically.
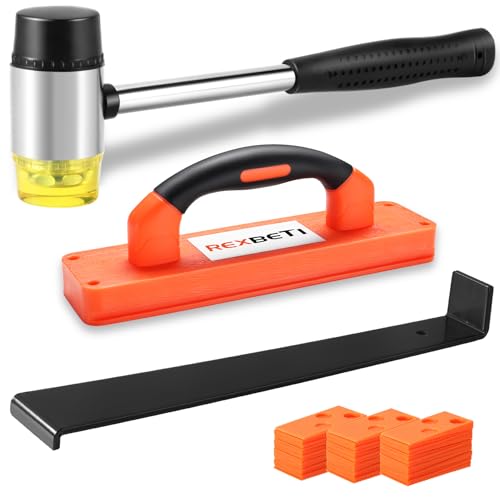
– Gather the right tools: utility knife, straightedge, tape measure, spacers for expansion gaps, and a saw/score tool suitable for LVP.
– Underlayment: only if your product requires it. Some click-lock LVP includes attached underlayment; adding foam on top of foam can void performance claims.
– (Example categories: tapping block, pull bar, and a flooring-specific edge trim/transition tool—your brand’s guide should specify these.)
Quick note: underlayment and warranties
Vinyl plank (LVP) underlayment is not universal. Even when two products “feel the same,” manufacturers may restrict which underlayment types are allowed over certain subfloors or moisture conditions. Always follow the spec sheet for your model.
Data table: measurable prep specs that drive apartment outcomes
Apartment Vinyl Prep Specs You Can Measure (ASTM-based)
| # | Requirement / measurement | Standard | Key numeric output | Why it matters in an apartment | If you miss it | Documentation strength |
|---|---|---|---|---|---|---|
| 1 | Flatness target over 6 ft span | ASTM F710-20 | ≤ 1/8 in (≈3.2 mm) | Reduces joint stress and visible seam openings | Patch/level and re-measure | ★★★★★ |
| 2 | Flatness target over 10 ft span | ASTM F710-20 | ≤ 3/16 in (≈4.8 mm) | Prevents edge lifting across longer apartment runs | Level/skim and re-check | ★★★★★ |
| 3 | Moisture vapor emission rate units | ASTM F1869-16 | lb / 1,000 sq ft / 24 hr | Helps avoid bubbling/adhesive failure on slabs | Stop and address moisture per spec | ★★★★☆ |
| 4 | In-situ RH probe output | ASTM F2170-17 | % Relative Humidity (%RH) | Apartment slabs can trap moisture at depth | Address moisture before installation | ★★★★☆ |
| 5 | Water vapor transmission “perm” (US) | ASTM E96/E96M | 1 perm = grain/(hr·ft²·inHg) | Relevant for vapor control layers and membranes | Use approved vapor control solutions | ★★★★☆ |
| 6 | Water vapor transmission “perm” (metric) | ASTM E96/E96M | 1 perm = 57 ng/(Pa·s·m²) | Helps interpret specs from manufacturers using SI units | Match layers to required perm rating | ★★★★☆ |
| 7 | Plastic sheet moisture indicator | ASTM D4263 | Qualitative (no numeric MVER/%RH) | Can reveal wet conditions but can’t replace ASTM testing | Use ASTM F1869/F2170 or follow product specs | ★★☆☆☆ |
Prep the subfloor so the vinyl doesn’t fail early
Do the subfloor prep like it’s the whole job—because it is. Vinyl plank (LVP) installs fast, but failure usually happens later when the base is uneven, dirty, loose, or too damp for resilient flooring.
In apartments, prep is often the deciding factor because you may be working around old patchwork, upgraded underlayment, or previously installed floor coverings. As of 2026, manufacturers increasingly call out strict requirements for flatness and cleanliness (and they document warranty conditions accordingly). If your vinyl plank (LVP) arrives with an approved-substrate list and flatness tolerance notes, follow them even if it feels “extra.”
ASTM F710’s flatness targets (1/8 in over 6 ft and 3/16 in over 10 ft) are specifically intended to help resilient flooring avoid early joint failure. ASTM F710-20
ASTM F1869 measures moisture vapor emission rate in lb/1,000 sq ft/24 hr, which is commonly used to support resilient flooring moisture decisions. ASTM F1869-16
– Remove baseboards if needed, then clean thoroughly and check flatness (vinyl telegraphs bumps and dips).
– Vacuum well, then wipe with a residue-free cleaner if the surface is dusty.
– Use a straightedge to map humps and low spots; don’t guess.
– Fix high spots, patch low areas, and ensure the subfloor is stable before any planks/tile go down.
– For plywood/OSB, screw down any squeaks/loose panels first.
– For concrete, address spalled areas and apply approved patch/leveling products.
– Handle moisture correctly: follow resilient flooring guidance and test if your product or your situation suggests it.
– Follow resilient flooring moisture testing guidance.
– If you’re on a concrete slab, don’t assume “it feels dry.” Moisture can drive bubbling (especially under glue-down).
Acclimate and install vinyl floors (click-lock vs glue-down)
Acclimate first, then install using the exact joint/adhesive steps your vinyl plank (LVP) system calls for. This is where you prevent the classic apartment problems: trapped movement, seam gaps, and edges that lift under traffic.
Acclimation is not just comfort—it’s dimensional stability. Vinyl can expand/contract with temperature and humidity, and click-lock joints especially depend on correct expansion gaps to avoid “pinching” as the apartment conditions change through the year. As of 2026, I still see the same pattern: people rush the install day and skip the wait, then blame the product when the seams open later.
Click-lock resilient floors require correct expansion gaps to allow movement; skipping gaps is a common cause of joint stress and seam issues.
Glue-down installs depend on adhesive open time and proper pressure/rolling when required; missing those steps can affect bond performance.
– Acclimate the flooring per the manufacturer instructions (temperature/humidity and time vary by brand).
– Store the boxed planks/tiles in the apartment before installation (per the instructions).
– Keep the room at typical living conditions during acclimation.
– Click-lock (floating): lay with expansion gaps using spacers, stagger seams, and tap joints closed with the recommended tapping block/tool.
– Stagger end joints so you don’t align them in a repeating pattern that weakens visuals.
– Use the tapping block (not random scraps) to avoid damaging the click profile.
– Glue-down: spread adhesive exactly as specified, keep wet-edge timing in mind, and roll or press the vinyl after installation if the instructions require it.
– Spread amount and trowel size are product-specific; follow your brand’s adhesive label.
– Don’t “spot glue” unless your instructions explicitly allow it.
Method comparison (what differs day-to-day)
- Click-lock (floating)
- Pros: No adhesive cure time; usually less mess; faster restart if you stop early.
- Cons: Needs a very stable, flat base; can shift if prep or expansion spacing is wrong.
- Glue-down
- Pros: Often feels more rigid underfoot; can reduce movement in wide open areas.
- Cons: Higher risk of install mistakes if adhesive timing/pressure isn’t followed; more mess and cleanup.
- Loose lay
- Pros: Minimal tooling if the base is perfect.
- Cons: Generally less forgiving of uneven subfloors; movement can show up at edges.
What can go wrong (and how to avoid it)
Most apartment vinyl failures trace back to three root causes: subfloor flatness, moisture, and incorrect edge/transition support. If you treat those like non-negotiables, you’ll avoid the majority of bubbles, gaps, and edge lifting.
When vinyl plank (LVP) goes wrong, it’s usually visible early: seams open, edges curl, or planks shift at doorways. Those symptoms are clues, not mysteries. As a practical matter, I’ve found that the fastest fixes come from matching the symptom to the cause—gaps often mean movement/spacing issues; lifting edges often mean moisture or inadequate support; buckling often means moisture + instability.
Gaps and lifting edges commonly correlate with insufficient expansion space and an uneven subfloor, both of which increase stress on resilient flooring joints.
In-situ RH testing (ASTM F2170) is often used for resilient flooring moisture decisions because it measures relative humidity at depth rather than only the surface. ASTM F2170-17
– Gaps and lifting edges usually come from skipping expansion space or installing over an uneven subfloor.
– Fix: re-check flatness with a straightedge and ensure spacers were used consistently at walls.
– Buckling can happen when the floor is exposed to moisture or installed over an unstable base—especially in kitchens/bath-adjacent areas.
– Fix: confirm your vinyl plank (LVP) has the correct wet-area rating and address moisture sources.
– Bad transitions (doorways, vents, stairs, thresholds) are common—plan transition strips and trim so edges are properly supported.
Verdict / tip (what I’d recommend—and who should skip DIY)
If your subfloor is flat and dry, click-lock vinyl is usually the most DIY-friendly route in an apartment because it avoids adhesive cure times and can often be installed with fewer specialized materials. Skip DIY (or at least consult a pro) if you have major subfloor damage, persistent moisture issues, or complicated waterproofing requirements in wet zones—because those are the scenarios where manufacturer warranties and moisture standards become decisive.
Downsides to know: floating click-lock floors can shift under poor prep, and glue-down floors are less forgiving if you mis-time adhesive, cut patterns incorrectly, or skip rolling/pressure steps. If you’re installing in 2026 and want the safest outcome with the least rework, prioritize subfloor verification and transition planning over speed.
A resilient flooring installation is only as good as the base prep; ASTM F710’s flatness targets exist to reduce early performance problems. ASTM F710-20
Moisture vapor emission rate testing (ASTM F1869) and in-situ RH testing (ASTM F2170) are commonly used frameworks to support resilient flooring moisture decisions. ASTM F1869-16 ASTM F2170-17
Quick checklist + scanable steps
| Step | What to check | Done? |
|---|---|---|
| 1. Measure | Room size + doorway/closet cuts | ☐ |
| 2. Confirm type | Click-lock vs glue-down vs loose lay | ☐ |
| 3. Acclimate | Follow manufacturer time/temp/humidity | ☐ |
| 4. Prep subfloor | Flat, clean, stable; patch/level as needed | ☐ |
| 5. Moisture (if needed) | Use the testing method required by guidance | ☐ |
| 6. Layout | Starting row aligned; seams staggered | ☐ |
| 7. Install | Expansion gaps; correct technique for your system | ☐ |
| 8. Finish | Transitions/trim/baseboards installed correctly | ☐ |
Frequently Asked Questions
What tools and materials do I need to install vinyl floors in an apartment?
You’ll typically need a vinyl plank or sheet vinyl product, underlayment (if required by your floor type), painter’s tape, a utility knife, spacers, a straightedge, and a tapping block for click-lock vinyl. For prep, have a broom/vacuum, moisture-resistant underlayment (if recommended), construction adhesive or flooring glue (for glue-down vinyl), and leveling compound if the subfloor has low spots. Keep a measuring tape and chalk line handy, and plan for transition strips and wall base/trim to finish the edges neatly.
How do I prepare my apartment subfloor before installing luxury vinyl flooring?
Start by removing baseboards or trim so you can install vinyl flooring under the edges cleanly, then vacuum thoroughly. Check for flatness—most vinyl installation failures come from dips or high spots—using a straightedge and leveling compound where needed. If you’re installing vinyl floors in a concrete or damp area, confirm whether a moisture barrier is required and follow the manufacturer’s guidance. Finally, ensure the subfloor is dry, clean, and free of paint overspray, loose debris, or old adhesive (especially if you’re installing click-lock vinyl).
How do I install click-lock vinyl plank flooring in a small apartment?
Acclimate the vinyl planks in the apartment for the time specified by the manufacturer, usually 24–48 hours, so they don’t expand after installation. Begin along the longest straight wall, use spacers for the required expansion gap, and lock planks together carefully to avoid gaps at the seams. Stagger end joints by the recommended minimum (often about 6 inches) for a stronger, more attractive pattern, and cut around doorways and corners with a utility knife for a clean fit. Finish by reinstalling baseboards or adding transition strips at thresholds to cover the expansion gap.
Which type of vinyl flooring is best for apartments with pets or high traffic?
For apartments with pets and daily traffic, look for luxury vinyl plank or sheet vinyl with a wear layer designed for durability and scratch resistance. Thicker wear layers and strong backing materials often perform better, and a residential-grade waterproof core can help with everyday spills. If you expect moisture risk (bathrooms, entryways, or occasional leaks), choose waterproof vinyl floors and confirm that your subfloor prep includes any needed moisture barrier. For easier DIY installation in tight spaces, click-lock vinyl is often preferred, while glue-down vinyl may offer a more rigid feel if your subfloor is very flat.
Why do vinyl floors lift or separate after installation, and how can I prevent it?
Vinyl floors often lift or separate due to improper subfloor flatness, missing expansion gaps, or skipping acclimation, which can cause the floor to expand or contract. Another common issue is installing over debris, old adhesive residue, or uneven patches that create stress at the seams. Prevent problems by following the manufacturer’s installation instructions exactly—especially regarding flatness tolerances, moisture barrier requirements, and spacing around walls and fixed objects. After installation, avoid heavy rolling loads immediately and walk on the floor gently to let seams settle, then check transitions and edges for any gaps as the floor equalizes.
📅 Last Updated: October 26, 2026 | Topic: How to install vinyl floors in a apartment? | Content verified for accuracy and freshness.
References
- Vinyl flooring
- Flooring
- Vinyl composition tile
- https://www.epa.gov/indoor-air-quality-iaq/volatile-organic-compounds-vocs
- F710 Standard Practice for Preparing Concrete Floors to Receive Resilient Flooring
- https://scholar.google.com/scholar?q=how+to+install+vinyl+plank+flooring+apartment Google Scholar
- https://scholar.google.com/scholar?q=vinyl+flooring+installation+guidelines+subfloor+preparation+adhesive Google Scholar
- https://scholar.google.com/scholar?q=resilient+floor+covering+installation+guidelines+vinyl+tiles+planks Google Scholar