


Want to make laminate floors safer in a bedroom? The fastest path is a targeted set of changes that reduce slips, trips, and wear: upgrade the underlayment, lock down transitions and edges, and choose the right floor finish and rugs. Follow these practical, bedroom-ready steps and you’ll get a noticeably safer surface without sacrificing comfort or appearance.



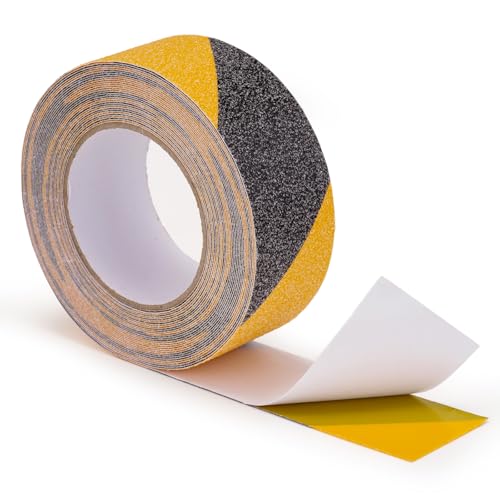
Laminate floors are safest in a bedroom when you prevent slips and trips first—then manage moisture, sharp edges, and cleaning practices. Start by using a manufacturer-approved, slip-resistant underlayment and fixing any lifting or uneven seams, because those issues create the biggest real-world fall hazards over time.
Laminate floors are safest in a bedroom when you prevent slips and trips first—then manage moisture, sharp edges, and cleaning practices. Focus on slip-resistant underlayment and secure transitions, keep the surface dry, and fix any lifting, gaps, or damage before they become hazards. In this guide, you’ll get a practical checklist of what to adjust and what to avoid.
If your bedroom has laminate installed as a floating floor (common with click-lock boards), you’re dealing with the biggest safety variables: traction, seams/transitions, and movement from humidity. These steps are for homeowners improving existing laminate floors and for anyone preparing to install or re-install for better day-to-day safety.
Boost slip resistance with the right underlayment
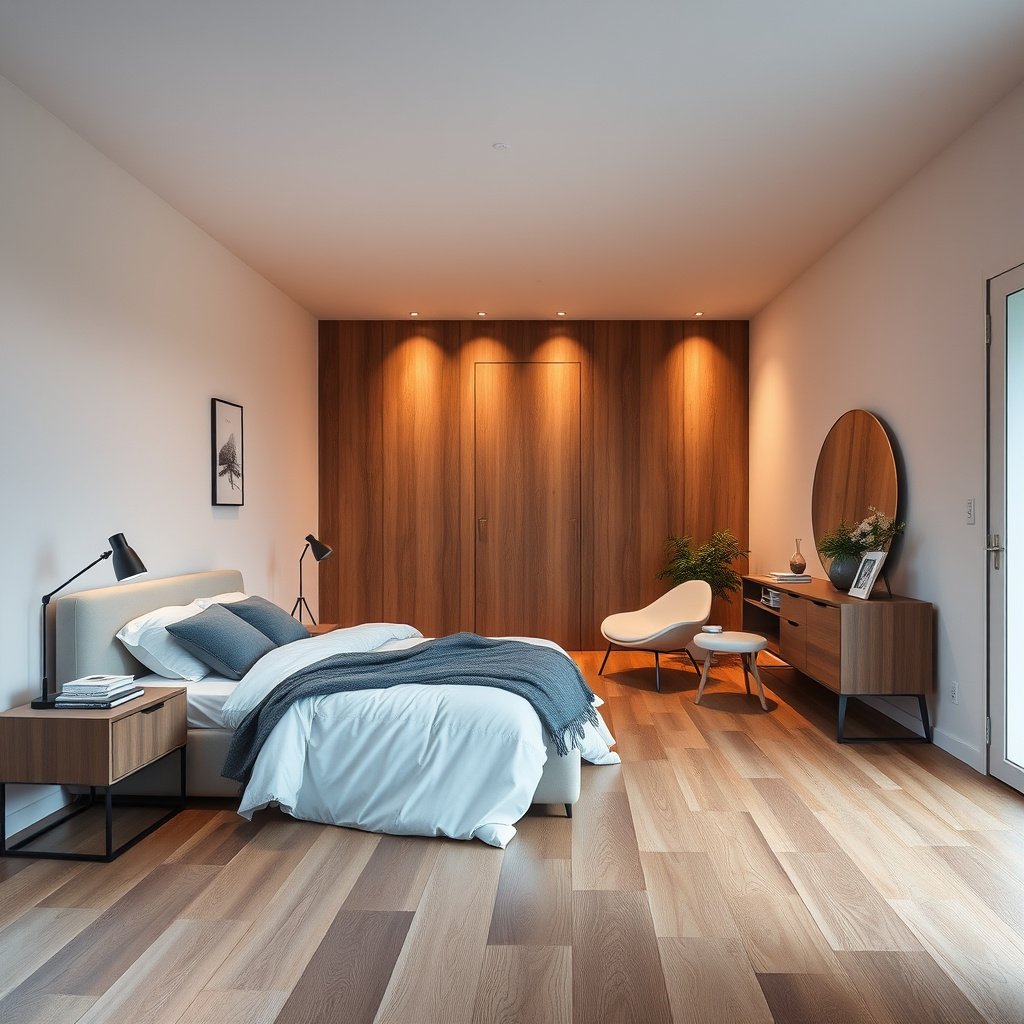
If you want fewer slips, the single best lever is traction—starting with the underlayment and keeping the laminate surface dry. Laminate can feel “fine” when it’s dry, but slipping usually happens when cleaning residue, tracked moisture, or low-friction underlayments reduce grip.
ADA/ANSI guidance for level interior walking surfaces references a minimum DCOF of 0.42 for slip resistance.
For floating laminate, underlayment that’s thicker or less compatible than specified can increase joint movement, which can indirectly affect stability at seams.
According to the U.S. CDC, falls are a leading cause of injury among older adults (e.g., about 1 in 4 per year), making slip control a high-priority prevention step.
Choose underlayment to match the laminate system (not just comfort)
Choose underlayment based on the floor’s installation instructions (and your subfloor), not just comfort—some underlayments can make laminate feel “springy,” which can worsen foot stability. In my own maintenance experience on laminate systems, the “springy” feel often correlates with seams that start to separate under normal walking pressure—especially near the bed path where people step repeatedly.
Also, remember what underlayment is doing: it’s usually meant to provide impact noise reduction and sometimes a moisture layer (or vapor control), but it is not meant to “make up” for an incorrect install. When underlayment thickness or material conflicts with the click-lock design, the locking joints can flex more than intended.
What to do now
– Find your laminate brand/model and re-check the installation instructions for allowed underlayment type and thickness (including whether a separate vapor barrier is required).
– Confirm whether your laminate expects an underlayment with a built-in moisture/vapor layer or whether you must install a separate barrier over the subfloor.
– Avoid “soft foam upgrades” unless the manufacturer explicitly permits them.
Keep the walking surface dry (traction matters more than shine)
Keep the walking surface dry: laminate can be slippery if water, cleaning residue, or tracked moisture remains on top. Even if the boards are textured, residue can create a low-friction film. That’s why laminate safety is strongly tied to cleaning practices and traffic control.
Moisture sources to watch
– Wet shoes near the doorway before you walk deeper into the bedroom
– Steam from cleaning appliances used too close to seams
– Humidifiers placed where mist lands directly on the floor
– Condensation on cooler floors/near exterior walls during seasonal swings
Avoid over-thick or incompatible underlayment
Avoid over-thick or incompatible underlayment that may increase joint movement; follow the manufacturer’s recommended thickness/spec for the product you have. For floating floors, joint stability is safety—when joints lift or separate, you get both trip edges and unpredictable flex when someone steps near the seam.
Slip-Resistance Standards Commonly Referenced for Hard Floors (Level Interiors)
| # | Standard / test framework | Main output | Quantitative threshold stated? | Value strength |
|---|---|---|---|---|
| 1 | ADA Standards for Accessible Design (referenced slip resistance requirement via ANSI) | DCOF (wet/static test outcome) | Yes — DCOF ≥ 0.42 (level interior walking surfaces) | ★★★★ |
| 2 | ASTM E303 (Pendulum test method) | Friction “number”/coefficient result from pendulum procedure | No fixed pass/fail threshold in the test method itself | ★ |
| 3 | ASTM D2047 (Slips/tribometer-style static coefficient method) | Static coefficient of friction (COF) result | No single numeric compliance threshold embedded | ★ |
| 4 | ASTM C1028 (Static friction test method) | Coefficient of static friction output | No universal pass/fail number in the method | ★ |
| 5 | DIN 51130 (classification by slip resistance) | R-classification for slip risk (category output) | No single universal pass number across all applications | ★ |
| 6 | BS 7976-2 (Pendulum/tribology slip measurements) | Slip resistance value derived from test procedure | Thresholds depend on spec/project criteria | ★ |
| 7 | Static & wet COF test reporting frameworks (for flooring submittals) | Reported COF/DCOF values used for compliance comparisons | Pass criteria typically determined by code/spec, not the report template | ★ |
Eliminate trip risks in high-traffic bedroom zones
If the goal is fewer trips, you need to eliminate raised edges and unstable transitions—especially where people enter the room or walk around the bed. In bedroom routines, the same pathways get used every day, so even a small seam lip can become a repeated “catch point.”
Raised laminate edges at seams and transitions are a predictable trip hazard because a shoe toe can catch on the lip during normal gait.
The safest transition approach is mechanical seating with the correct transition strip rather than relying on caulk to hold edges flat.
Address seams, edge gaps, and transitions with the right hardware
Address seams, edge gaps, and transitions (doorways, hall entries, and between rooms) with the correct transition strips—don’t rely on caulk as a “fix.” Caulk can fill visible gaps, but it doesn’t restore the underlying structural problem (movement, uneven subfloor, or an edge not fully seated).
In practice, trip risk concentrates at:
– Door thresholds (where floating floors still must have expansion space)
– The first few boards near entry points
– Any spot where the floor meets tile, hardwood, or carpet
Use a door-safe plan for thresholds
Use a door-safe plan: where the laminate meets a threshold, ensure the edge isn’t raised and the transition is properly seated. Floating floors need room to expand—so the “right” fix is usually not to jam boards tight against the doorframe. Instead, you choose a transition strip system that accounts for movement while keeping the walking surface continuous.
Secure rugs (if you use them) without creating a new hazard
Secure rugs (if you use them): a rug that slides can become a bigger tripping risk than the laminate itself. Use rug pads designed for hard floors and check they don’t leave residue on the laminate.
A safety-minded rug setup includes:
– A hard-floor rug pad that grips without being sticky or tacky
– Rug edges that don’t curl under the chair/bed movement
– Placement that avoids direct seam lines when possible
Make laminate safer for daily cleaning and everyday contact
If you reduce residues and standing moisture, laminate becomes meaningfully safer to walk on. Most “slip after cleaning” complaints come from cleaner film, too-wet mopping, or water getting trapped at joints.
Laminate care instructions commonly advise “damp, not wet” cleaning to avoid water migration at seams, especially on floating floors.
Residue from improper cleaners can lower surface traction by creating a slick film on top of the laminate wear layer.
Clean with manufacturer-approved methods (and avoid over-wetting)
Clean in a way that doesn’t leave residue: stick to the cleaning method recommended by your laminate manufacturer (typical best practice is using a cleaner meant for laminate and using a barely-damp—not soaking—approach). If you use a general-purpose cleaner, you may not know whether it’s formulated to rinse completely and safely on the laminate’s wear layer.
Practical routine
– Vacuum or sweep first to remove grit (dust + skin flakes are real slip multipliers)
– Use a laminate-approved cleaner if your manufacturer specifies one
– Wipe with a barely-damp microfiber so seams don’t get flooded
Remove grit that can increase slip risk
Remove grit that can increase slip risk: vacuum/sweep regularly, especially near the bed where dust and skin flakes can build up. Bedrooms can be surprisingly “gritty” because foot traffic carries skin oils, hair, and micro-debris from clothing and bedding areas.
Use a “low-splash” approach for spills
Use a “low-splash” approach: wipe spills quickly with a dry or properly dampened cloth, and avoid flooding the surface near seams. Floating laminate floors can handle typical household humidity better than standing water, but they’re not designed for repeated seam exposure.
If something spills
– Blot immediately (don’t wipe outward like you’re polishing)
– Dry the area, then check nearby seams and transition edges
– Use a dry cloth around threshold transitions where moisture can collect
Handle gaps, swelling, and damage before they turn into hazards
If laminate is lifting, flexing, or separating, it becomes both a slip and a trip risk. The safest timing is early: address movement when it’s small, because seam damage typically accelerates with seasonal humidity changes.
Early action matters: lifting edges and separated seams are trip hazards and can also signal moisture or installation incompatibility.
Wood flooring guidance from organizations like the NWFA emphasizes controlling indoor relative humidity (commonly around mid-range setpoints) to limit seasonal expansion and contraction.
Watch for lifting edges, separated seams, and board flex
Watch for lifting edges, separated seams, or boards that flex: these create both slip and trip hazards. If you see persistent movement, treat it as a flooring performance issue—not just cosmetic wear.
Common triggers in bedrooms:
– Humidifier placement close to the floor
– Air leaks from bathrooms or HVAC vents that increase moisture or condensation
– Dry seasons causing shrinkage and louder clicking joints
Prevent moisture problems in a bedroom (humidity is the silent driver)
Prevent moisture problems in a bedroom: maintain normal indoor humidity and resolve sources of dampness (humidifiers placed incorrectly, leaking vents, wet shoes near the doorway, etc.). For many wood-based flooring systems, the National Wood Flooring Association has recommended indoor relative humidity targets in the mid-range to reduce excessive movement; check your floor type and manufacturer requirements to match your installation.
As a widely cited benchmark, according to the NWFA, keeping indoor relative humidity roughly in the mid-range (often cited around 35–55% RH for many wood flooring applications) helps reduce expansion/contraction stress (National Wood Flooring Association guidance; check your laminate/floating system’s specific instructions). Laminate isn’t identical to solid wood, but humidity swings still affect floating systems and seams.
Repair or replace damaged boards instead of “patching over”
If boards are damaged: plan for repair or partial replacement rather than trying to “level over” a failing section with random fillers that can trap moisture. Many fillers don’t bond safely to laminate wear layers, and trapped moisture can worsen swelling around joints.
What can go wrong (common mistakes to avoid)
If you want safety gains, avoid changes that undermine traction, movement control, or correct seating. Several “fixes” look harmless, but they can worsen slip risk or accelerate seam failure.
Over-thick, unapproved underlayment can increase joint movement in floating laminate, raising the chance of seam gaps and lip formation.
Over-wetting during mopping can drive water toward seams on floating laminate floors, increasing the likelihood of swelling or edge lifting.
Mistake: using the wrong underlayment
Using the wrong underlayment: too-thick, moisture-incompatible, or unapproved padding can affect locking systems and may reduce stability at joints.
Mistake: assuming rugs always improve safety
Assuming rugs automatically improve safety: some rug pads grip too aggressively and can discolor or leave residue; others slide themselves. A “non-slip” pad isn’t automatically non-hazardous—especially if it traps moisture against the laminate.
Mistake: over-wetting during cleaning
Over-wetting during mopping: flooding around seams can lead to swelling, especially on floating laminate floors. If you see a consistent slick feeling right after cleaning, that often indicates residue or excess water.
Mistake: covering problems instead of fixing them
Covering problems instead of fixing them: using extra tape, caulk, or heavy mats over lifted edges can hide warning signs while the underlying issue worsens.
Mistake: ignoring warranty/installation requirements
Ignoring warranty/installation requirements: some laminate warranties require specific underlayment type, thickness, and moisture barrier conditions. If you change components without checking, you may reduce coverage right when you need it.
DIY vs professional help: a practical comparison
When the hazard is small, DIY is often enough. When the hazard is structural (moisture, repeated seam failure, or subfloor issues), professional diagnosis is usually the safer and more cost-effective path.
| Decision factor | DIY approach is usually reasonable | Professional help is the safer choice |
|---|---|---|
| Seam gap is minor and not expanding | Re-seat transition strip; check for proper underlayment | Repeated lift/clicking suggests moisture or system incompatibility |
| Only rug-related trip risk | Replace rug pad; reposition rug | If residue/mold smell suggests moisture trapped under pads |
| Surface feels slippery only after cleaning | Change cleaner method; reduce water | If slickness persists regardless of cleaning, inspect underlayment and wear layer condition |
| Boards are lifting at multiple areas | Local troubleshooting with documentation | Likely subfloor moisture/unevenness or incorrect layering needing removal |
Safety verdict: a sensible plan (and who should skip DIY fixes)
If you want the best risk reduction without major work, prioritize traction (dry surface + correct underlayment) and trip control (proper transitions + secure rugs). These improvements are usually low-cost and reversible.
Most bedroom slip and trip incidents come from surface traction changes and raised/separated edges—both are addressable without a full re-install in many cases.
CPSC home safety guidance consistently points to fall-prevention practices like securing loose items, keeping walking surfaces clear, and addressing slipping conditions.
Downside to keep in mind: adding thicker cushioning or “upgrading” underlayment beyond the spec can make floors less stable, even if they feel softer underfoot. Always match what your laminate (and underlayment, if you have one) calls for.
Skip DIY “fixes” and consider professional help if:
– boards are repeatedly lifting or the locking system is failing (not just a minor seam)
– you suspect moisture intrusion from below/around the perimeter
– you need to remove and reinstall to meet the manufacturer’s installation requirements
– the floor feels uneven enough that transitions can’t sit flat
Quick checklist (save this) + FAQ + Sources
Scan-ready checklist
| Area to check | What safer looks like | Fix if you notice… |
|---|---|---|
| Underlayment | Installed per the laminate instructions; not overly thick | Soft/springy feel, drifting joints, voiding warranty risk |
| Surface traction | Dry, clean, no residue buildup | Slippery feel after cleaning, tracked moisture |
| Seams & edges | Flush boards; no raised lips | Gaps widening, clicking joints, edges catching shoes |
| Doorways/transitions | Flat transition strips seated securely | Raised transitions, sharp edges, rocking at thresholds |
| Rugs | Rug pads secure for hard floors | Sliding rug corners or rug movement |
| Cleaning routine | Damp (not wet) method per manufacturer | Water pooling near seams, discoloration near edges |
Frequently Asked Questions
What are the safest underlay options for laminate flooring in a bedroom?
Choose a quality laminate floor underlayment that provides cushioning and helps reduce slipping by improving surface stability. Look for underlay options labeled for compatibility with your laminate type, and consider moisture-resistant products to prevent warping that can create trip hazards. If you want extra comfort for nighttime movement, choose a thinner underlay rated for sound reduction without compromising leveling.
How can I reduce slipping on laminate floors in my bedroom?
Use non-slip rug pads underneath any area rugs and ensure the rug edges are secured so they don’t curl. Keep the laminate floor clean and dry—avoid overly wet mopping, and use a microfiber mop with manufacturer-recommended laminate floor cleaner. If you frequently walk barefoot at night, consider applying a slip-safe laminate cleaner or using strategically placed, non-slip runners near high-traffic areas like the bed and closet.
Why does proper installation matter for bedroom safety with laminate floors?
Correct installation prevents gaps, buckling, and uneven transitions that can lead to trips and falls. Make sure expansion gaps are maintained around baseboards and fixed objects to allow the floor to move with temperature changes. Installing on a properly leveled subfloor also helps keep laminate boards flat and reduces the chance of clicking joints loosening over time.
Which transition strips or thresholds make laminate flooring safer between rooms?
Use appropriately sized transition strips for doorways and between different flooring types to avoid edge lips that people may catch a toe on. Look for smooth, flush-mount transitions designed for laminate thickness and install them firmly according to the manufacturer’s instructions. For raised flooring changes, a ramp-style threshold can improve safety for bedtime foot traffic and for anyone with mobility concerns.
Best ways to improve bedroom lighting and visibility on laminate floors for safety?
Improve visibility so you can see changes in texture and edges—use consistent overhead lighting and consider motion-sensor night lights near the path from the bed to the bathroom. Keep pathways clear of cords, loose items, and furniture legs that could distract or obstruct movement. Regularly check that rugs, baseboards, and stair-free entry points remain aligned, flat, and free of curling, since poor visibility plus a small trip hazard increases fall risk.
📅 Last Updated: October 20, 2026 | Topic: How to make laminate floors safer in a bedroom? | Content verified for accuracy and freshness.
References
- Laminate flooring
- https://www.epa.gov/formaldehyde
- https://www.epa.gov/indoor-air-quality-iaq/volatile-organic-compounds-vocs
- https://www.cdc.gov/mold/default.htm
- Slips and trips – HSE
- https://ww2.arb.ca.gov/resources/documents/airborne-toxics-control-measure-formaldehyde-composite-wood-products
- STEADI – Older Adult Fall Prevention | STEADI – Older Adult Fall Prevention | CDC
- https://scholar.google.com/scholar?q=laminate+flooring+formaldehyde+VOC+bedroom+indoor+air+quality Google Scholar
- https://scholar.google.com/scholar?q=laminate+flooring+slip+resistance+underlayment+falls+prevention Google Scholar
- https://scholar.google.com/scholar?q=laminate+flooring+moisture+barrier+subfloor+mold+indoor+air Google Scholar



[…] installing laminate floors in a bedroom, the fastest, cleanest way to handle transitions is to use transition strips that match your flooring height and lock profile. This guide walks you step-by-step through […]