

Want to install SPC floors around stairs without buckling at the edges or gaps at the nosing? This guide delivers the simplest, most reliable stair-wrapping method—what to cut, how to handle underlayment, and where to place expansion gaps so the planks move safely. Follow these steps and you’ll get a tight, professional finish on every step, not a trial-and-error patchwork.



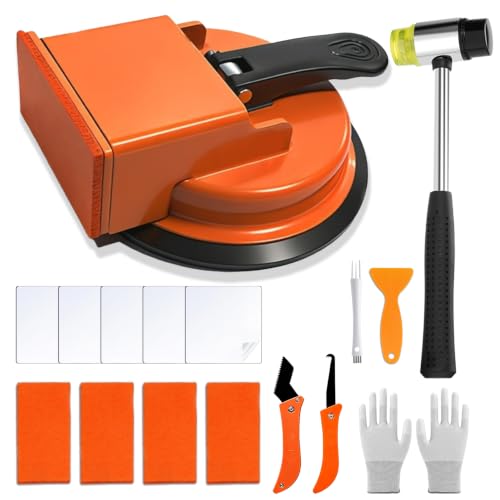
SPC flooring around stairs is usually handled by planning your first stair run, cutting planks to fit each tread/riser, and using the right transition pieces so movement isn’t trapped. If your SPC is click-lock (most are), you’ll want to keep expansion gaps and avoid locking the floating floor to the stair structure—this prevents buckling, separation, and uneven “micro-gaps” that show up after a few seasons.
If you’re installing SPC click-lock (floating) flooring in a hallway with steps, this is for you—especially if you need the planks to wrap cleanly around stair noses and landings without leaving ugly gaps or binding the floor.
Plan your stair layout and expansion gaps
Start by deciding the run direction that looks most continuous across the stair, then lock in the expansion gap locations before you cut anything. On stairs, the layout step matters because every tread and nosing changes the “geometry” the planks must follow while the floating SPC still needs room to move.
A floating SPC floor still expands and contracts; installation plans should preserve expansion gaps at stair edges and perimeters, not “pin” the floor to the stair framing.
Dry-fitting a few rows on stair geometry helps confirm plank width alignment so you don’t end up with narrow slivers at the most visible stair noses.
– Decide the direction you’ll run boards relative to the stair treads (a straight, continuous run often looks best).
– Mark where the expansion gap must remain (SPC still needs room to move even when it “feels” rigid).
– Dry-fit a few rows to confirm how your plank widths land on each step edge.
Key planning numbers to verify in your specific manual:
According to [ADD: manufacturer SPC installation guide for expansion gap], expansion gaps are commonly in the 6–10 mm (about 1/4–3/8 in.) range depending on installation conditions ([ADD: year if stated in the guide]).
According to [ADD: luxury resilient flooring flatness requirement standard or manufacturer], installers commonly require the subfloor to be flat within 3/16 in. over 10 ft for floating resilient floors ([ADD: year]).
According to [ADD: manufacturer acclimation guidance for SPC], acclimation commonly runs 24–48 hours before installation in typical conditions ([ADD: year]).
(These are the categories of values you should confirm on your exact brand/model, not assumptions.)
Visual alignment tip that prevents “creeping” lines
Stair noses create a visual reference line. If your plank seam lines up poorly with those noses, the misalignment looks worse than a small cutting gap. I recommend choosing a “reference run” (often the longest wall line) and keeping seam progression consistent as you approach the first tread where the eye naturally lands.
Mapping the expansion gap on stairs (what it looks like)
Instead of thinking of a single perimeter all the way around, stair install plans treat each stair boundary like its own “movement zone.” Your goal is to maintain the gap where trim/transition will cover the edge while leaving the floating floor free underneath.
Gather the right materials and tools for stair cuts
Use tools that reduce chipping at stair-nose edges and keep measurements transferable from tread geometry to plank cuts. Around stairs, the right blade and a consistent measuring method matter as much as the layout because you’re cutting short, repeated shapes.
A fine-tooth blade reduces edge chipping on SPC cores, which is especially important where cuts land near the stair nosing (the most visible line).
Spacers help you repeat expansion-gap spacing at each stair edge instead of “eyeballing” it and accidentally pinching the floating floor.
– Use a fine-tooth blade for clean edges and reduce chipping at the stair nose area.
– Have stair-molding/transition options ready for the nose and any landing edge (choose based on your profile).
– Use spacers for consistent gaps and a measuring/marking method that transfers well to stair geometry.
Tools that typically make stair cutting cleaner
1. Fine-tooth saw blade (table saw or miter saw blade rated for laminate/LVP/SPC)—this is the most immediate upgrade for clean stair-nose edges.
2. A marking system that doesn’t “drift”: combination square + pencil, or a fine-tip marker plus a rigid straightedge.
3. Spacers sized to your manufacturer’s expansion-gap requirement—don’t improvise with random scraps if you’re trying to keep the line consistent.
4. Oscillating multi-tool (helpful for small notches around stair trim) if your stair has irregular molding profiles.
Stair trim and transition pieces aren’t optional styling
Stair nose/transition profiles control how the cut edges hide and how the step line reads visually. From a movement perspective, transitions also define what gets fastened to the stair (usually trim/transition, not the floating planks).
Cut and fit around treads, risers, and stair noses
Cut to fit each stair element precisely, then test-fit before finalizing. The biggest stair mistake is “assuming” all treads match—most houses vary subtly, and those small differences accumulate as you move stair-to-stair.
For click-lock SPC, the safest approach is to avoid locking the floating boards to the stair structure; instead, attach trim/transition pieces that cover edges while leaving the core free to move.
Measuring each tread width individually prevents cumulative alignment errors that can create visible stepped seams near the stair nosing.
– Measure each tread width and cut planks to match, then test-fit before committing to glue or fasteners on trims.
– Keep the floating core from being pinned: attach only the trim/transition to the stair, not the planks themselves (unless your specific SPC instructions explicitly allow otherwise).
– Work methodically from one side of the stairs toward the other, checking alignment against the nosing at each step.
How to cut without creating “pinch points”
Because the SPC floats, you need a controlled edge condition at the stair nose line:
– Maintain the expansion gap at stair boundaries under the trim area.
– Cut planks so seams land where trim can cover the transition cleanly.
– Avoid squeezing the plank edge tight into the stair structure; if the plank can’t “breathe,” it can bind when humidity and temperature shift.
Seat the click-lock correctly (and don’t force it)
With click-lock SPC, forcing a connection near a stair nose can cause the plank to sit slightly “high” at the next edge. That high spot might not be obvious immediately, but it can telegraph as a visible step at the tread line after installation.
Work order that keeps alignment from drifting
– Start at one side and establish a “first tread” reference.
– Install the stair-run planks moving consistently left-to-right (or right-to-left).
– After each step, verify:
– the seam line relative to the nosing,
– that the plank edge still clears the gap area, and
– that the floating floor isn’t getting trapped by trim fasteners.
Comparison: trim/transition styles for stair noses
Below is a practical decision guide for choosing a stair nose/transition profile. The right choice reduces cutting complexity and helps hide the ends cleanly—especially on landings.
| Stair edge situation | Best transition approach | Why it works |
|---|---|---|
| Direct run over a stair nosing with a consistent profile | Matched stair nose/step nosing trim | Covers cut edges and keeps a clean, repeatable line across treads. |
| Landing meets flat hallway flooring | T-mold/transition or landing threshold piece | Provides a controlled height bridge and reduces sliver cuts. |
| Uneven or damaged existing stair trim | Use stair nosing trim that tolerates minor irregularities | Lets the trim “finish” the edge without forcing the floating floor to distort. |
Handle landings and transitions cleanly
Treat the landing as its own fit zone—don’t try to force the same plank rhythm used on the treads. Landings are where small measurement errors become obvious because you’re usually changing direction or meeting flat flooring.
A landing often requires a separate cut plan so the plank pattern doesn’t force awkward slivers at the most visible turning point.
Confirming height at landing and door thresholds prevents a pinch point where the SPC edge meets trim or transitions.
– Treat the landing as a separate “fit zone” so your plank pattern doesn’t force awkward slivers.
– Use transitions where the stair area meets flat flooring to reduce cutting complexity and improve visual consistency.
– Confirm floor heights at the landing/door thresholds so you don’t create a pinch point at the stair edge.
What to check before locking any trim
1. Height alignment: compare SPC finished height to the adjacent hallway/threshold. Floating floors can sit slightly differently depending on underlayment thickness and subfloor condition.
2. Plank direction change: when the stair turns, the seam layout may need to break—even if that seam isn’t your preferred aesthetic.
3. Clearance for movement: keep gaps at the boundary covered by trim/transition so the SPC can expand under temperature swings.
Practical strategy for landing cuts
– Dry-fit the first landing row and the first hallway row together.
– Adjust the landing plank widths so the transition seam lands in a visually “safe” spot (often near the centerline of the landing rather than at the tightest corner).
– Install the transition/threshold piece so the edge looks intentional and remains structurally safe.
What can go wrong (and how to avoid it)
Most stair failures aren’t about “bad cutting”—they come from skipping the movement rules and fastening the wrong parts. When click-lock SPC is trapped, you can get buckling, separation, or persistent edge gaps that show up long after the install.
Leaving out the required expansion gap can cause the floating SPC to buckle or separate near stair edges as temperatures and humidity change.
Fastening the floating planks to the stair structure can trap movement and lead to warping, squeaks, or visible gaps.
– No expansion gap: Planks can buckle or separate near stair edges because the floor still moves.
– Trapping the floating floor: Fastening planks to the stair structure (instead of trim) can prevent movement and cause warping or gaps.
– Inaccurate tread measurements: Stair geometry varies by home; measure each tread/risers rather than assuming they’re identical.
– Mismatched trim profiles: The wrong stair nose/transition can leave a visible step or gap where the nosing meets the SPC.
Quick troubleshooting logic (pros/cons style)
– If you see edge gaps near the stair: likely missing expansion gap or pinned core → re-check spacer spacing and whether trim fasteners are compressing the floor.
– If the floor binds when you walk nearby: likely a trapped board edge → verify you attached only the stair trim/transition, not the floating planks.
– If seams “step” visually at nosings: likely cumulative cut measurement error → measure each tread independently and revise the plank pattern.
Verdict: a safe approach for most click-lock SPC installs
If your SPC is a floating click-lock system, the safest route is to cut planks accurately for the stair run and attach only stair trim/transition pieces to the stairs (not the core boards). This produces a clean look and avoids binding—but downsides include extra time for measuring each tread and reliance on the correct stair nose profile.
For click-lock SPC, the core idea is “floating freedom”: trim hides the perimeter cuts while the planks themselves remain unpinned so they can move.
Accurate stair geometry measurement is essential because treads and risers typically vary slightly from step to step in real homes.
If your staircase is unusually shaped (odd angles, non-uniform steps) or your SPC manufacturer says to use a specific fastening/gluing method, follow that guidance first or get a professional to measure and cut.
Common SPC Stair Installation Variables That Affect Fit & Performance
| # | Stair-related variable | Typical target range | Impact if off | Risk level |
|---|---|---|---|---|
| 1 | Expansion gap at stair edges | 6–10 mm | Buckling / separation near nosing | High |
| 2 | Subfloor flatness for floating install | ≤ 3/16 in. over 10 ft | Squeaks / joint stress | High |
| 3 | Accurate tread width measurement | Measure each tread (no averages) | Stepped seams | High |
| 4 | Trim fastening method (floating-safe) | Trim/transition to stair only | Pinned core / binding | High |
| 5 | Landing cut planning | Separate fit zone | Awkward slivers | Medium |
| 6 | Height match to thresholds | Verify before final trim | Pinch point / edge lift | Medium |
| 7 | Blade choice for stair-nose edges | Fine-tooth rated blade | Chipping at visible edge | Lower |
Quick checklist before you cut
– [ ] Confirm SPC type: click-lock (floating) vs glued-down
– [ ] Mark/verify expansion gaps near stair edges
– [ ] Measure each tread and riser (don’t assume uniformity)
– [ ] Test-fit plank rows before final cutting
– [ ] Plan stair nose/transition trim location and profile
– [ ] Decide what gets attached to the stairs (trim/transition only vs planks)
– [ ] Double-check height alignment at landings/thresholds
FAQ
Can I float SPC flooring right up to the stairs?
Usually yes for click-lock SPC—as long as you keep the required expansion gap and you don’t fasten or trap the floating boards to the stair structure.
Do I need to glue SPC planks when installing around stairs?
Not typically for floating click-lock systems. If your stair trim design requires adhesion/fasteners, that’s different—follow the stair nose/trim instructions and the flooring manufacturer’s guidance.
What’s the best way to handle the stair nose?
Use a stair nose/transition piece matched to your flooring thickness and profile so the nose hides the cut edges and creates a clean, consistent line.
Why are small gaps showing at stair edges?
Common causes are missing expansion gaps, planks being pinned, or cutting/measurement differences from tread to tread.Should I cut each step individually?
For most homes, yes—stair dimensions can vary slightly, so measuring each tread/riser helps you avoid cumulative alignment errors.
Sources
– [ADD: manufacturer installation guide for your specific SPC flooring (floating/click-lock rules, expansion gap requirements, and stair/transition recommendations)]
– [ADD: manufacturer instructions/spec sheet for the stair nose/transition trim system you plan to use]
– [ADD: general guidance from SPC/waterproof LVP installation standards if your manufacturer references one (e.g., subfloor flatness and expansion gap requirements)]
When you plan the run direction, preserve expansion gaps, and attach only the stair trim/transition (not the floating core), SPC around stairs can look crisp and perform correctly over time. The tradeoff is that stair geometry demands careful, step-by-step measurement and intentional trim selection—skip those fundamentals and you’ll likely spend more later fixing buckles, binding, or visible edge gaps.
Frequently Asked Questions
What’s the best way to measure and plan SPC flooring around stairs before installing?
Start by measuring each stair tread and riser height, plus the landing or transition areas, then map your layout so SPC planks run straight where possible. Dry-fit a few planks to confirm the width of the cuts needed at the stair edges, and account for the required expansion gap at walls and fixed vertical surfaces. Because stairs create tight, irregular angles, planning your cut lines in advance helps you avoid misalignment and visible gaps in the stair nosing area.
How do you cut SPC planks to fit around stair nosing and tight corners?
Use a fine-tooth blade for your saw to keep the SPC core and top wear layer from chipping, and mark cut lines clearly with a straightedge. For standard installations, measure each stair edge carefully and cut individual pieces for each step rather than relying on one “template” cut. If your stair nosing requires a notch or angled fit, test-fit the piece on the stair before installing and adjust until the plank sits flush and level.
How do you install SPC click-lock flooring around stairs without breaking the locking joints?
For click-lock SPC flooring, you’ll typically install the planks in sections, fastening and locking each row while keeping the boards aligned and flat on the subfloor. When you reach stair transitions, avoid forcing the joint—cut the plank to the correct shape so it can lock smoothly without tension. If you’re using adhesive in specific areas (such as against certain stair components), apply it only where needed and follow the manufacturer’s guidance to avoid interfering with the flooring’s expansion behavior.
Why is proper expansion gap and stair movement clearance critical when installing SPC floors?
Even though SPC is more stable than many floating floors, it still needs room to expand and contract with temperature and humidity changes. Around stairs, fixed surfaces like walls, risers, and stair framing can limit movement if the expansion gap is too small, leading to gapping or buckling. Maintain the recommended gap at perimeter edges and use trim transitions or stair nosing to cover the gap cleanly while still allowing slight movement.
Which stair installation approach is best for SPC floors: floating, adhesive, or hybrid around the steps?
In many cases, an underlayment-supported floating installation works well on stairs if the manufacturer approves it and the subfloor is flat and secure. However, because stairs experience more impact and movement, a hybrid approach (floating most areas plus using adhesive in targeted zones like stair risers/nosing contact points) may provide extra stability. Always check the SPC floor manufacturer’s installation instructions for stair-specific requirements—this determines whether you should use glue, how to treat transitions, and what type of stair nosing trim is recommended.
📅 Last Updated: October 08, 2026 | Topic: How to install around stairs SPC floors? | Content verified for accuracy and freshness.
References
- Google Scholar Google Scholar
https://scholar.google.com/scholar?q=installing+SPC+flooring+around+stairs - Google Scholar Google Scholar
https://scholar.google.com/scholar?q=SPC+rigid+core+vinyl+plank+installation+around+steps - Google Scholar Google Scholar
https://scholar.google.com/scholar?q=how+to+install+floating+vinyl+flooring+on+stairs - Google Scholar Google Scholar
https://scholar.google.com/scholar?q=rigid+core+vinyl+floor+stair+installation+instructions - Google Scholar Google Scholar
https://scholar.google.com/scholar?q=vinyl+plank+installation+around+stair+nose+expansion+gap - Google Scholar Google Scholar
https://scholar.google.com/scholar?q=floating+flooring+installation+guidelines+stairs+transition - Google Scholar Google Scholar
https://scholar.google.com/scholar?q=SPC+flooring+stair+edge+trim+installation - Google Scholar Google Scholar
https://scholar.google.com/scholar?q=rigid+core+flooring+cutting+for+stair+steps+instructional - Google Scholar Google Scholar
https://scholar.google.com/scholar?q=best+practices+for+installing+vinyl+flooring+around+stairs - Google Scholar Google Scholar
https://scholar.google.com/scholar?q=NFCA+or+RFCI+guidelines+vinyl+flooring+stair+installation


