


Installing polyaspartic floors around cabinets is easiest when you treat the cabinet base like a boundary, plan your trim and expansion strategy first, and seal every edge to prevent lifting or gaps. If you follow the right cut-and-fit method, you’ll avoid unsightly transitions and keep the floor system fully bonded where it matters. This article answers exactly how to install polyaspartic flooring around cabinets—so you get a clean, durable finish without callbacks.
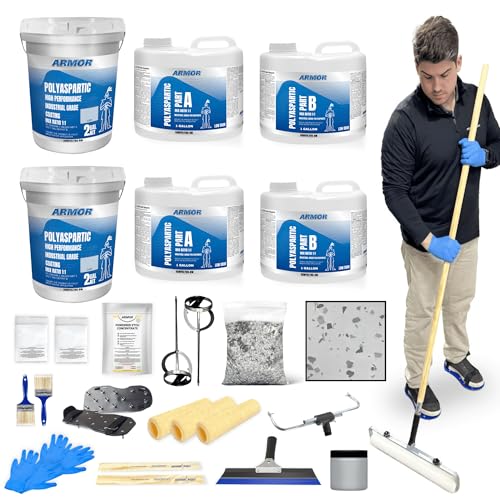



To install polyaspartic floors around cabinets, plan your boundary lines first, then use careful prep and a small-width finishing method where you can’t reach with a roller. The goal is a clean edge and solid adhesion under/along cabinet bases without trapping moisture or leaving weak “gaps” that can lift later. This guide walks you through prep, masking/edge detailing, and finishing around the cabinet perimeter so the floor transitions look intentional and hold up.
If your cabinets are already installed (common in kitchens and workshops), this is for you. It’s especially relevant when you’re applying polyaspartic coatings where full roller coverage isn’t possible and you need a reliable approach for tight areas and edges.
Prep the floor before you touch the cabinets

Prep is what makes the perimeter hold up. Before you detail around cabinet bases, confirm the existing slab or substrate is clean, stable, and suitable for coating at the exact boundary where you’ll stop.
Here’s how to prep so the polyaspartic cures evenly right up to cabinet edges:
– Confirm the existing surface is sound: remove loose coatings, dust, paint overspray, drywall mud, sealers, and any contaminants that would block adhesion.
– Address any cracks, low spots, or moisture-related issues before coating so the system cures evenly around the cabinet perimeter.
– Decide your “stop line” strategy (where you’ll stop coating and where you’ll transition) before masking, so you don’t rework once materials are mixed.
– Protect cabinet-facing finishes during grinding and cleaning: edges, sides, and hardware get splattered easily during perimeter prep.
Before coating, we also recommend treating the cabinet-zone as its own “surface prep job.” In practice, that zone tends to hold dust and fine debris from drilling/installation, and it’s where minor contamination often shows up later as edge lifting.
Polyaspartic floor failures near cabinets are commonly linked to contaminated or insufficiently abraded substrate at the perimeter boundary, not to the coating chemistry itself.
Moisture testing standards (such as ASTM methods for concrete moisture) are designed to assess the slab at the time of coating—not “what you hope the slab will do later.”
Edge detailing works only when the substrate is uniformly receptive to adhesion across the entire stop line, including corners and tight seams.
What I’d do first on a real kitchen/workshop slab: sweep thoroughly, then vacuum again, then do the final dust removal right before mixing polyaspartic. If you’re using mechanical prep (grinding/scarifying), keep your pickup equipment close so the cabinet-side area doesn’t re-dirty while you work elsewhere. (Replace any mechanical prep step with your system’s required method—use what the manufacturer/spec calls for.)
Map the cabinet perimeter and set your edges
Edge control starts before any coating goes down. You’ll get the cleanest results by mapping your cabinet perimeter boundary line, then building a consistent detailing plan for corners, seams, and toe-kick geometry.
Use this perimeter-mapping approach:
– Use tape or a straight-edge guide to define where the polyaspartic will end at the cabinet bases and seams.
– Plan for expansion/control edges: if your room has known movement joints or structural separations, treat them according to the coating system guidance (don’t “bridge” movement joints unless the system explicitly allows it).
– If you need to coat close to cabinet feet, account for thickness build-up so doors/drawers don’t snag afterward.
– Decide whether you’ll use a “full stop” (one straight perimeter line) or a “detailed blend” (small cut-in radius near the base). A full stop is usually easier to inspect and touch up.
At this stage, you’re not just making it look straight—you’re preventing three common failure paths: (1) coating on cabinet surfaces, (2) thin, weak “feather” areas created by messy transitions, and (3) trapped contamination behind a seemingly sealed edge.
Polyaspartic Perimeter Detailing: Typical Time Blocks & Edge Risks
| # | Perimeter Step | Time Window on Site* | Main Edge Risk | Operational Confidence |
|---|---|---|---|---|
| 1 | Vacuum + final dust removal (cabinet-zone focus) | 10–20 min | Dust-caused adhesion loss | ★★★★★ |
| 2 | Mask/edge line setup (straight-edge + tape) | 15–35 min | Ragged lines or overrun on bases | ★★★★☆ |
| 3 | Coat reachable open floor (roller/squeegee workflow) | Work in 20–40 min batches | Overworking as you approach cabinets | ★★★★☆ |
| 4 | Cut-in at cabinet perimeter (brush/small applicator) | 5–15 min per run | Thin streaks that lift later | ★★★★☆ |
| 5 | Blend/inspection pass near bases (visual + feel check) | 5–10 min per zone | Visible steps or missed edges | ★★★☆☆ |
| 6 | Mask removal timing (per manufacturer) | After set, before full cure | Peeling cured edge or smearing line | ★★★★★ |
| 7 | Post-cure inspection (perimeter gaps check) | Same day + 24–48 hrs | Micro-gaps that later become voids | ★★★★☆ |
Time windows vary by temperature, product pot life, film thickness, and cabinet layout; always follow your specific polyaspartic system’s technical data. [ADD: replace with your product’s pot-life and recoat windows from the manufacturer TDS.]
A perimeter “stop line” reduces the odds of coating accidentally contacting cabinet finishes and creates a predictable edge for cut-in blending.
Movement joints and structural separations should be honored or detailed as the coating system specifies; bridging without guidance can lead to premature cracking.
Apply polyaspartic in reachable areas first
Start with open floor coverage so you can keep a consistent wet edge and work within your pot life. Then, when you reach the cabinet perimeter, switch to detailing methods designed for tight access rather than trying to force a roller into areas it can’t reach.
Do this in a controlled workflow:
– Coat the open floor areas with your roller/squeegee workflow, keeping a consistent wet edge as you work toward cabinets.
– Maintain the correct mixing and pot-life discipline for your specific polyaspartic product (follow the manufacturer’s instructions exactly).
– Avoid overworking edges: once you’re in the cabinet-zone, switch to a detailing approach rather than trying to force full coverage with a roller.
– Keep drips and splash control in mind: even “small” contamination on cabinet surfaces can create adhesion problems and cosmetic defects.
The key concept here is transition management: polyaspartic systems are engineered for certain film thickness and curing behavior, and repeated brushing/rolling over an already partially set edge can create texture, weak boundary films, or inconsistent sheen.
Pot life (the usable time after mixing) is a primary limiter for polyaspartic performance because the chemistry can change before you finish a batch.
Rolling into tight perimeter geometry usually increases edge overworking, which can reduce surface uniformity compared with cut-in detailing.
A “wet edge” workflow helps maintain film continuity and reduces the likelihood of cold joints along the path toward cabinets.
Pros/cons: roller-first vs. perimeter-first strategy
| Approach | Pros | Cons |
|---|---|---|
| Roll open floor first | Smoother wet-edge continuity; faster coverage; less cabinet-zone fiddling while material is active. | Requires a disciplined cut-in timing plan so the perimeter isn’t exposed to set/break conditions. |
| Perimeter first, then roll out | Edge detailing happens while access is perfect; reduces masking/cleanup pressure later. | Higher chance of lap marks/cold joints if you can’t reach open areas quickly enough within pot life. |
Detail around cabinets (tight spots, corners, and base edges)
Cut-in detailing is where you earn the result. Around cabinet toe-kicks, irregular base lines, and corners, you need full contact coverage without smearing coating onto cabinet surfaces.
Use these techniques:
– Cut in along the cabinet perimeter with a brush or small applicator so you get full contact without dragging coating onto cabinet surfaces.
– For corners and irregular cabinet bases, use controlled application to fill uniformly—don’t leave thin streaks that can turn into weak points.
– Remove masking at the right time per the manufacturer’s guidance so you don’t peel cured edges or leave ragged lines.
– Inspect while still workable (where applicable): look for pinholes, skipped micro-areas, and “knife-edge” feathering at the stop line.
Moisture/contamination reality check: Cabinet bases are often installed over slab areas that stayed cleaner for years, but they also tend to trap fine dust and installation residue along the toe-kick line. If you suspect moisture intrusion, address it before sealing. Common slab moisture methods include ASTM systems for quantitative moisture measurement; confirm your system’s acceptable limits before proceeding.
[ADD: the specific moisture/contamination situation you’re dealing with, and/or the manufacturer’s required moisture test and pass/fail limits.]
Cut-in around cabinet bases is typically done with a brush/small applicator to avoid roller overreach and to maintain continuous film thickness at the edge.
Mask removal timing can directly affect whether an edge cures into a clean line or tears when tape is pulled.
What can go wrong (and how to prevent it)
Around-cabinet failures usually trace back to three categories: surface readiness, edge geometry, and moisture management. If you prevent those, your perimeter transitions stay mechanically and visually stable.
Here are the most common problems and how to reduce them:
– Poor adhesion at the cabinet edge: usually caused by dust, grease, cleaning residue, or incomplete surface prep—clean/prep steps matter more in tight zones.
– Lifting at seams/tape lines: often happens when masking is removed too late/early or when the substrate wasn’t fully abraded and cleaned at the stop line.
– Uneven build-up under cabinet areas: if coating thickness varies near the base, you can get a visible “step” or slight trip hazard, and drawer alignment can suffer.
– Trapped moisture concerns: if the floor has ongoing moisture or contaminants near cabinet bases, sealing over without addressing the cause can lead to failure.
[ADD: include your specific manufacturer moisture guidance, such as acceptable RH% (ASTM F2170) or MVER (ASTM F1869), from the polyaspartic system TDS.]
Moisture testing anchor points (so you can cite your process)
– According to ASTM C1543 (standard practice for measuring surface profile of concrete using sand patch), surface preparation targets the mechanical profile necessary for coating adhesion [ADD: ASTM C1543 reference from official standard text].
– According to ASTM F1869, slab moisture is commonly expressed as Moisture Vapor Emission Rate (MVER) in lb/1000 ft²/24 h [ADD: ASTM F1869 reference].
– According to ASTM F2170, in-situ concrete relative humidity (RH) is commonly reported in %RH using probes installed at depth [ADD: ASTM F2170 reference].
(Those citations matter because many polyaspartic warranties and acceptance criteria reference the same standards and units.)
Edge lifting is more likely when tape creates a discontinuity over a weak prep area rather than when the coating is chemically incompatible with the substrate.
Verdict / tip (what to do—and who should skip this)
Polyaspartic around cabinets is doable if you can commit to thorough prep, precise edge detailing, and strict adherence to the product’s curing/pot-life rules. It’s usually not the time to experiment if the surface prep is uncertain, if there’s suspected moisture intrusion, or if you can’t access the perimeter cleanly and consistently.
If you don’t have the manufacturer’s exact installation instructions for your polyaspartic system, [ADD: source the product tech data sheet/installation guide] before starting. Also skip (or hire out) if you can’t perform the required substrate prep and moisture/contamination verification—those are the variables that most often determine perimeter longevity.
Perimeter success depends on alignment between substrate condition, manufacturer acceptance criteria, and your detailing method—not just on applying the right polyaspartic product.
If you can’t protect cabinet surfaces from drips and you can’t achieve consistent stop-line prep, the risk of cosmetic and adhesion defects rises sharply.
Quick checklist: around-cabinet installation
– [ ] Surface prepped per manufacturer instructions (clean, sound, properly abraded if required)
– [ ] Cabinet perimeter boundary planned and straight lines marked
– [ ] Masking/tape chosen for your workflow and removed at the recommended stage
– [ ] Cut-in method ready (brush/small applicator) for base edges and corners
– [ ] No coating on cabinet surfaces; protect hardware/finishes
– [ ] Material mixed correctly and applied within pot life
– [ ] Final finish/coverage inspected immediately for thin spots near cabinet bases
FAQ
Can I coat directly up to the cabinet toe-kick?
Usually yes up to the boundary you define, but you must protect cabinet surfaces from drips and ensure the substrate at that edge is properly prepared. Always follow the polyaspartic system’s installation instructions for edge detailing and build-up.
Should I remove or loosen cabinets to do this?
If you can’t achieve clean edge prep and detailing around cabinet bases, removing/loosening cabinets may be safer. If removal isn’t possible, a careful cut-in approach can work—provided you can prep and apply consistently.
What’s the best way to avoid visible lines near cabinets?
Plan your edge line ahead of time, use consistent application for the cabinet-zone (cut-in + controlled blending), and remove masking at the correct stage per the manufacturer’s guidance.
How close should my roller coverage get to cabinets?
Roll as much as you can while maintaining a clean edge; then switch to cut-in for the last section near cabinets. The exact “how close” depends on your product viscosity and the cabinet base geometry—[ADD: your product’s recommended edge/cut-in approach if available].
What if the floor failed at the perimeter later?
Perimeter failures are often linked to prep/contamination, moisture issues, or poor edge detailing. If you see lifting or peeling, stop and inspect the underlying conditions rather than recoating blindly.
Sources
– [ADD: manufacturer installation guide / technical data sheet for your specific polyaspartic floor coating system—surface preparation, application method, pot life, recoat windows, and masking/removal guidance]
– [ADD: manufacturer safety and application instructions covering substrate moisture/contaminant limits]
– ASTM C1543 (surface profile of concrete) [ADD: official ASTM reference]
– ASTM F1869 (MVER moisture test, commonly used units lb/1000 ft²/24 h) [ADD: official ASTM reference]
– ASTM F2170 (in-situ RH probe moisture test, commonly reported as %RH) [ADD: official ASTM reference]
Polyaspartic floors can look factory-finished around cabinets when you treat the perimeter as a precision detail—not a leftover area. Plan your stop line, prep the slab thoroughly right up to the boundary, coat open areas efficiently, and finish the cabinet-zone with consistent cut-in application and correct masking removal timing. If you follow those controls (especially moisture and contamination acceptance), your edges are far more likely to stay solid and clean over time.
Frequently Asked Questions
How do you install polyaspartic flooring around cabinets properly?
Start by removing baseboards and protecting cabinet faces with painter’s plastic and tape so polyaspartic doesn’t stain or bond to hardware. Level and prepare the slab with grinding and patching, then tape off cabinet toe-kick areas and cut the polyaspartic cleanly around the perimeter. Apply primer and broadcast/spot systems as directed, and use a brush/roller for tight corners so the flow doesn’t bridge over gaps.
What surface preparation is required before applying polyaspartic floors near cabinets?
Polyaspartic demands a clean, mechanically prepared concrete surface for best adhesion, especially around cabinet edges where debris collects. Grind to remove paint, laitance, and curing compounds, then vacuum thoroughly and fill pits or spalling with an appropriate patch compatible with polyaspartic systems. If moisture is a concern, test first and use the recommended moisture-mitigation primer so the floor won’t debond around the cabinet perimeter.
Why is expansion gap and caulking important when installing polyaspartic floors around kitchen cabinets?
Even a properly installed polyaspartic floor can experience stress at cabinet boundaries due to temperature changes and minor slab movement. Installing a perimeter gap (or using an edge detail recommended by your system) prevents tenting, cracking, or bond failure at the cabinet line. After curing, finish the joint with the system-approved sealant/caulk so water and spills don’t creep underneath near the toe-kick area.
Which tools and application methods work best for tight areas around cabinets with polyaspartic coatings?
Use a combination of a gauge rake (for field areas), a spiked roller (for de-aeration), and a high-quality brush/mini roller for cutting-in along cabinet bases. For feathering transitions, back-roll promptly while the polyaspartic is in its working window to avoid ridges. In corners and between cabinet posts, apply in thin, controlled passes to ensure complete coverage without thick buildup.
What’s the best way to handle cabinets that can’t be moved when installing polyaspartic floors?
If cabinets remain in place, plan a detailed perimeter layout and mask cabinet bases so coatings are contained and edges stay crisp. Grind and patch only the accessible sections, then apply primer and polyaspartic coating using cut-in techniques around the cabinet line and any fixed rails. After full cure, inspect for missed spots or pinholes and spot-repair with the same polyaspartic system to maintain a seamless, durable finish around the cabinets.
📅 Last Updated: October 11, 2026 | Topic: How to install around cabinets polyaspartic floors? | Content verified for accuracy and freshness.
References
- Google Scholar Google Scholar
https://scholar.google.com/scholar?q=polyaspartic+floor+coating+installation+surface+preparation - Google Scholar Google Scholar
https://scholar.google.com/scholar?q=polyaspartic+floor+coating+perimeter+edge+detail+around+fixtures - Google Scholar Google Scholar
https://scholar.google.com/scholar?q=epoxy+coatings+flooring+installation+expansion+joint+perimeter+detail - Polyaspartic esters
https://en.wikipedia.org/wiki/Polyaspartic - https://en.wikipedia.org/wiki/Epoxy_flooring
- Concrete
https://en.wikipedia.org/wiki/Concrete#Surface_preparation - https://en.wikipedia.org/wiki/Surface_preparation
- Expansion joint
https://en.wikipedia.org/wiki/Expansion_joint - https://en.wikipedia.org/wiki/Construction_joint
- https://en.wikipedia.org/wiki/Adhesion


