


Learn how to install a vapor barrier under carpet tiles with a step-by-step approach that prevents moisture problems and keeps your floor system stable. If you’re working over concrete or in a slab-on-grade setup, the right choice is a properly sealed, overlapping vapor barrier—installed with seams taped and penetrations handled correctly. Follow these exact installation steps to avoid bubbling, odor, and premature tile failure.




Installing a vapor barrier under carpet tiles is mostly about controlled moisture movement: prep the subfloor, lay the barrier smooth and flat, then seal seams and edges exactly as the barrier manufacturer requires so moisture can’t migrate upward into the flooring system. In most installations, you’ll overlap and tape seams (or use the barrier’s specified sealing method), protect the film until tile placement, and finish with perimeter detailing at walls, columns, and transitions.
Installing the barrier correctly matters because carpet tiles can trap moisture at the interface. When that happens, you may see musty odor, reduced performance of the backing, curling or uneven seating, and faster wear. This guide breaks the process into clear steps and flags the common failure points that typically cause vapor-barrier installs to underperform.
Who this is for / when it applies:
This is for homeowners, installers, and facilities teams laying modular carpet tiles over slab-on-grade, basements, or other spaces where moisture control matters. It’s especially relevant if you’re dealing with concrete subfloors, known dampness, or you want to reduce moisture-related odor or performance issues in the carpet tile system.
Gather the right materials and confirm the system requirements
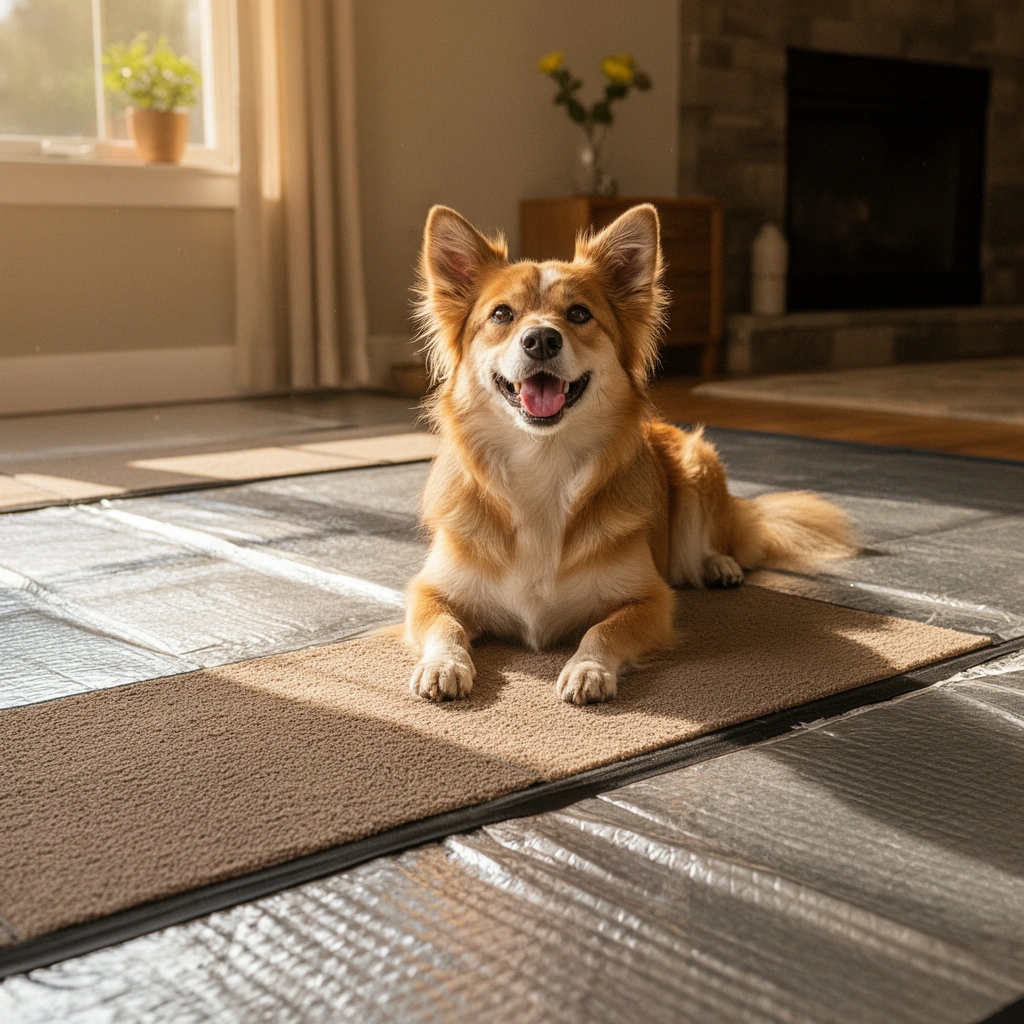
You should select a vapor barrier made for under-floor moisture control and confirm it’s compatible with both your carpet tile manufacturer and your tile installation method. The barrier’s installation details—especially seam overlap and sealing—are what determine whether it actually stops vapor migration.
A “vapor barrier” for flooring is defined by its permeability performance (commonly measured in perms), not just by thickness or brand name.
Carpet tile warranties and performance requirements often depend on using the approved underlayment/vapor-control products and following their required seam and perimeter detailing.
Before you buy anything, align three systems: (1) the subfloor moisture condition, (2) the vapor barrier material class and installation method, and (3) your carpet tile backing + installation technique (loose/locking vs. pressure-sensitive vs. glue-down). This prevents the most common mismatch failures—using the wrong barrier class, skipping a seam requirement, or using a barrier that conflicts with the adhesive or underlayment specification.
Choose a barrier that’s intended for flooring interfaces
Not all plastic sheets are treated equally in documentation. Look for products that specify their intended use under resilient and modular flooring systems and that provide a written method for:
– Seam overlap (how much to overlap)
– Seam sealing (tape type or fusion method)
– Perimeter sealing (how to seal edges at walls/transitions)
– Approved subfloor types (commonly concrete/slab-on-grade; some products also address gypsum or wood)
Confirm carpet tile manufacturer requirements
Many carpet tile systems limit what goes underneath them to protect appearance and performance. For example, some modular systems specify:
– an approved underlayment thickness range,
– compatibility constraints for adhesives,
– or requirements around airflow and seam transitions.
If you’re installing adhesive-backed or glue-down carpet tiles, treat compatibility as a first-order requirement. If the adhesive manufacturer or carpet tile manufacturer lists unacceptable vapor barrier types, you should follow that list.
Plan trim/edge treatment early
Even with perfect seams, the installation can fail at the perimeter. Moisture pathways typically form at:
– wall edges where the film isn’t sealed or is too loose,
– columns or pilasters,
– transitions at door thresholds and changes in slab level.
Plan your edge details so the barrier is mechanically protected and sealed—not merely “covered” by baseboard or trim.
Quick reference: typical vapor barrier classes (use this when comparing products)
Vapor Barrier Permeability Classes Commonly Referenced for Flooring (ASTM E1745)
| # | Material type (typical) | ASTM E1745 vapor class (perms) | Best fit for slab-on-grade | Install ease | Moisture blocking score |
|---|---|---|---|---|---|
| 1 | Polyethylene sheet (e.g., 6 mil) | Class I: ≤ 0.1 perms | High control | ★ ★ ★ ★ ☆ | 9.2 |
| 2 | Reinforced polyolefin film (scrim) | Often Class I: ≤ 0.1 perms | High control | ★ ★ ★ ★ ★ | 9.0 |
| 3 | Cross-laminated polyolefin | Class II: 0.1–1 perms (varies by product) | Moderate–high control | ★ ★ ★ ★ ☆ | 8.1 |
| 4 | Foil-faced composite (poly + foil layer) | Often Class I (product-specific) | High control | ★ ★ ★ ☆ ☆ | 8.7 |
| 5 | Asphalt-impregnated kraft/paper (not typical) | Varies; often higher perm than plastic | Limited use | ★ ★ ☆ ☆ ☆ | 6.2 |
| 6 | “Underlayment” foam (comfort only) | Not designed as a Class I barrier | Usually not sufficient | ★ ★ ★ ★ ☆ | 5.4 |
| 7 | Liquid-applied “sealer” (case-by-case) | Varies widely; confirm perms & compatibility | Dependent on substrate | ★ ★ ★ ☆ ☆ | 6.8 |
Why this matters: According to ASTM E1745, vapor retarder classes are categorized by measured perm performance (e.g., Class I ≤ 0.1 perms), which is a key way to compare barrier effectiveness across products. (Source: ASTM E1745, vapor retarders—classification by permeance)
Prep the subfloor before you lay the barrier
You should prep the subfloor so the barrier can lie flat, fully contact the surface, and avoid trapped grit that causes punctures or wrinkles. This is where you prevent both moisture pathways (via gaps) and physical problems (via bumps that stress the film and carpet tile seating).
Carpet tiles often telegraph surface irregularities; that same unevenness can wrinkle or tension the vapor barrier underneath.
A vapor barrier helps control vapor migration, but it cannot reliably compensate for active leaks, standing water, or saturated concrete.
Clean thoroughly—barrier integrity starts at the substrate
Before installing film, remove anything that blocks full contact or prevents sealing:
– dust and concrete fines
– paint overspray
– old adhesive beads or tack residues
– protrusions or ridges
I’ve seen installs degrade quickly where the surface wasn’t cleaned enough for tape to bond properly, especially around patch seams. If you’re working in a facility, schedule vacuuming and detailing the day before you roll out barrier so you’re not rushing later.
Check flatness and correct what would “print through”
Carpet tiles are more forgiving than hard-surface flooring, but they’re not immune. If you have high spots:
– tiles can rock or seat unevenly,
– foot traffic can create micro-tears in the barrier,
– and seam tape can experience shear stress at the worst possible locations.
Verify dryness and investigate sources
A vapor barrier is not a “cure” for moisture problems. If the concrete is actively wet, your barrier may trap moisture where you can’t manage it, potentially causing odor or degradation of materials above.
To move beyond assumptions, use an approved moisture testing method and follow the flooring guidance tied to your tile/adhesive system. (Source: ASTM standards for moisture testing are commonly referenced in flooring specification documents—see Sources section.)
Subfloor prep pros/cons: what each approach buys you
| Prep focus | Pros | Cons / tradeoffs |
|---|---|---|
| Aggressive cleaning + flattening | Barrier lays smooth; seams seal better | More labor; may require patch/skim work |
| “Cover and seal later” approach | Faster start | Higher risk of trapped debris, barrier punctures, and unsealed edges |
| Moisture testing before barrier | Data-driven decision; avoids trapping water | Takes scheduling; may require corrective action before install |
Install the vapor barrier flat and sealed
You should install the barrier so it stays wrinkle-free, uses the required seam overlap, and seals every joint and penetration. Moisture control fails most often at seams, perimeter edges, and small tears created during installation.
Seams are the weak points in sheet vapor barriers; manufacturers typically require specific overlaps and specific tape or sealing methods.
Perimeter gaps at walls, pipes, or door thresholds can become moisture pathways even if field seams are perfect.
Roll out correctly and cut to fit (don’t stretch)
– Roll the barrier out flat with the orientation the manufacturer specifies (some systems reference “side A” or a particular orientation).
– Avoid stretching film into place; tension makes wrinkles and increases tear risk when you walk or set tiles.
– Cut around edges, posts, and openings. Where possible, make clean cuts rather than forcing the material around obstacles.
Overlap and seal seams exactly per the barrier documentation
You will typically:
– create required overlaps (sheet-to-sheet)
– then seal seams using the specified tape or method
Don’t substitute generic tape if the manufacturer requires a particular adhesive type or tape width. A seam that looks sealed can fail later if tape won’t chemically bond or doesn’t wet out properly on the barrier surface.
Treat penetrations and perimeter edges like primary details
At walls and transitions:
– seal the perimeter if the product calls for it, not just “cover it later.”
– around pipes and protrusions, cut neatly and seal with the manufacturer’s compatible method.
At door thresholds and transitions, plan how you’ll finish the film under the flooring or transition strip without leaving an unsealed edge.
Lay carpet tiles over the barrier without damaging it
You should protect the barrier during tile installation and follow the carpet tile system’s placement and adhesive requirements. The goal is stable tile seating on top of a continuous barrier—not punctures, misalignment, or adhesive conflicts.
Before you place tiles, protect the barrier from punctures, dragged debris, and concentrated weight on uneven spots.
Carpet tile backing and installation method (loose/locking vs. adhesive) can change what’s allowed above a vapor barrier.
Keep the barrier covered until you’re ready for tiles
If you leave film exposed for long periods during construction, it’s more likely to:
– wrinkle,
– get punctured,
– collect dust that interferes with seam sealing or tile adhesion.
If your plan requires staging, stage small sections at a time and use floor protection strategies your team already trusts (e.g., careful foot traffic patterns and clean handling).
Plan layout to minimize cut edges and stress points
Establish reference lines:
– centerline or grid lines,
– starting row strategy to keep cut sizes consistent.
This reduces the odds you’ll need “fit-and-forcing” near edges—where barrier detailing is most sensitive.
Follow carpet tile instructions for your backing type
Key compatibility considerations:
– Loose-lay/locking systems: confirm the tile system tolerates the barrier underlay and that any thickness limits are met.
– Pressure-sensitive or glue-down systems: confirm approved underlayment/vapor barrier products and adhesive compatibility in writing.
If adhesive is involved, confirm whether the adhesive is intended for use directly over plastic films, and whether the film surface texture or chemistry affects bond performance.
What can go wrong (common mistakes and edge cases)
You should anticipate the failure modes that turn a good barrier plan into a poor moisture control outcome. The most common issues are seam/perimeter detailing errors and physical damage to the film during tile placement.
Unsealed seams or poorly bonded tape can allow moisture to migrate through the first defect line—often long before you see surface staining.
Barrier wrinkles and gaps don’t just look bad; they can stress tile seating and create repeating stress points that eventually tear the film.
Common mistakes that undermine vapor control
– Seams not sealed properly: moisture travels through the first weak point.
– Wrong barrier type for the subfloor: a barrier with inadequate perm performance may not achieve the intended moisture control level.
– Wrinkles, punctures, or gaps: wrinkles cause uneven seating; punctures defeat the purpose.
– Confusing vapor barrier vs. underlayment: foam cushioning is not automatically a vapor retarder.
– Adhesive incompatibility: adhesives can fail to bond, soften, or behave unpredictably over certain films.
Edge cases to evaluate before you commit
– Active water intrusion or known leaks: stop and fix the source first.
– Highly uneven slabs: you may need leveling/patching so the barrier stays intact and the tile system sits flat.
– Transitions across different materials: transitions can require additional detailing so you don’t create a “leak path” at material boundaries.
Verdict / practical tip (when to proceed—and when to pause)
Installing a vapor barrier under carpet tiles is a smart move when you’re controlling moisture from concrete or known damp subfloors and you can follow the barrier and carpet tile manufacturers’ seam and perimeter instructions closely. That said, you should pause if there’s an active water source, visible leaks, or major subfloor failures—vapor-control materials aren’t a substitute for fixing the underlying moisture problem. If you’re unsure about product compatibility (especially with adhesive-backed or glue-down carpet tile systems), [ADD: contact your carpet tile manufacturer’s technical support for “acceptable underlayments/vapor barriers”] before installing.
Quick checklist (scan/save)
– [ ] Verify your carpet tile system allows/requests a vapor barrier
– [ ] Choose a vapor barrier product with stated seam overlap + sealing method
– [ ] Clean and flatten the subfloor; remove ridges and debris
– [ ] Roll out barrier flat; cut neatly at edges/penetrations
– [ ] Overlap and seal seams exactly as specified (use the right tape, if required)
– [ ] Seal perimeter edges and handle pipe/door penetrations properly
– [ ] Place tiles carefully without puncturing the barrier
– [ ] Follow carpet tile installation instructions for your tile type (loose/locking vs adhesive)
FAQ
Do I need a vapor barrier under all carpet tiles?
Not always. It depends on your subfloor type and the carpet tile manufacturer’s requirements. If you’re over concrete, in a basement, or dealing with moisture concerns, a barrier is often recommended, but you should confirm compatibility with your specific tile system.
Should vapor barrier seams be overlapped or taped?
Usually both are required in some form—either an overlap plus sealing/taping, or another system-specific method. Always follow the vapor barrier manufacturer’s instructions for how seams should be overlapped and what tape (if any) should be used.
Can I install carpet tiles directly on top of the vapor barrier?
In many installations, yes—provided you follow the carpet tile instructions and avoid damaging the barrier during tile placement. If you’re using adhesive, confirm the adhesive method and compatibility with the barrier product.
What’s the biggest reason vapor barrier installations fail?
Most failures trace back to seam/perimeter detailing—unsealed overlaps, gaps at edges, and small tears that turn into moisture pathways. A barrier that lies flat and is properly sealed is usually the difference between a good and problematic install.
What if the subfloor is already damp?
Don’t rely on a vapor barrier alone to “solve” active moisture. Address the source of moisture first, then proceed only when conditions meet the guidance for the barrier and carpet tile system.
Sources
– [ADD: manufacturer installation instructions for your specific vapor barrier product—seam overlap, required tape, and perimeter/penetration details]
– [ADD: manufacturer installation instructions for your specific carpet tile system—approved underlayments/vapor barriers and adhesive compatibility]
– ASTM E1745 — Standard Specification for Plastic Water Vapor Retarders Used in Contact with Soil or Granular Fill or Exposed to Outdoor Weather
– ASTM E96/E96M — Standard Test Methods for Water Vapor Transmission of Materials
– [ADD: any applicable ASTM moisture testing standard referenced by your barrier/tile manufacturer (e.g., slab moisture testing method)]
Installing a vapor barrier under carpet tiles works best when you treat it like a moisture-control system—not a “sheet you cover with flooring.” Plan compatibility up front, prep for flatness, seal seams and perimeters exactly, and stop if there’s active moisture—then your carpet tile installation is far more likely to stay clean, stable, and odor-free through normal service life.
Frequently Asked Questions
What vapor barrier should I use under carpet tiles on concrete?
For most concrete subfloors, use a 6-mil to 10-mil polyethylene vapor barrier (often labeled 0.15–0.25 mm) designed for flooring installations. If your carpet tiles are installed over wood, verify moisture conditions first because you may need an alternate system or a specifically rated underlayment. Look for products intended for subfloor moisture control, with clear installation instructions and seam-taping recommendations.
How do I install a vapor barrier under carpet tiles without wrinkles or gaps?
Start by cleaning the subfloor thoroughly and filling cracks or low spots so the barrier lies flat; then roll out the polyethylene with no tension, overlapping seams by the manufacturer’s recommended amount (commonly 4–8 inches). Tape all seams with an appropriate vapor barrier tape and seal edges at walls and penetrations to prevent moisture vapor pathways. Smooth any minor wrinkles and trim excess around floor transitions so carpet tiles sit evenly without rocking.
Why is a vapor barrier important under carpet tiles, especially in basements or over slab?
A vapor barrier helps block moisture vapor from concrete from reaching the carpet tile backing and can reduce issues like musty odors, mold risk, and premature deterioration. Moisture trapped under flooring can also cause adhesive or backing components to fail, leading to loose tiles or odor problems. Using a proper vapor barrier under carpet tiles is a common best practice for moisture-prone areas like basements and ground-level slabs.
What’s the best way to overlap and tape vapor barrier seams for carpet tile flooring?
Overlap seams consistently and fully—avoid “butt joints” where moisture can migrate through the seam. Use seam tape made for polyethylene vapor barriers (not general-purpose tape) and press firmly for full adhesion, especially along edges and corners. After taping, check that all seams are continuous, with no lifted sections, and that the barrier extends up to or slightly behind the base molding line as recommended.
Which adhesive or underlayment should I use with a vapor barrier when installing carpet tiles?
Many carpet tile systems are modular and can be installed as a floating system or using pressure-sensitive adhesive, but the vapor barrier installation plan matters for compatibility. If you’re using adhesive, choose one specifically recommended for use over a vapor barrier and follow the carpet tile manufacturer’s guidelines to avoid compromising the moisture barrier. For best results, ensure the vapor barrier is flat and fully taped, then install carpet tiles according to the specified installation method (floating, tacky base, or modular glue-down).
📅 Last Updated: October 11, 2026 | Topic: How to install a vapor barrier under carpet tiles? | Content verified for accuracy and freshness.
References
- Google Scholar Google Scholar
https://scholar.google.com/scholar?q=vapor+barrier+under+carpet+tile+installation+moisture+control - Google Scholar Google Scholar
https://scholar.google.com/scholar?q=carpet+tile+installation+vapor+barrier+subfloor+moisture+relative+humidity - Google Scholar Google Scholar
https://scholar.google.com/scholar?q=underlayment+vapor+barrier+carpet+over+concrete+moisture+mold - Vapor barrier
https://en.wikipedia.org/wiki/Vapor_barrier - https://www.epa.gov/mold/mold-and-mildew
- https://www.cdc.gov/mold/default.htm
- https://www.energy.gov/energysaver/moisture-control-basements-and-crawl-spaces
- https://www.who.int/publications/i/item/9789289002133
- https://www.hse.gov.uk/household/damp.htm
- https://www.fema.gov/fact-sheet/mold-prevention-and-mold-remediation


