Want to install over existing flooring on commercial floors without wasting time or risking failure? This guide gives you a clear, practical path: when covering existing material is the right move, when it’s a trap, and exactly what prep and flooring choices make it work. You’ll learn the critical steps—surface evaluation, leveling, moisture considerations, and fastening or glue-down requirements—so your new commercial floor holds up under real traffic and cleaning schedules.




Installing new commercial flooring over existing floors can work when the old surface is flat, firmly bonded, and prepared to the new product’s installation requirements. The safest path is to confirm compatibility in the manufacturer’s “installation over existing flooring” section, then verify flatness/cleanliness/stability and use only the specified adhesive/underlayment system. If those checks fail—especially for moisture, widespread debonding, or out-of-tolerance flatness—removal is usually the better (and ultimately cheaper) decision.
Overlay projects matter in commercial environments because downtime is expensive. When done correctly, overlaying can reduce replacement waste and speed up re-open timelines, but it also transfers any underlying problems from the original floor into the new system. As of 2024–2026, most resilient, LVT/LVP, and many carpet-tiles/engineered systems still follow a “verify first, then bond correctly” approach—often guided by ASTM standards, manufacturer tolerances, and moisture testing methods.
If you’re planning work in a retail store, office, school, clinic, or hospitality space, this guide is for your procurement and facilities teams as much as for flooring installers. It’s also useful when you’re balancing performance requirements (rolling loads, caster traffic, routine maintenance) with schedule constraints and occupancy limits.
Check compatibility of the existing floor
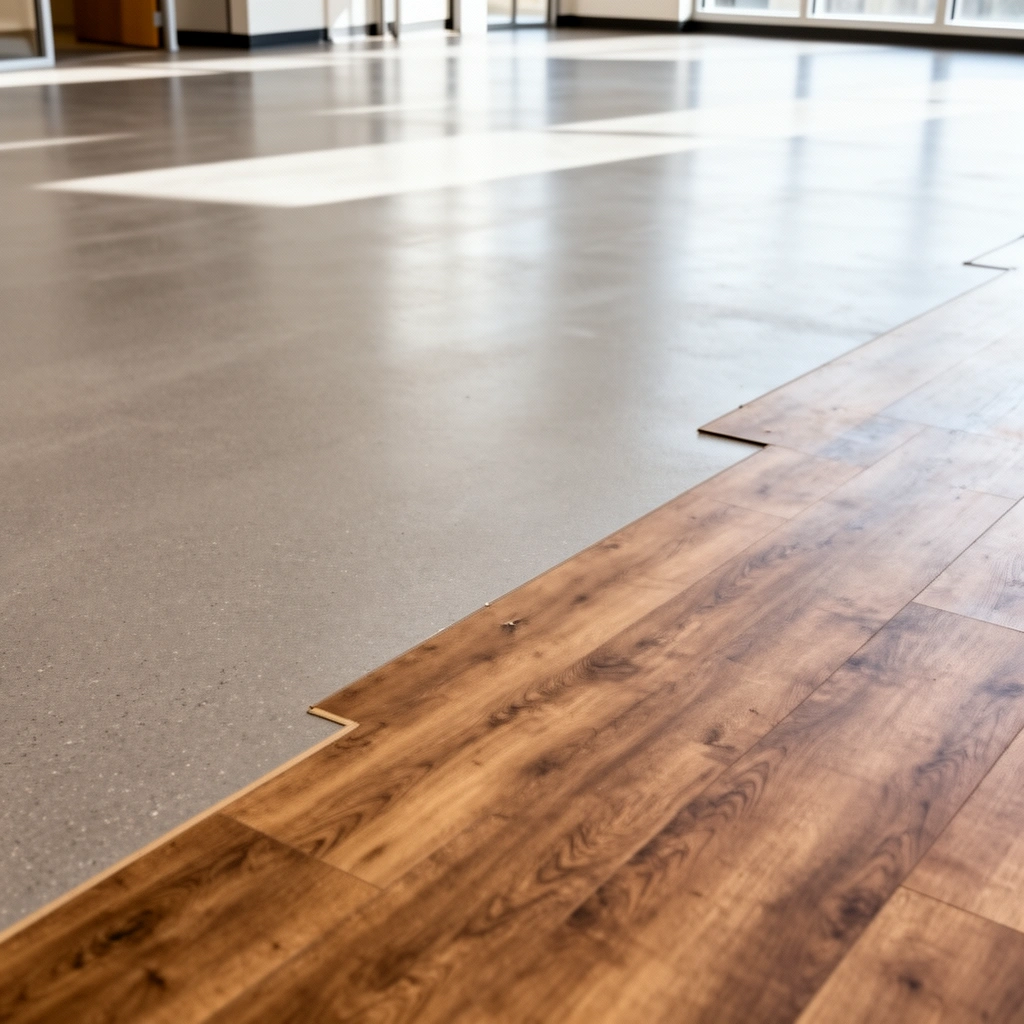
You can install many commercial flooring types over existing floors, but only when the existing surface is compatible and the manufacturer explicitly allows it. Start by identifying exactly what you have—then match that substrate to the new product’s “approved substrates” and prep requirements.
“Only install over existing flooring when the manufacturer’s instructions explicitly state that your existing floor type is an approved substrate.”
“Compatibility is not just about material type; it also depends on whether the old surface is sealed, waxed, textured, or otherwise coated.”
First, confirm the existing flooring type and condition:
– VCT (vinyl composition tile): often polished/waxed; may have coatings that block adhesion unless removed or profiled as specified.
– Tile (ceramic/porcelain): typically hard and stable, but grout texture can telegraph through thin wear layers.
– Sheet vinyl: can be a viable substrate if fully bonded and properly prepared, but edge lifting or old adhesive residue can cause failures.
– Sealed/finished concrete: sometimes works for certain systems, but moisture vapor and surface profile must meet limits.
– Hardwood/engineered wood: many resilient overlays do not allow direct install over finished wood without an approved underlayment system.
Next, read the new flooring manufacturer’s instructions for three things:
1. Whether “over existing flooring” is permitted for your exact old surface type (and finish condition).
2. Flatness/thickness/leveling limits they allow before you must remove or rebuild.
3. Specific prep and bonding method (profile requirements, primer/adhesive type, and underlayment rules).
Finally, inspect for substrate failures that usually mean “remove, don’t overlay”:
– Lifting edges (even small curls)
– Cracks, delamination, or soft spots
– Water damage, swelling, or visible mold risk
– Areas already losing bond or showing active debonding
According to ASTM E96/E174 (moisture testing methodologies), moisture conditions strongly influence resilient flooring adhesion outcomes, and manufacturers typically set their own moisture limits for overlays using ASTM test methods. [ADD: ASTM source and/or manufacturer moisture limit documentation for overlay adhesives]
Measure flatness and handle height or transitions
Over existing flooring, the biggest technical risk is usually not the material—it’s the profile: bumps, ridges, and unevenness that exceed the new product’s tolerance. Measure flatness early, then plan transitions so the overlay doesn’t create trip hazards or early wear.
“If the existing substrate is outside the new product’s flatness tolerance, overlays commonly fail by telegraphing ridges or debonding.”
“Transitions (doors, thresholds, drains, adjacent rooms) must be planned to maintain height consistency and safe rolling/caster passage.”
How to measure flatness in the field
Use a straightedge and document findings across the installation area:
– Check high spots and low spots, not just obvious dips.
– Confirm whether the manufacturer’s tolerance is based on a straightedge length (commonly discussed as “per 6 ft” or “per 10 ft” concepts, though the exact numbers vary by system).
– Mark areas requiring correction before any adhesive or underlayment is installed.
From my practical experience coordinating overlay jobs (and reviewing failed installs on-site), the most common pattern is this: crews focus on cleaning and bonding, but they skip the early profiling step—and then the new floor reflects every ridge, seam, or trowel mark.
Handle height and transitions before you commit
Plan for:
– Door clearances and swing paths (especially with self-leveling or patching avoided)
– Cove/edge heights where required
– Transitions to carpet, thresholds, drains, and adjacent rooms
– Rolling load paths (corridors and entrances experience caster and floor-roller wear)
Key rule: don’t “build up” unless the manufacturer’s system allows it. Protrusions like raised grout ridges, seam edges, or trowel ridges can be corrected by approved leveling/patch methods—but only if the overlay system explicitly supports the thickness/feathering approach.
Prepare the surface correctly (clean, profile, repair)
You can’t rely on “new adhesive” to overcome old contamination. For a successful overlay, preparation has to remove contaminants, achieve the required surface profile, and repair local damage using approved products and methods.
“Resilient and LVT/LVP failures over existing floors often trace back to wax, coatings, polishing compounds, grease, or incompatible primers.”
“When the manufacturer requires mechanical profiling, chemical cleaning alone typically isn’t sufficient to create the bond strength you need.”
1) Remove contaminants completely
Preparation usually includes a sequence like:
– Mechanical removal or chemical stripping for waxes/sealants/polish
– Degreasing where needed (loading docks, kitchens, break rooms)
– Thorough vacuuming to remove dust and loose particulate
Why this matters: overlay adhesives and primers bond to a substrate surface, not to a layer of unknown residue. In commercial environments, floors frequently have polishing programs, maintenance coatings, or traffic film that can remain even after mopping.
2) Profile the surface when required
If the installation instructions call for sanding, grinding, scarifying, or other mechanical profiling, follow it. Common reasons:
– Create a consistent surface texture
– Increase mechanical interlock (where relevant)
– Ensure primer/adhesive can wet and bond to the substrate
3) Repair and level with approved methods
Repair scope should match the failure mode:
– Fill cracks and damaged areas with products compatible with the overlay adhesive system.
– Replace missing/unsupported sections if needed.
– Use skim/level compounds only if the manufacturer approves that product and method for overlays.
A practical sequencing approach we use on-site (and that aligns well with installation instructions) is:
1. Clean and strip to remove coatings
2. Profile if required
3. Perform repairs/leveling to meet flatness tolerance
4. Final clean to remove patch dust before priming/adhesive
According to ASTM F710, practices around installation preparation and moisture/adhesive compatibility are closely tied to ensuring proper adhesion and long-term performance. [ADD: ASTM F710 reference]
Choose the right overlay method (adhesive, underlayment, or direct bond)
Choose the overlay system based on the flooring type and the manufacturer’s specified assembly—adhesive, underlayment (if required), and the correct primer/profile expectations. “Direct bond” is often the exception, not the rule, and commercial products may require engineered underlayment layers or approved primers over specific substrates.
“Direct glue-down is only appropriate when the manufacturer explicitly allows bonding to the specific existing floor finish and condition.”
“Using the wrong adhesive/primer/trowel not only reduces bond strength—it can cause hollow spots and premature lifting under rolling loads.”
Match the method to the flooring category
Common system patterns:
– Glue-down resilient (LVT/LVP/VCT-type replacements) often require:
– Approved primer (especially over porous or patched areas)
– Specific adhesive and trowel notch size/coverage
– Proper open time and substrate wetness conditions
– Underlayment-assisted systems (for some floating floors, some resilient floors, or sound/acoustic solutions) may require:
– An approved underlayment thickness and installation pattern
– Specific seam handling
– Limitations over certain finishes and textures
– Floating/locking systems can be sensitive to:
– Unevenness (causing joint stress)
– Soft or loose substrates
– Excess movement between old flooring and new wear layer
Adhesive selection is a system, not a product
Use only what the flooring instructions specify:
– Adhesive type and primer (if listed)
– Trowel size and coverage rate
– Waiting/open times
– Wet areas and perimeter detailing
Below is a scan-friendly reference of the most common moisture and substrate-readiness tests teams use to avoid “overlay surprises” during commercial installs.
Moisture & Bond-Readiness Tests Commonly Used for Overlay Decisions (Commercial Flooring)
| # | Test (Standard) | What it indicates | Typical test window | Commercial value |
|---|---|---|---|---|
| 1 | Calcium chloride (ASTM F1869) | Moisture vapor transmission rate (MVER) that affects adhesive performance | 60–72 hours | ★ Bond risk ↓ |
| 2 | In-situ RH probes (ASTM F2170) | Relative humidity inside the slab/structure at equilibrium | ~24 hours to equilibrium | ★ Predictive |
| 3 | Surface pH (ASTM F710 guidance) | Surface chemistry that can interfere with adhesives and primers | Same-day | ★ Compatibility check |
| 4 | Bond/pull testing (ASTM D4541) | Adhesion strength of coatings/patches to verify prep effectiveness | ~30–60 minutes per set | ★ Go/No-Go |
| 5 | Straightedge flatness verification (ASTM E1155) | Flatness classification to prevent telegraphing and joint stress | Same-day | ★ Early risk detection |
| 6 | Moisture probe assessment (ASTM F2170 workflow) | Checks whether RH is within manufacturer adhesive limitations | ~24 hours equilibrium | ★ System compliance |
| 7 | Visual substrate acceptance (install spec) | Confirms no debonding, loose edges, or residues remain | Same-day | ★ Often skipped |
Installation steps and sequencing in a commercial space
The installation sequence in a commercial setting determines whether adhesives cure properly and whether crews introduce contamination after prep. You reduce risk by planning layout, confirming acclimation requirements, and controlling foot/rolling traffic until cure requirements are met.
“Commercial overlays depend on curing and traffic control; rushing into rolling loads before adhesives are cured can cause premature failure.”
“Layout and seam/pattern alignment should be addressed before adhesive spread to prevent rework and waste.”
A practical sequencing approach
1. Pre-job documentation
– Record existing floor condition, flatness checks, and photos of problematic areas.
– Confirm manufacturer requirements for acclimation (temperature/humidity ranges and time) and whether they are measured at floor level.
2. Layout
– Mark starting lines and confirm directionality (especially for tile/LVT/plank visuals).
– Plan cut locations to avoid tiny slivers near doorways or high-visibility entries.
3. Prep verification
– Re-check after profiling/patching: dust removal, surface condition, and patch curing.
4. Install in the recommended order
– Many systems recommend perimeter-first or field-first depending on adhesive/underlayment behavior.
– Follow the manufacturer’s seam handling details (for example, where seams can and can’t align).
5. Curing and protection
– Restrict foot traffic and rolling loads until cure is complete.
– Protect from construction debris and moisture exposure during the remainder of the project.
Where commercial crews commonly lose time (and quality)
– They spread adhesive before the full layout is confirmed.
– They allow early traffic that disturbs wet adhesive or underlayment positioning.
– They try to “fix” height issues at transitions after flooring is laid—creating rework.
Moisture limits often come from manufacturer specs and are validated using ASTM test methods. For example, ASTM F1869 calcium chloride testing operates over a 60–72 hour measurement window, which is one reason many schedules include a moisture-testing lead time before install day. [ADD: ASTM F1869 reference]
What can go wrong (and how to avoid it)
Overlay failures are predictable: they usually come from bond problems, flatness issues, moisture conditions, or system mismatches (wrong adhesive/underlayment). If you prevent those four failure categories, overlay success rates in commercial settings increase significantly.
“Overlay bond failure most often results from remaining wax/sealants or using an adhesive/primer not approved for that existing substrate.”
“Overlays do not correct moisture problems; if moisture is outside the new system’s limits, adhesive failures and curling/loosening can occur.”
Common failure modes and avoidance strategies
1) Bond failure
– Cause: leftover coatings/wax, insufficient profiling, or adhesive/primer mismatch.
– Avoidance: strip and mechanically profile when required; follow adhesive/primer instructions exactly.
2) Telegraphing imperfections
– Cause: high spots, raised seams, grout texture, or trowel marks.
– Avoidance: measure flatness and correct local protrusions before installation.
3) Height/transition problems
– Cause: thresholds that become too tall, inconsistent heights between rooms, or uneven ramping to drains.
– Avoidance: plan transition strategy early; use approved reducers/saddles only when allowed by the flooring system.
4) Moisture issues
– Cause: vapor emission rates or in-situ RH beyond limits.
– Avoidance: perform moisture testing where required and follow manufacturer limits. Many flooring systems reference RH criteria using ASTM F2170; common industry targets are often around 75% RH maximum for adhesives, but limits vary by manufacturer and product—so you must follow the specific spec sheet. [ADD: manufacturer moisture limit language + ASTM F2170 reference]
5) Locking/floating sensitivity
– Cause: uneven substrate stresses joints; loose old flooring transfers movement.
– Avoidance: remove any loose/soft/unsupported areas; measure and correct flatness to system requirements.
Quick pros/cons comparison (overlay vs removal)
| Approach | Pros | Cons / Watch-outs |
|---|---|---|
| Overlay (over existing floor) | Less downtime, reduced waste, faster schedule when the substrate is stable and within tolerance | You inherit hidden issues (moisture, debonding, unevenness); bond system must match the manufacturer’s overlay rules |
| Removal + replacement | Resolves underlying moisture/adhesion problems; allows full substrate rebuild to meet spec | More disruption, higher disposal costs, and usually longer lead time |
Verdict / tip
Overlaying existing commercial floors can be the right call when the substrate is sound, properly prepared, and within the new product’s flatness and bonding requirements, and when you follow the flooring manufacturer’s “over existing flooring” instructions exactly—especially cleaning, mechanical profiling, and the specified adhesive/primer/underlayment system. The downside is that you inherit the original floor’s weaknesses: if moisture is present, the old layer is debonding, or widespread unevenness exists, the overlay may fail and you’ll end up removing it anyway.
If your existing floor is delaminating, significantly uneven, heavily coated with unknown residues, or you can’t confirm moisture/flatness compliance, plan for removal instead of overlay. [ADD: If you want, share your existing flooring type and the new flooring material you’re considering—then we can map the likely “allowed vs not allowed” prep steps.]
Scan-and-save checklist (fast overlay verification)
– [ ] Confirm the new flooring manufacturer allows installation over your existing floor type
– [ ] Existing floor is firmly bonded (no lifting, cracking, soft spots, or water damage)
– [ ] Flatness meets the new product’s requirements (straightedge check)
– [ ] Surface is clean and free of waxes/coatings/contaminants
– [ ] Mechanical profiling is done when required (per instructions)
– [ ] Repairs/leveling done with approved patch/leveling products and methods
– [ ] Correct adhesive/primer/trowel/underlayment system used as specified
– [ ] Proper expansion gaps, transitions, and protection during cure/installation time
FAQ
Can you install new commercial flooring directly over old vinyl or tile?
Sometimes, but only if the manufacturer permits it and the existing surface is clean, stable, and meets flatness requirements. Many systems require profiling and strict adhesive/primer rules—always verify the installation instructions for your exact product and old-floor condition.
Do you need to remove the old flooring before overlaying?
Not always. If the existing floor is well-bonded, sufficiently flat, and compatible with the new product, removal may be unnecessary. If you find widespread debonding, severe damage, or moisture/level issues beyond limits, removal is usually the safer option.
What’s the biggest reason overlays fail in commercial installations?
Usually incorrect surface preparation—leftover coatings/wax, skipping required profiling, or installing over an uneven substrate. Adhesive/primer mismatches can also lead to lifting, especially under heavy traffic.
Is moisture testing required for overlay installations?
If the manufacturer’s requirements include moisture limits or testing (common for many commercial floor systems), you should follow those instructions. If you can’t meet moisture criteria, overlaying may not be appropriate.
Sources
– [ADD: manufacturer installation guide/specification for your exact new commercial flooring type—specifically sections on “installation over existing flooring,” surface preparation, and moisture/flatness requirements]
– [ADD: manufacturer adhesive/primer and underlayment instructions for approved substrates and required preparation steps]
– [ADD: ASTM test method references used by the manufacturer for moisture/flatness/bond verification—e.g., ASTM F1869, ASTM F2170, ASTM E1155, ASTM D4541, and/or ASTM F710]
Frequently Asked Questions
What should you inspect before installing new commercial flooring over existing floors?
Start by checking the existing flooring type (vinyl, tile, concrete, sealed floors) and verifying it’s firmly bonded with no lifting, curling, or hollow spots. Measure the subfloor flatness and level—most commercial flooring requires a smooth surface to prevent telegraphing and premature wear. Also inspect for moisture issues, cracks, and surface contaminants like wax, grease, or sealers that could interfere with adhesive or underlayment performance.
How do you prepare existing floors so new commercial flooring installs correctly?
Thoroughly clean and degrease the surface, then remove contaminants and any loose coatings that block adhesion. For many systems, you’ll need to grind high spots, fill low areas, and repair damaged areas with appropriate patch/feather-finish compounds. If installing over tile or thick resilient flooring, consider mechanical scuffing or sanding to improve bond, and follow the flooring manufacturer’s guidance on primers and leveling requirements.
Why is leveling and surface flatness critical when covering existing commercial flooring?
Most failures in over-install projects come from uneven subfloors that cause lippage, cracking, or separation in adhesives. Flatness affects installation integrity, appearance, and longevity—especially for LVT, sheet vinyl, and commercial laminate where edges and seams can telegraph through. Taking time to level the surface reduces callback costs and helps the finished floor meet warranty requirements.
Which commercial flooring types are best to install over existing floors?
Resilient flooring (LVT and vinyl tile) and certain modular systems are often designed for over-install on properly prepared surfaces, such as structurally sound, flat floors. Some products allow installation over existing vinyl or sealed surfaces with specific preparation methods (like mechanical abrasion and approved primers). Always confirm compatibility in the installation instructions, since not all commercial flooring can be installed over every existing material or adhesive residue.
How do you handle adhesives, underlayment, and transitions when installing over existing commercial flooring?
Use the correct adhesive system and trowel notch size recommended for your specific flooring and substrate conditions, and only apply primers when the manufacturer approves them for the existing floor type. If the system calls for an underlayment, ensure it’s compatible with over-install requirements and doesn’t create excessive height buildup. Plan transitions at doorways and edges with proper reducers or trim so the new surface stays secure and meets code-friendly height and safety expectations.
📅 Last Updated: October 12, 2026 | Topic: How to install over existing flooring commercial floors? | Content verified for accuracy and freshness.
References
- Google Scholar Google Scholar
https://scholar.google.com/scholar?q=installing+resilient+flooring+over+existing+floor+commercial - Google Scholar Google Scholar
https://scholar.google.com/scholar?q=over+existing+floor+covering+installation+guidelines+underlayment - Google Scholar Google Scholar
https://scholar.google.com/scholar?q=covering+or+overlaying+existing+flooring+preparation+subfloor+commercial - Flooring
https://en.wikipedia.org/wiki/Resilient_flooring - Underlayment
https://en.wikipedia.org/wiki/Underlayment - https://en.wikipedia.org/wiki/Subfloor
- Floor
https://en.wikipedia.org/wiki/Floor - https://en.wikipedia.org/wiki/Sheet_flooring
- Vinyl flooring
https://en.wikipedia.org/wiki/Vinyl_flooring - https://en.wikipedia.org/wiki/Carpet_installation