
You can install LVP floors over existing flooring with confidence when the current surface is clean, flat (within the manufacturer’s tolerance), and structurally sound—without loose planks, water damage, or significant dips. This step-by-step guide shows the exact prep, underlayment, and layout steps that prevent clicking-floor failures and uneven seams. Follow it and you’ll know whether your existing floor is a green light or a dealbreaker before you buy a single box.




You can often install LVP (luxury vinyl plank) over existing flooring when the surface is solid, clean, and sufficiently flat—and when your LVP manufacturer explicitly allows that substrate. The biggest keys are removing anything loose or soft, correcting high spots and dips to meet flatness tolerances, and maintaining proper expansion gaps so the click-lock system (or glue-down system) can perform as designed.
If you’re planning a “no tear-out” upgrade to reduce dust, downtime, and disposal, this approach is most commonly viable when the existing floor is already well-bonded and stable—such as sealed vinyl sheet, well-adhered tile, or hard surfaces that don’t flex underfoot. However, if your current flooring is soft, uneven, lifting at edges, badly damaged, or has moisture concerns (especially over basement slabs), you may need removal or a different floor system. In this guide, we cover the most likely existing floors homeowners consider: tile, vinyl sheet, and some types of sealed hardwood/laminate subfloors where allowed by the LVP warranty.
Check Your Existing Flooring and LVP Type First

You should confirm compatibility before you buy materials or start removing baseboards because not all LVP systems tolerate all subfloors. Once you verify (1) the substrate is approved and (2) the LVP style matches the job, you can plan the correct prep steps to prevent gapping, clicking failures, or future lifting.
Start by identifying what you currently have and what your LVP is designed to do:
– Verify manufacturer allowance: Many brands list which existing flooring types/subfloors are permitted (and which are not). Some systems require removal down to the subfloor.
– Confirm LVP installation method:
– Click-lock / floating LVP relies on a stable, flat base and movement allowances (expansion gaps).
– Glue-down LVP relies on correct adhesive, compatible surface condition, and moisture-safe conditions.
– Underlayment rules matter: Some LVP has attached padding and says no extra underlayment. Others require a specific type/thickness over certain substrates.
Typical LVP Installation Requirements for Common “Over Existing Floor” Scenarios
| # | Existing Floor / Scenario | Most Common LVP Compatibility Factor | Typical Flatness Target* | Installer Risk Level |
|---|---|---|---|---|
| ★ | Sealed vinyl sheet (fully adhered, no ridges) | Surface must be firm + free of soft spots | ≤ 3/16 in over 10 ft* | Low ★★★★☆ |
| ★ | Ceramic tile (stable, grout lines minimal) | Grout ridges must be flattened/filled | ≤ 1/8 in over 6 ft* | Moderate ★★★☆☆ |
| ★ | Existing laminate (no loose planks) | Movement/deflection must be eliminated | ≤ 3 mm over 2 m* | High ★★☆☆☆ |
| ★ | Vinyl plank/rigid core (loose edges) | Any top-layer movement transfers to joints | Depends on brand flatness spec* | Very High ★☆☆☆☆ |
| ★ | Painted/unknown coating over subfloor | Adhesion may fail without proper prep | Must be stable + flat* | Very High ★☆☆☆☆ |
| ★ | Basement slab with unknown moisture | Moisture can damage adhesives/locks | Moisture limits apply* | Very High ★☆☆☆☆ |
| ★ | Previously installed LVP (intact, rigid, level) | Sometimes allowed only if fully bonded | ≤ 3/16 in over 10 ft* | Moderate ★★★☆☆ |
Flatness targets and moisture limits vary by brand/model—always use your LVP’s installation manual. See [ADD: manufacturer installation spec for your LVP model].
“Floating LVP requires a stable, flat base and expansion room; if the existing surface shifts, the click joints will feel it.”
“Glue-down LVP is only as strong as the adhesion between the adhesive and the existing substrate—loose layers and coatings are common failure points.”
“Check for attached underlayment: adding a second padding layer can defeat the locking tolerance.”
Prep the Surface (This Is Where Most Problems Start)
You’ll prevent most LVP failures by removing what can move or telegraph—because any bump, loose edge, or soft layer usually shows up in the new floor. Surface prep is especially critical when you’re installing over existing vinyl, tile, or layered flooring where adhesion and flatness are harder to guarantee.
Do the following before you level or install:
– Remove anything loose/soft: Scrape off lifted seams, replace failing subfloor sections, and don’t “cover it up” if the existing floor feels spongy.
– Flatten telegraphing features:
– Ridge/edges at seams
– Curling corners
– Broken grout chunks or high mortar ridges
– Worn-down areas that create dips
– Clean to installation-grade:
– Sweep and vacuum thoroughly
– Remove wax, cleaner residue, and dust
– For glue-down, residue can reduce bond strength (manufacturers typically warn against contamination).
– Repair instead of installing over deterioration: If grout is crumbling or existing vinyl is separating, replacing or stabilizing those areas is usually safer than trying to level on top.
According to [ADD: LVP manufacturer cleaning/prep guidance], the bonding/locking performance can be compromised by dust and residues on the substrate.
Also, many LVP brands specify installing only over “stable” surfaces and explicitly discourage flexible or moisture-damaged layers (see [ADD: your LVP manual]).
Level and Flatten: Meet the “Flatness” Requirement
You need to hit the LVP’s specified flatness tolerance (not “close enough”), because unevenness turns into joint stress and gapping. In my experience coordinating real-world remodels, installers often underestimate how much small high spots matter—especially with click-lock edges that must align under load.
Here’s the practical leveling workflow:
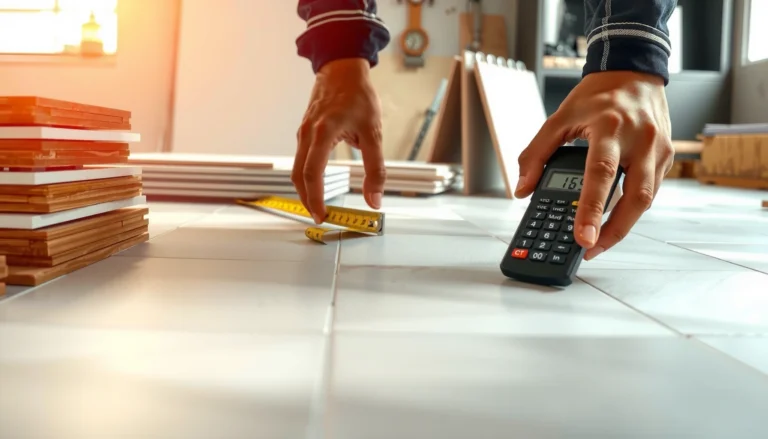
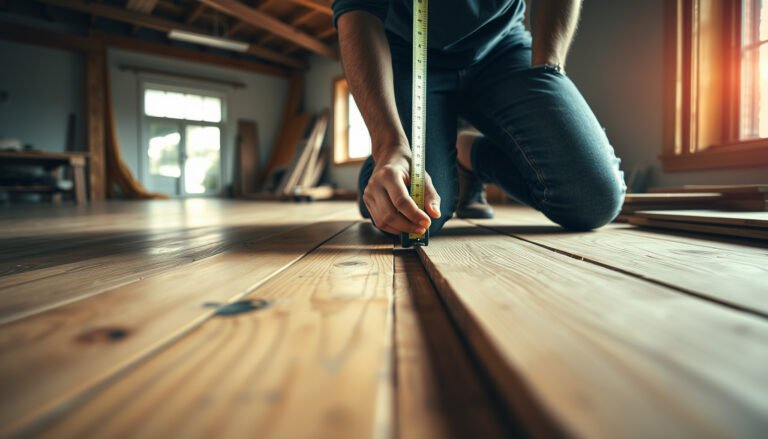
– Measure systematically: Use a straightedge (often 6 ft / 10 ft lengths) and measure high/low areas across the room.
– Target the exact tolerance in your manual: Common industry targets often look like “within 3/16 inch over 10 feet” or similar (but it varies by model and thickness).
– According to [ADD: manufacturer flatness tolerance], typical guidance is along the lines of ≤ 3/16 in over 10 ft (verify your brand/model).
– Fix highs first (not lows):
– Grinding is usually preferred for high spots
– Feather finishing/patching is used for low spots
– Avoid “chasing” the floor and creating new dips.
– Confirm firmness and stability: The surface can be flat but still fail if it flexes. Movement underfoot can stress the locking system and adhesive seams.
“If the subfloor isn’t flat to the manufacturer’s tolerance, floating LVP can develop hollow sounds and visible gaps at seams.”
“Flatness checks are about measuring straightedge contact, not eyeballing—high points concentrate stress on click-lock joints.”
“For glue-down LVP, unevenness can create thin/uneven adhesive thickness, which reduces bond integrity.”
Plan Layout, Transitions, and Expansion Gaps
A well-planned layout reduces waste and protects performance because floating floors need controlled space to move. Before you install a single row, you should design plank direction, cut locations, and transitions so the floor can expand and contract without buckling or stressing the clicks.
Key planning steps:
– Choose plank direction strategically: Common best practice is aligning planks with the room’s primary light direction or the longest continuous run to minimize awkward cuts (follow your site conditions).
– Maintain required expansion gaps: Leave space around walls, door jambs, and fixed objects.
– Many floating floor manuals call for around 1/4 in (6–7 mm) expansion, but confirm your model: [ADD: expansion gap requirement from your LVP manual].
– Plan transitions for unsupported edges: Use reducers/T-moldings between rooms or at doorways so plank ends remain supported.
– Account for irregular framing: Snap chalk lines and dry-lay rows to verify that your “starting row” won’t force tiny slivers at the far wall.
Pros/cons of floating over existing floors (when allowed):
– Pros: Lower labor, less demolition, faster install, often fewer subfloor repairs.
– Cons: Requires strict flatness, depends on proper expansion gaps, and any existing-floor movement will transfer.
Install the Planks Over Existing Flooring (Step-by-Step)
You install LVP over existing flooring by following the correct method for your LVP type—floating/click-lock or glue-down—while keeping rows square and meeting flatness/expansion requirements. The safest “step-by-step” approach is to acclimate, dry-fit the pattern, then install with discipline so you don’t trap errors into the next row.
1) Acclimate and dry-lay
– Acclimate planks per the manufacturer’s temperature/humidity guidance (often 48 hours, but use your manual): [ADD: acclimation time range from your LVP spec].
– Dry-lay or test-fit a small section to confirm transitions, direction, and how the click joints align over your existing floor.
2) Floating / click-lock LVP
– Install approved underlayment only if your manual allows it. Many pre-attached LVP systems specify “no additional pad” or require a particular type.
– Lock planks using manufacturer steps (angle/lowing method differs by brand).
– Keep rows square: a slightly skewed first row can compound into larger alignment problems later.
3) Glue-down LVP
– Use the adhesive type specified (trowel notch size, spreading time, and cure time are usually model-specific): [ADD: adhesive and trowel guidance from your manual].
– Spread adhesive only in areas you can cover within the working time.
– Do not glue over unstable spots—adhesive needs a firm substrate to maintain bond integrity.
“With click-lock LVP, row alignment starts at the first few planks; if those are off, every subsequent row magnifies the problem.”
“With glue-down LVP, adhesive coverage and cure time must match the manufacturer’s instructions to avoid weak bond zones.”
What Can Go Wrong (Common Mistakes and Edge Cases)
You can usually avoid LVP failures by identifying risk early: soft/loose existing flooring, inadequate flatness, missing expansion gaps, and moisture conditions. When LVP is installed over the wrong surface condition—or when the install rules are bent—the result is often gapping, noise, or premature joint failure.
Common failure modes:
– Installing over loose or “spongy” floors: This creates movement under the new planks and stresses the locking mechanism.
– Skipping flatness verification: High spots can cause hollow areas; dips can lead to joint stress and visible gaps.
– Ignoring expansion gaps: Without proper room to move, floating floors can buckle or separate at transitions.
– Using the wrong underlayment: Too thick, too soft, or incorrect underlayment can reduce locking performance.
– Moisture surprises:
– Over basement slabs or wet crawlspaces, moisture can undermine adhesives and affect floor performance.
– If your site has unknown slab moisture, you may need moisture testing and/or a moisture-mitigation system.
For moisture guidance, follow standardized methods: moisture testing and slab requirements vary by jurisdiction and product. If you publish steps, base them on [ADD: ASTM moisture test standard referenced by your LVP adhesive/manual, e.g., ASTM F2170 or F1869] and your LVP brand’s moisture limits.
Verdict: When This Approach Makes Sense (and When to Skip It)
Installing LVP over existing flooring makes sense when the old surface is firmly bonded, clean, and flat enough to meet your exact LVP manufacturer tolerance—and when you can maintain expansion gaps and proper transitions. If the existing floor is soft, uneven beyond the tolerance, actively lifting, or moisture-unsafe, then the “no tear-out” approach can trade short-term speed for long-term failure risk.
Skip or strongly consider tear-out if:
– the existing floor is flexible or visibly moving
– tile/grout is crumbling or creating major ridges
– there are known moisture issues (especially with slabs and basements)
– your LVP manual does not list your existing substrate as approved
If compatibility is unclear, the most reliable next step is to follow your LVP owner’s manual’s approved substrate list exactly—or consult a flooring professional for a substrate assessment.
Quick Checklist (Scan Before You Start)
– [ ] Confirm your LVP type (click-lock vs glue-down) allows installation over the existing flooring
– [ ] Remove anything loose/soft; replace failing sections
– [ ] Clean thoroughly and check for residue (especially for glue-down)
– [ ] Verify flatness tolerance per manufacturer instructions (measure high/low spots)
– [ ] Address high spots/low spots before installing
– [ ] Plan expansion gaps around walls and fixed objects
– [ ] Use transitions at doorways and room-to-room edges
FAQ
Can I install LVP over tile?
Often yes, if the tile surface is stable, properly bonded, and flat enough per the LVP manufacturer’s requirements. If grout lines create significant ridges, you may need leveling/patching so the finished surface meets flatness targets; verify allowed prep materials and methods in your LVP manual. [ADD: source for tile-installation guidance from your specific LVP brand’s manual.]
Do I need to remove vinyl flooring before installing LVP?
If the existing vinyl is fully adhered and in good condition, some LVP systems allow installation over it. If it’s loose, damaged, uneven, or you can feel motion at seams, removal or flattening/repair is usually necessary. [ADD: source for “existing vinyl” acceptance from manufacturer specs.]
What’s the biggest reason LVP fails when installed over existing floors?
In many cases, failures trace back to inadequate flatness, installing over movement/looseness, incorrect underlayment choices, or missing expansion gaps. These issues stress joints and can lead to noise, gapping, and separation.
Is underlayment required when installing LVP over existing flooring?
It depends on your LVP design (pre-attached pad vs separate underlayment) and the manufacturer’s approved underlayment rules. Using an incompatible pad can change the floor’s effective stiffness and interfere with click-lock tolerances. [ADD: source for underlayment requirements from your specific manufacturer.]
Sources
– [ADD: Manufacturer installation instructions/spec sheet for your specific LVP brand and model—flatness tolerance, approved subfloors, expansion gap, and underlayment rules.]
– [ADD: Manufacturer guidance on click-lock floating floors vs glue-down systems (adhesive type/coverage and moisture-related requirements, if stated in the manual).]
– [ADD: Any official substrate-prep guidance included in the LVP owner’s manual (e.g., how to handle grout lines, patch materials, and cleaning requirements).]
When done correctly, installing LVP over existing flooring can be a fast, low-disruption path to a fresh look. The trade is discipline: compatibility checks, surface prep, strict flatness, correct underlayment (or none), moisture awareness, and properly sized expansion gaps are what keep the floor stable and quiet for years.
Frequently Asked Questions
What prep steps do I need before installing LVP over existing flooring?
Start by removing anything loose, damaged, or uneven—LVP should sit on a stable, solid surface. Clean thoroughly (no dust, grease, or wax) and repair cracks, gouges, or soft spots so the subfloor is flat. Most LVP manufacturers require a maximum variation (often around 3/16 in over 6 ft), so measure dips and humps before you install. If your existing flooring is resilient (like vinyl) or has a cushioned backing, you may need to remove it or add an approved underlayment to comply with the product warranty.
How do I install floating LVP planks over existing floors without buckling?
Floating LVP must be allowed to “move” slightly, so leave the required expansion gap around walls, doorways, and pipes (commonly 1/4 in). Use the correct underlayment if your LVP calls for it—don’t double up if the flooring already has attached padding. Keep the room temperature and humidity within the manufacturer’s recommended range before and during installation to prevent gapping or buckling. Finally, ensure the existing floor is smooth and level; thick low spots can cause flex that leads to joint failure.
How do I handle uneven or cracked existing floors when laying LVP?
If the existing flooring has ridges, seams, or height differences, you’ll need to address them—shimming or leveling compounds are often required. For tile or stone floors, grind down high spots and fill grout lines or low areas with a compatible patch/leveler so the surface is flat. If you’re installing over laminate, vinyl, or other resilient materials, check the manufacturer’s instructions closely because many require a smooth, hard surface and may forbid installing over soft or cushioned backing. The key goal is a flat subfloor to protect LVP click-lock seams and keep your floors from rocking.
Which existing flooring types are best to install LVP over?
In most cases, LVP can be installed over existing hard, flat surfaces such as well-adhered vinyl sheet flooring, ceramic tile, or sealed subfloors—provided the surface is clean, solid, and within the flatness tolerance. Engineered wood or laminate may work if it’s firmly attached and not damaged, but loose boards and significant seams must be repaired first. Avoid installing over soft, spongy carpet padding, heavily damaged resilient flooring, or surfaces with peeling/unstable layers, since that can cause movement and failure. Always match your choice to the LVP manufacturer’s “approved subfloors” list to stay within warranty requirements.
Why is moisture control important when installing LVP over existing flooring?
Moisture can damage the adhesive, underlayment, or locking mechanism depending on the LVP type, and it can also lead to mold or odor trapped under the floor. Even when you’re installing LVP over existing flooring, check for signs of moisture issues like bubbling, warping, or a musty smell, and consider a manufacturer-approved moisture barrier if required. In damp areas (basements, slabs, or concrete subfloors), use the correct vapor barrier thickness and placement per instructions. Proper moisture control helps prevent swelling, gapping, and premature LVP failure.
📅 Last Updated: October 07, 2026 | Topic: How to install over existing flooring LVP floors? | Content verified for accuracy and freshness.
References
- Google Scholar Google Scholar
https://scholar.google.com/scholar?q=installing+LVP+over+existing+flooring+recommended+work+practices - Google Scholar Google Scholar
https://scholar.google.com/scholar?q=loose+lay+vinyl+plank+over+existing+floor+subfloor+preparation+flatness+moisture - Google Scholar Google Scholar
https://scholar.google.com/scholar?q=resilient+flooring+installation+guidelines+over+existing+subfloor+RFCl - https://en.wikipedia.org/wiki/Vinyl_flooring
- https://www.rfciprecision.com/installation-recommended-work-practices/
- https://www.britannica.com/art/flooring
- eCFR :: 29 CFR 1910.134 — Respiratory protection.
https://www.ecfr.gov/current/title-29/chapter-XVII/part-1910/subpart-H/section-1910.134 - https://www.cdc.gov/mold/moistureprevention/index.html
- https://pubmed.ncbi.nlm.nih.gov/?term=resilient+flooring+indoor+air+quality+volatile+organic+compounds+vinyl
- Google Scholar Google Scholar
https://scholar.google.com/scholar?q=How+to+install+over+existing+flooring+LVP+floors?