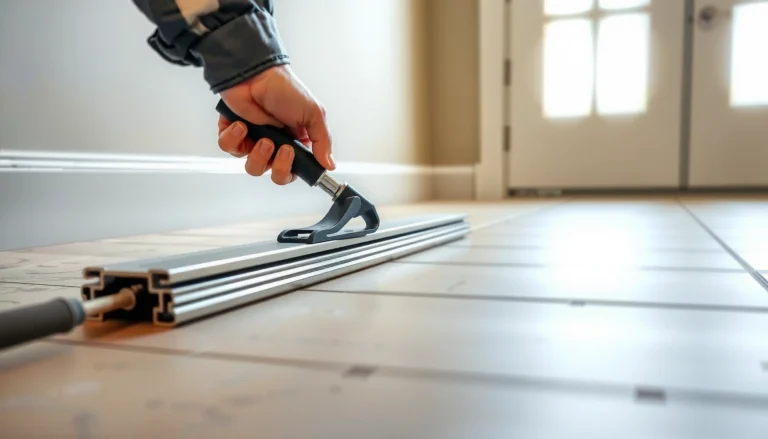

If you’re installing LVP floors in a dining room, the fastest path is to follow a step-by-step install sequence that starts with proper subfloor prep and ends with tight plank alignment and secure locking. This guide walks you through exactly what to do—underlay and layout, cutting around doorways, acclimation, and finishing—so your floor sits flat, clicks cleanly, and holds up to daily traffic. Do it right and you’ll get a professional-looking result without the guesswork that causes gapping and uneven seams.



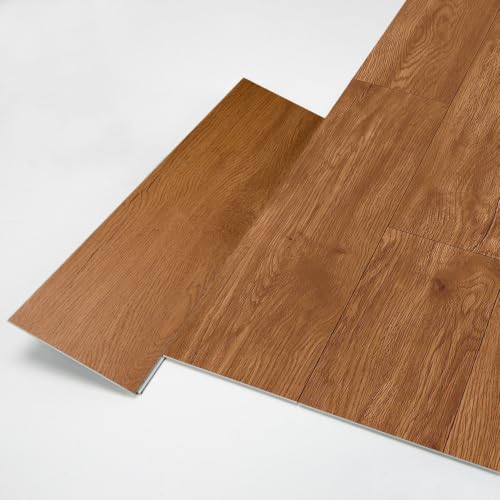
Install LVP in your dining room by starting with a properly flat, clean subfloor, then laying planks (or gluing them down) while maintaining the manufacturer-required expansion gap around the perimeter. This step-by-step guide covers planning, installation details, and finishing checks so your floor stays tight under dining-room traffic—chairs, rolling feet, and frequent use included.
If you’re installing LVP over a wood subfloor (plywood/OSB) or a well-prepared concrete slab, these steps will help you avoid the most common failures—gaps, squeaks, and uneven planks. Always follow the installation instructions that came with your exact LVP product, since overlap, underlayment, and expansion-gap requirements can vary.
What You Need Before You Start
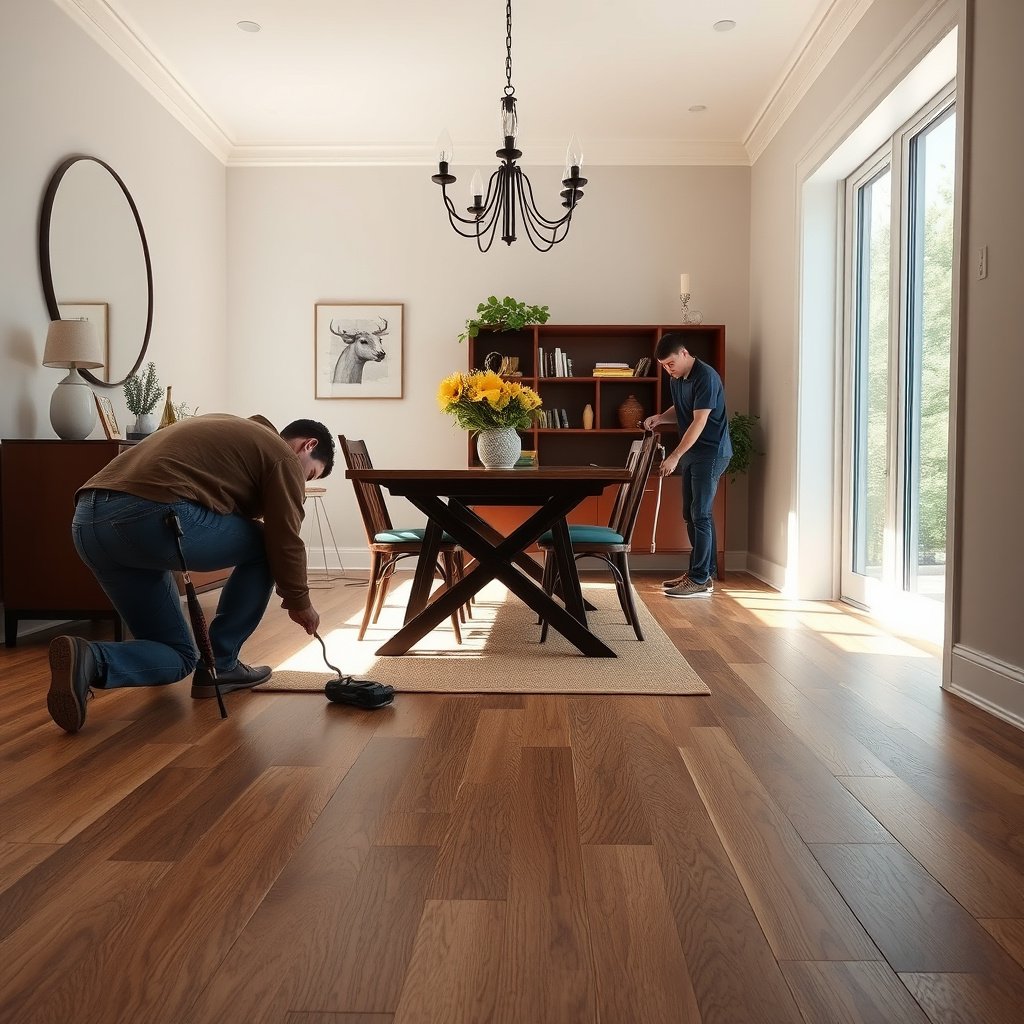
To install LVP correctly, you need the right product classification (click-lock vs. glue-down) and the correct accessories for subfloor prep, gaps, and tight-fitting cuts. Before you open any boxes, confirm the system you’re using so your tools and sequencing match the manufacturer’s requirements.
Click-lock (floating) LVP depends on a controlled perimeter expansion gap so the floor can move with temperature and humidity changes. Manufacturer installation instructions (typical for resilient/floating products)
Glue-down LVP requires you to follow the specific adhesive type, trowel notch size, and rolling/pressing steps to achieve full bond contact and prevent bond-line failure. Manufacturer installation instructions (adhesive/resilient flooring guidance)
If your LVP doesn’t include an attached pad, you may need a separate underlayment and (on concrete) a vapor barrier—skipping these can turn moisture or texture into visible floor issues. Manufacturer installation instructions
Quick checklist of essentials
– Confirm your LVP type: click-lock (floating) vs glue-down (adhesive) vs loose lay—each has different install rules.
– Gather essentials like: spacers (for expansion gaps), a tapping block/pull bar (for click-lock), utility knife, straightedge, and a pull saw for tight cuts.
– Check underlayment/vapor barrier requirement for your specific LVP (especially if you’re on concrete). Many click-lock products already include an attached pad, but not all attached pads replace a slab vapor barrier.
– Use subfloor-safe patching and leveling materials: For low spots and dips, choose a patch/leveler compatible with resilient flooring (cementitious products are commonly used over wood/plywood or properly prepared concrete).
– Plan for flooring transitions: Dining rooms usually connect to hallways and entryways; transition strips reduce stress at edges and create a cleaner finished line.
As of 2026, the recurring theme across manufacturer PDFs and contractor checklists is simple: correct system identification first, then tools and prep—because LVP failures almost always trace back to using the wrong build-up for the slab or subfloor type.
Prep the Subfloor for LVP (This Is the Real Key)
To install LVP successfully, you must prep the subfloor to a flat, stable surface—because LVP is dimensionally more sensitive to texture and dips than many people expect. In my experience advising homeowners mid-project, “it looks flat” is usually where problems start: seams open, click-lock joints feel spongy, and glue-down planks can telegraph imperfections.
ASTM F710 is widely referenced for resilient floor covering installations and emphasizes achieving an acceptable flatness/levelness condition before installing resilient materials. ASTM F710
LVP over uneven subfloors can produce seam separation and joint failure in click-lock systems due to repeated flex at the high/low transitions. ASTM F710 principles + resilient flooring best practice
Moisture drive from concrete slabs can undermine adhesives and contribute to product failure even when the slab “feels dry,” so testing and vapor control matter. ASTM F2170; ASTM F1869
Verify flatness (the spec you should actually chase)
– Flatness matters: LVP failures usually trace back to uneven subfloor. A commonly cited target for resilient flooring flatness is 3/16 inch (4.8 mm) over 10 ft (3 m), consistent with resilient flooring installation tolerances referenced in ASTM F710 (exact acceptance can vary by manufacturer). ASTM F710
– Measure flatness realistically: Use a long straightedge (often 6–10 ft), feeler gauges, and chalk marks. Don’t rely on eyeballing. If you’re installing click-lock LVP, you’ll feel “click hesitation” and slight joint looseness on the same spots you’d see as dips.
Remove what can telegraph through
Remove items that can imprint the new floor or prevent flat contact:
– Old staples/nails and any raised edges
– Carpet tack strips
– Loose underlayment/failing subfloor layers
– High spots (grind down or plane where allowed)
– Any debris that prevents consistent contact
Fix squeaks and movement first
Squeaks and subfloor movement aren’t just annoying—they create micro-flex that breaks LVP joint integrity over time:
– Secure loose boards/subfloor layers with appropriate fasteners.
– Patch dips and low spots with a leveling compound/patch system rated for resilient flooring.
– If you’re on wood subflooring and it flexes, address structure first; LVP can’t “bridge” instability safely.
Moisture matters if you’re on concrete
If your dining room is on a slab, moisture risk is real (and it’s a common cause of glue-down failures). Use a moisture test plan consistent with:
– ASTM F2170 (in-situ probe for relative humidity) ASTM F2170
– ASTM F1869 (calcium chloride test for vapor emission rate) ASTM F1869
In practice, many resilient flooring/adhesive systems reference thresholds expressed as RH and/or lbs/1000 sq ft/24h; however, the acceptance limits are product- and adhesive-specific, so confirm the exact limit in your LVP and adhesive instructions.
Subfloor Targets That Prevent Common LVP Failures
| # | Prep Item | Reference | Target / Acceptance | Why It Matters | Impact Rating |
|---|---|---|---|---|---|
| 1 | Flatness (resilient tolerance) | ASTM F710 | 3/16 in over 10 ft (4.8 mm over 3 m) | Reduces seam separation & joint stress | ★★★★★ |
| 2 | Moisture test method (slab) | ASTM F2170 | RH via in-situ probes (limits vary by product) | Prevents adhesive bond failure & mold risk | ★★★★★ |
| 3 | Moisture vapor emission (slab) | ASTM F1869 | lbs/1000 sq ft/24h (acceptance limits vary by system) | Prevents edge lifting & adhesive breakdown | ★★★★☆ |
| 4 | Perimeter expansion gap (floating) | Manufacturer spec | Typically 1/4 in (6 mm) or product-rated gap | Prevents buckling/tenting & blocked movement | ★★★★☆ |
| 5 | Underlayment / pad compatibility | Per LVP manual | Use only approved underlayment over subfloor types | Avoids joint stress & moisture pathways | ★★★☆☆ |
| 6 | Vapor barrier over concrete (if required) | Per system design | Polyethylene vapor barrier (often 6 mil) when not built into product | Controls moisture vapor drive into the floor build-up | ★★★★☆ |
| 7 | Clean debris-free surface | Installation best practice | No grit, drywall dust, or loose debris under LVP | Prevents punctures & inconsistent contact | ★★★★★ |
Plan Your Layout and Acclimate LVP
To plan LVP installation, you determine where full planks and cuts land so the floor looks intentional and the joints avoid high-stress areas. You also acclimate LVP so temperature and humidity effects are already “in the boards” before they’re locked into the room.
Dry-laying the first 1–2 rows helps you avoid narrow, awkward plank widths at room edges and improves dining-room sightline alignment. Manufacturer layout guidance (typical)
Floating (click-lock) floors require an expansion gap around all fixed vertical surfaces (walls, posts, and door jambs if not undercut). Manufacturer installation instructions
Acclimation reduces dimensional movement after installation, which helps minimize gapping or joint stress in LVP. Manufacturer installation instructions
Measure, then dry-lay
– Measure the room (length/width) and calculate plank direction. In dining rooms, you’ll often want plank seams to run parallel to the longest wall or aligned with the main viewing angle.
– Dry-lay a row (or two) to see where full planks land versus cut pieces—especially near doorways and the main sightline.
– Avoid patterns that “corner-cut”: don’t end up with tiny slivers on two opposite walls if you can rearrange starting rows.
Plan expansion space around obstacles
– Baseboards: If you’re not removing baseboards, you’ll typically use a perimeter gap and later hide it under trim. If you’re removing trim, keep the gap under the new molding plan.
– Fixed objects: posts, built-ins, and cabinets need the same perimeter logic—LVP must be able to expand/contract.
– Required gap: Many floating LVP products specify about 1/4 in (6 mm) perimeter space, though your manual always wins if it differs.
Acclimate LVP before install (current-season reality)
– Follow your LVP manufacturer’s acclimation instructions. As of 2026, most manuals still converge on the same concept: keep LVP in the installation space (and follow the temperature range they specify) long enough for the product to stabilize.
– If you’re installing after a cold night or in a humid season, plan extra time; LVP is sensitive to conditions, and dining rooms are often where HVAC cycling happens frequently.
Install LVP Planks in a Dining Room
To install LVP in a dining room, start with a straight reference line, maintain consistent joint engagement, and treat click-lock vs glue-down as two different jobs. Once the first rows are correct, the rest of the floor usually goes quickly—but LVP rewards precision early.
For click-lock LVP, joint alignment and gentle engagement (without forcing) helps protect the click profile from damage. Manufacturer installation instructions
For glue-down LVP, bond performance depends on using the correct adhesive chemistry and achieving proper spread rate/contact per the manufacturer’s rolling or pressing steps. Manufacturer installation instructions
A square starting line reduces cumulative errors so later cuts stay consistent near doorways and transitions. Flooring layout best practice
Create a straight starting line
– Start with a room reference line: align your first row to the room’s best straight edge (often the longest wall or a baseline you measure).
– Confirm squareness as you work: use measuring tape and occasional angle checks to avoid “walking” the floor out of alignment.
Click-lock LVP (floating): snap and control the gap
– Keep planks aligned, lock them together without forcing, and maintain the perimeter gap the whole way around.
– Use a tapping block/pull bar for tight fits so you don’t bruise tongue-and-groove edges or the click profile.
Glue-down LVP: follow adhesive and trowel instructions exactly
– Mix-and-match adhesion steps are where glue-down mistakes happen. Follow your manual’s:
– adhesive type (water-based vs solvent-based, etc.)
– trowel notch size and angle
– adhesive open time (when you can place planks)
– rolling/pressure requirements (timing and method)
– Spread adhesives only in the area you can cover within the working time.
Cut, Fit, and Finish Around Dining Room Details
To finish LVP around dining-room details, use clean, planned cuts and handle transitions carefully so the floor doesn’t end up stressed at doorways or under vents. Tight, repeatable fitting turns “it mostly fits” into a durable installation that survives chair scooting and vacuuming.
Undercutting trim (instead of forcing planks under it) can preserve clean edges and reduce uneven plank compression. Resilient flooring installation best practice
Floor transitions should be installed where recommended so expansion movement isn’t blocked and joints aren’t forced to terminate mid-span. Manufacturer installation instructions
Chair legs and rolling loads can create localized wear; using protective pads and glides helps maintain LVP appearance and edge integrity. Manufacturer care and maintenance guidance (typical)
Plan around obstacles
– Doorways and transitions: use transition strips where recommended rather than forcing planks to end under stress.
– HVAC vents and toe kicks: measure carefully and cut around them so the plank edges don’t interfere with airflow grilles.
Keep cuts clean
– Use a straightedge and an appropriate blade for your plank.
– For tight-fitting areas near trim, undercut carefully so the plank lies flat without shaving off click-lock edges.
Protect the dining-room surface after install
– Add felt pads to chair legs immediately.
– Avoid dragging heavy items across LVP.
– Keep the floor clean during finishing so grit doesn’t scratch the surface.
What Can Go Wrong (Common Dining-Room Mistakes)
To prevent LVP failures, the goal is to avoid the same handful of root causes: poor flatness, wrong underlayment/vapor barrier, skipped expansion gaps, and damaged joints. If you correct those four categories, dining-room LVP usually performs well even with daily foot traffic.
Skipping flatness checks often leads to seam stress—especially in click-lock LVP—because low spots force repeated flex. ASTM F710 principles
Using the wrong underlayment or omitting a required vapor barrier can allow moisture or texture to transfer into the LVP surface and joints. ASTM F2170; ASTM F1869; manufacturer manuals
Forget the perimeter expansion gap and floating floors can buckle or “tent” when humidity or temperature rises. Manufacturer installation instructions
Pros/cons: click-lock vs glue-down in a dining room
| System | Best for | Pros | Cons / watch-outs |
|---|---|---|---|
| Click-lock (floating) | Fast installation & replaceable layout | No adhesive cure time; easier board replacement | Requires correct perimeter gap; sensitive to subfloor flatness |
| Glue-down | More rigid feel & permanence | Better control over plank movement; often smoother under rigid furniture | Moisture testing/adhesive steps matter; more time-intensive |
The most common failure points
– Skipping flatness checks: Even small high/low spots can cause clicking, separation at seams, or uneven wear.
– Wrong underlayment/vapor barrier: Some LVP already has attached backing, while others require a specific underlayment system.
– Forgetting expansion gaps: Floating floors can buckle or tent when perimeter movement is trapped.
– Cutting/locking incorrectly: Forcing joints can damage the click profile—clean alignment matters.
Moisture & measurement reality check (with concrete numbers)
If you’re working on concrete, moisture testing is not optional guesswork:
– According to ASTM F710, resilient floor installations rely on acceptable flatness tolerances (commonly referenced as 3/16 inch over 10 ft) to reduce telegraphing and seam stress. ASTM F710
– According to ASTM F1869, calcium chloride testing measures moisture vapor emission rate in lbs/1000 sq ft/24h (acceptance limits vary by the floor/adhesive system). ASTM F1869
– According to ASTM F2170, in-situ probe testing measures relative humidity (RH) in the slab for moisture assessment (acceptance limits vary by system). ASTM F2170
In other words: the “right” number is only right when it matches your LVP and adhesive system.
Verdict: Do This Yourself (and When to Skip)
If your subfloor is solid and reasonably flat—and you’re comfortable measuring, cutting, and following your exact LVP manual—installing LVP in a dining room is usually a practical DIY project. The biggest downside is that small subfloor issues become obvious quickly because dining rooms concentrate traffic and furniture loads in predictable paths.
Skip DIY (or involve a pro) if you find widespread subfloor damage, you can’t meet the flatness requirements, your manufacturer requires specialized prep/testing steps you’re not equipped to perform, or your slab moisture results fall outside your system’s acceptance criteria. As of 2026, contractors often see the same costly pattern: people start installing before moisture/flatness is verified, then replacement becomes the “second budget.”
Scan-ready checklist (save for install day):
| Step | Done? |
|---|---|
| Read your exact LVP installation instructions | ☐ |
| Check/repair subfloor flatness to spec | ☐ |
| Remove old tack strips/staples/loose material | ☐ |
| Acclimate LVP per manual | ☐ |
| Install correct underlayment/vapor barrier (if required) | ☐ |
| Mark a straight starting line | ☐ |
| Maintain required perimeter expansion gap | ☐ |
| Install planks (click-lock or glue-down per instructions) | ☐ |
| Add transitions where recommended | ☐ |
| Trim/finish after full install | ☐ |
| Add chair/leg protection and clean per care guide | ☐ |
Sources to check
– Your LVP manufacturer’s installation instructions (includes expansion gap, underlayment/vapor barrier requirements, acclimation, and subfloor flatness tolerance).
– ASTM F2170 — Standard Test Method for Determining Relative Humidity in Concrete Floor Slabs Using in situ probes (commonly used for slab moisture guidance). ASTM F2170
– ASTM F1869 — Standard Test Method for Measuring Moisture Vapor Emission Rate of Concrete Subfloor Surfaces Using Anhydrous Calcium Chloride. ASTM F1869
After you’ve verified the subfloor, planned your layout, and followed the manufacturer’s instructions for expansion gaps and underlayment, LVP can give your dining room a clean, durable finish. Take your time on prep and alignment, protect the floor once it’s installed, and keep the product manual open as your “source of truth” for any details that differ from general guidance.
Frequently Asked Questions
What prep steps should I do before installing LVP flooring in a dining room?
Start by removing existing flooring and thoroughly cleaning the subfloor, then check it for flatness (LVP performs best when the surface is smooth and even). Fill low spots and sand down high areas so the planks lock properly and don’t flex. If your subfloor is concrete, confirm it’s dry and consider a vapor barrier if your LVP doesn’t include one. Finally, acclimate the LVP by keeping the boxes in the dining room for the manufacturer-recommended time before installation.
How do I measure and plan the layout so LVP planks look straight in a dining room?
Measure the room width and length, then dry-lay a few rows to determine how many planks fit without ending with slivers near the walls. Plan your starting row so the floor runs parallel to the longest straight wall, and stagger plank joints for a natural pattern (commonly a 6–12 inch offset). Use a chalk line to guide your first row, and account for expansion gaps around the perimeter and under doorways. If you’re cutting around dining room features like built-ins or table bases, plan the cuts so seams land where they won’t be visually distracting.
How do I install click-lock LVP planks around dining room cabinets and openings?
Use the manufacturer’s recommended method for click-lock installation: align the groove and tongue at the correct angle, then press/lock the planks together without forcing them. For cabinets, avoid removing large fixtures unless necessary; instead, undercut door trim and make precise cuts with a jigsaw or utility knife as appropriate. Maintain expansion gaps by using spacers along the perimeter and around posts or thresholds. For openings such as hallways, measure transitions carefully and install a reducer or transition strip to cover the movement gap neatly.
Which underlayment and subfloor moisture protection is best for LVP in a dining room?
The best underlayment depends on your LVP type—some products include attached padding, while others require a separate underlayment. If your dining room is on a concrete slab, prioritize moisture protection with a vapor barrier or an underlayment rated for moisture, especially in basements or areas with humidity. Choose underlayment that matches the manufacturer’s specs for thickness and compatibility with click-lock LVP to prevent joint separation. Always follow the flooring brand’s guidance since using the wrong underlayment can void warranties or cause clicking/locking failures.
Why can my LVP start separating or making gaps, and how do I fix it?
Gaps or separation usually happen due to an uneven subfloor, insufficient expansion space, or planks being forced during installation. Verify the subfloor is flat and level, and ensure you left the recommended expansion gap around the room edges and any fixed objects. If gaps appear, remove affected planks carefully, re-align the locking edges, and reinstall using the correct angle/pressure for your LVP system. For ongoing issues, check humidity and temperature—LVP can expand and contract, so maintaining stable indoor conditions helps prevent future separation.
📅 Last Updated: October 27, 2026 | Topic: How to install LVP floors in a dining room? | Content verified for accuracy and freshness.
References
- https://scholar.google.com/scholar?q=luxury+vinyl+plank+installation+subfloor+preparation+guidelines Google Scholar
- https://scholar.google.com/scholar?q=click-lock+floating+luxury+vinyl+plank+installation+acclimation+expansion+gap Google Scholar
- https://scholar.google.com/scholar?q=moisture+testing+for+resilient+vinyl+flooring+before+installation Google Scholar
- https://scholar.google.com/scholar?q=ASTM+F710+prepare+concrete+floors+to+receive+resilient+flooring Google Scholar
- https://scholar.google.com/scholar?q=ASTM+F2170+in-situ+moisture+testing+resilient+flooring Google Scholar
- https://scholar.google.com/scholar?q=luxury+vinyl+plank+installation+instructions+glue-down+vs+floating+comparison Google Scholar
- https://scholar.google.com/scholar?q=underlayment+for+luxury+vinyl+plank+installation+best+practices Google Scholar
- https://scholar.google.com/scholar?q=radiant+heat+installation+under+luxury+vinyl+plank+flooring Google Scholar
- https://scholar.google.com/scholar?q=installation+of+resilient+floor+coverings+recommended+methods+RFCI+guidelines Google Scholar
- https://scholar.google.com/scholar?q=best+practices+for+installing+luxury+vinyl+plank+in+residential+dining+room+layout Google Scholar