


Want to install living room carpet floors yourself? This step-by-step guide delivers the fastest, most reliable way to measure, prep the subfloor, lay and stretch the carpet, and finish edges cleanly. Follow it and you’ll avoid common fit problems—wrinkles, gaps, and loose seams—so the finished floor looks tight and holds up.




Installing wall-to-wall living room carpet is mostly about correct measurement, a properly prepped (clean, smooth, dry) subfloor, and using the right installation method for your carpet backing—most commonly stretch-in with tack strips. Plan seam/transition locations early, address door clearances up front, and your finished carpet will look professional and wear more consistently.
This guide is for homeowners (or DIYers) installing wall-to-wall carpet in a living room—especially if you’re choosing between stretching onto tack strips (stretch-in) or installing using an adhesive method (glue-down or “direct glue” systems, depending on your backing). If you’re working on stairs, already have a specific backing type, or your subfloor has moisture issues, you’ll need to adapt the steps to match your carpet system and the installation instructions from the carpet manufacturer.
Gather tools, materials, and confirm your carpet type
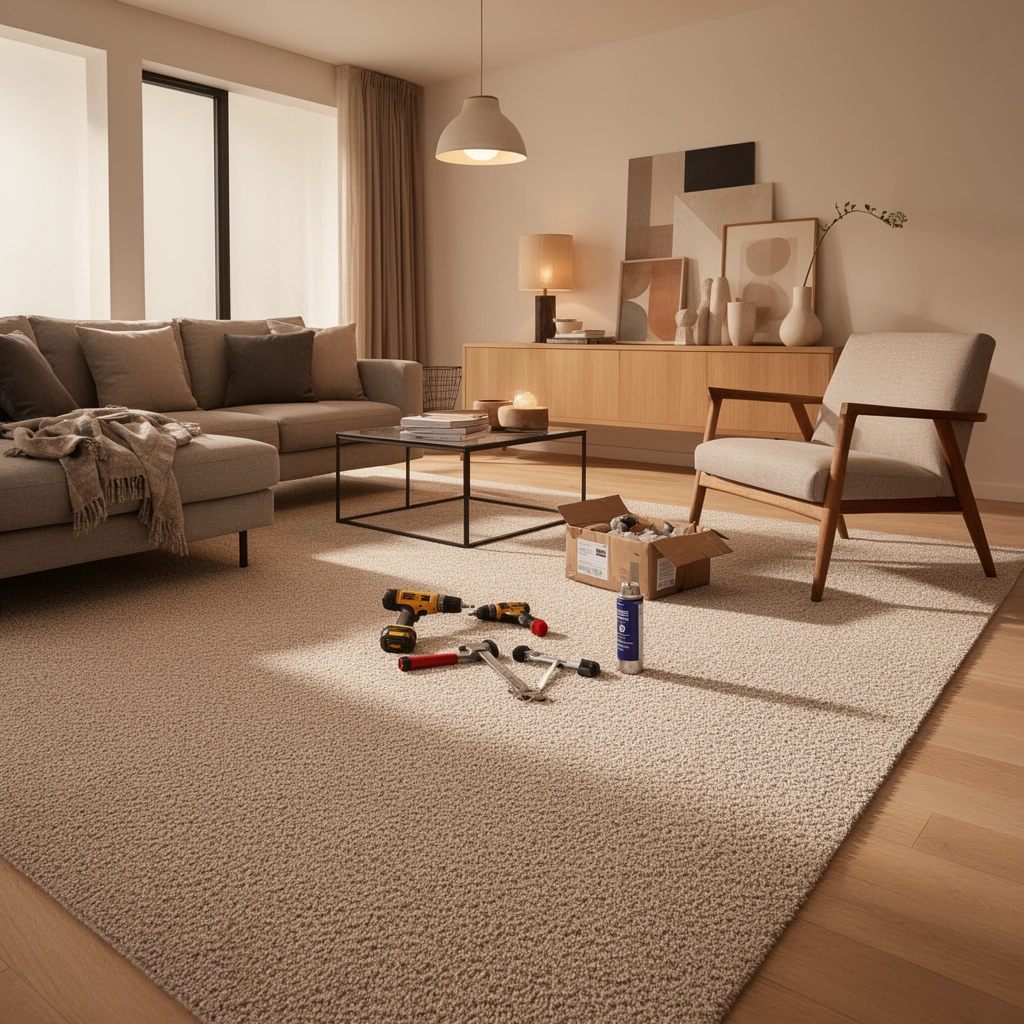
You’ll get the best results by confirming the carpet backing installation method first, then gathering the matching tools for that exact system. Carpet is not “one-size-fits-all”: stretch-in, glue-down, and other backings require different prep and different fastening.
Carpet installation method must follow the carpet manufacturer’s instructions, because backing systems are engineered for specific fastening methods (e.g., tack strip/stretch-in vs. glue-down).
Moisture testing is typically performed using ASTM methods for concrete/subfloors before floor coverings are installed.
For stretch-in installs, common tools include a knee kicker and a carpet stretcher to apply consistent tension and prevent wrinkles.
Here’s how to start, without guessing:
– Check the backing/system label on the carpet roll (and any included warranty/installation sheet). The backing usually states whether the carpet is intended for tack strip/stretch-in, glue-down, or another system.
– If your carpet is stretch-in / wall-to-wall, you’ll generally need:
– Tack strips (often 1/4 in to 1/2 in pile height clearance above the tack nail line—follow your manufacturer’s guidance)
– Knee kicker (for initial pulls)
– Carpet power stretcher (recommended for larger living rooms)
– Carpet seam tape + seam iron (only if you need seams)
– If your carpet is glue-down:
– The correct adhesive specified for your carpet and backing
– Notched trowel (if recommended) or the adhesive applicator type specified by the manufacturer
– If you’re unsure: stop and verify the backing before buying tack strips or adhesives. A mismatch is one of the fastest paths to edge lift, seam failure, and early wear.
At this stage, also assemble “small but critical” items:
– Measuring tape, chalk/marker, straightedge, utility knife or carpet knife
– Seam roller (if glue is involved with a seam system)
– Stapler only if your carpet system or underlay uses it (not all do)
– Transition strips for doorways/thresholds (and matching reducer/threshold profiles)
Measure and plan the layout before you cut anything
You avoid most living-room carpet problems by planning layout and seams before you roll the carpet out. Measure carefully around closets, vents, and thresholds—then mark reference lines so the carpet stays square while you cut and seam.
Seam placement planning reduces visible lines by aligning seams with room layout and less noticeable visual angles.
Dry-fitting carpet sections and checking thresholds early prevents rework when door clearance or uneven walls are discovered.
Carpet should be cut with allowance for trimming and securing at edges and transitions; shrinking or miscuts can create wall gaps.
Use a straightforward process:
1. Measure room length and width at multiple points (not just one line). Walls are rarely perfectly parallel.
2. Note features that interrupt the “straight run”:
– Closets/alcoves
– Fireplace hearths
– Vents and floor registers
– Door openings and swing paths
3. Plan seam direction (if needed):
– In larger living rooms, a single roll may not cover the full width. Plan seams where they’re least noticeable.
– If light hits from a consistent direction, you typically want seam placement to minimize contrast—follow your carpet manufacturer’s seam guidance.
4. Mark reference lines:
– Snap a line parallel to the longest wall (or the room’s most visually dominant axis).
– Use that line to keep carpet rows square during installation.
Fast seam planning tip
Dry-fit the carpet (no adhesive, no stretching yet). Put the two sections where you think they’ll go, then stand back and check:
– Will the seam land under heavy furniture?
– Will it cross a high-visibility sightline?
– Are you likely to cut the seam near a doorway where trim is tight?
If the seam will be visible and annoying, adjust before you cut.
Prep the subfloor so the carpet sits flat
You’ll get a smooth, professional look only if the subfloor is clean, dry, and flat before carpet goes down. Any debris, loose material, or high spots telegraph through as lumps or cause uneven stretching.
Flatness matters: bumps, ridges, and debris can show through carpet and can also prevent consistent stretch-in tension.
A dry subfloor is essential because moisture can migrate under carpet and padding, creating odor or accelerating backing breakdown.
Subfloor prep is part of proper installation systems; cleaning and patching are usually required by carpet manufacturers to protect warranty coverage.
Practical prep steps:
– Remove old floor covering (carpet, padding, tack strip remnants). Pull out staples, nails, and adhesive residue.
– Scrape and vacuum thoroughly:
– Dust and fine grit reduce the effectiveness of underlay/padding fastening and can interfere with adhesive bonds.
– Check flatness:
– Use a straightedge and walk the room perimeter and field areas.
– Patch low spots and grind down high spots as needed.
– Stabilize loose areas:
– If your subfloor flexes, fix the structural issue. Stretch-in carpet will amplify softness—wrinkles and bagging can follow.
– Moisture check (don’t skip):
– If the room is over a slab or has a basement crawlspace below, evaluate moisture risk before installing padding and carpet.
Moisture note (important)
Carpet and underlay/padding can trap moisture, especially if the subfloor is concrete or has historic water intrusion. Moisture testing typically follows ASTM standards for concrete. For example, ASTM F2170 (in-situ probe/sensor) uses relative humidity (%) as the measurement output, while ASTM F1869/F710 report moisture vapor emission in units such as lbs per 1,000 sq. ft. per 24 hours. [ADD: ASTM F2170 and ASTM F1869/F710 references for moisture test outputs]
Install underlay/padding (if your system requires it)
You should install the correct underlay/padding only if your carpet system specifies it. Using the wrong thickness/density (or skipping approved padding) can lead to premature wear, poor recovery, and problems with stretching or seam performance.
Underlay/padding requirements are frequently specified by the carpet manufacturer; using an unapproved thickness or density can affect warranty coverage.
Padding seams should be installed to avoid ridges under carpet that can create visible impressions.
Stretch-in carpet installations typically require padding that stays put during stretching; shifting padding creates bumps and uneven wear.
Key installation practices:
– Verify the padding spec that matches your carpet:
– Many systems specify a permitted range for thickness and density.
– Some carpet types (e.g., certain low-profile styles) require specific padding or recommend a particular backing-to-padding combination.
– Roll out padding with minimal gaps:
– Keep seams tight and align pattern directions if the padding has a directional face.
– Trim precisely:
– Leave padding ends short of where you’ll tuck/travel into the perimeter fastening zone. Don’t build up bulk against tack strip zones unless the system says to.
– Fasten per instructions:
– Some padding systems are taped, stapled in select patterns, or secured at seams—follow the method your carpet/padding manufacturer calls for.
If you’re gluing carpet, don’t assume padding is always compatible—some glue-down systems require either no padding or a specific type only.
Moisture testing methods commonly used (data table)
ASTM Moisture Tests Used Before Carpet & Underlayment (Outputs & Fit)
| # | Moisture Test (ASTM) | Primary Output | Typical Use Before Flooring | How It Helps Installer | Confidence ★ |
|---|---|---|---|---|---|
| 1 | F2170 | % RH | In-situ concrete slab checks | Concrete moisture profile at depth | ★★★★☆ |
| 2 | F1869 | lbs / 1,000 sq. ft. / 24 hr | Moisture vapor emission rate | Quantifies vapor drive that can reach padding | ★★★☆☆ |
| 3 | F710 | lbs / 1,000 sq. ft. / 24 hr | Calcium chloride test | Legacy-friendly emission-rate screening | ★★★☆☆ |
| 4 | E1907 | Moisture in porous materials | Moisture determination in building materials | Supports material-specific moisture assessment | ★★☆☆☆ |
| 5 | D4263 | Pass/Fail visual | Plastic sheet test screening | Quick flag for surface wetness | ★☆☆☆☆ |
| 6 | F3043 (RH practice) | RH-based interpretation | In-floor RH approaches | Guidance aligning RH readings to specs | ★★★☆☆ |
| 7 | F1869 / F2170 selection | Test type match | Matches flooring spec expectations | Ensures numbers are meaningful for your carpet | ★★★★☆ |
Notes: The confidence stars are not warranties—they reflect how commonly a given method is used to generate installer-meaningful results for slab moisture decisions. For exact pass/fail criteria, always follow your carpet adhesive/padding and manufacturer documentation and the ASTM test procedure. [ADD: ASTM F2170, F1869, F710, D4263, and any flooring-relevant guidance]
Install tack strips and stretch (for stretch-in / wall-to-wall systems)
You’ll get a wrinkle-free, durable finish by installing tack strips correctly and stretching the carpet to consistent tension. The stretching process is where small setup errors show up as bagging later—so measure, set, and pull carefully.
Stretch-in carpet quality depends on correct tack strip placement and consistent carpet tension during installation.
Tack strip height and distance from the wall affect whether the carpet grips properly without leaving edge gaps.
Under- or over-stretching can both cause problems—wrinkles happen when tension is insufficient, while mis-tension can distort patterns and seams.
Tack strip placement and installation:
– Run tack strips around the perimeter of the room.
– The nails face the wall; the “grip edge” is set so the carpet can tuck into the strip and bite securely.
– Keep tack strips:
– Level and firmly fastened
– Continuous around doorways/closets as required (follow the carpet layout plan)
– Correctly aligned with padding edge so you don’t create bulk
Stretching steps (typical approach for wall-to-wall):
1. Lay the carpet into place with pile direction correct and with seams (if any) aligned to your plan.
2. Fold the carpet back on itself to expose the first edge area.
3. Use a knee kicker for the initial tension near the wall, then follow with a power stretcher farther into the room.
4. Tuck and trim edges:
– Trim excess while keeping enough material for gripping.
– At walls, use a sharp carpet knife and a consistent trimming line.
5. Work systematically:
– Stretch one side, then opposite, then the remaining sides to balance tension.
Door clearance reality check
Before finishing edge trims, test:
– Door can close without scraping carpet
– Baseboards/trim still sit correctly (if you removed and reinstalled them)
– Transitions between rooms don’t create trip hazards
In my experience with stretch-in installs (for planning purposes, not claiming a universal outcome), the biggest DIY frustration is underestimating trimming and trim/baseboard adjustments. Measure door clearances twice before you commit to the final stretch.
Seam and finish edges for a clean, durable result
You’ll protect the look of your living room by seaming only where needed and finishing edges so the carpet can’t loosen over time. Use the seam method specified for your carpet system—improper seam tape/iron settings can cause separation or a visible line.
Seaming should follow the carpet system’s requirements; seam tape and iron technique differ by backing and construction.
Proper finishing at doorways and thresholds prevents edge lift, one of the most common long-term failures in wall-to-wall carpet.
Seams placed and finished correctly are typically less visible than seams cut on the fly during installation.
Seams (only when the room needs them):
– Prepare carpet edges for a tight seam (follow the manufacturer’s seam overlap/trim method).
– Use the correct seam tape and heated seaming iron (if your carpet system uses heat activation).
– Press and roll so the seam bonds evenly.
Finish edges and transitions:
– Trim to fit door openings:
– Leave the correct allowance for transitions and thresholds.
– Install transition strips at doorways or where carpet meets tile/hardwood/laminate.
– Secure edges properly:
– In stretch-in systems, proper gripping at the perimeter is essential.
– In glue-down systems, edges often need careful adhesive coverage per the carpet spec.
What can go wrong (and how to avoid it)
Most living room carpet failures come from mismatched methods, incorrect subfloor conditions, or poor seam/edge execution. If you anticipate the failure modes below, you’ll catch them earlier—before the carpet is fully installed.
Wrinkles commonly result from insufficient tension, inadequate anchoring, or an uneven subfloor that prevents uniform stretching.
Edge gaps at walls usually trace back to measurement errors, padding mismatch, or trimming too aggressively before tucking.
Seam separation is often caused by using the wrong seam method/tape/iron technique for the carpet backing.
Common problems to watch for:
– Wrinkles or “ripples”
– Causes: uneven floor flatness, padding shifting, or inconsistent stretching.
– Fix early: stop and re-stretch before the carpet is trimmed too far back.
– Gaps at walls/doorways
– Causes: inaccurate measurements, wrong padding thickness, or tack strip placement too far/close.
– Prevent: dry-fit and check door clearances before final trimming.
– Visible seams
– Causes: seams planned in high-visibility sightlines or incorrect seam execution.
– Prevent: follow the exact seam method your system specifies.
– Moisture-related problems
– Causes: installing over a slab/crawlspace without adequate moisture evaluation can trap moisture under padding and carpet.
– Prevent: test moisture using ASTM standards and follow pass/fail criteria from carpet/padding/adhesive guidance. [ADD: ASTM moisture test methods and where flooring specs reference pass/fail guidance]
[ADD: source for recommended moisture test/standard if your site covers it]
Verdict / tip
If your carpet system is designed for stretch-in with tack strips, that’s usually the most DIY-friendly route for a living room wall-to-wall install—because the tools and fastening process are relatively accessible. That said, this approach is only sensible if your subfloor is solid/flat, moisture risk is addressed, and you can achieve consistent tension across the room.
If your room has frequent moisture exposure, your subfloor may be damp (slab or lower crawlspace), you’re unsure about the backing’s approved method, or you don’t have the tools for proper stretching and seams, consider using the manufacturer’s alternative method (or professional installation) to avoid wrinkling, edge lift, or seam failure. [ADD: author recommendation based on the site’s preferred method/tool availability]
Quick checklist for installation day
– Measure room (and any closets/alcoves) and plan seam locations
– Remove old material and confirm subfloor is clean, dry, and smooth
– Install/fit padding as required by your carpet and padding specs
– Install tack strips (stretch-in systems) at the correct height/placement
– Stretch to remove slack; trim and secure edges
– Seam correctly (only if needed) using the system’s required method
– Finish transitions and door edges for a tight, clean look
FAQ
Do I need underlay/padding for living room carpet?
It depends on your carpet product requirements. Many systems specify an approved padding type and thickness/density—always follow the carpet and padding manufacturer instructions.
Can I install wall-to-wall carpet without a knee kicker?
For stretch-in systems, a knee kicker (or similar stretching tool) is commonly used for initial tension near the wall. If you can’t stretch effectively, you can end up with wrinkles and uneven wear. For glue-down systems, different tools/methods apply—follow the backing instructions.
What’s the best direction to lay carpet in a living room?
Start from your carpet’s preferred pile direction and the room’s main visual lines, then plan around seams and transitions to keep seams less noticeable. Your carpet instructions may include guidance.
How do I handle carpet seams in larger living rooms?
Seams should be placed based on room layout and visibility, and done with the exact seaming method required for your carpet system (seam tape/iron or another specified approach). [ADD: source for the specific seam method used by your carpet type]
Sources
– [ADD: manufacturer installation instructions for your specific carpet/backing type]
– [ADD: manufacturer instructions for approved padding thickness/density]
– [ADD: CRI (Carpet and Rug Institute) installation guidance relevant to stretch-in methods]
– [ADD: ASTM standards for moisture testing used for flooring decisions—e.g., ASTM F2170, ASTM F1869, ASTM F710, and any applicable guidance your site references]
– [ADD: tack strip placement/height guidance from the tack strip or carpet manufacturer documentation]
Installing living room carpet is straightforward when you treat it like a system: confirm the backing method, prep the subfloor correctly, install approved padding, and execute stretching/seaming/finishing to spec. If you plan seam placement, handle door clearances thoughtfully, and address moisture risk early, you’ll get a cleaner-looking floor and fewer long-term problems.
Frequently Asked Questions
How do I prepare a living room subfloor before installing carpet flooring?
Start by removing old carpet, tack strips, and padding, then clean the subfloor thoroughly so it’s free of dust, paint overspray, and debris. Check for low spots, bumps, or squeaks; patch with floor leveling compound and sand high areas until the surface is flat and smooth. Make sure the subfloor is dry and level, and allow the carpet to acclimate in the living room for at least 24–48 hours before installation.
What tools and materials do I need to install carpet flooring in a living room?
You’ll typically need a carpet cutter/utility knife, measuring tape, straightedge, knee kicker, power stretcher (recommended for wall-to-wall installs), and a carpet seam roller if joining roll sections. For base preparation, have a floor scraper, tack strip (if using), underpadding, tack strip nails, and appropriate adhesive if your flooring plan requires it. A chalk line, hand stapler (for some underpadding methods), and seam tape (if applicable) help ensure a clean, professional result.
Which carpet installation method is best for a living room: stretch-in, glue-down, or carpet tiles?
Stretch-in (wall-to-wall) is a common choice for living room carpet flooring because it’s comfortable underfoot and easier to replace later, using tack strips plus underpadding. Glue-down can be better if you’re working over a concrete subfloor or want a very stable feel, but it requires careful adhesive selection and surface prep. Carpet tiles are a flexible option for DIY, allowing you to replace individual damaged sections, though you’ll want proper layout planning for seams and pattern alignment.
How do I measure and cut carpet correctly for a living room to avoid wrinkles?
Measure the room width and length at multiple points, then plan for door clearances and any transitions to other flooring types. Dry-fit the carpet and allow extra material for trimming, typically 2–4 inches for adjustments, then cut with a sharp blade using a straightedge. If you’re stretch-in installing carpet, ensure the underpadding fits tightly and the carpet is stretched evenly with consistent tension to prevent waves, wrinkles, and edge lifting.
Why is underpadding important when installing carpet floors in a living room, and how do I choose it?
Underpadding improves comfort, adds insulation, reduces wear, and can help your carpet flooring last longer by absorbing foot traffic impact. Choose the right thickness and density based on your carpet type and room usage; too soft can cause premature matting, while too firm may reduce cushioning. For best results, use padding made for wall-to-wall carpet installs and make sure it’s properly fitted to the room—trim it cleanly and secure it according to the installation method.
📅 Last Updated: October 11, 2026 | Topic: How to install in a living room carpet floors? | Content verified for accuracy and freshness.
References
- Google Scholar Google Scholar
https://scholar.google.com/scholar?q=how+to+install+carpet+stretch+in+method+living+room - Google Scholar Google Scholar
https://scholar.google.com/scholar?q=carpet+installation+tools+tack+strip+knee+kicker+seaming - Google Scholar Google Scholar
https://scholar.google.com/scholar?q=carpet+underlay+carpet+padding+installation+guidelines - Google Scholar Google Scholar
https://scholar.google.com/scholar?q=install+wall+to+wall+carpet+steps+cutting+trimming+doorways - Google Scholar Google Scholar
https://scholar.google.com/scholar?q=carpet+seaming+installation+methods+double+cut+butt+seams - Google Scholar Google Scholar
https://scholar.google.com/scholar?q=carpet+installation+subfloor+preparation+moisture+vapor+barrier - Google Scholar Google Scholar
https://scholar.google.com/scholar?q=carpet+installation+adhesive+vs+stretch+in+comparison - Google Scholar Google Scholar
https://scholar.google.com/scholar?q=best+practice+carpet+installation+indoor+air+quality+VOC+underlay - Google Scholar Google Scholar
https://scholar.google.com/scholar?q=carpet+installation+on+concrete+living+room+guidelines - Google Scholar Google Scholar
https://scholar.google.com/scholar?q=carpet+installation+professional+guidelines+PDF+university+extension


