
Want to know how to install laminate floors in a home gym without costly mistakes? This step-by-step guide shows the exact prep, underlayment choice, layout method, and click-lock installation sequence to get a flat, quiet, durable surface that holds up to heavy traffic. Follow it closely and you’ll finish faster with fewer gaps, lifted planks, and uneven seams.




Yes—laminate can be installed reliably in a home gym when you prep the subfloor for flatness, control moisture, and respect the floor’s movement needs. If you prep the subfloor correctly and keep moisture and movement under control, laminate flooring can be installed in a home gym reliably. Start by checking the floor flatness, installing an appropriate underlayment, and leaving the right expansion gap around the room. This guide walks you through the order of operations so your gym floor stays stable under regular equipment use.
If you’re converting a spare room, garage bay, or basement corner into a workout space, this is for you—especially if your gym will see rolling equipment, occasional sweat/moisture, and more foot traffic than a typical living room. It’s written for homeowners installing floating laminate planks (not glued-down systems).
Measure the room and confirm the laminate type

Answer-first: Start by measuring accurately and confirming you have the correct laminate system (floating click-lock vs. glued). That single decision determines the underlayment, moisture barrier approach, and installation steps you’ll follow.
According to ASTM E1155, floor flatness evaluations typically use a defined reference-length straightedge approach to judge whether a surface can support a finish floor without telegraphing irregularities.
Floating laminate is designed to “float,” meaning it should not be rigidly fixed to the subfloor; that movement is why expansion gaps around walls are required by manufacturers.
– Measure the room length and width, then add for cutting losses.
– In gyms, waste often increases because you’ll cut around: HVAC vents, baseboard lines you don’t remove, support posts, and door thresholds.
– Identify whether your laminate is click-lock “floating floor” (most common) or a glued system; follow the manufacturer’s specific method.
– If it’s a glued laminate, the “floating” rules (like expansion gap behavior) may still apply, but the locking mechanism and adhesive workflow change.
– Check the plank thickness and overall tolerance guidance in the laminate manual before choosing underlayment.
– Many laminate manufacturers require a specific underlayment thickness and performance level to prevent excessive flex and joint separation under load.
Prep the subfloor for a stable, quiet gym floor
Answer-first: Prep is where gym flooring success is made—your goal is a flat, clean, stable surface that won’t flex under training. If the subfloor is uneven or soft, laminate joints can open and noise can increase fast in high-traffic areas.
According to ASTM E1745, vapor control materials are characterized by permeance; moisture vapor behavior matters because laminate can fail even when the surface looks dry.
Most laminate installation failures in active rooms trace back to subfloor flatness, not the planks themselves—because locking joints depend on consistent support.
– Remove baseboards (or plan carefully around them) and clean the subfloor thoroughly—no dust, paint overspray, or debris.
– Vacuum well, then wipe with a manufacturer-approved cleaner if you need to remove residue. Any loose grit becomes an uneven “shim.”
– Check flatness across the room; if you’re beyond the manufacturer’s allowable variation, level the floor before installing.
– Measure in multiple directions (long way, short way, and diagonals). Gyms often have equipment paths that “reveal” unevenness over time.
– Repair soft spots, high ridges, and squeaks so the floating floor doesn’t flex where you’ll stand and train most.
– Fix squeaks at the source (subfloor fasteners/joists) before you lay underlayment. A squeak you hear now can become a joint problem later.
Choose underlayment and manage moisture
Answer-first: Choose underlayment based on your laminate’s written requirements, not on what’s “comfortable” underfoot. In basement and garage gyms especially, the moisture barrier layer is as important as cushioning.
According to ASTM E1745, a Class I vapor retarder has a permeance of ≤0.1 perms—commonly the target range when moisture risk is present.
According to ASTM F1869, moisture vapor emission rate (MVER) tests report in “pounds per 1,000 square feet per 24 hours” (commonly abbreviated lb/1000 sq ft/24 hr).
According to ASTM F2170, in-situ concrete moisture testing reports relative humidity as a percentage (%RH) using probes installed into the slab.
– Use an underlayment rated for laminate and (if required) with an attached moisture barrier or a separate barrier per the manufacturer’s instructions.
– If your laminate manual says “use underlayment X” (or specifies a thickness/performance), follow that exactly to protect warranty coverage.
– Don’t layer random foams/insulation types together—many laminates specify a specific underlayment thickness and performance.
– Layering can create too much “give,” which leads to micro-movement at seams when you rack weights or roll equipment across the floor.
– Seal transitions where moisture can intrude (for example, along seams or if your room has known dampness)—always in line with the laminate guide.
– This usually means tape/overlaps per underlayment instructions. Avoid generic construction tape that may not bond correctly to your specific barrier material.
7 Key ASTM Standards Commonly Cited for Laminate Gym Subfloors
| # | ASTM standard | Primary purpose | Key metric/unit | Priority for gyms |
|---|---|---|---|---|
| 1 | ASTM E1745 | Vapor retarder classification | Perm (e.g., Class I ≤0.1 perms) | ★★★★★ |
| 2 | ASTM F1869 | Concrete MVER moisture test | lb/1,000 sq ft/24 hr | ★★★★★ |
| 3 | ASTM F2170 | In-situ RH moisture test | %RH from probes | ★★★★☆ |
| 4 | ASTM F710 | Concrete slab prep | Surface prep acceptance approach | ★★★★☆ |
| 5 | ASTM F3191 | Flooring system testing focus | Installation/system performance references | ★★★☆☆ |
| 6 | ASTM E1155 | Floor flatness measurement | Straightedge/reference evaluation (FF/FL methodology) | ★★★★☆ |
| 7 | ASTM E96 | Water vapor transmission rate | Permeance/transfer rate concepts | ★★★☆☆ |
(Note: Your laminate manufacturer may require a different moisture test method or acceptance limit than the general ASTM practice. Always follow the laminate and underlayment instructions first.)
Install the expansion gaps and plan your first rows
Answer-first: Plan your first row(s) around expansion gaps before you cut anything—this is how you avoid crooked seams and “trapped” planks. For floating laminate in a gym, expansion control is non-negotiable because temperature and humidity swings still move the floor.
Floating laminate needs an expansion gap at walls and fixed vertical surfaces so the “floating” system can expand/contract without buckling.
Most installation instructions also require a straight initial reference line to prevent cumulative alignment errors across long, equipment-heavy gym runs.
– Leave the required expansion gap at walls and fixed vertical surfaces (the exact size must match the laminate instructions).
– Your layout text references —use the exact number from the spec sheet you’re following.
– Plan plank direction for your gym layout so seam lines land where you want them and cuts near doorways look intentional.
– In gyms, seams that align with rolling paths can get stressed visually, even when they’re structurally sound—so consider where wheels travel.
– Start with a straight reference line (often the long wall or the flattest wall) to keep subsequent rows aligned.
– Keep a chalk line or laser level line handy, and re-check it before moving into full-row installation.
Click-lock plank installation: keep it tight and consistent
Answer-first: Click-lock laminate succeeds when you lock joints correctly, avoid damaging the click edges, and maintain the required stagger at end joints. Consistency in your technique matters more than speed—especially in a gym where seams see frequent micro-stresses from movement and rolling.
Click-lock joints rely on intact tongues/cores; bent or chipped edges can prevent full engagement and lead to joint separation under normal gym use.
Staggering end joints per the manufacturer’s offset limits helps distribute stresses and prevents weak “cross-joint” lines from forming.
– Dry-fit a few rows first to understand how your cuts will fall around vents, columns, or doorways.
– This also helps you decide which side of the room to start from so you’re not left with thin, fragile cuts in high-traffic zones.
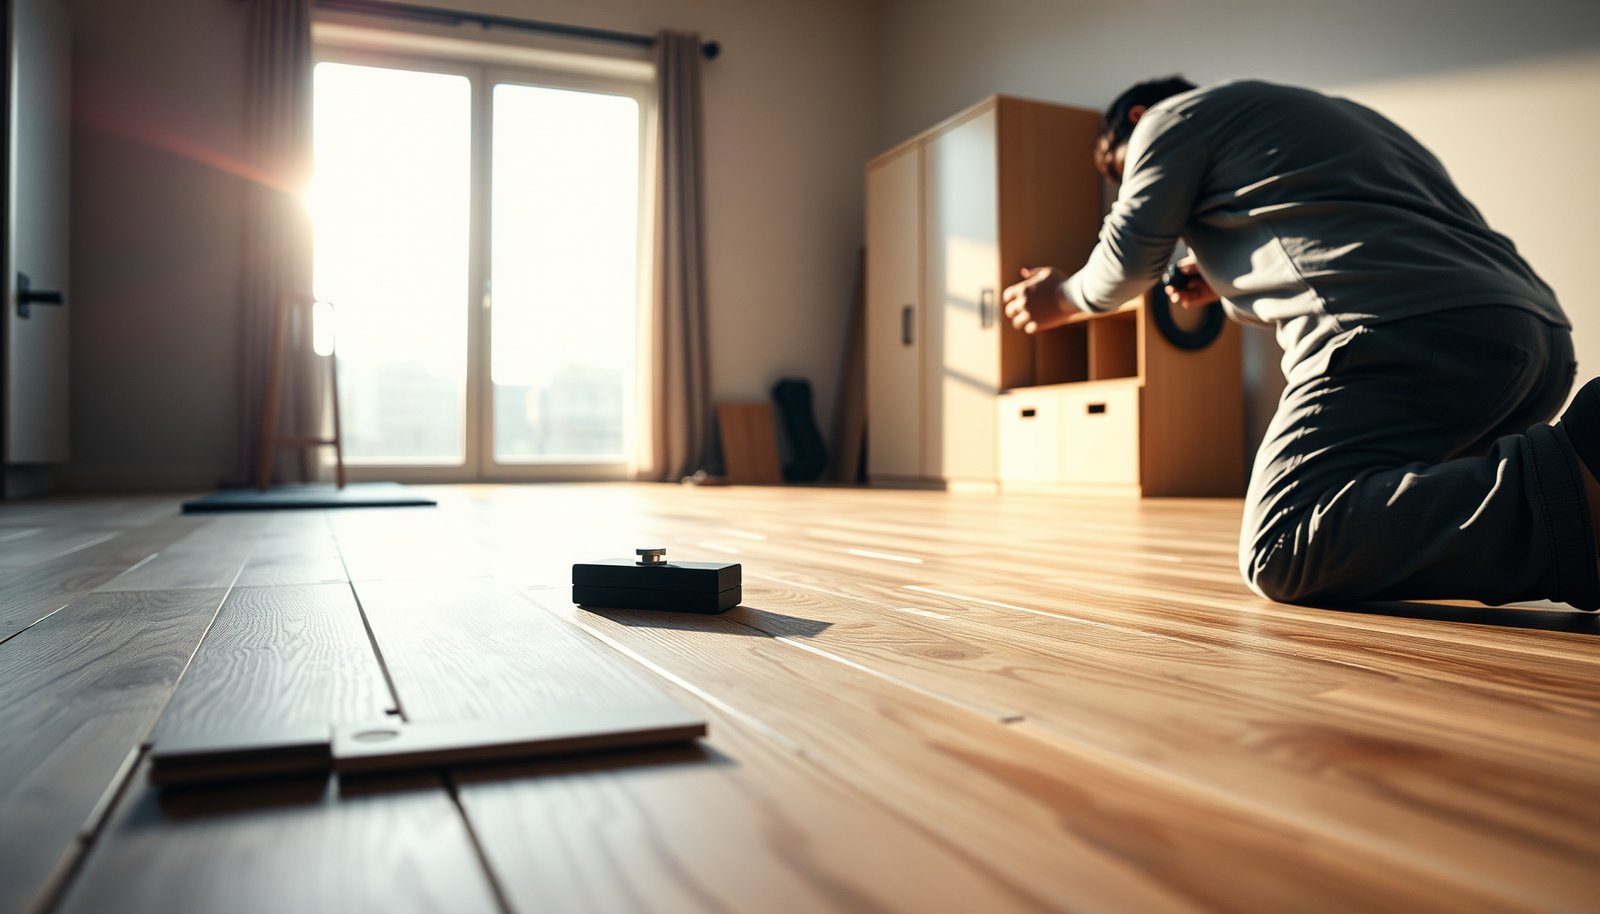
– Use the correct tapping block and spacers so you don’t damage the click edges or chip tongues/cores.
– Avoid direct hammer strikes on planks. If you’ve ever replaced a damaged board because someone “made it fit,” you already know why this step matters.
– Stagger end joints per the manufacturer’s minimum/maximum offset requirement (follow the manual’s specified rule).
– Gym layouts often include doorways or equipment bays; staggering helps seams avoid lining up across those openings.
Finish details for a home gym: doorways, transitions, and trim
Answer-first: Finish work determines whether your laminate stays free to move and whether doors transition smoothly over changes in height. Done correctly, trim covers gaps without pinning the floor.
Transition strips at door thresholds are important when you have height changes, because they support the edge without restricting the floating floor’s movement.
Baseboard installation should not clamp the floating laminate—fasteners should go into the wall, not through the flooring where expansion needs to occur.
– Use transition strips at door thresholds or between rooms—especially where different flooring heights or materials meet.
– If you have an adjacent tile or concrete area, transitions reduce edge stress and make rolling equipment safer when crossing thresholds.
– Reinstall baseboards using methods that don’t compress the flooring (floating laminate needs to expand/contract).
– Keep fasteners out of the laminated surface. Leave the required gap where the baseboard would otherwise touch the floor.
– Seal or caulk only where the instructions allow it; generally, expansion areas are not meant to be rigidly blocked.
– If you seal expansion spaces incorrectly, you can lock the floor to the wall and create buckling during seasonal swings.
What can go wrong (and how to avoid it)
Answer-first: The most common failures are preventable: uneven subfloors, moisture setup mistakes, and missing expansion gaps. If you correct those three early, laminate tends to perform well in home gyms with normal residential use.
When laminate locks over uneven subflooring, incomplete engagement can create gaps and noise—problems that often show up first under foot traffic paths and equipment movement.
If your underlayment moisture barrier does not match the laminate manufacturer’s requirements, the floor can cup or lose dimensional stability even if the surface appears dry.
– Skipping subfloor flatness checks: laminate can lock/unlock improperly if the surface is uneven, leading to gaps or noise.
– Fixing flatness after installation is far more expensive than leveling before underlayment.
– Incorrect moisture setup: basements/garage conversions often need a specific vapor barrier approach; using the wrong underlayment can cause cupping or joint separation.
– If you’re using a barrier, confirm it matches the exact vapor retarder approach recommended for the product system.
– No (or too-small) expansion gaps: locking systems still need room to move; tight walls can buckle the floor as temperatures change.
– In a gym, HVAC cycles can be frequent because people enter/exit and equipment warms the space.
– Forcing damaged click edges: chips or bent tongues can make boards fail to lock; replace compromised planks instead of “making them work.”
– A “workaround” board often becomes a weak seam later.
– Mixing underlayment products: some combinations invalidate warranty or create too-soft floors that flex under heavier exercise equipment.
– This is especially relevant in homes where people try to “improve comfort” by swapping in thicker foam.
Pros/cons comparison (quick parsing)
- Laminate (floating) Pros for gyms
- Faster DIY install than many solid wood options; generally stable in controlled indoor moisture; easy plank replacement for a damaged area.
- Laminate (floating) Cons for gyms
- Less forgiving than thicker specialty gym flooring if subfloor isn’t flat or if moisture/vapor barriers are incorrect; joint seams can telegraph under severe rolling loads.
- Where you mitigate issues
- Underlayment spec compliance, correct expansion gaps, and equipment mat use for rolling/dragging zones.
Verdict / tip: worth it for many gyms, but skip if…
Answer-first: Laminate is a strong DIY option for many home gyms when you follow the laminate manual’s subfloor flatness, underlayment, and moisture requirements. The tradeoff is that laminate isn’t ideal for rooms with ongoing dampness, constant water exposure, or super heavy rolling loads (unless the system is specifically designed for that).
Laminate is often a practical DIY option for home gyms because it’s relatively fast and provides a firm surface for standing and light-impact training—*as long as you follow the manufacturer’s subfloor flatness, underlayment, and moisture requirements*. The downside is that laminate isn’t ideal for rooms with ongoing dampness, constant water exposure, or super heavy rolling loads (unless the system is specifically designed and installed for that). Skip this DIY plan and consider a flooring pro if you can’t correct subfloor unevenness within the laminate’s allowed tolerance or if your room has persistent moisture issues. If you do proceed, take your time on the first rows and don’t compromise on expansion gaps.
Quick checklist (scan before you start)
– [ ] Confirm laminate type (floating click-lock vs glued) and follow its install method
– [ ] Clean and prep subfloor; repair soft spots/high ridges
– [ ] Check flatness against the manufacturer’s allowable variation
– [ ] Select the correct underlayment/moisture barrier per the laminate manual
– [ ] Leave required expansion gaps around walls and fixed posts
– [ ] Start with a straight reference line and keep end-joint offsets correct
– [ ] Use transitions at doorways/changes in flooring height
– [ ] Reinstall trim in a way that doesn’t pin the floating floor
Sources
– (for expansion gap size, flatness tolerance, underlayment/moisture barrier requirements, and click/offset rules).
– (for moisture barrier performance and thickness limits, if your laminate references it).
If you’re planning a home gym that needs to look good and stay solid under frequent use, laminate can deliver—especially when the subfloor is flat, the moisture plan is correct, and the floor is allowed to move. Follow the order of operations above, confirm every requirement from your laminate and underlayment specs, and treat the first rows and expansion gaps as the “foundation” of the whole installation.
Frequently Asked Questions
What’s the best way to prepare a subfloor before installing laminate flooring in a home gym?
Start by checking that the subfloor is clean, dry, and structurally sound, because laminate requires a flat surface to prevent joint separation. Use a straightedge to verify the floor is level within the manufacturer’s tolerance, then fill low spots with an appropriate leveling compound and sand high areas. In a home gym, also inspect for moisture sources and consider using a vapor barrier if your concrete slab is damp.
How do I choose the right underlayment for laminate floors in a workout area?
Choose underlayment that matches your subfloor type (concrete vs. wood) and includes adequate moisture protection for gym environments. Look for underlayment with an appropriate thickness and acoustic benefits, since impact from weights and cardio can travel through the slab. Always follow laminate manufacturer requirements, because using the wrong underlayment can void warranties or affect click-lock performance.
Which laminate flooring thickness and AC rating are best for a home gym?
For a home gym, consider thicker boards (often 8mm–12mm) for added stability under movement and equipment traffic. Select a higher AC rating—typically AC4 or above—because it’s designed for heavier residential use and can handle grit, rolling loads, and daily wear. If you plan to use heavier items like squat racks or kettlebells, prioritize sturdier construction and ensure you meet the flooring’s load and installation guidelines.
How do I install laminate flooring around gym equipment and transitions (doors, mats, and thresholds)?
Plan your layout to keep plank joints away from the most concentrated load areas, such as where you step or where equipment sits, and maintain a clean working path during installation. Use expansion gaps around the perimeter and at doorways, then finish with appropriate transition strips or reducer moldings where laminate meets tile, carpet, or other flooring types. If you’re installing over existing flooring, verify compatibility first and avoid trapping the floor without proper spacing for movement.
Why is acclimation important when installing laminate floors in a home gym, and how should I do it?
Laminate can expand or contract with temperature and humidity changes, so acclimating the planks helps prevent gaps, buckling, or noisy floors after installation. Set your home gym to normal living conditions for at least 48 hours before installation and keep it stable during the acclimation period as directed by the manufacturer. This step is especially important for rooms that experience swings in HVAC use, seasonal humidity, or frequent workouts that affect indoor moisture levels.
📅 Last Updated: October 24, 2026 | Topic: How to install laminate floors in a home gym? | Content verified for accuracy and freshness.
References
- Laminate flooring
- https://www.cdc.gov/mold/default.htm
- F710 Standard Practice for Preparing Concrete Floors to Receive Resilient Flooring
- F1869 Standard Test Method for Measuring Moisture Vapor Emission Rate of Concrete Subfloor Using …
- F2170 Standard Test Method for Determining Relative Humidity in Concrete Floor Slabs Using in sit…
- E492 Standard Test Method for Laboratory Measurement of Impact Sound Transmission Through Floor-C…
- E2179 Standard Test Method for Laboratory Measurement of the Effectiveness of Floor Coverings in …
- https://scholar.google.com/scholar?q=laminate+flooring+installation+underlayment+moisture+barrier+acclimation Google Scholar
- https://scholar.google.com/scholar?q=floating+laminate+floor+expansion+gap+installation Google Scholar
- https://scholar.google.com/scholar?q=home+gym+floor+impact+sound+underlayment+laminate Google Scholar