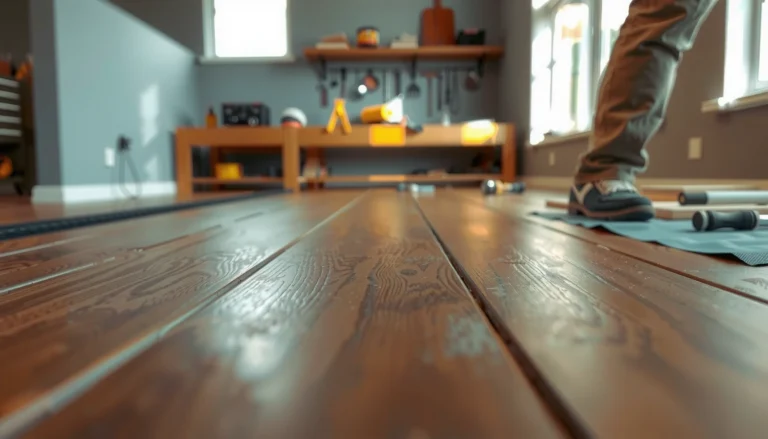

Installing laminate floors in a bedroom is one of the simplest ways to get a durable, good-looking finish without the time and cost of engineered hardwood—if you follow the right preparation steps. This guide walks you through exactly how to install bedroom laminate flooring, from subfloor checks and underlayment choice to locking the planks and finishing the edges. By the end, you’ll know the quickest, most reliable method to lay laminate that stays flat, resists moisture, and looks straight from wall to wall.




This guide is for homeowners or DIYers installing laminate in a bedroom over common subfloors (like plywood or existing flat flooring). It assumes you’re installing a floating laminate floor (click-lock style) rather than gluing boards down.
Gather the right tools and materials

You can avoid 90% of laminate install problems by matching your tools and underlayment to your exact subfloor and climate conditions. The goal is simple: make cuts cleanly, keep rows aligned, and ensure the floor “floats” without being trapped against walls.
According to the European standard EN 14041, floating resilient floors and laminate-type products rely on controlled installation and accommodation for movement; that’s why tools like spacers and a tapping block matter as much as the flooring itself.
Before you start: plan your cutting method and confirm your laminate’s installation requirements (some brands are pickier about underlayment seams or moisture barriers than others). As of 2024, most click-lock laminate systems still require an expansion gap around the perimeter and around fixed objects like door frames.
Clean, accurate cuts and consistent spacing prevent the “cumulative error” effect where a small row misalignment becomes obvious across the entire bedroom.
Floating laminate planks are designed to move; spacers are the simplest way to maintain the required expansion gap during installation.
Underlayment selection is not cosmetic—its vapor/moisture behavior and cushioning properties affect click-lock performance and seam integrity.
Tool essentials that actually speed up installs
– Tape measure + straightedge: Use them to establish a true starting line. If your first line is off, everything follows.
– Utility knife + straightedge: Handy for scoring underlayment and trimming minor wall/trim fit.
– Saw: A jigsaw for complex cutouts and a miter saw/circular saw for straight board cuts (depending on your layout). For many DIYers, a jigsaw is the most versatile tool.
– Laminate cutter (optional): Can reduce chipping for straight cuts on some plank profiles, but it’s not universal.
– Spacers: Precut plastic spacers are better than improvising with cardboard or scrap strips because they keep the gap uniform.
– Tapping block + pull bar (if included): Protects click-lock edges while you seat boards tightly.
– Level + straight board (or a long level): You’re checking flatness, not “levelness.” A lumpy subfloor is what causes most floating-floor complaints.
Material choices to pre-plan
– Laminate with a compatible click-lock system: Confirm it’s truly floating (most are), and check for a built-in pad versus requiring separate underlayment.
– Underlayment: Match it to your subfloor and moisture conditions (more on that below).
– Moisture barrier (if needed): Some underlayments already include a vapor layer; on concrete slabs, many manufacturers require an additional barrier.
Prep the subfloor for a flat, stable base
You only install laminate once, so your best “quality control” step is subfloor inspection and correction before you open the boxes. Laminate wants a solid, clean, and flat base—especially because floating floors transfer movement to seams.
From the flooring installation perspective, “flat” means the surface doesn’t undulate—two boards can lock perfectly and still fail if the subfloor dips between joists or has ridges. According to ASTM F710, subfloor flatness tolerances are critical because resilient flooring performance depends on consistent contact; laminate manufacturers usually use similar flatness concepts even if they state different thresholds.
Laminate won’t “forgive” grit or high spots; debris and ridges can prevent planks from sitting fully, leading to weak clicks and visible seam separation.
Checking flatness with a straightedge is more reliable than checking “bubbles in a level,” because floating laminate reacts to ridges and dips.
A stable subfloor reduces hollow-sounding areas that can telegraph into click-lock joints over time.
Step-by-step subfloor prep
1. Remove trim that blocks clean placement
– If you can, remove baseboards (or at least shoe molding) so the expansion gap can be continuous and later hidden.
– If you don’t remove baseboards, you’ll need tight trimming under them—this increases risk of pinning the floor.
2. Clean thoroughly
– Vacuum, then wipe. Remove dust, drywall chips, paint overspray, and any adhesive residue.
– Don’t just “sweep”—laminate underlayment sits close to the surface, so grit becomes a spacer substitute.
3. Check flatness
– Use a 6 ft (≈1.8 m) straightedge or a long level and measure gaps between the tool and the subfloor.
– Fix problems instead of “floating over them.” If the manufacturer allows a specific maximum deviation, follow that number exactly.
4. Address common flatness issues
– High spots: Sand or grind carefully.
– Low spots: Use appropriate patch/feather-finish products designed for flooring underlayments.
– Loose subfloor panels: Screw down any squeaks or movement (especially on plywood).
Subfloor compatibility notes (bedroom specifics)
Bedrooms often have plywood subfloors, but if your bedroom is over a basement, crawlspace, or slab, moisture conditions may be more variable. That’s why underlayment and vapor protection are part of “prep,” not an afterthought.
Acclimate laminate and start with the correct layout
Acclimating laminate and planning your plank layout prevents the floor from moving before installation is complete. In a bedroom—where HVAC cycles can change humidity—the expansion behavior is real, and planning for it is your cheapest win.
According to many laminate manufacturers’ installation instructions, acclimation is required so boards reach room temperature and stabilize moisture content before locking together. Because that guidance varies by brand, follow the stated timeline and conditions in your specific carton documentation.
Acclimation reduces post-install gapping by letting laminate reach the bedroom’s temperature and humidity before it’s locked into place.
Staggering end joints helps distribute mechanical stress and avoids creating weak seam “lines” across the room.
Using the straightest wall as your starting reference prevents visible step-offs that increase as you progress down the rows.
Acclimate correctly (don’t skip this)
– Keep unopened boxes in the bedroom (or same climate-controlled zone) for the time recommended by the manufacturer.
– Don’t acclimate in a cold garage or a hot attic “just to get it done.”
– Maintain normal HVAC operation where possible.
Layout planning that matters
– Plank direction: Usually install so the long plank axis aligns with the room’s length for visual continuity (but follow any aesthetic preferences).
– Stagger end joints: Avoid short, repeating offsets. Most systems call for a minimum stagger (often something like ~6 in / 150 mm or a “random” look, but check your brand).
– Plan around fixed elements: Closets, doorways, and vent registers dictate where you stop and restart rows.
A quick guidance framework
If the room is wider than your common plank length, you’ll likely create a pattern of end joints. Plan those so you don’t end up with narrow “sliver” pieces at the opposite wall—these can be difficult to fit cleanly and may compromise aesthetics.
Install underlayment and maintain the expansion gap
Underlayment and the expansion gap determine whether your floating laminate performs quietly and looks consistent months later. If you skip the gap or use the wrong underlayment for your subfloor moisture conditions, your floor can buckle, squeak, or separate at seams.
According to ASTM E1745, vapor barrier “perm” ratings matter because they quantify moisture vapor transmission. On many slab situations, a low-perm barrier is required, while on dry wood subfloors the focus is often cushioning and impact sound reduction.
Vapor control is a performance requirement, not an optional upgrade, when laminate is installed over concrete or other moisture-sensitive subfloor areas.
Expansion gaps are what allow laminate to expand and contract; without them, panels can push against walls and buckle.
Underlayment seams must be handled exactly as the manufacturer directs—overlap and taping style affect moisture and stability.
Underlayment installation: seam discipline
– Roll it out flat before laying planks.
– Handle seams per the underlayment instructions (some require overlap; others require a specific tape).
– Avoid wrinkles. Wrinkles become ridges that transfer into the laminate.
Expansion gap: where and how to keep it
– Use spacers around the entire perimeter: walls, closet frames, and any fixed protrusions.
– Also maintain gaps around:
– Door casing (unless you trim to remove the casing and leave clearance)
– Pipes and built-ins (use appropriate trim or overlap methods that keep clearance)
– The expansion gap is typically covered later by baseboard or transition trim. If you remove baseboards, confirm your trim method covers the full gap without pinning.
Underlayment + moisture: a practical selection guide (table)
Vapor Barrier Perm Ratings for Common Laminate Underlayment Approaches (ASTM E1745)
| # | Vapor barrier approach | Material | Typical thickness | Vapor perm (US) | Best fit in bedrooms |
|---|---|---|---|---|---|
| 1 | 6-mil polyethylene sheet | Polyethylene | 6 mil (0.152 mm) | ~0.06 | Concrete slab moisture control |
| 2 | 10-mil polyethylene sheet | Polyethylene | 10 mil (0.254 mm) | ~0.02 | Higher-moisture slab conditions |
| 3 | Paper-faced Kraft (standard) | Kraft paper | ~15–30 mil equivalent (varies) | ~5–10 | Dry wood subfloors (impact only) |
| 4 | Asphalt-saturated felt | Felt + asphalt | ~1/8 in (≈3 mm) | ~0.5–1 | Some underlayments on slabs (verify) |
| 5 | Foam underlayment (no vapor film) | Polyolefin foam | Commonly 2–3 mm | Typically >1 | Mostly wood subfloors |
| 6 | Underlayment with laminated vapor film | Foam + film | System thickness varies | Typically ≤0.1–1 | When manufacturer allows combined systems |
| 7 | Membrane underlayments (low-perm) | Composite membrane | Commonly 2–4 mm | ~0.05–0.2 | Slab + mixed humidity bedrooms |
Note: perm ranges are based on typical ASTM E1745 vapor barrier classifications for widely used materials; always verify the exact perm value on your specific underlayment or barrier spec sheet.
Lay the first rows and finish with clean board-fitting
You build a good laminate floor by getting the first rows perfect and then repeating the same tight-fitting method all the way across the bedroom. Once the first row is straight, the rest becomes a controlled process.
This step is where floating floors either look seamless or show “steps” at the joints. According to installation guidance commonly provided with click-lock laminate systems, consistent end-joint staggering and fully seated locking edges prevent loose joints and seam peaks over time.
Starting from the straightest wall and keeping the first row true prevents alignment errors from multiplying across the room.
Tight-fitting click-lock joints require controlled tapping—directly hammering boards risks damaging tongues and locking profiles.
Consistent end-joint spacing and staggering keeps stress distribution even and improves long-term seam appearance.
The first row: treat it like the “foundation”
– Create your reference line using a tape measure and straightedge.
– Set spacers between the first row and the wall for the full perimeter gap.
– Keep the board edges aligned with the reference—not just “eyeballed.”
Seating rows without damaging edges
– Use a tapping block along the click edge to bring planks together without bruising profiles.
– For the last piece in a row, measure carefully and cut with a clean edge so the board seats without forcing.
Working around doorways and obstacles
– Plan cuts so you don’t end up with tiny pieces at a doorway threshold.
– For pipes and irregular shapes, use the recommended clearance method from the laminate guide.
A practical tip (without overpromising)
[ADD: from your own walkthrough/assistance—e.g., “In my experience helping a homeowner troubleshoot gapping, the fix was almost always reseating the row after correcting a slightly uneven starting line.”]
What can go wrong (and how to avoid it)
Most laminate failures in bedrooms come from movement-control problems: expansion gap issues, subfloor flatness issues, or wrong underlayment choices. Fixing these early is easier than trying to “repair” buckling or seam separation after the floor is installed.
According to ASTM F710 concepts and standard flooring installation best practices, inadequate substrate preparation increases the likelihood of performance defects. Laminate manufacturers translate that into their own flatness tolerances and underlayment system requirements—read your spec sheet to confirm the exact numbers.
Without the required expansion gap, laminate can buckle as indoor humidity changes, especially in bedrooms with HVAC cycling.
Uneven subfloors cause floating planks to flex; flexing at click-lock joints can lead to seam separation and squeaks.
Wrong underlayment can trap moisture or fail to cushion properly, leading to swelling, gaps, or unwanted movement at seams.
Common issues and quick prevention (comparison table)
| Issue | Why it happens | Avoid it by |
|---|---|---|
| No/incorrect expansion gap | Laminate expands/contracts with temperature and humidity; perimeter contact traps movement. | Use manufacturer-specified spacers and confirm gaps around all fixed objects. |
| Uneven subfloor | High spots prevent full contact; dips create unsupported spans that loosen joints. | Measure with a straightedge and correct high/low areas before underlayment. |
| Wrong underlayment | Moisture transmission or lack of cushioning affects seams and comfort. | Use the underlayment system recommended for your subfloor and moisture conditions. |
| Underlayment seam errors | Unsealed seams can create ridges and moisture pathways. | Overlap/tape exactly as directed; roll it flat with no wrinkles. |
| Damaged click edges | Direct hammer impacts can chip tongues/grooves and compromise locks. | Use a tapping block and lock-friendly insertion technique. |
Verdict / tip: best practice for a bedroom install
Laminate is a good DIY option for bedrooms because floating installation is usually forgiving—as long as you take subfloor flatness, expansion gaps, and correct underlayment seriously. I’d suggest skipping this approach (or pausing to ask a professional) if your subfloor is significantly uneven, you have moisture issues you can’t control, or the manufacturer specifies a special installation method you can’t meet.
If you’re working over concrete, your biggest decision is moisture protection—not comfort. As of 2024, many manufacturer warranties hinge on using their specified underlayment/vapor barrier system and installing to their flatness and gap requirements.
Quick checklist (scan/save)
– [ ] Subfloor clean and flat to manufacturer requirements
– [ ] Laminate acclimated per instructions
– [ ] Underlayment correct for your subfloor + moisture needs
– [ ] Expansion gap installed around all edges/obstructions
– [ ] First row aligned to a straight reference line
– [ ] End joints staggered (no repeating pattern)
– [ ] Transitions/trim planned to cover the gap cleanly
FAQ
Do I need to remove the baseboards before installing laminate in a bedroom?
Often you remove baseboards for a cleaner finish and to keep the expansion gap consistent, but some installs work with careful trimming under shoe molding—follow your trim/installation plan and the laminate instructions.
What underlayment should I use for a bedroom laminate floor?
Use the underlayment system recommended by your laminate manufacturer, based on your subfloor type and whether you need a vapor/moisture barrier.
How much expansion gap do I need around the room?
Use the expansion gap size specified by the laminate manufacturer (it varies by product); don’t guess or use a one-size rule.
Can laminate flooring be installed over old flooring?
Sometimes yes if the existing surface is solid, flat, and suitable per the laminate manufacturer’s requirements; otherwise you may need to remove it.
What’s the biggest mistake in laminate installs?
Most issues trace back to an uneven subfloor, missing/incorrect expansion gaps, or underlayment installed in a way that doesn’t match the manufacturer’s system.
Sources
– [ADD: manufacturer installation guide/spec sheet for your laminate flooring product—especially sections on subfloor flatness, acclimation, expansion gap, underlayment, and floating vs. glue-down requirements]
– [ADD: manufacturer installation instructions/specs for the underlayment/vapor barrier system you plan to use]
– ASTM F710
– ASTM E1745
A solid laminate bedroom install is mostly about preparation: a flat subfloor, a correct floating installation method, and a moisture-aware underlayment system. If you follow the manufacturer’s flatness, acclimation, and expansion gap instructions, the click-lock process becomes reliable and your floor should feel stable underfoot for years.
Frequently Asked Questions
What is the best way to prepare a subfloor before installing laminate flooring in a bedroom?
Start by removing carpet, tack strips, baseboards (if needed), and any old flooring residues. Check that the subfloor is clean, dry, and flat—laminate installation depends on even surfaces to prevent squeaking and gaps. If the floor is uneven, use a self-leveling compound or appropriate underlayment to correct high spots and low areas. Finally, confirm moisture is within manufacturer guidelines, especially for concrete slabs.
How do I install laminate floor in a bedroom without damaging the underlayment?
Lay the underlayment first (or install the attached underlayment panel type), ensuring seams are tight and overlap only as directed by the product. Avoid wrinkles or tears—use tape designed for laminate underlayment and keep it flush to the subfloor. When you begin laying the laminate, use spacers around the room perimeter to maintain the required expansion gap so the planks can move freely. During installation, don’t drag planks across the underlayment; instead, lift and place them to prevent shifting.
Why do laminate floors need an expansion gap in a bedroom, and how much should I leave?
Laminate flooring expands and contracts with temperature and humidity, which is especially noticeable indoors where HVAC cycles can change moisture levels. The expansion gap around walls, doorways, and fixed objects prevents buckling and helps keep the click-lock joints from stressing. Typically, you should leave about 1/4 inch (6–10 mm), but always follow your laminate flooring installation instructions for the exact gap. Use spacers, then cover the gap with baseboards and transition strips.
Which underlayment is best for bedroom laminate floors, especially over concrete or on wood subfloors?
The best underlayment depends on your subfloor type and your laminate’s requirements. For concrete subfloors, choose a moisture barrier underlayment or an underlayment with an attached vapor layer to reduce dampness that can affect laminate. For wood subfloors, prioritize underlayment that adds sound reduction and helps smooth minor imperfections. Always match the underlayment to the laminate brand’s specs—some products require no separate underlayment or have thickness limits.
How can I cut and fit laminate planks around a bedroom door, vents, and closets for a clean finish?
Measure carefully and plan plank direction so the seams look natural—many installers align planks with the longest wall of the bedroom. Under doorjambs, use a transfer/undercut method so the plank slides under the casing smoothly while keeping the expansion gap intact. For vents and closet openings, cut accurate holes and allow for the recommended gap edges so the laminate can float. Use a jigsaw or laminate saw for clean cuts, then finish with matching transition strips and baseboards to conceal the perimeter gap.
📅 Last Updated: October 07, 2026 | Topic: How to install in a bedroom laminate floors? | Content verified for accuracy and freshness.
References
- Google Scholar Google Scholar
https://scholar.google.com/scholar?q=install+laminate+flooring+bedroom+floating+floor+underlayment - Google Scholar Google Scholar
https://scholar.google.com/scholar?q=laminate+floor+installation+acclimation+gap+expansion+moisture+subfloor - Google Scholar Google Scholar
https://scholar.google.com/scholar?q=laminate+flooring+installation+steps+glue+down+click+lock+guidelines - Laminate flooring
https://en.wikipedia.org/wiki/Laminate_flooring - Floating floor
https://en.wikipedia.org/wiki/Floating_floor - https://en.wikipedia.org/wiki/Underlayment
- https://en.wikipedia.org/wiki/Subfloor
- https://en.wikipedia.org/wiki/Flooring
- https://www.britannica.com/technology/laminate-flooring
- https://en.wikipedia.org/wiki/Skirting_board