


Install kitchen ceramic tile floors with confidence by following a proven step-by-step method that takes you from prep and layout to setting tile, grouting, and sealing. This guide answers exactly how to install in a kitchen ceramic tile floors so the job comes out straight, durable, and ready for daily traffic. If you want fewer mistakes and a faster, cleaner install, start here and follow the sequence that pros use.



Installing kitchen ceramic tile floors comes down to two things: a well-prepped, flat subfloor and the correct thinset/thinset system for that substrate. If you plan the layout carefully, use the right mortar, and grout only after the mortar has cured, ceramic tile performs reliably in the kitchen—where moisture, rolling loads, and frequent cleaning test every joint.
This guide is for homeowners installing (or planning) a kitchen floor tile project who want a practical, step-by-step workflow—from substrate prep to finishing edges and transitions. It also helps you understand where failures usually originate so you can prevent lippage, cracking, and grout breakdown before they start.
Plan Your Tile Layout (So You Don’t End Up With Tiny Cuts)

A good kitchen tile layout prevents narrow “sliver” cuts and keeps the finished floor looking intentional. The best time to solve layout issues is before you open thinset—because once the first tiles are set, everything downstream depends on that starting line.
For kitchens, plan around the doorway, cabinets, and any layout constraints (like a toe-kick line that can hide edges but not height differences). A precise starting line also reduces the number of awkward partial tiles near the most visible room entries and traffic paths.
Measure the room and set a reference line so the pattern stays consistent and centered through the main entry sight line.
Dry-lay several rows before mixing thinset—layout changes at this stage are far cheaper than fixing them after tiles are set.
Plan transitions early (hallway thresholds, other flooring types) so you can match height and avoid fragile “edge-only” tile conditions.
Measure the room and map your “best face” zones
Start by measuring:
– Overall room length/width
– The doorway opening width(s)
– Cabinet locations and any fixed features (islands, ranges, built-ins)
– Where the floor transitions to other materials
Then sketch the tile pattern. A common mistake is treating cabinets as “free space” and assuming tile cuts will disappear under overhangs. Sometimes you can hide edges under cabinets, but you can’t always hide every cut—especially where the room opens to a living area.
Dry-lay to verify symmetry (before thinset)
Dry-lay (no mortar) at least a few rows—often 2–4 rows across the width that you’ll see most. Check:
– Whether you end up with a narrow edge tile at the entry side
– Whether the layout is visually balanced left-to-right
– Whether your pattern aligns with grout joints you want to keep consistent
Decide transitions and trims up front
Ceramic tile floors usually look best when transitions are intentional:
– Use threshold/transition strips where tile meets another floor type (especially if heights differ)
– Consider tile edge trim if your outer edges aren’t protected by a door casing or baseboard
If you’re matching wood flooring or vinyl, focus on height matching first; the visual seam will be secondary.
Layout reality check (what specs can’t fix)
Even a perfect layout won’t prevent failure if the floor system is out of flat. Ceramic tile follows what’s underneath: if the subfloor is not stable or flat, your “good plan” still produces lippage.
Prep the Subfloor for Flatness and Stability
Good prep is the difference between tile that lasts and tile that fails. Before you mix thinset, verify the subfloor is clean, sound, and flat enough for ceramic tile—not just “smooth to the eye.”
In kitchens, subfloors commonly suffer from old adhesive residue, uneven framing, or movement (squeaks and flex). Tile installations are rigid; they don’t accommodate bounce the way flooring like sheet vinyl sometimes does.
Tile installations depend on substrate preparation—movement or debris under the tile reduces bond reliability and increases cracking risk.
Ceramic tile systems require an approved substrate/underlayment approach; manufacturer instructions control what’s acceptable over plywood vs. concrete.
Fix dips, high spots, and squeaks before tiling because thinset can’t “correct” major flatness issues without proper flattening methods.
Clean to the bonding surface
Remove:
– Loose materials and old flaking adhesives
– Dust, paint overspray, drywall mud, and construction debris
– Anything that creates a bond-breaking layer
You don’t need it to look “pretty,” but you do need it to be bond-ready.
Confirm the substrate type and use the correct underlayment system
Follow the underlayment/backer board system requirements from the tile industry standards and your specific products. For example:
– Plywood often needs a tile-rated underlayment/backer system designed to reduce movement and support bonding.
– Concrete typically needs surface preparation for flatness and proper mortar bonding.
Manufacturers usually specify requirements like thickness, fastening patterns, and whether self-leveling compounds (SLC) are allowed for flattening.
Fix movement and unevenness first
Address:
– Dips or humps (flatten them)
– Squeaks (stabilize framing/fasteners)
– Loose subfloor panels (re-secure or replace as required)
From a project-planning standpoint, we recommend thinking of this stage as “structural.” Tile is the finish layer—your subfloor work is the real waterproofing and durability strategy (even if ceramic is not a water barrier by itself).
Flatness matters more than people expect
Many tile failures come from exceeding the system’s allowable tolerance for flatness, which can lead to lippage and stressed grout joints. If you’re unsure what flatness tolerance applies to your system, check the TCNA method you’re following and the mortar/underlayment manufacturer’s installation guidelines.
[ADD: exact flatness tolerance requirement from the specific TCNA method or your mortar/underlayment manufacturer’s spec—include the measurement and timeframe.]
Choose Materials and Set the Correct Thinset
The “right thinset” is not optional—it’s a system decision. Use the mortar type specified for ceramic tile and your substrate, and match grout selection to kitchen cleaning needs.
Kitchens are high-traffic and wet/dirty frequently (spills, wet mops, dropped cookware). That makes grout selection and joint cleanliness critical.
Use a mortar/thinset that is rated for ceramic tile and for the substrate you’re installing over (concrete vs. plywood/wood-like floors).
Grout performance depends on the joint details and cleaning process—cured mortar and grout instructions drive durability more than “DIY speed.”
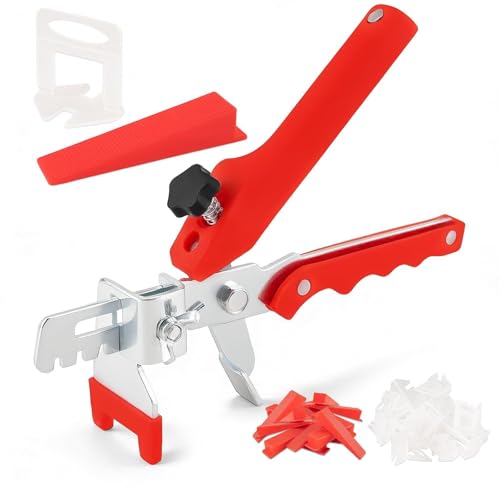
Consistent spacers and correct mortar coverage support even joint spacing and reduce the chance of weak, poorly filled grout lines.
Thinset choice: substrate + tile system compatibility
– If the label calls for a modified thinset for ceramic tile over your substrate, follow it.
– If the substrate system requires an approved mortar and underlayment combination, don’t mix brands or methods casually.
Also verify:
– Interior-rated use (kitchens are interior)
– Temperature and jobsite conditions (thinset working time and cure timing can shift)
Grout choice: typical vs. stain-resistant
In kitchens, your grout choice should reflect maintenance reality:
– Cement-based grouts can be sealed (or not) depending on the manufacturer’s guidance.
– Stain-resistant options can help reduce discoloration but still require correct cleaning and joint preparation.
[ADD: grout type you’re using—cement grout vs. urethane/cementitious polymer blend vs. epoxy—and the manufacturer’s stated recommendations.]
Trowel notch + coverage is where most mortar problems begin
Thinset must be combed consistently, and the tile must be pressed into contact. If you skip proper combing or don’t achieve full contact, you can get hollow spots that increase break risk.
As a planning datapoint: according to ANSI A108 installation methods, mortar coverage and contact requirements are critical to bond performance (ANSI A108 (TCNA/ANSI methods overview; bond/contact requirements)). Specific coverage depends on tile size and trowel notch.
[ADD: exact trowel notch sizes and recommended tile size ranges from your mortar/tiles technical data sheet—use your product’s chart.]
Practical comparison: what you’re balancing
Here’s how to choose without overthinking the label.
| Decision point | Common option | Why it matters for kitchens | What to verify on the label |
|---|---|---|---|
| Thinset type | Modified cement mortar (typical for ceramic) | Improves workability and bond consistency over many common substrates | Approved for ceramic tile + approved for your substrate (concrete/plywood) |
| Grout type | Cementitious grout (often sealed/optional sealing) | Cleaning resistance is driven by joint cleanliness and curing/curing time | Stain resistance and whether sealing is required or recommended |
| Spacers | Same spacer type throughout | Consistent joints make grouting faster and reduce cleanup haze | Compatible spacer size with tile and grout/joint width |
Trowel notch guidance table (plan before you buy tools)
Use this to choose a starting point for trowel notch selection. Final authority is your mortar/tiles technical sheet.
Trowel Notch Selection for Common Kitchen Ceramic Tile Sizes
| # | Ceramic tile format | Typical trowel notch | Grout line planning | Tile-contact focus |
|---|---|---|---|---|
| 1 | 4 in x 4 in (small field tile) | 1/8 in x 1/8 in | ~1/16–1/8 in | ★★★☆ |
| 2 | 6 in x 6 in (medium tile) | 3/16 in x 1/4 in | ~1/16–3/16 in | ★★★★ |
| 3 | 8 in x 8 in (common kitchen size) | 1/4 in x 1/4 in | ~1/8 in | ★★★★☆ |
| 4 | 12 in x 12 in (large square field) | 1/4 in x 1/4 in or 1/2 in x 1/2 in (if flatness demands) | ~1/8–3/16 in | ★★★★☆ |
| 5 | 2 in x 2 in mosaics (mesh-backed) | 3/16 in x 1/4 in | ~1/16–1/8 in | ★★★☆ |
| 6 | 2 in x 8 in rectangular planks | 1/4 in x 3/8 in (commonly) | ~1/8–3/16 in | ★★★★ |
| 7 | Large-format ceramic (15–20 in class) | 1/2 in x 1/2 in (often) + back-buttering if instructed | ~3/16 in (verify tile specs) | ★★★ |
Install Ceramic Tile with Clean Lines and Consistent Spacing
Installing ceramic tile is a controlled process: spread thinset consistently, set tiles firmly, and check flatness often. If you treat it like “apply mortar and hope,” you’ll usually pay for it with lippage and difficult grouting later.
This phase is where layout discipline turns into a clean finish. Kitchens also involve constant working around corners, walls, and obstacles—so consistent technique matters.
Spread mortar with the correct trowel notch and comb in one consistent direction to improve coverage and reduce bond voids.
Set tiles firmly with spacers and routinely check level/flatness across multiple tiles—not just tile-by-tile alignment.
Clean, planned cuts around doorways and obstacles keep the floor looking “installed,” not patched.
Spread thinset correctly (and don’t overwork it)
– Mix thinset to the manufacturer’s instructions (water ratio matters).
– Spread thinset with the correct trowel notch size.
– Comb consistently—avoid gouging or constantly re-combing once you start setting.
Work in sections you can tile before the mortar skins over. If you see film formation on the thinset ridges, that’s often a sign you’re approaching the end of your workable time.
Set tiles with firm contact and spacing
– Place the tile on the ridges and press into contact.
– Use spacers consistently for uniform joint width.
– Periodically check:
– Level (bubble/straightedge reference)
– Flatness (across several adjacent tiles)
– Alignment (line-to-line)
[ADD: exact tool names you’ll use, if you want—e.g., 6 ft level, laser line, tile leveling system—based on your workflow.]
Check lippage before it locks in
Lippage happens when tiles sit at slightly different heights. Even small steps can become obvious under kitchen lighting and when you mop. If you catch lippage early, you can adjust; after cure, correction is far harder.
Cutting strategy around cabinets and obstacles
For neat edges:
– Dry-fit cut tiles before setting.
– Place the “best face” of cut tiles where it stays visible (typically near walls that people see first).
– Use a tile saw approach that matches your tile material (ceramic vs. porcelain vs. thickness).
If you’re installing under appliances, be mindful that movement tolerances and access may require careful sequencing. Confirm whether appliances should be moved before tile or whether you’ll tile up to them.
Grout, Seal (If Needed), and Finish Edges
Grout finishing is where a good install becomes a durable-looking floor. Thinset must cure fully before grouting, and your joint cleaning technique prevents discoloration and haze.
In kitchens, grout needs to be:
– Properly mixed (no dry pockets)
– Packed into joints (not just smeared on top)
– Cleaned correctly without pulling grout out of joints
Follow the thinset manufacturer’s cure time before grouting; grouting too early can weaken the bond and damage joint integrity.
Keep thinset residue out of grout joints—contamination makes joints weaker and more prone to staining and cracking.
Whether you seal grout depends on the grout manufacturer’s recommendations; sealing is not universal for every grout type.
Grout timing: don’t rush the cure
Follow mortar instructions for minimum cure time. If you grout too early, you can compromise joint strength and increase the odds of later cracking.
[ADD: your thinset product’s stated “before grouting” minimum cure time.]
Apply grout thoroughly and wipe correctly
– Force grout into joints (don’t leave gaps).
– Remove excess from the tile face using a method appropriate for your grout type.
– Avoid overworking grout; pushing and pulling too long can contribute to haze or surface weakening.
Seal only if your grout calls for it
Some grouts are designed to be sealed; others may not require sealing for stain resistance (though sealing can still be beneficial in some cases). Check your grout spec.
[ADD: your grout brand/product and whether sealing is required, recommended, or optional according to the technical data sheet.]
Finish edges and transitions for longevity
At doorways and floor transitions:
– Use matching height transitions or thresholds
– Protect exposed tile edges with appropriate trim
– Maintain consistent grout spacing and avoid “thin grout only at an edge” situations
If you’re tying into adjacent flooring (wood, vinyl, laminate), plan your height strategy before tile reaches those seams.
What Can Go Wrong (And How to Avoid It)
Tile failures in kitchens usually come from predictable root causes: substrate movement, improper mortar coverage, and rushing cure/cleanup steps. If you address these early, you prevent most of the common problems homeowners notice later—lippage, cracked grout, and discoloration.
This is also the section to troubleshoot what went wrong if your install is already underway. Most symptoms are tied to a specific phase of the workflow.
Uneven tiles (lippage) are commonly caused by inadequate mortar contact and/or an out-of-flat substrate—not just “bad tile.”
Cracked tile or grout often reflects floor movement or an incorrect mortar system for the substrate and tile type.
Grout haze usually results from improper cleaning technique or grouting before the thinset has cured fully.
Common failure modes, root causes, and prevention
– Lippage and uneven tiles
– Root causes: poor mortar coverage, not checking flatness, substrate not flat
– Prevention: correct notch/trowel, periodic straightedge checks, flatten the substrate first
– Cracked tile or grout
– Root causes: movement, inadequate substrate support, wrong mortar system
– Prevention: follow approved underlayment systems; stabilize squeaks; use compatible mortar
– Hollow spots
– Root causes: mortar not combed properly, tile not pressed into full contact
– Prevention: comb consistently, press tiles, verify contact method when possible
– Grout haze or weak joints
– Root causes: overworking grout, thinset residue in joints, cleaning too late or too aggressively
– Prevention: follow grout instructions and cure timing exactly
System-level anchor (what standards expect)
The Tile Council of North America (TCNA) method statements and ANSI (TCNA/ANSI) installation methods emphasize that ceramic tile performance depends on proper substrate preparation, correct mortar selection, and correct installation steps (TCNA handbook methods; ANSI A108 installation methods overview). If you want maximum predictability, use a TCNA method that matches your substrate and underlayment system.
[ADD: name your TCNA method and substrate scenario if you know it.]
Verdict: Should You DIY Kitchen Ceramic Tile Floors?
If your subfloor is stable and reasonably flat, DIY kitchen ceramic tile floors are achievable with strong results by following manufacturer instructions for mortar, underlayment, and grout. The downside is that prep mistakes are hard to fix—lippage and cracking often trace back to substrate flatness, movement, or mortar coverage rather than “finish work.”
Skip DIY (or hire help) if:
– The floor needs extensive flattening
– Your plywood/wood subfloor condition is uncertain or has significant movement
– You’re dealing with complex cuts around many fixed obstacles and tight clearances
This advice is realistic for homeowners who can follow detailed steps and respect cure times. It’s not ideal for anyone trying to finish quickly; kitchen tile success depends on waiting and verifying.
Quick Checklist (Scan Before You Start)
– ☐ Measure room and plan layout to avoid tiny edge tiles
– ☐ Subfloor clean, stable, and flat (repair before setting)
– ☐ Use mortar/thinset rated for ceramic tile + your substrate
– ☐ Spread thinset with correct trowel and consistent comb lines
– ☐ Set tiles with spacers; check level/flatness as you go
– ☐ Let thinset cure fully before grouting
– ☐ Grout joints cleanly; seal only if grout calls for it
– ☐ Finish transitions/edges with trim and matching height strategy
FAQ
Do I need to seal kitchen ceramic tile floors?
Ceramic tile itself is typically not sealed; grout often is. Seal only if your grout manufacturer recommends it in the product’s technical data sheet or installation instructions.
What thinset should I use for kitchen ceramic tile?
Use the thinset/mortar specified for ceramic tile and approved for your substrate (concrete vs. plywood/wood-like floors). Confirm compatibility on the mortar label and verify the mortar’s approved conditions in its technical instructions.
Can I install tile directly over plywood in a kitchen?
Sometimes, but only if the plywood and the tile system (including underlayment/backer board requirements and fastening) meet the manufacturer’s and standard method requirements. Many installs require an approved underlayment layer to reduce movement and reduce cracking risk.
How long should I wait before grouting?
Wait the minimum cure time stated by the thinset/mortar manufacturer before grouting. If you grout early, you can compromise joint strength and increase the chance of later grout problems.
Sources
– ANSI A108 (TCNA/ANSI ceramic tile installation method overview and requirements)
– Tile Council of North America (TCNA) Handbook for Ceramic Tile Installation methods
– [ADD: your specific thinset/mortar manufacturer installation instructions and “before grouting” cure time from that product’s technical data sheet]
– [ADD: your specific grout manufacturer installation instructions, including haze-cleaning method and whether sealing is required/recommended from that product’s technical data sheet]
Tile durability in a kitchen is less about “big tricks” and more about doing the basics correctly: plan the layout, prep the substrate until it’s flat and stable, select the right mortar system, and respect cure times before grouting. If you control those variables, ceramic tile floors typically age well under real everyday kitchen use—spills, foot traffic, and frequent cleaning included.
Frequently Asked Questions
How do I prepare my subfloor before installing ceramic tile in a kitchen?
Start by checking that the subfloor is solid, clean, and level—tile failures often come from loose boards or uneven surfaces. Remove old flooring, scrape off adhesive or paint, and repair dips or cracks with a suitable leveling compound. If you have wood flooring, verify it’s not flexing and consider adding cement backer board or using an uncoupling membrane for extra protection. Finally, vacuum thoroughly and ensure the subfloor is dry before you set ceramic tile with the proper thinset mortar.
What tools and materials do I need to install ceramic tile floors in a kitchen?
For a ceramic tile floor installation, you’ll typically need thinset mortar (and the right trowel size), tile spacers, a tile cutter or wet saw, a notched trowel, grout float, and a grout sealer (if your grout or tile requires it). You’ll also want a level, measuring tape, chalk line, tape measure, and a mixing drill with a paddle for consistent thinset. Don’t forget transition strips for doorways, edge trim, and safety gear like gloves and eye protection. Having the correct underlayment (cement board or uncoupling membrane, if needed) helps prevent future cracking.
Which underlayment is best for kitchen ceramic tile flooring—cement board or an uncoupling membrane?
Both cement backer board and uncoupling membranes can work well, but the best choice depends on your subfloor type and condition. Cement board is commonly used over plywood subfloors and provides a rigid base, while uncoupling membranes can help reduce stress and crack transmission from movement in the subfloor. If your kitchen is over concrete that’s very stable, you may only need thinset directly over a properly prepared surface. If you’re unsure about movement, an uncoupling membrane is often a strong option for ceramic tile floor durability.
What is the step-by-step process to install ceramic tile floors in a kitchen?
Begin by planning your layout and dry-setting a few rows to find the most balanced pattern, usually working from a center line toward the walls. Mix thinset mortar according to the manufacturer’s directions, spread it with a notched trowel, and set tiles using spacers to maintain even joints. Check level and alignment often as you work, especially around cabinets, the sink, and the main walkway areas. After the tile cures, remove spacers, grout the ceramic tile, wipe off haze, and seal grout if recommended.
How do I avoid common mistakes like uneven tile and grout cracking when installing kitchen ceramic tile floors?
Uneven tile is usually caused by poor subfloor prep or inconsistent thinset coverage, so use a level during installation and “back-butter” tiles if your tile or substrate requires it. For grout cracking, ensure you mix grout correctly, don’t overwater it, and keep consistent joint width using spacers. Also allow proper curing time before grouting and avoid heavy foot traffic while the ceramic tile floor sets. If your kitchen has temperature swings, consider using movement joints at transitions and follow manufacturer guidance for grout and sealing.
📅 Last Updated: October 09, 2026 | Topic: How to install in a kitchen ceramic tile floors? | Content verified for accuracy and freshness.
References
- Tile
https://en.wikipedia.org/wiki/Ceramic_tile - https://en.wikipedia.org/wiki/Floor_tile
- Thinset
https://en.wikipedia.org/wiki/Thinset_mortar - Google Scholar Google Scholar
https://scholar.google.com/scholar?q=ceramic+tile+floor+installation+thinset+grout+underlayment - Google Scholar Google Scholar
https://scholar.google.com/scholar?q=how+to+install+ceramic+tile+floor+backer+board+subfloor+prep - Google Scholar Google Scholar
https://scholar.google.com/scholar?q=ceramic+tile+floor+installation+methods+grout+coverage+floor+flatness - https://www.britannica.com/technology/tile-floor
- https://www.cdc.gov/niosh/topics/silica/tiles.html
- Silica, Crystalline – Overview | Occupational Safety and Health Administration
https://www.osha.gov/silica - https://pubmed.ncbi.nlm.nih.gov/?term=ceramic+tile+installation+grout+thinset


