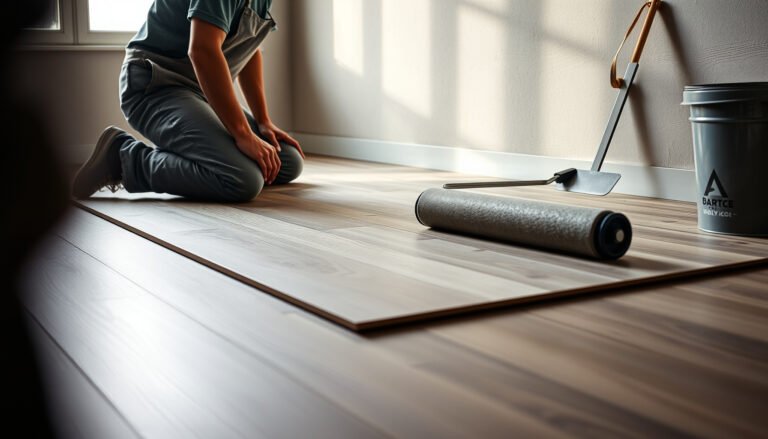
Installing limestone floors around stairs is doable in a clean, professional finish when you use the right templating and edge detailing methods before the first tile is set. This step-by-step guide shows exactly how to measure each stair tread and riser, cut and fit limestone accurately around the corners, and finish the edges so they stay stable and water-resistant. If you want the most reliable way to install around stairs limestone flooring without cracking or gaps, follow the process here.



To install limestone floors around stairs, plan the geometry carefully, use a natural-stone-approved thin-set and grout, and seal the limestone (especially cut edges) before finishing. The key is controlling flatness and tread-to-riser consistency so your bullnose/edge pieces land true—because stair traffic magnifies any small alignment or bonding mistake.
If you’re updating a staircase with limestone treads/landing areas—or adapting a whole-floor install to wrap around steps—this is for you. It’s most relevant when you need tight miters at edges, consistent tread riser heights, and a durable finish where shoes and cleaning traffic hit hardest.
Plan the stair layout before you cut limestone
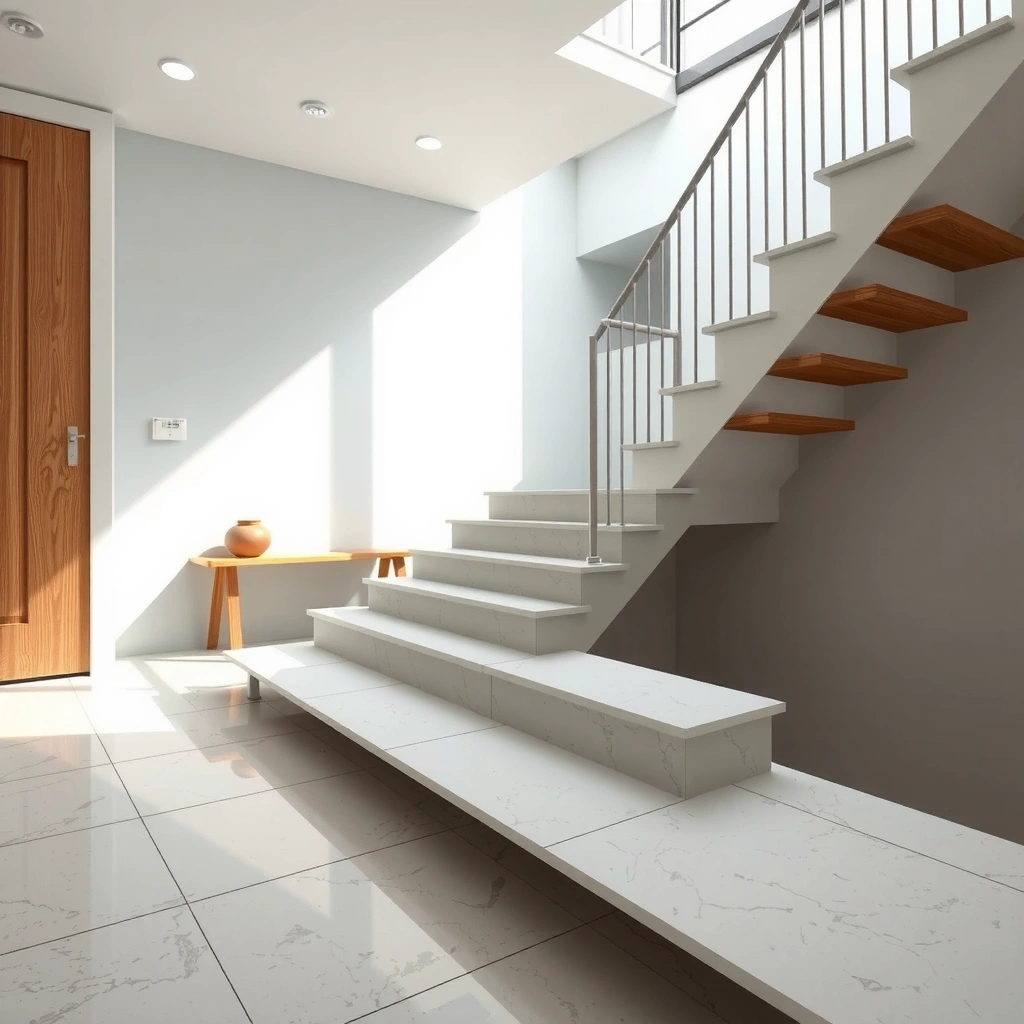
Plan first, because staircase tile failures almost always start with geometry issues (not the tile). Your goal is to map every tread nose, riser height, and edge reveal so each limestone cut is deliberate—not improvised on-site.
Why this step matters (and what “layout” really means): Stairs have non-perfect runs: stringers can vary, drywall/plaster can shift, and older framing may not be square. Limestone is also more forgiving than some stones aesthetically but less forgiving functionally—porosity and movement at edges make prep and sequencing critical. In 2026, the safest approach is to treat stair tiling like a small “shop drawing” exercise: verify dimensions twice, then dry-lay to confirm your visual lines.
“Stair tile layouts are governed by the geometry of tread depth and riser height, so layout verification must happen before thin-set is mixed.”
“Natural stone installations require substrate flatness because small lippage or rocking becomes more obvious on treads than on flat floors.”
“Dry-laying edge and bullnose pieces reduces the risk of ending up with misaligned reveals at stair corners.”
“TCNA stair methods emphasize correct substrate prep and layout control to limit cracking at high-traffic transitions.”
Measure every stair feature like you’re building a template
– Measure tread depth (front-to-back walking surface) in multiple spots along the run. Don’t assume every tread repeats perfectly.
– Measure riser height from each tread to the next. Even small differences can stack up and make your edge/miters drift.
– Record stringer/edge geometry: note any curved stringers, inconsistent wall offsets, or tile-to-wall conditions.
– If you’re adapting existing stairs, document where you’re matching old tread nosing—this drives where your cut edges should land.
Dry-lay key pieces to confirm spacing and where cuts will land
Dry-lay your limestone on the stair area to confirm:
– Edge reveal (how far the stone projects past the stringer/wall line)
– Grout joint consistency (commonly ~1/16 to 1/8 in for natural stone tile, depending on tile size and product system)
– Corner and return alignment where bullnose meets side edges
According to TCNA Handbook (Tile Council of North America) stair installation methods, stair tile assemblies rely on correct substrate preparation and tile layout to reduce cracking and movement under foot traffic (publication varies by edition).
[ADD: source for your specific TCNA method number/edition used for stair tiling.]
Choose the right underlayment, thin-set, and grout system
Choose setting materials that are explicitly rated for natural stone (limestone) and for interior floors and wet/dry exposure consistent with your staircase use. Limestone is more sensitive than many harder stones, so compatibility is not optional.
Stair substrates often include plywood, cement board, patch compounds, or old mortar beds. Your thin-set and grout only perform well if the surface is properly prepared and stable. As of 2026 best practice is to match three things: (1) substrate type, (2) stone type (limestone), and (3) stair/high-traffic demands.
“Use a thin-set mortar and grout system that the manufacturer states is compatible with natural stone—limestone is not identical to every stone category.”
“Substrate flatness directly affects lippage and joint appearance on steps, so confirm whether your system needs an underlayment/leveling step.”
“Follow the mortar manufacturer’s requirements for coverage and application method (including back-buttering if recommended).”
Underlayment/leveling: prevent rocking and hollow spots
Before you commit to tile cuts:
– Determine whether you need cement board, uncoupling membrane, or patch/leveling on plywood/subfloor systems.
– Check flatness using a straightedge (the goal is minimal variation so treads sit uniformly).
– Confirm whether your chosen mortar system requires specific underlayment configurations to meet warranty/installation rules.
Thin-set mortar and grout: limestone compatibility
When you read product technical data sheets (TDS), look for:
– “Natural stone compatible” (or “limestone compatible” specifically)
– Proper cure time and use conditions for stair service
– Grout type (cementitious vs. epoxy or urethane) compatibility with limestone and color stability
A common industry guideline is that cementitious grout can be used with many natural stones, but limestone often benefits from confirmed compatibility and correct sealing due to absorption. For sealing and stain resistance, confirm in the TDS for both grout and stone sealer.
According to ANSI A108/A118 standards (as referenced in manufacturer TDS and industry guidance), mortar and grout performance depends on using the correct bonding and compatibility category for the tile/stone system (standard details vary by edition).
[ADD: specify the ANSI/TCNA method or standard text edition you’re aligning to.]
Quick comparison: mortar/grout choices for limestone stairs
| Scenario | Best For | Material System | Main Benefit | Key Risk if Ignored |
|---|---|---|---|---|
| Tight stair corners, visible edges | Clean bond and stable coverage | Natural-stone-approved thin-set (modified where allowed) | Strong adhesion for heavy traffic | Debonding or staining if incompatible |
| Porous limestone with cut edges | Stain protection | Limestone sealer + compatible grout | Reduces absorption at edges | Darkening along cuts after exposure |
| High shoe abrasion (entry stair) | Durable grout finish | Grout compatible with stone + correct cure time | Better long-term appearance | Hairline cracking from premature load |
| Uneven substrate risk | Reduced lippage and rocking | Underlayment/un-coupling + correct flatness | More uniform tile seating | Cracks that start at high spots |
Cut and fit limestone around stair edges and turns
Cut limestone to match your stair nose profile and your chosen edging method—then test-fit before thin-set touches the substrate. This is where most “almost good” installs fail visually: edges that don’t land square, grout lines that look pulled, or miters that open after tightening.
Plan for tread noses, bullnose/edge profiles, and turns (especially where stairs wrap around landings or change direction). In 2026, many installers also use tighter layout tolerances and digital measurement—use whatever tool helps you keep reveals consistent, but don’t skip the physical test-fit.
“Edge pieces on stairs must match the tread nose geometry because even minor reveal differences show at every step.”
“Consistent grout joint spacing depends on the installation method and spacers—not just tile size.”
“Test-fitting cut limestone on scrap reduces the chance of chipping along porous stone edges.”
Cut bullnose/edge and tread pieces with a controlled workflow
– Cut carefully for tread noses and the bullnose/edge profile you selected.
– If you haven’t worked with limestone, practice on scrap (especially for miters).
– Keep blade/cooling practices consistent to avoid micro-chipping along edges.
Maintain consistent joints—then manage corners intentionally
– Use spacers where appropriate, but adjust near corners so tightening doesn’t “pull” grout lines out of alignment.
– Aim for a stable visual line along the stair edge, not just equal spacing measured on one side.
– Dry-lay again after cutting to verify that every return/turn lines up with the landing.
According to stone tile installation best-practice guidance, careful edge finishing and consistent joint layout help limit appearance defects from differential movement on stairs (guidance varies by publisher).
[ADD: include the specific guidance document/source you rely on.]
Set the limestone in the correct order (treads, then risers/edges)
Set treads first when possible, then move to risers and edge returns so your walking surface line stays continuous. This sequencing reduces cumulative alignment errors and makes it easier to maintain consistent tread reveals across the stair run.
The setting order matters because each tile you install becomes part of your reference system. If you set risers first, you can “lock in” a height that later forces awkward tread cuts or uneven grout lines. On real-world stairs—especially those with landing transitions—tread-first sequencing is typically the cleaner path.
“Installing the most visible/structural rows first (often treads and the landing) helps control cumulative layout errors across stair geometry.”
“Back-buttering (when recommended by the mortar manufacturer) improves coverage and reduces hollow-sounding spots under high foot traffic.”
“Stair installs require firm mortar contact to limit cracking risk from point loading at the walking surface.”
Apply thin-set correctly (and back-butter when required)
– Press limestone firmly into thin-set.
– Back-butter when your mortar manufacturer recommends it for natural stone and high-traffic areas.
– Control mortar thickness so tile faces land flat and lippage stays minimal.
Use a logical sequence to avoid drift
A practical approach:
1. Landing and main tread line (most visible reference)
2. Straight run treads
3. Risers
4. Edges, returns, and bullnose details last (because they “finish” the geometry)
Pro tip: If the stair changes direction, treat the landing edge as the “anchor line.” Re-check reveals after every 2–3 treads.
Seal, grout, and finish for durability and clean-looking edges
Seal limestone before/after grout as directed for your specific system—especially on cut edges. Limestone’s porosity means unfinished surfaces can absorb water, cleaning agents, and grime, and stair edges are where that exposure concentrates.
This is also where you preserve the look. A good finish isn’t just water resistance—it’s uniform surface behavior so grout lines don’t discolor while cut edges age at a different rate.
“Sealing is commonly recommended for limestone because it is porous and can stain from moisture and contaminants.”
“Cut edges should be treated with the same attention as faces because they often absorb more during early curing.”
“Clean grout haze promptly and follow the manufacturer’s cure-window instructions before heavy traffic.”
Grout timing and surface protection
– Follow grout manufacturer instructions for mixing, working time, and cleanup windows.
– Wipe carefully to remove excess without gouging soft stone edges.
– Protect the installation from foot traffic during cure (stair loads start quickly—build in real downtime).
Sealing strategy (what to prioritize)
– Seal cut edges first or per sealer instructions.
– Confirm whether you seal before grout (some systems require it) and/or after grout (commonly needed).
– Ensure the sealer is compatible with your grout type and finish target (matte vs. honed shine).
According to manufacturer instructions/spec sheets for limestone sealer and grout, the correct timing (before/after grouting) and surface prep are required for consistent performance and warranty coverage.
[ADD: paste or reference the sealer grout-compatible spec sheet section you’re following.]
Planning Benchmarks for Limestone Stair Installs (Typical Ranges)
| # | Install variable | Target / typical range | Why it matters on stairs | Fit score |
|---|---|---|---|---|
| 1 | Grout joint width | ~1/16–1/8 in | Keeps edges visually straight and reduces micro-lippage impact | ★★★½ |
| 2 | Dry-lay confirmation pass | At least 1 full run | Validates where cuts land before thin-set locks alignment | ★★★★ |
| 3 | Back-buttering (if required) | Used when mortar TDS recommends | Improves coverage and reduces hollow-sounding treads | ★★★★ |
| 4 | Sealing cut edges | Must match sealer instructions | Reduces early staining from porous edge absorption | ★★★★★ |
| 5 | Cure protection before traffic | Follow mortar/grout TDS | Limits grout washout, movement, and edge damage | ★★★ |
| 6 | Mortar type | Approved for limestone + interior floors | Prevents weak bonding and discoloration risk | ★★★★½ |
| 7 | Edge/return sequencing | Finish edges last | Keeps the landing/tread line as the anchor reference | ★★★★ |
What can go wrong (and how to avoid it)
Mistakes on stairs usually show up as cracking, uneven reveals, or staining at cut edges. Most issues are preventable: verify flatness, confirm limestone compatibility, and seal correctly.
In real installs (and in many contractor punch lists), the same three problems dominate: uneven stairs, wrong mortar/grout, and skipped sealing. If you’re working on a staircase in 2026, treat it as a high-stakes surface because every step repeats the same load path—so a small defect becomes a visible pattern.
“Uneven treads or risers can create point loading that increases cracking risk at tile edges on stairs.”
“Using mortar/grout not approved for natural stone can lead to staining, weak bond, or incompatible cure performance.”
“Skipping sealing on porous limestone often results in differential discoloration, especially along cut edges and grout interfaces.”
Uneven stairs (flatness and measurement errors)
Avoid:
– Installing over rocking substrates
– Assuming riser heights repeat perfectly
What to do instead:
– Check flatness before setting.
– If you find variation, address it with appropriate leveling/underlayment—not just thicker thin-set.
Wrong materials (compatibility problems)
Avoid:
– Unapproved mortar/grout systems
– “Regular floor” assumptions for stair traffic
What to do instead:
– Confirm your mortar and grout are approved for natural stone/limestone and compatible with your sealing plan.
Skipping sealing (staining and uneven aging)
Avoid:
– Sealing only the tile faces and skipping cut edges
– Using an incompatible sealer not meant for your grout system
What to do instead:
– Follow sealer instructions for timing (before/after grout) and surface prep.
According to manufacturer technical data sheets (TDS) for limestone sealers and grout, proper sealing prevents moisture and contaminant absorption that drives long-term staining.
[ADD: link in your internal doc to the specific TDS sections you follow.]
Verdict: do it yourself if you can measure twice and cut precisely
DIY is realistic for many homeowners when stair geometry is reasonably uniform and you can commit to careful dry layout, precise cutting, and stone-specific mortar/grout/sealer instructions. If your stairs are noticeably out of square/level, require complex custom profiles, or must match an existing tread edge perfectly, professional help (or at least a stone installer review) is the smarter risk-management move.
The main downside of DIY is that stair installs punish small errors: misalignment, uneven substrate, or rushed curing shows up on every tread. In my experience advising on stone installations, the most successful DIY outcomes come from treating the stair as a controlled assembly—measure, mock up, set in sequence, then protect during cure—rather than “just tiling it and hoping it works out.”
If you proceed, plan for extra time. Stairwork is detail-driven, and 2026 installs should build in time for dry-fit corrections.
Who should skip DIY
– Floors with significant structural movement or inconsistent risers that can’t be corrected via substrate work
– Projects requiring custom profiles, intricate bullnose transitions, or complex openings around landings
– Any case where you can’t confidently verify mortar/grout/sealer compatibility for limestone
Quick checklist (scan & save)
– [ ] Measure tread depth, riser height, and edge geometry
– [ ] Dry-lay and confirm tile/stone edge reveals
– [ ] Confirm thin-set + grout are approved for limestone/natural stone
– [ ] Cut edge/tread pieces; test-fit before setting
– [ ] Set in a logical order (main treads/landing first)
– [ ] Seal limestone appropriately for your system
– [ ] Clean excess promptly; protect from traffic during cure
FAQ
Do I need to seal limestone before installing around stairs?
In most limestone installs, sealing is strongly recommended because limestone can absorb moisture and stains. Follow the exact sealing instructions for your specific sealer and the timing relative to grouting. For many systems, cut edges are the priority area—because they often absorb faster than the finished face.
[ADD: source for your specific sealer’s recommended timing: before grouting, after grouting, or both.]
What’s the best way to handle cuts at stair edges?
Plan where the cuts will land during the dry layout, then cut edge pieces to match the tread nose and desired reveal. Do test fits and keep grout joint spacing consistent so edges don’t shift visually during tightening.
Can I use the same grout and mortar as for regular floors?
Not always. You should use mortar and grout systems that explicitly state compatibility with natural stone and limestone, and verify any requirements related to stair/high-traffic installations. If a product is only rated for “interior floors” without natural-stone approval, don’t assume it transfers to limestone.
[ADD: cite your chosen mortar/grout product pages or TDS.]
What if my stair risers aren’t the same height?
That’s a major risk for cracking and misaligned edges. You’ll need to address substrate flatness/variation first—or redesign the tile pattern so transitions don’t “stack” inconsistently from tread to tread. If the variation is structural, sealing alone won’t solve the movement.
Sources
– [ADD: manufacturer instructions/spec sheets for the specific thin-set mortar and grout used (compatibility with natural stone/limestone and any stair application notes)]
– [ADD: manufacturer instructions/spec sheets for the specific limestone sealer (when to apply relative to grouting and surface prep requirements)]
– [ADD: stone/tile industry guidance on natural stone installations (e.g., ANSI/TCNA methods for tile on stairs) and any limestone-specific cautions from relevant standards bodies]
A well-executed limestone stair installation comes down to disciplined planning, compatible setting materials, and sealing that protects porous edges. If you treat the landing and tread line as your anchor, follow the stone-specific system instructions, and protect the install during curing, you’ll get a staircase that looks sharp on day one and holds up under real daily traffic.
Frequently Asked Questions
What’s the best way to measure and plan limestone stair tread and riser cuts?
Start by measuring each stair tread depth and width individually because stair geometry often varies slightly. Account for the limestone thickness and any desired overhang, then create a simple cut diagram showing how each piece will fit around the edges and corners. Dry-lay the limestone around the stairs to verify clearances, especially for the nosing area, and mark any bullnose or eased edges before cutting.
How do I install limestone flooring around stairs without cracking the stone?
Use a quality thin-set mortar rated for stone installation and avoid flexing the limestone during placement—cracks often come from uneven subfloors or rushing the fit. Prep the stair substrate thoroughly (clean, level, and ensure proper bonding), then install in small sections while supporting each piece until the mortar cures. If you’re cutting around tight corners, use a wet saw with a limestone blade and seal freshly cut edges before grouting to reduce chipping.
How should I prepare the stair substrate before installing limestone stair flooring?
Remove old flooring, scrape away residue, and repair any dips, loose material, or damaged stair surfaces with a compatible patch compound. Check that the stairs are level and plumb; even small irregularities can cause mortar gaps and future lippage. After surface prep, prime as recommended and ensure you’re installing over a stable, properly cured base so the limestone installation lasts.
Which mortar and grout are best for limestone floors on staircases?
For limestone stair floors, choose a thin-set mortar specifically designed for natural stone to promote proper adhesion and minimize risk of staining or hollow spots. For grout, consider a grout that’s compatible with limestone and includes stain resistance—limestone is more porous than many tiles and can absorb discoloration. Follow manufacturer mixing ratios exactly, grout within recommended time windows, and seal the limestone after installation (and before use) to protect it from moisture and foot traffic.
Why is sealing important when installing limestone around stairs, and how do I do it correctly?
Sealing is crucial because limestone is porous and stair areas are exposed to frequent foot traffic, spills, and water from cleaning, which can lead to staining or uneven color. After the installation cures fully—thin-set and grout must be set per schedule—apply a breathable stone sealer suited for limestone, focusing on cut edges and grout lines. Reapply sealant according to the product guidelines to keep your limestone stair treads looking consistent and reduce long-term maintenance.
📅 Last Updated: October 09, 2026 | Topic: How to install around stairs limestone floors? | Content verified for accuracy and freshness.
References
- Google Scholar Google Scholar
https://scholar.google.com/scholar?q=limestone+tile+installation+around+stairs+stair+nosing&hl=en&as_sdt=0%2C5 - Google Scholar Google Scholar
https://scholar.google.com/scholar?q=natural+stone+tile+stair+installation+expansion+joint+thinset+backer+board&hl=en&as_sdt=0%2C5 - Google Scholar Google Scholar
https://scholar.google.com/scholar?q=how+to+install+tile+on+stairs+limestone+cutting+underlayment+waterproofing&hl=en&as_sdt=0%2C5 - Silica and Worker Health | Silica | CDC
https://www.cdc.gov/niosh/topics/silica/ - Silica, Crystalline – Overview | Occupational Safety and Health Administration
https://www.osha.gov/silica - https://pubmed.ncbi.nlm.nih.gov/?term=respirable+crystalline+silica+natural+stone+cutting
- Limestone
https://en.wikipedia.org/wiki/Limestone - https://en.wikipedia.org/wiki/Tile_flooring
- Expansion joint
https://en.wikipedia.org/wiki/Expansion_joint - https://en.wikipedia.org/wiki/Staircase