
Learn exactly how to install kitchen basement floors step by step, from prepping the slab to setting your final finish. This guide gives you the fastest, most reliable sequence for a basement that won’t buckle, peel, or trap moisture. By the end, you’ll know which prep steps matter most and how to install with confidence—whatever flooring type you choose.




Controlling moisture first is the difference between a basement kitchen floor that lasts and one that fails early. After you confirm the slab is dry enough and prep it to a manufacturer-approved standard, you can choose a basement-compatible flooring system and install it on the correct assembly (direct-on-slab, underlayment, or subfloor) for long-term stability.
If your kitchen shares a basement level (or you’re converting a basement area into a kitchen-adjacent space), these steps help—especially if the slab gets cool, looks slightly stained, or you’ve noticed musty odors. This layout is aimed at homeowners and contractors planning a basement floor install who want a practical checklist and common pitfalls to avoid.
Check moisture and surface condition first
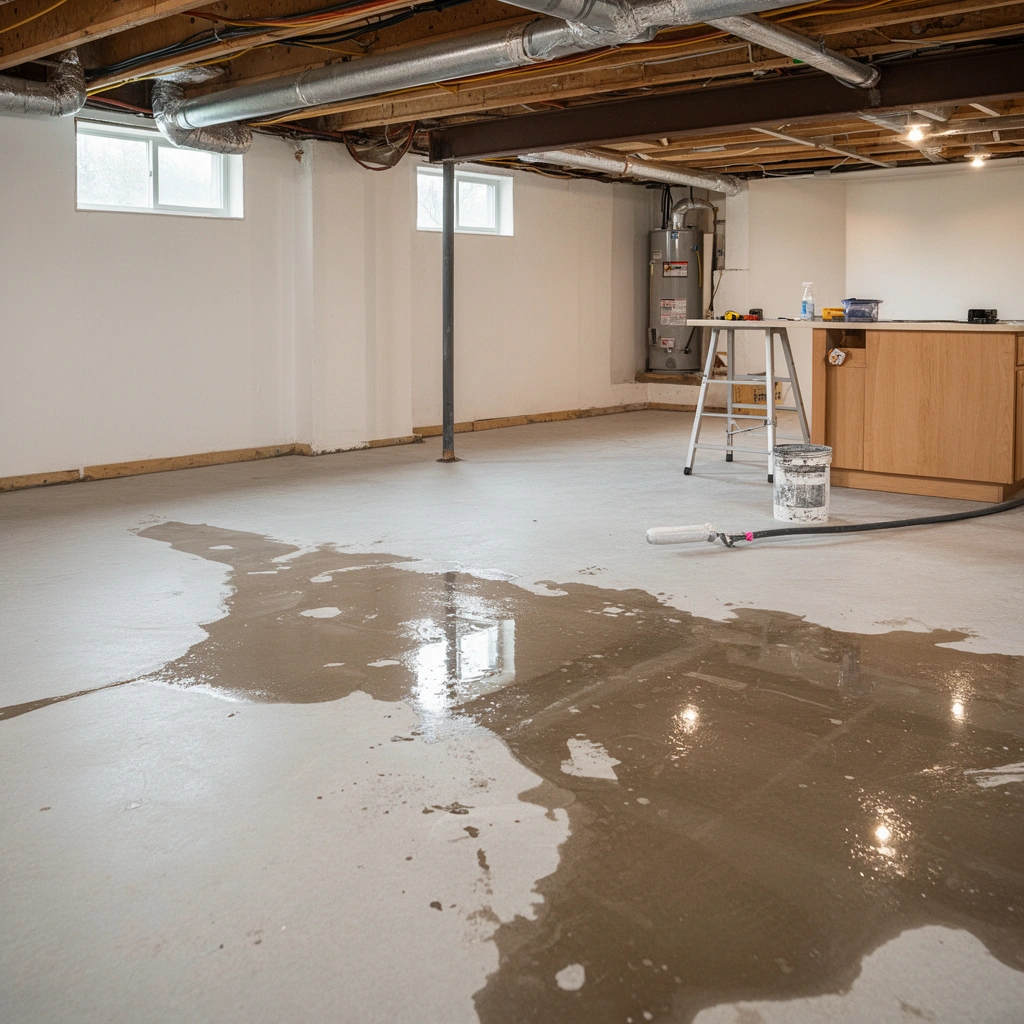
The best way to keep kitchen basement floors from buckling, cupping, or developing odors is to test for moisture and verify slab condition before you install anything. In practice, basement failures most often come from water vapor migrating through concrete and from skipping surface prep that flooring systems rely on.
“Mold can grow when indoor humidity is high, and the CDC advises controlling indoor moisture by keeping humidity around 30–50%.” CDC
“The EPA explains that mold growth commonly occurs when relative humidity remains at or above roughly 60%.” U.S. Environmental Protection Agency (EPA)
“Concrete curing and drying are slow processes, and Portland Cement Association guidance often cites typical drying rates of about 1 inch per month (conditions vary).” Portland Cement Association (PCA)
– Inspect the slab for visible moisture, staining, peeling coatings, and cracks—these determine whether you can proceed as-is. In a basement kitchen, look beyond the floor: check for plumbing leaks, HVAC condensate, and cracks near exterior walls because vapor and water entry often come from those routes.
– If you find signs of dampness, use a moisture-mitigation approach recommended for your floor type (or have it assessed). Sealing over active moisture without verifying what’s happening beneath the slab can trap vapor and cause adhesive failure or odor buildup.
– Make sure the surface is flat and solid: repair spalling, fill cracks/low spots, and remove anything that will prevent proper adhesion or underlayment contact. For resilient floors and most underlayment systems, the “flatness” requirement is typically tight enough that a small lippage problem at the edges of tiles or planks becomes a joint stress problem after appliances and rolling loads start moving across the floor.
How we typically decide if we’re “ready to install”: we treat the slab as an assembly substrate, not just a surface. That means the slab’s moisture behavior and its mechanical condition (bond-ready surface, no loose material, correct finish) both need to meet the flooring system’s instructions. If a product specifies a particular moisture test and threshold, you follow that—“best effort” rarely performs as well as a system-designed approach.
What to measure (practical moisture testing targets)
Instead of relying on appearance alone (stains can be old), match your testing method to the flooring system you plan to install.
Basement Floor Moisture Checks That Map to Concrete Flooring Systems
| # | Moisture test (standard practice) | What it measures | Typical output unit | Kitchen basement relevance |
|---|---|---|---|---|
| 1 | ASTM F2170 (In-situ RH probe) | Relative humidity inside concrete | % RH | ★★★☆☆ |
| 2 | ASTM F1869 (MVER) | Moisture vapor emission rate through slab | lb/1000 sq ft/24h | ★★★★☆ |
| 3 | ASTM F710 (practice for slab prep) | Conditions impacting bond and performance | Pass/fail criteria | ★★★☆☆ |
| 4 | Concrete pH / alkalinity check | Surface chemistry for coatings/adhesives | pH (typical test strip) | ★★☆☆☆ |
| 5 | Relative humidity in-room (hygrometer) | Ambient conditions that drive vapor risk | % RH | ★★★☆☆ |
| 6 | Calcium chloride slab test (MVER alternative) | Vapor emission behavior at the surface | lb/1000 sq ft/24h | ★★★☆☆ |
| 7 | Moisture barrier system verification | Whether the coating meets a specified target | Manufacturer limits | ★★☆☆☆ |
Choose the right basement-friendly flooring system
The best basement kitchen flooring system is the one that matches your slab’s moisture behavior and installation method. If you choose the wrong combination—such as a product that needs a warm, dry environment or a moisture-sensitive adhesive—you can get failures even when workmanship is excellent.
Basement-friendly assemblies prioritize vapor management because concrete slabs naturally transmit moisture vapor even without visible leaks.
Engineered wood flooring and laminate typically require specific underlayment and moisture limits stated by the manufacturer (often referenced alongside ASTM test methods).
A direct-on-slab approach is only “best” when the slab is flat, clean, and within the manufacturer’s moisture tolerance.
– Match the flooring to your basement conditions: common lower-risk choices are engineered solutions with appropriate underlayment or systems designed for concrete slabs. In many kitchens, traffic patterns (including appliances) make a stable click-lock or a rigidly bonded floor especially valuable.
– Confirm compatibility with concrete (and with any underlayment you plan to use), since not every material is meant for basement slabs. Pay attention to whether the flooring is approved for “below-grade” installations and whether the underlayment is a vapor barrier or simply cushioning.
– Decide whether you’ll install directly on slab, use a floating system, or build a subfloor—each approach changes prep and fastening steps. Floating floors can handle minor slab movement differently than bonded floors, but they still require moisture control to prevent mold growth under coverings.
Quick pros/cons reality check (system selection)
When you’re planning a basement kitchen floor, the tradeoffs usually come down to moisture risk, sound, and long-term stability under appliances.
| Assembly approach | Pros | Cons / watch-outs |
|---|---|---|
| Direct-on-slab (with approved product) | Lowest height build-up; fewer layers; faster install | Less forgiving if slab isn’t within moisture/flatness limits |
| Floating floor with underlayment | Handles minor movement; reduces some joint stress | Still needs vapor control; trapped moisture can cause odor under planks |
| Raised subfloor / sleepers | Improves comfort and can reduce cold feel; allows assembly ventilation if designed that way | More height, more labor; requires careful support and ventilation planning |
Prep the floor for installation
The safest path to long-lasting kitchen basement floors is to prep until the slab matches the flooring manufacturer’s surface requirements—then install exactly per the system spec. Most problems blamed on “bad flooring” are actually bond failures, unevenness, or leftover contaminants that prevent proper underlayment contact or adhesive curing.
Flooring warranty coverage commonly depends on meeting manufacturer prep requirements (cleanliness, flatness tolerances, and approved primers/adhesives).
Removing curing compounds, sealers, dust, and paint overspray is critical because residues interfere with adhesive bond and underlayment adhesion.
Flatness issues are a joint killer: minor unevenness can telegraph through planks and compromise click/lock joints over time.
Planning transitions early helps avoid forcing small cuts at thresholds, where kitchen loads and movement are most likely to stress edges.
– Clean thoroughly (no dust, paint overspray, or curing compounds), then follow the flooring manufacturer’s requirements for primers/adhesives if you’re gluing. Concrete dust control matters in basements—use proper PPE and cleanup methods to avoid embedding grit under underlayment.
– Level and flatten: many failures come from minor unevenness that telegraphs through planks or compromises click/lock joints. Focus on low spots and high spots; “patching only” can worsen ridges unless you follow a proper leveling compound plan.
– Plan transitions and edges early (doorways, counters/edges, stairs) so you don’t end up cutting around obstacles without clearance. Kitchens often include doorways to hallways, an entry landing, and appliance edges—every one of those is a stress point for expansion gaps and transition trims.
Kitchen-specific prep notes that matter
– Appliances and rolling loads: Ensure subfloor support is continuous under likely furniture/appliance locations to reduce point loading and joint separation.
– Door clearance: basement ceilings are often tighter; confirm final floor height before reinstalling doors or adding underlayment thickness that changes swing clearances.
Install underlayment, vapor barrier, or subfloor (as needed)
Your basement kitchen flooring performs best when the moisture-control layer and the load-bearing layer are installed as one approved system. Follow the manufacturer’s sequencing precisely—small deviations in overlaps, seams, or fastening can create pathways for vapor migration and trapped condensation.
Vapor barrier installation details (overlap direction, seam tape, and edge sealing) are part of the “system” and must match manufacturer instructions.
Raised assemblies in humid environments need to avoid trapping moisture; ventilation paths and stable support are central to performance.
Underlayment seams that don’t align or tape correctly can become air/vapor channels, especially around perimeter edges.
Any movement under the flooring—subfloor wobble or unstable sleepers—can lead to squeaks and early wear.
– If your system requires a vapor barrier/underlayment, install it per the manufacturer’s guidance (overlap/seams and taped joints where required). In basements, perimeter sealing at walls and around penetrations matters as much as field seams.
– For raised subfloor systems, ensure proper spacing, support, and ventilation paths—basements need assemblies that can handle humidity without trapping it. Use the system’s recommended joist/sleeper spacing and underlayment type so the floor doesn’t flex under kitchen traffic.
– Keep the installation surface stable: wobble or movement under the flooring will cause joint separation, squeaks, and early wear. “Mostly flat” isn’t enough when you have click-lock joints and rolling appliance traffic.
Direct-on-slab vs raised subfloor: which is safer for kitchens?
If you’re deciding late and your slab moisture status isn’t perfect, this comparison helps you choose the lower-risk assembly.
| Criteria | Direct-on-slab (approved only) | Raised subfloor / sleepers |
|---|---|---|
| Moisture tolerance sensitivity | Lower margin for error | More forgiving when designed for humidity |
| Cold feel | More noticeable | Often improved |
| Sound control | Varies by product/underlayment | Typically better with correct layer design |
| Height build-up | Lowest | Higher (planning required) |
| Installation complexity | Simpler layering | More steps and layout control |
| Risk from slab flatness issues | Higher if slab isn’t within tolerance | Can reduce telegraphing when supported correctly |
| Kitchen load handling | Good if bonded/stable and thresholds are correct | Good if joists/sleepers are continuous where needed |
| Penetration sealing complexity | Must be perfect at transitions | Still critical, but assemblies can route details differently |
| Best fit when slab is uncertain | Only when within moisture limits | Often lower-risk when designed for humidity |
| Warranty alignment | Requires strict system match | Requires strict system match (assembly too) |
| Verdict | Choose only if moisture/flatness are verified to the manufacturer’s limits. | Choose when moisture is more variable and you can build the approved raised assembly. |
Lay the flooring and handle kitchen-specific details
The installation approach that protects a basement kitchen floor is the one that respects expansion gaps, transitions, and penetrations. Kitchens add extra movement—appliances roll, doors swing, and spills occur—so finishing details determine whether you’ll have gaps that invite moisture intrusion.
Expansion spacing rules exist to manage dimensional movement; ignoring them can cause buckling or joint stress in basement environments.
Threshold and doorway transitions reduce stress concentrations where planks or tiles meet other surfaces under daily kitchen traffic.
Penetrations (pipes, conduits, drains) need sealed finishing approaches to prevent vapor pathways at edges and around trims.
– Follow the layout direction and expansion/spacing rules exactly (especially along walls, pipes, and door frames). Basements can experience temperature swings year-round, and even small movement adds up at perimeter constraints.
– Use proper transitions at thresholds and openings; kitchens often have rolling loads and frequent appliance movement, so stable transitions matter. A poorly supported transition becomes the first “rocking” point that damages joints.
– At penetrations (plumbing lines, electrical conduits), seal and finish using methods that won’t leave gaps that invite moisture intrusion. The key is to avoid open seams behind trim pieces where vapor can migrate and condense.
Workmanship details that reduce callbacks
– Keep plank/tile edges clean as you install; debris under joints acts like a wedge.
– If you’re using adhesives, follow open-time and trowel guidance from the manufacturer—guessing leads to weak bonds and trapping of moisture in the glue line.
What can go wrong (and how to avoid it)
Basement kitchen floors fail when moisture management and prep are treated as optional. If you want fewer call-backs, plan for the failure modes that show up most often: vapor migration, flatness problems, incompatible materials, and installation conditions that never stabilize.
Covering an active moisture condition without a designed moisture mitigation system can trap water vapor beneath the floor covering.
Uneven slabs increase joint stress in click/lock floors and can create separation lines that collect debris and moisture.
Some adhesives and flooring types are not approved for concrete slabs under specific vapor conditions; warranty coverage may require documented compliance.
Basements can fluctuate in temperature and humidity; installing before conditions stabilize can stress materials during curing or acclimation.
– Skipping moisture mitigation: even “small” dampness can lead to cupping, adhesive failure, mold risk under coverings, or odors. Treat odors as a warning sign—not a deodorizing opportunity.
– Ignoring flatness: floors laid over uneven slabs can separate at joints or create squeaks and weak spots. Leveling compounds and grinding methods matter; follow the product system’s prep guidance.
– Choosing an incompatible assembly: some flooring types and adhesives are not meant for concrete basements or certain vapor conditions. Don’t assume “basement-rated” claims apply to your specific glue-underlayment combination.
– Wrong acclimation/temperature conditions: large basement temperature swings can stress materials before the install stabilizes. Follow the product’s acclimation and installation temperature/humidity windows exactly.
Verdict / practical tip
A successful kitchen basement floor install mostly comes down to moisture control and correct prep—if you nail those, the rest is straightforward installation steps. That said, if you have ongoing water intrusion, persistent damp odor, or repeated slab moisture concerns, don’t rely on “cover-it-up” materials; address the moisture source first or get it professionally evaluated.
If you’re not comfortable checking flatness, matching manufacturer system requirements, or following adhesive/vapor instructions precisely, consider hiring a contractor for at least the prep and moisture steps. Skipping those pieces can turn a manageable project into a rework problem.
Quick checklist (scan/save)
– [ ] Check slab for moisture signs, cracks, and loose coatings
– [ ] Confirm your flooring type is approved for concrete basements
– [ ] Clean and flatten the surface to manufacturer specs
– [ ] Install required vapor barrier/underlayment or subfloor assembly
– [ ] Follow expansion gaps and seam/overlap rules
– [ ] Use correct transitions around kitchen openings and thresholds
– [ ] Finish penetrations and edges to prevent moisture intrusion
FAQ
Can I install kitchen basement floors directly on the slab?
Sometimes—if the slab is flat, clean, and the flooring manufacturer allows direct installation for your conditions. If there are moisture signs, you may need a vapor barrier or a different assembly first. [ADD: source for direct-on-slab requirements from your flooring manufacturer.]
What’s the most common reason basement floors fail?
Moisture management errors—either missing dampness problems or sealing over active water vapor—tend to cause the earliest issues. Flatness and incompatible materials also commonly contribute.
Do I need a subfloor in a basement kitchen?
It depends on your flooring type, slab condition, and whether your system specifies an underlayment/subfloor for performance. Follow the manufacturer’s installation system rather than mixing components.
How long should I acclimate flooring for a basement?
Acclimation time depends on the product instructions and your basement temperature/humidity conditions. [ADD: exact acclimation guidance from your flooring manufacturer.]
Sources
– CDC — humidity and moisture guidance to reduce mold risk
– U.S. Environmental Protection Agency (EPA) — mold and humidity fundamentals
– Portland Cement Association (PCA) — concrete drying guidance (drying rate concepts)
– [ADD: flooring manufacturer installation guide/spec sheet for your exact flooring type (includes slab/vapor/subfloor requirements).]
– [ADD: underlayment/vapor barrier manufacturer instructions (overlap seams, tape guidance, and concrete suitability).]
– [ADD: moisture mitigation guidance from a recognized authority or product system documentation appropriate to basements (e.g., manufacturer technical bulletins).]
Frequently Asked Questions
How do I prepare a kitchen basement floor before installing flooring?
Start by clearing the entire area and removing old flooring, adhesives, and debris so the subfloor is clean and stable. Check for moisture problems by taping down a plastic sheet for 24–48 hours; if condensation forms, you’ll likely need a moisture barrier or subfloor repairs before installing kitchen basement floors. Then level the surface—fill low spots, repair cracks, and ensure the slab or subfloor is dry, solid, and flat for best results.
What moisture barrier is best for basement kitchen floors to prevent water damage?
In basements, moisture control is critical, especially for kitchens where spills and humidity are common. For concrete slabs, consider a vapor barrier such as a 6-mil polyethylene sheet with seams overlapped and sealed, followed by an appropriate underlayment if your flooring type requires it. If you suspect higher moisture levels, look into a more robust basement moisture mitigation system (like specialized membranes) to protect your flooring from warping and mold.
Which flooring types work best for kitchen basement floors?
For kitchen basement floors, moisture-resistant options are usually the safest choices, such as luxury vinyl plank (LVP), vinyl tile, porcelain tile, and waterproof laminate designed for basements. If you want warmth and comfort, engineered hardwood can work in some cases, but only with strong moisture control and proper acclimation. Avoid carpet in basements unless you have excellent moisture management, because it can trap dampness and lead to odor or mold.
How do I install LVP or vinyl flooring over a concrete basement slab?
First, make sure the concrete is clean, dry, and level—use a self-leveler if the floor has dips that exceed the product’s tolerance. Install a compatible underlayment or vapor barrier based on the LVP brand instructions, then allow planks to acclimate in the room temperature conditions before installing. Use manufacturer-recommended expansion gaps at walls and doorways, and ensure transitions are sealed or finished properly for a watertight kitchen basement flooring installation.
Why is proper leveling and underlayment important for kitchen basement floors?
Basement slabs often have uneven spots, and installing flooring over a flatness issue can cause gaps, squeaks, or premature wear. Underlayment also helps with moisture protection (when specified), sound reduction, and minor subfloor imperfections, which improves durability in high-traffic kitchen areas. Investing time in leveling and using the correct underlayment for your floor type can significantly reduce installation problems and extend the life of your basement flooring.
📅 Last Updated: October 11, 2026 | Topic: How to install in a kitchen basement floors? | Content verified for accuracy and freshness.
References
- Google Scholar Google Scholar
https://scholar.google.com/scholar?q=basement+floor+installation+concrete+moisture+vapor+barrier - Google Scholar Google Scholar
https://scholar.google.com/scholar?q=vinyl+flooring+installation+basement+concrete+humidity - Google Scholar Google Scholar
https://scholar.google.com/scholar?q=tile+floor+installation+basement+concrete+surface+preparation - https://www.epa.gov/mold/mold-and-mildew-basements
- https://www.cdc.gov/mold/default.htm
- Flooring
https://en.wikipedia.org/wiki/Flooring - https://www.britannica.com/technology/flooring
- https://pubmed.ncbi.nlm.nih.gov/?term=basement+humidity+mold+health
- Checking your browser – reCAPTCHA
https://www.ncbi.nlm.nih.gov/books/ - https://www.energy.gov/energysaver/basement-insulation