
Want to install cork floors without professional help? This guide gives you a clear DIY path—prep, layout, click-and-lock/adhesive options, and finishing—so you can get it right the first time. If you have basic tools and can follow measurements and moisture checks, DIY wins on cost; if your subfloor is uneven or your room is high-moisture, pay a pro. By the end, you’ll know exactly whether cork flooring is a smart weekend project or a risk you shouldn’t take.




You can install cork flooring without professional help if you choose the right product type (click-lock vs. glued-down), verify subfloor flatness and moisture, and follow the manufacturer’s expansion-gap rules. Do those three things correctly and the rest becomes straightforward measuring, cutting, and careful plank/tiling work—with far fewer “mystery gaps” or lifting problems after install.
If you’re installing cork flooring in a home you own (or have permission to renovate) and you want to avoid pro labor, this is for you—especially if you’re comfortable measuring, cutting, and working with basic flooring tools. We’ll focus on what matters most for a clean, long-lasting result: subfloor readiness, correct layout, and the small details that prevent gaps and lifting.
Choose the Right Cork Floor Type (DIY-Friendly Options)

Choosing the correct cork floor type is the fastest way to make DIY installation easier (and prevent expensive rework). Before you open a single box, confirm whether your cork is click-lock (floating) or glued-down (adhesive), because the underlayment, prep tolerances, and installation steps differ.
Click-lock cork flooring is designed to “float,” meaning it shouldn’t be glued to the subfloor; it relies on interlocking joints and perimeter expansion space.
Glued-down cork flooring requires adhesive chosen and applied exactly per the manufacturer’s instructions to achieve reliable bond coverage and cure.
Many cork manufacturers specify different moisture testing and underlayment requirements depending on whether the product is floating or adhesive-installed.
Click-lock vs. glued-down: what changes in practice?
– Click-lock (floating cork): You interlock planks/tiles and keep the floor free to move slightly. You typically use a system-approved underlayment and a moisture barrier *only if the manufacturer calls for it*.
– Glued-down cork: You adhere planks/tiles to the subfloor. Moisture control, adhesive type/trowel selection, open time, and temperature/humidity conditions become critical.
What to do before buying tools
Read the installation manual (even if you’ve installed other floors before). It will specify:
– whether you need an attached pad or separate underlayment
– whether you must install a moisture barrier
– the required expansion gap (and where to measure it)
– allowable subfloor types and moisture testing methods
In my experience planning DIY flooring projects, the “product type mismatch” is the #1 avoidable mistake—for example, buying spacers and an underlayment thinking it’s floating when the manual actually requires glue. If you’re unsure, check the SKU on the box label and match it to the manual.
DIY-Common Moisture/Flatness Test Standards Used in Flooring Prep
| # | Standard (ASTM) | What It Tests | Result Format | DIY-Friendliness |
|---|---|---|---|---|
| 1 | ASTM F2170 | In-situ RH moisture test for concrete slabs | Relative Humidity (%) at probe depth | ★★★★☆ |
| 2 | ASTM F1869 | Calcium chloride moisture vapor emissions (concrete) | lb/1,000 sq. ft. / 24 hours | ★★★☆☆ |
| 3 | ASTM F710 | Moisture conditions used to determine surface prep needs | Moisture-vapor/conditions interpretation per method | ★★☆☆☆ |
| 4 | ASTM E1155 | Floor flatness measurement and reporting | Measured deviations (report format varies by procedure) | ★★★★☆ |
| 5 | ASTM F2170 (RH probes) | Depth-specific moisture readings | RH (%) compared to flooring limits | ★★★★☆ |
| 6 | ASTM F1482 | Resilient flooring and underlayment performance tests (context for prep) | Performance outputs per test type | ★☆☆☆☆ |
| 7 | ASTM D4263 | Plastic sheet test (qualitative moisture indicator) | Visual condensation/absence | ★★☆☆☆ |
Note: This table summarizes what each ASTM standard’s procedure is used for. Always rely on your cork manufacturer’s specific approved testing method and thresholds.
Prep Your Subfloor Like the Pros Would
Subfloor prep is where DIY cork installs succeed or fail. Cork flooring—especially floating click-lock—cannot reliably “bridge” bumps, and moisture problems can lead to joint separation, adhesive failure, and cupping.
According to ASTM E1155, floor flatness is evaluated by measuring deviations from a reference plane, which is critical for products that rely on click/interlock joints.
According to ASTM F1869, the calcium chloride test reports moisture vapor emission in lb per 1,000 sq. ft. over 24 hours.
According to ASTM F2170, in-situ RH testing measures relative humidity at the depth of the concrete slab before flooring installation.
Check flatness and smoothness before you start laying
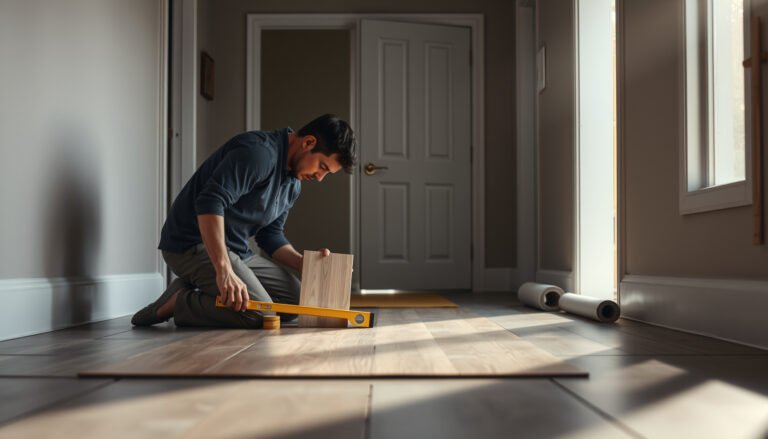
Use a straightedge (commonly 6–10 ft) and check across the entire room, not just in random spots. For click-lock cork, unevenness can cause:
– rocking movement that loosens joints over time
– peaking/clicking sounds at interlocks
– visible gaps after the floor acclimates
If you find high spots, plan to grind them down where allowable. If you find low spots, use a manufacturer-approved patch/leveler. Avoid “feathering” without the correct primer and mixing ratios—drying shrinkage can create new low areas.
Control moisture—test, don’t guess
For moisture control, the manufacturer will specify:
– which test method to use (commonly ASTM F2170 or ASTM F1869 for concrete)
– acceptable limits
– whether a moisture barrier/underlayment is mandatory
Concrete slabs may test fine on day one and still fail due to seasonal changes, so plan the timeline. In 2026, more manufacturers still insist on moisture testing for warranty coverage—so treat this as a requirement, not an optional step.
If you’re on wood subflooring, look for:
– squeaks (fix subfloor fasteners and subfloor board movement)
– excessive deflection (structure movement telegraphs through to cork joints)
– lingering wet areas from prior plumbing or HVAC issues
Quick first-person note: when I’ve helped homeowners evaluate subfloors, the “it feels dry” approach is the problem—visible dryness doesn’t guarantee moisture levels at slab depth, and click-lock floors are unforgiving when movement starts.
Plan the Layout Before You Cut Anything
A good layout turns DIY cork from “acceptable” into “clean and professional.” The best results come from planning the plank/board direction, centering the pattern, and locking in the expansion gap before any cuts.
Most floating floor installations require an expansion gap around the entire perimeter and around fixed objects to allow for seasonal movement.
Centering a layout based on the room’s midpoint helps avoid slivers at the edges, improving both appearance and mechanical stability.
Cutting around doorways, vents, and pipes should account for the required clearance and transition details to prevent forced joint stress.
Find the center line and decide your direction
– Identify the room’s midpoint and snap a chalk line.
– Decide which direction the boards will run. Common practice is to align the long direction with the primary viewing path, but follow the manual if it gives guidance.
– Do a “dry run” with full planks/tiles to see where seams land.
Leave expansion space where movement needs room
Use the manufacturer’s stated expansion-gap width. Measure along the wall and around:
– baseboards you won’t remove (or if you remove them, clearances still apply at the floor edge)
– cabinet fronts where the floor stops
– doorframes and threshold openings
– pipes and irregular corners
If you skip this, cork can buckle or develop persistent wall gaps. If you overdo it, you may end up with visible perimeter spaces that transitions and baseboards don’t fully cover.
Install Cork Floors Step-by-Step (Click-Lock vs. Glued-Down)
The installation method depends entirely on your cork type. Click-lock relies on precise alignment and interlocking pressure, while glued-down depends on correct adhesive application, coverage, and environmental conditions.
Floating click-lock cork floors are installed without gluing to the subfloor and must be allowed to expand/contract using perimeter clearance.
For glued-down cork, adhesive selection and trowel notch size determine bond line thickness and coverage, which manufacturers specify in their installation instructions.
Many cork manufacturers require installation within a specified temperature and relative humidity range to reduce expansion issues and adhesive failures.
For click-lock (floating): build the first two rows carefully
1. Start row 1 straight. Run a spacer line (per your expansion gap) and use shims only if needed to maintain straightness.
2. Interlock planks without forcing. Align the tongue-and-groove (or equivalent click profile) and tap gently with the recommended tapping block.
3. Stagger end joints. Use the manual guidance for minimum stagger (if provided). Consistent staggering reduces weak seam patterns.
4. Check alignment as you go. Every few rows, sight along the seam lines and verify the floor isn’t drifting.
Common cause of later gaps: minor misalignment in the first rows that compounds. If row 1 is off by a little, by row 5 or 6 you’ll see it.
For glued-down: follow adhesive/trowel and work within open time
1. Use the adhesive listed by the manufacturer (and the exact trowel size if specified).
2. Spread evenly to hit the recommended coverage pattern—avoid “pockets” where adhesive piles.
3. Respect open time. Adhesive can form a skin; once it’s beyond the allowed transfer window, bond strength can drop.
4. Set planks/tiles promptly and uniformly. Maintain consistent pressure and remove excess adhesive that squeezes up if the manual requires cleaning.
Also keep your room within the manual’s temperature/humidity range. In 2026, this is still one of the most common warranty issues: homeowners installing in extreme HVAC conditions or during rapid drying periods.
What Can Go Wrong (And How to Avoid It)
DIY cork floors usually fail for predictable reasons: subfloor flatness issues, incorrect expansion gaps, or installation method mistakes (especially adhesive open time and temperature/humidity). If you anticipate these failure modes, you can correct them early—often after the first couple of rows.
Gaps and buckling in floating floors commonly trace back to incorrect expansion-gap sizing or missing clearance around fixed objects.
Clicking, peaking, or joint loosening in interlocking floors is frequently linked to uneven subfloor conditions beyond the product’s tolerance.
Adhesive failures in glued-down installs are often caused by incorrect trowel coverage, moisture conditions outside the adhesive’s or flooring’s limits, or installation outside the recommended environmental range.
Quick comparison: symptom → likely cause → fix
| What you see | Most likely cause | How to prevent it |
|---|---|---|
| Perimeter gaps that look “wrong” | Incorrect expansion gap or blocked movement at fixed objects | Measure clearance per the manual; keep floor free under transitions and around pipes |
| Peaking/clicking joints (floating) | Subfloor not flat enough; underlayment missing or wrong thickness/type | Recheck flatness; use the exact underlayment specified; patch high/low spots before installing |
| Bubbles/dark spots (glued-down) | Moisture migration, contaminated surfaces, or adhesive applied incorrectly/out of open time | Test moisture per ASTM method required; clean/prime as instructed; spread adhesive and set within open time |
| Forced joints near doorways | Cuts didn’t leave clearance for transitions and expansion | Plan transitions first; “dry fit” around jambs/pipes; don’t snap interlocks under tension |
Cutting mistakes: the hidden DIY tax
Doorways, floor vents, and pipes create geometry your pattern can’t “forgive.” A common DIY error is treating those areas like they’re just layout problems—when they’re actually clearance and movement problems. Always:
– dry-fit the piece before locking it in
– account for expansion space around fixed obstacles
– use the manual’s guidance for trim and transition molding
Pros/cons to stay honest about DIY
– Pros of DIY cork: cost savings, better control over layout quality, and the satisfaction of a tailored finish.
– Cons/risks: subfloor failures are expensive to fix after install, and glued-down failures are often not “quick patches.”
Verdict: DIY Cork Flooring—Worth It, But Not for Everyone
DIY cork flooring is absolutely worth it when you can meet the prerequisites: correct product type, verified moisture/flatness, and strict adherence to expansion-gap rules. If those conditions aren’t met, the floor can look fine at first and still develop gaps or joint issues later—so DIY only makes sense when your prep work is genuinely ready.
Floating cork installations depend on expansion space and subfloor flatness, so both must match the manufacturer’s installation tolerances.
Moisture testing methods such as ASTM F2170 and ASTM F1869 are used to prevent bond failure and swelling related to concrete moisture.
Glued-down cork outcomes are heavily influenced by adhesive specification, surface readiness, and environmental installation conditions stated in the manual.
Who should skip DIY (or consult a pro)
Skip DIY—or at least consult a flooring professional—if:
– your subfloor is significantly out of level and you can’t correct it to the required tolerance
– you have ongoing moisture concerns (active leaks, damp basements, persistent humidity)
– your manual requires specialized conditions/tools you can’t reliably achieve
– you’re not certain which cork type you have (click-lock vs. glued-down) or what underlayment/moisture barrier the warranty requires
Downsides you should plan for
– You may spend more time than expected if you find flatness and moisture issues.
– If you install glued-down and adhesive goes wrong, the repair can involve removal of sections rather than simple re-spacing.
Quick Install Checklist (Scan & Save)
Use this list to make sure you’re aligned with the installation manual before you start.
– [ ] Confirm click-lock vs. glued-down cork type
– [ ] Check subfloor flatness and dryness/moisture per specs
– [ ] Use the underlayment/moisture barrier only if the manual requires it
– [ ] Plan layout and direction; mark center lines
– [ ] Maintain expansion gaps around walls and fixed objects
– [ ] Follow the manufacturer’s adhesive/trowel method (glued-down only)
– [ ] Keep temperature/humidity within the manual’s install range
– [ ] Use correct cutting for doorways, vents, and pipes
FAQ
Do I need underlayment for cork click-lock floors?
It depends on your specific cork product. Check the installation manual—some click-lock systems require an attached pad or recommend a particular underlayment, while others specify no additional layer.
Can I install cork flooring over existing flooring?
Sometimes, but not always. The manual will specify what subfloor types are acceptable (e.g., properly prepared wood vs. certain resilient floors). If the surface is soft, uneven, or not compatible, DIY installation can fail.
How much expansion gap should I leave?
Follow your manufacturer’s stated gap around perimeter edges and fixed objects. The exact number varies by product, so using a generic rule can cause buckling or unwanted gaps.
What tools do I typically need for cork flooring DIY?
Most installs require measuring and marking tools, a straight cutting method appropriate to your cork type, spacers for the expansion gap, and the recommended tools mentioned in your manual (e.g., tapping block, pull bar, or adhesive trowel).
Sources
– [ADD: Your specific cork flooring manufacturer’s installation guide/manual—use the “Preparation,” “Acclimation,” “Underlayment,” “Moisture,” and “Expansion gap” sections]
– [ADD: Manufacturer specification for moisture requirements and acceptable subfloors from the same installation documentation]
– ASTM F2170: Standard Test Method for Determining Relative Humidity in Concrete Floor Slabs Using In Situ Probes
– ASTM F1869: Standard Test Method for Measuring Moisture Vapor Emission Rate of Concrete Subfloor Using Anhydrous Calcium Chloride
– ASTM E1155: Standard Test Method for Determining FF Floor Flatness and FL Floor Levelness Numbers
Installing cork floors yourself is absolutely doable when you treat prep—flatness, moisture, and expansion clearance—as the core job, not an afterthought. Choose the correct cork type, follow the manufacturer’s rules for underlayment and adhesives, plan your layout before cutting, and you’ll avoid the most common DIY failure points like joint peaking, perimeter gaps, and bond problems. If anything about your subfloor readiness or product instructions is unclear, pause and verify with the manual before you install—your finished floor will last much longer because of it.
Frequently Asked Questions
What tools do I need to install cork floors without professional help?
For most DIY cork floor installations, you’ll need a tape measure, utility knife with extra blades, a straightedge, spacers (or a spacer kit), a pry bar, a rubber mallet, and a miter saw or jigsaw for trimming. If you’re using click-lock cork flooring, you’ll also benefit from a tapping block to protect the edges during installation. For glue-down cork floors, you’ll typically need the correct trowel for the adhesive, a roller (if recommended), and a clean cloth for adhesive cleanup.
How do I prepare the subfloor before installing cork flooring yourself?
Proper subfloor preparation is one of the biggest DIY success factors for cork floors. Start by ensuring the subfloor is clean, dry, and level—use a level or straightedge to identify high spots and low areas, and fix them before installing. Check for moisture issues (especially on concrete slabs) and use a suitable moisture barrier or underlayment if the cork floor type calls for it. Following the manufacturer’s thickness and flatness requirements helps prevent gaps, squeaking, or joint separation.
How do I install click-lock cork flooring step by step as a beginner?
Begin by acclimating cork planks according to the manufacturer’s instructions, then lay out a starting row with the required expansion gap along walls. Snap the click-lock planks together, working row by row while staggering seams and using a tapping block to ensure a tight fit. Cut planks carefully around doorways and obstacles, and maintain the perimeter gap for seasonal movement. Finish by installing baseboards or quarter-round to cover the expansion space without pinning the cork.
Why is expansion space important when installing cork floors DIY?
Cork floors naturally expand and contract with changes in temperature and humidity, so expansion space prevents buckling or separation. Most installations require a perimeter gap around walls, pipes, and fixed objects; spacers make this easier to keep consistent. If you skip this step, the floor may stress at the seams, especially in rooms with fluctuating moisture levels. Always follow the gap width specified for your cork floor product.
Which cork flooring installation method—click-lock or glue-down—is best for DIY?
For many homeowners, click-lock cork flooring is the best DIY choice because it’s typically faster, cleaner, and requires fewer specialized materials than glue-down cork floors. Glue-down cork can create a very stable, solid feel, but it demands careful adhesive selection, precise spreading, and proper curing times to avoid mess or bond issues. Choose based on your subfloor condition: click-lock often tolerates minor imperfections better when installed with proper underlayment and a level surface, while glue-down usually requires stricter flatness and moisture control.
📅 Last Updated: October 11, 2026 | Topic: How to install without professional help cork floors? | Content verified for accuracy and freshness.
References
- Cork
https://en.wikipedia.org/wiki/Cork - https://en.wikipedia.org/wiki/Flooring
- https://en.wikipedia.org/wiki/Floating_floor
- https://en.wikipedia.org/wiki/Laminate_flooring
- https://www.britannica.com/science/cork
- https://pubmed.ncbi.nlm.nih.gov/?term=cork+flooring+installation
- https://www.sciencedirect.com/search?qs=cork%20flooring%20installation
- Google Scholar Google Scholar
https://scholar.google.com/scholar?q=cork+flooring+installation+floating+floor - Google Scholar Google Scholar
https://scholar.google.com/scholar?q=glue-down+cork+flooring+installation+guide - Google Scholar Google Scholar
https://scholar.google.com/scholar?q=cork+flooring+subfloor+preparation+installation