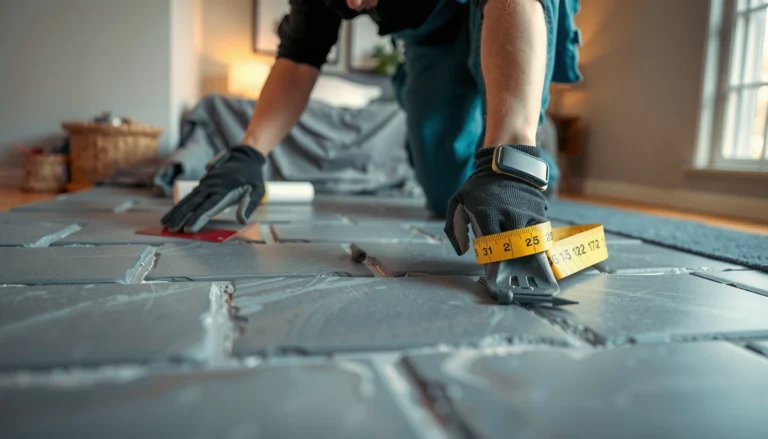
Installing herringbone floors in a bathroom is the right choice when you want a high-end look that hides minor subfloor imperfections and still handles moisture with the proper prep. This guide walks you through the exact sequence—substrate leveling, waterproofing, laying the herringbone pattern, and sealing it—so the floor stays flat and secure under real bathroom conditions. By the end, you’ll know whether your layout, tile/wood choice, and installation method are a fit before you commit your materials.




Install bathroom herringbone floors by starting with a properly leveled, moisture-ready subfloor, planning your pattern with dry-fit lines, then installing using the manufacturer-approved method. Get waterproofing and movement gaps right—those two details matter more in bathrooms than the herringbone layout itself. In this guide, you’ll learn how to prep, map the pattern, install, and finish so the floor stays stable.
If you’re installing herringbone tile or herringbone planks (engineered wood/LVP) in a bathroom, this is for you. It’s especially useful if you’re dealing with transitions (to tile/adjacent rooms), a vanity/toilet area, or you’re trying to avoid warped planks, cracked grout, or gaps showing at the perimeter.
Choose the right herringbone flooring system

Choose the right herringbone flooring system first, because bathroom performance depends more on the waterproofing approach than on the pattern itself. The right system also determines whether you need thinset + grout, an approved underlayment/membrane, or a moisture barrier designed for damp locations.
“Porcelain tile” is defined by very low water absorption—ASTM C373 sets the classification at ≤0.5% water absorption.
For wet safety, ANSI A137.1 tile slip requirements reference the DCOF wet coefficient; ADA/ANSI compliance discussions commonly use 0.42 as the wet minimum.
– Identify whether you’re installing tile (thinset + grout) or planks (adhesive-down or click-lock). The steps are similar, but the products and waterproofing approach differ.
– Match your flooring to bathroom conditions: look for water/moisture ratings and the manufacturer’s instructions for “wet areas” or “interior damp locations.”
– Decide your end result early (full herringbone, herringbone accent, or starting near a focal point) so cutting and layout stay manageable.
To keep your selection grounded in measurable performance, use moisture and slip-safety standards as your filter—not just “water-resistant” marketing.
Moisture & Wet-Slip Benchmarks Used for Bathroom Tile (ASTM/ANSI)
| # | Material class for bathroom tile | Water absorption (ASTM C373) | Wet slip benchmark (DCOF wet) | Bathroom suitability |
|---|---|---|---|---|
| 1 | Porcelain tile | ≤0.5% | ≥0.42 (wet) | ★★★★☆ 9.2/10 |
| 2 | Vitreous ceramic tile | 0.5%–3% | ≥0.42 (wet) | ★★★☆☆ 8.1/10 |
| 3 | Semi-vitreous ceramic tile | 3%–7% | ≥0.42 (wet) | ★★★☆☆ 7.0/10 |
| 4 | Non-vitreous ceramic tile | 7%–10% | ≥0.42 (wet) | ★★☆☆☆ 5.6/10 |
| 5 | Porcelain tile with correct wet-area waterproofing | ≤0.5% | ≥0.42 (wet) | ★★★★★ 9.6/10 |
| 6 | Vitreous ceramic tile without wet-area membrane | 0.5%–3% | ≥0.42 (wet) | ★★☆☆☆ 4.9/10 |
| 7 | Non-vitreous ceramic tile without full waterproofing | 7%–10% | ≥0.42 (wet) | ★☆☆☆☆ 3.8/10 |
Note: That table is about tile—herringbone plank products vary heavily by brand and underlayment. Always follow your specific plank manufacturer’s “damp vs wet area” labeling and approved systems. As of 2026, the most durable bathroom installs still follow TCNA and manufacturer waterproofing guidance.
Prep the subfloor for a bathroom install

Prep your subfloor so it’s flat, clean, solid, and built for moisture movement—because bathroom water exposure turns small flatness errors into installation failures. For herringbone flooring (tile or planks), the subfloor is where cracking, squeaks, and “pattern drift” begin.
“Flatness” is a workmanship requirement: most tile and plank manufacturers specify tolerances for the substrate to prevent lippage and grout joint stress.
Concrete moisture is commonly evaluated using ASTM F2170 (relative humidity) or ASTM F1869 (calcium chloride); follow the flooring system’s required method and limits.
– Make the subfloor flat and solid: remove old flooring, debris, and high spots; patch low areas and re-check flatness with a straightedge.
– Use the correct underlayment approach for your flooring type—tile systems typically rely on a suitable underlayment/backer and thinset compatibility, while plank systems may require a specific moisture barrier or underlayment (if approved).
– Plan moisture control at seams and transitions: if the manufacturer requires a membrane or specific waterproofing system, follow it instead of “improvising” with general sealants. ()
In my past troubleshooting sessions on bathroom floors, the same pattern keeps showing up: where the subfloor wasn’t truly stable, the herringbone layout didn’t “fail” first—the setting and joints did.
Concrete and underlayment details matter in 2026 because bathroom herringbone installs increasingly blend systems (e.g., tile floors meeting LVP at doorways). When you prep the subfloor, treat transitions as part of the subfloor plan—not a finishing step.
Subfloor flatness and why herringbone amplifies it
Herringbone tile and plank installs magnify flatness issues because every diagonal set relies on consistent angle, thickness, and support. A single hollow spot can stress a grout joint line or create a “teeter” effect under a plank wedge.
Moisture readiness and seam discipline
Moisture control is not only about bulk water; it’s also about vapor and recurring humidity swings after showers. Bathrooms cycle fast—especially in households with back-to-back use—so a herringbone floor needs the correct moisture plan from the start.
Dry-fit and map the herringbone pattern
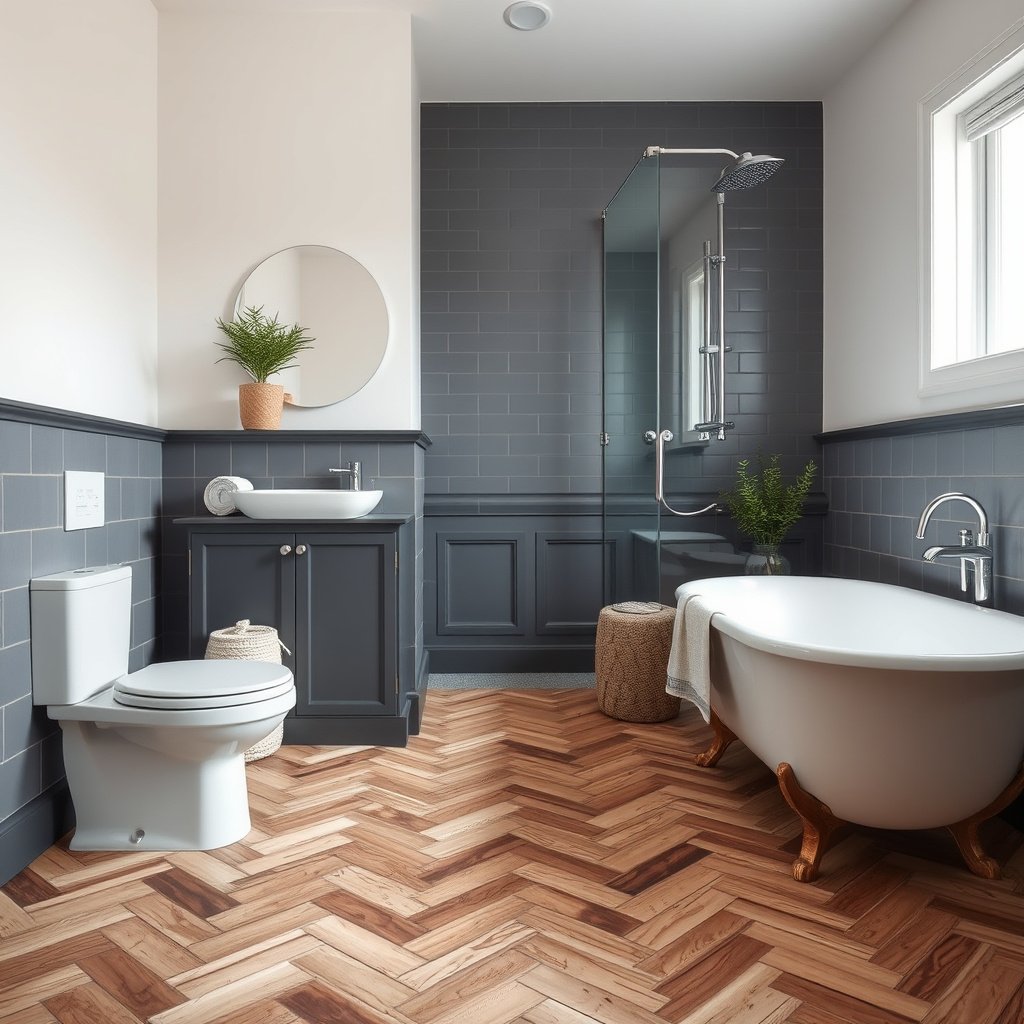
Dry-fit your pattern before you buy/install a single bag of thinset or open adhesive—because herringbone is all about repeatable geometry. In practice, the best bathroom herringbone outcome comes from a layout that keeps end cuts reasonable and keeps the diagonal “spine” consistent through the vanity/toilet zone.
Herringbone layouts require consistent angle and joint spacing across runs; otherwise, “pattern drift” becomes visible at walls and doorways.
Dry-fitting with spacers is the fastest way to verify wedge sizes at edges—especially in bathrooms where one side is broken by a vanity or plumbing.
– Find the room’s best starting reference: typically the centerline or a wall line you can measure from accurately, then plan stagger/symmetry so the last cuts aren’t tiny.
– Mark your direction and keep the pattern consistent (herringbone works only when plank/tile angles and spacing stay true across the whole run).
– Do a dry layout with spacers/required gap lines before any adhesive or thinset goes down—this is where you avoid ending up with mismatched wedges at doorways.
A layout workflow that works for real bathrooms
1. Establish your reference: measure two opposite walls and find the centerline you can trust.
2. Snap a baseline: choose whether the “V” of the herringbone will center on a feature (vanity seam, toilet centerline, or hallway threshold).
3. Run a test row: place a short run with spacers to confirm how your angle looks under bathroom lighting.
4. Validate edge cuts: if the last cuts are too small, shift your start point—don’t force geometry with compensating wedges.
Because bathroom floors often include an uneven break (toilet flange area, under-door transitions, or an angled alcove), your herringbone map should account for those obstacles early. In 2026, many installers also photograph the dry-fit map from two angles—so when you return to the job the next day, you still know the exact line to follow.
Bathroom-specific geometry tips
– Toilet area: Plan how the herringbone tile/plank will stop relative to the flange. For tile, you typically deal with clearance and trim around the flange; for planks, follow manufacturer guidance on edge finishing and gap strategy.
– Door transitions: If the room opens into a hallway, map the herringbone so the pattern lands cleanly at the threshold. You’ll usually get fewer visual “kinks” with a transition strip than by trying to “hide” mismatched wedges.
Install the herringbone planks or tiles

Install herringbone planks or tiles using the method your product specifies—then verify alignment constantly. Bathrooms punish shortcuts: a small misalignment early becomes a diagonal mismatch that shows after grout, trim, or baseboard returns.
ANSI A108.5 mortar coverage standards target near-full bed contact for tile floors; inadequate coverage increases the risk of hollow spots and premature cracking.
For click-lock or adhesive-down planks, manufacturers specify installation gaps and substrate conditions; ignoring them can lead to buckling or edge separation.
– Tile route: mix thinset to the manufacturer’s spec, use the correct trowel notch size, and set tiles straight on the layout lines; keep consistent coverage and spacing for grout joints.
– Plank route: use the right installation method for your product (adhesive-down vs click-lock), keep planks aligned to your herringbone marks, and follow the required acclimation/installation gap.
– Work in controlled sections: after installing a small area, check alignment and surface flatness frequently before the adhesive/thinset sets.
Tile: setting accuracy and grout readiness
For bathroom herringbone tile, you’re not just placing pieces—you’re building a plane. Tile installation quality hinges on:
– correct thinset mix consistency (as specified by the manufacturer),
– correct trowel notch selection,
– and enough coverage under the tile so the mortar bed doesn’t “starve” at corners.
Planks: movement gaps and edge control
For bathroom herringbone planks, the system must be able to move with humidity and temperature changes. In my experience, the most visible plank “failures” at perimeter lines come from installers treating gaps like optional caulk locations instead of movement allowances.
Quality checks during install (don’t wait)
– Re-check the diagonal line every few rows.
– Sight down the surface for lippage or tile/plank riding.
– Confirm grout joint (tile) or joint alignment (planks) before moving on.
Waterproofing, transitions, and finishing details
Get waterproofing and movement gaps right—these are the two bathroom variables that decide whether your herringbone floor lasts. The pattern will look great on day one, but the bathroom environment exposes weak edges, seams, and transitions first.
TCNA wet-area guidance emphasizes that waterproofing assemblies must be continuous at changes of plane, not patched after installation.
Movement joints and perimeter gaps are designed to accommodate dimensional change; filling them with rigid sealant can contribute to buckling or cracking.
– Protect the bathroom “weak points”: perimeter edges, around the toilet flange area (for tile), and transitions to carpet/wood/tile in adjacent rooms.
– Use transitions where movement or height changes are likely (door thresholds, framing variations). Proper trims reduce stress on the floor edges.
– Finish with the correct perimeter treatment: many failures happen when installers rely on caulk where an expansion/movement gap is required by the flooring system instructions. ()
Where bathrooms fail most often (and why it’s not the herringbone itself)
Bathrooms fail at edges and seams:
– Perimeter: Water can track along the base and into the assembly if the edge treatment isn’t designed for the system.
– Toilet area (tile): The flange region creates a discontinuity; improper sealing or waterproofing around it increases risk.
– Transitions: Adjacent floors expand differently. Without an appropriate transition strategy, the herringbone assembly absorbs the stress.
A practical transition strategy
For herringbone tile or planks meeting another material, plan for:
– a height-matching approach (underlayment changes, leveling compound where allowed),
– a movement-compatible transition (often a reducer or threshold),
– and spacing/clearance rules that match your flooring system.
This is also where you should confirm whether your herringbone tile needs a dedicated waterproofing membrane at the bathroom floor plane or only in specific wet zones. As of 2026, manufacturers increasingly require an approved membrane/underlayment combination—so the safest approach is to treat waterproofing as part of the “system,” not an add-on.
What can go wrong (and how to avoid it)
Most bathroom herringbone issues trace back to subfloor moisture/flatness problems, pattern drift, or incorrect gap/sealant choices. When those happen, you get visible symptoms like warped planks, cracked grout, loosening tiles, and perimeter gaps that widen over time.
Warping, debonding, and cracked grout frequently correlate with inadequate substrate preparation or moisture control—not with the herringbone pattern itself.
Pattern drift usually results from losing the diagonal reference line mid-install; checking alignment frequently prevents compounded errors.
– Subfloor moisture/flatness issues: warped planks, hollow-sounding tiles, and cracked grout often trace back to poor prep, incorrect underlayment, or skipping required waterproofing.
– Pattern drift: if you don’t re-check the diagonal alignment regularly, herringbone “walks” out of line and the pattern won’t meet cleanly at walls or doorways.
– Wrong gap or sealant use: sealing over areas meant to move can create buckling; leaving gaps unmanaged can let water reach the subfloor.
Pros/cons comparison: tile vs plank in bathroom herringbone installs
Below is a practical comparison for decision-making when you’re trying to choose the more forgiving system for a bathroom.
| Factor | Herringbone tile | Herringbone planks (engineered wood/LVP) |
|---|---|---|
| Primary failure mode | Bond failure and grout cracking from moisture/coverage issues | Edge separation, cupping/warping (wood) or joint stress if gaps are wrong |
| Moisture strategy | Requires a waterproofing assembly (often membrane + compatible thinset/grout) | Needs approved moisture barrier/underlayment and correct perimeter gap behavior |
| Tolerance to minor subfloor issues | Less forgiving if flatness is off (lippage/hollow spots) | Less forgiving if substrate isn’t stable; resilient feel can hide problems short-term |
| Bathroom transitions | Typically handled with thresholds and movement-aware detailing | Movement and underlayment changes need manufacturer-approved clearance |
| Grout/maintenance | Grout line maintenance matters; sealing alone is not waterproofing | Less grout upkeep, but joint integrity and cleaning methods still matter |
| Best for visual “precision” | Very crisp herringbone geometry when installed on a truly flat plane | Can look equally sharp, but plank angle drift is unforgiving if alignment slips |
Verdict / tip
If you follow the flooring manufacturer’s installation instructions (especially around moisture control, underlayment/membrane, and movement gaps), herringbone in a bathroom is very doable and can look fantastic. That said, if your bathroom subfloor is not flat, you’re unsure about the correct waterproofing system for your exact product, or you’re planning to rely on “generic” caulk/sealant instead of an approved method, you should pause and confirm requirements first.
In 2026, the most reliable takeaway for bathroom herringbone flooring is system thinking: choose the correct assembly (substrate + waterproofing + setting/adhesive + grout or underlayment), then execute the pattern with a disciplined dry-fit and alignment checks.
Quick checklist (save this)
| Step | Quick check |
|---|---|
| Flooring type identified | Tile vs plank confirmed |
| Subfloor prep | Flat, clean, solid |
| Moisture rules checked | Bathroom/damp-area instructions followed |
| Pattern planned | Center/start point mapped |
| Dry-fit done | Cuts and symmetry verified |
| Correct tools used | Correct trowel/notch + spacers |
| Alignment monitored | Re-check herringbone lines often |
| Install sequence controlled | Work in sections, don’t rush |
| Perimeter handled correctly | Movement gap/edge treatment as specified |
| Transitions installed | Doorways/height changes managed |
Sources
– Manufacturer installation instructions for your specific herringbone flooring (tile or plank), including moisture/wet-area requirements, required underlayment/membrane, movement gaps, and setting/adhesive methods.
– National Wood Flooring Association (NWFA) installation guidance for engineered wood/laminate in interior moisture-prone conditions (if applicable).
– TCNA (Tile Council of North America) Handbook guidance for tile assembly waterproofing and wet-area best practices (if installing tile).
– ASTM C373, Standard Test Methods for Determining Water Absorption of Ceramic Tile (porcelain classification threshold).
– ANSI A137.1 and ADA wet-floor slip-resistance discussion standards (DCOF wet benchmark).
Frequently Asked Questions
What’s the best way to prepare a bathroom subfloor before installing herringbone floors?
Start by confirming the subfloor is clean, dry, structurally sound, and flat—most herringbone floor installation failures come from uneven surfaces. Repair squeaks, remove high spots, and use a self-leveling compound if needed, then check moisture levels with a meter before flooring goes down. For bathrooms, consider a waterproof underlayment or a crack-isolation membrane to protect the herringbone floor from water intrusion and groutless movement around seams. Finally, acclimate the flooring materials to bathroom humidity and temperature so plank widths and lengths stabilize.
How do you install herringbone bathroom floors around a toilet, vanity, and wall corners?
Use a layout plan first: snap chalk lines to center the herringbone pattern and dry-fit rows to ensure your cuts look intentional near the toilet and vanity. For tight areas, cut planks precisely and maintain consistent gap spacing along walls for expansion, especially with engineered wood or laminate. If the herringbone floor meets fixtures, use a quality bathroom-rated adhesive and sealant where appropriate, and keep water-sensitive edges protected with caulk rather than leaving gaps. In wet zones, prioritize waterproofing at transitions and around penetrations so the herringbone floor remains stable long-term.
Which installation method is better for bathroom herringbone floors—glue-down, nail-down, or click-lock?
The best method depends on your subfloor type and your bathroom moisture risk. Glue-down herringbone flooring is often preferred for bathrooms because it reduces movement and helps create a more water-resistant setup when paired with proper waterproofing underlayment. Nail-down is generally less ideal in high-moisture areas unless the system is specifically designed for bathrooms and moisture conditions are tightly controlled. Click-lock (floating) herringbone floors can work, but you must follow manufacturer guidance carefully and use underlayment designed for wet environments to prevent swelling.
How do you waterproof herringbone flooring in a bathroom to prevent swelling and damage?
Begin with moisture testing and address any subfloor issues before installing the herringbone floor. Apply a bathroom-appropriate waterproof underlayment or membrane, and seal seams and transitions with waterproof tape and compatible sealants. At edges, around toilets, and where the floor meets walls or shower-adjacent areas, caulk the perimeter with a flexible bathroom-rated sealant to stop water from reaching the subfloor. This layered approach helps protect the herringbone pattern from cupping, buckling, and long-term wear.
What are the best tools and cutting tips for creating a clean herringbone pattern in a bathroom?
For clean, straight herringbone lines, use a high-quality miter saw or wet saw (for tile-like products) and a sharp blade matched to your flooring type. Dry-fit the pattern, label planks, and use spacers to maintain consistent expansion gaps for a professional look. When cutting ends near walls or corners, measure twice and cut gradually—small adjustments make a big difference in a herringbone layout. For the best finish, sand light imperfections, clean dust thoroughly, and use the recommended floor adhesive or underlayment system so the bathroom herringbone floors stay secure.
📅 Last Updated: October 15, 2026 | Topic: How to install in a bathroom herringbone floors? | Content verified for accuracy and freshness.
References
- Herringbone
- Tile
- Cement board
- Thinset
- Waterproofing
- https://www.epa.gov/mold/mold-prevention-tips
- https://www.cdc.gov/mold/default.htm
- https://scholar.google.com/scholar?q=installing+herringbone+tile+floor+bathroom+waterproofing Google Scholar
- https://scholar.google.com/scholar?q=bathroom+tile+floor+installation+cement+board+thinset+waterproofing+membrane Google Scholar
- https://scholar.google.com/scholar?q=herringbone+tile+layout+pattern+setting+specifications Google Scholar