
Want a reliable way to install commercial floors? This step-by-step guide walks you through prepping the subfloor, laying the material, and finishing to meet real-world commercial durability standards. If you follow these instructions in order, you’ll avoid the most common installation mistakes and get a clean, long-lasting result.




Commercial floors install best when you treat prep (level, clean, dry subfloor) as the main job and then follow the exact product system (glue-down, click-lock, sheet seaming, etc.) for acclimation, adhesive, and curing. In practice, the difference between “looks great” and “still solid after heavy traffic” is usually moisture control, flatness, and staying inside the manufacturer’s installation limits.
This guide is built for facility managers, contractors, and DIYers working on retail, office, school, or light industrial spaces—especially where durability, frequent foot traffic, and tight maintenance windows matter. If you need to avoid expensive redo work, you’ll want to nail subfloor prep, layout, and the specific installation requirements for your flooring system the first time (because commercial failures tend to show up fast, not gradually).
>
Commercial flooring performance is driven primarily by subfloor flatness, dryness, and system-specific installation steps like acclimation, adhesive selection, and curing time.
>
Most warranty disputes for resilient and laminate flooring trace back to incomplete prep (moisture/flatness) or installing outside the manufacturer’s method and tolerances.
Plan the Commercial Floor System (Material + Specs)
You’ll get the best outcome when you plan the flooring “system,” not just the top layer. Start by confirming the commercial flooring type, traffic conditions, and the exact installation method the manufacturer specifies—because glue-down, click-lock, and sheet goods each require different subfloor and process controls.
Before you open boxes, confirm your product category and requirements: LVT/LVP, carpet tile, vinyl sheet, laminate, rubber, and similar systems behave differently under commercial stress. For example, resilient floors (like LVT/LVP) typically depend on bond integrity and flatness, while click-lock products depend on clean, stable flatness and correct expansion/perimeter rules. Carpet tile and rubber often have their own underlayment and seam/edge handling requirements too.
Also plan your room geometry early. Seams and transitions (doorways, lifts, planters, floor drains, baseboard changes) should be located where they’re easiest to maintain and where your flooring system can handle movement.
What to verify before you buy extra tools or materials
– Traffic + environment: rolling carts, wheeled chairs, mop water frequency, direct sunlight, temperature swings, humidity.
– Subfloor type: concrete slab, plywood/OSB, old resilient, terrazzo, ceramic tile (overlay rules vary).
– Install method constraints: some systems require specific adhesives, trowels, or approved primers.
>
Before installation, the manufacturer’s spec sheet governs subfloor prep, adhesive method (if any), underlayment rules, and acclimation/stabilization conditions.
>
For most commercial resilient and laminate installs, layout planning is critical because seam placement and direction can reduce visible gapping and stress concentration.
>
If your space has frequent temperature/humidity swings, you must plan for movement with perimeter spacing and correct transition details.
Prepare the Subfloor Correctly (This Drives Results)
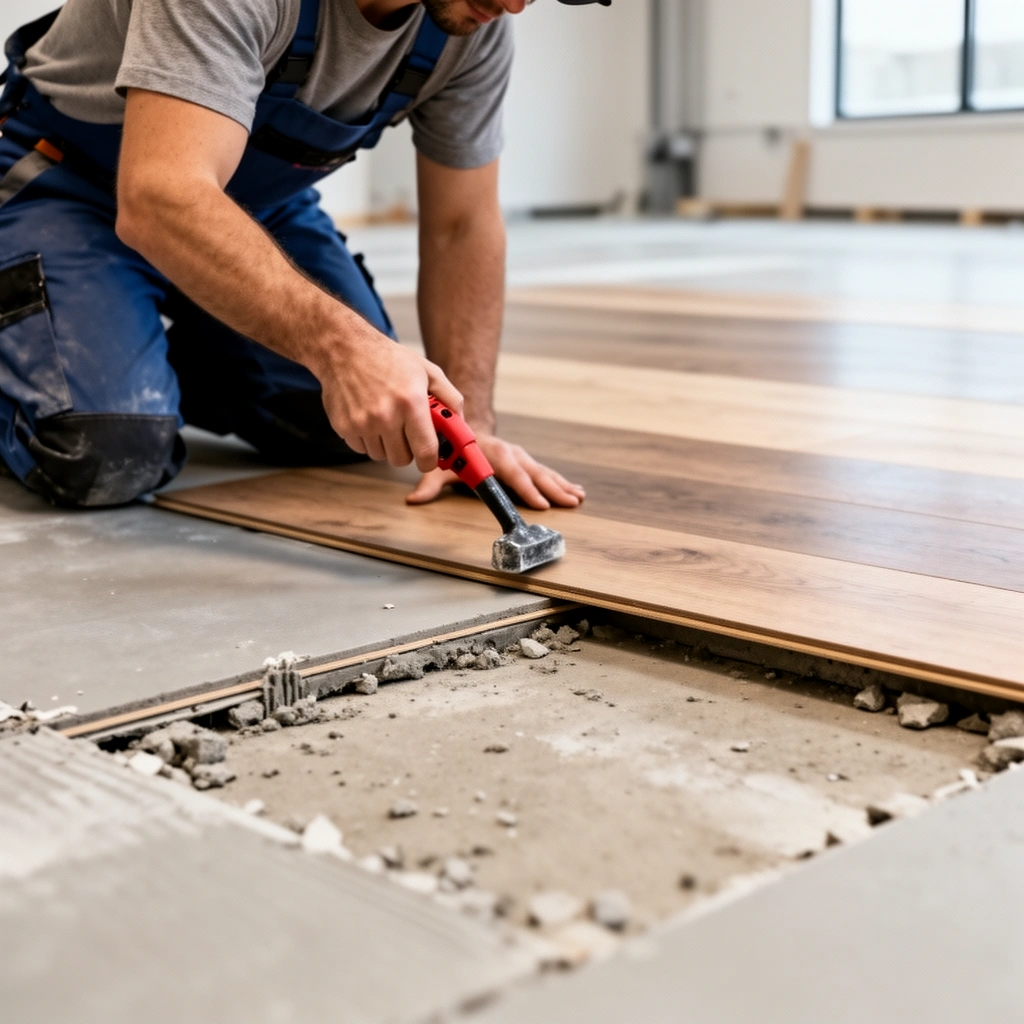
A commercial floor lasts when the substrate is clean, structurally sound, and within the required flatness and moisture limits. Preparation is where most premature failures begin—bubbles, loose edges, and lifting usually aren’t “random,” they’re symptoms of bond failure or movement.
Start with surface condition:
– Remove contamination: paint overspray, drywall mud, dust, old adhesives (only if allowed), caulk ridges, and high ridges.
– Make it dry: most commercial flooring failures tie back to moisture vapor transmission or wet surfaces that prevent adhesive performance.
– Make it stable: fix loose tiles, delaminating underlayment, or unstable patched areas before flooring goes down.
Then measure flatness. Don’t rely on the idea that “resilient flooring will compress.” Many commercial systems still telegraph subfloor waves into the finished surface, especially in high-traffic entry zones and along seam lines. If flatness is out of tolerance, correct it using approved patch/leveling compounds compatible with your flooring system and expected moisture conditions.
Moisture and flatness are separate requirements
These are two different checks that should be treated independently:
– Moisture testing: confirm emissions and/or in-situ relative humidity using the test method required by the adhesive or flooring warranty.
– Flatness testing: verify tolerance over the required measuring intervals (and address high spots/low spots accordingly).
According to the ASTM installation and testing framework widely used in flooring work, moisture testing protocols include methods like ASTM F1869 (calcium chloride) and ASTM F2170 (in-situ RH). Many commercial flooring/adhesive instructions set acceptance thresholds (often expressed as pounds/1000 sq ft/24h for F1869 and % RH for F2170), but your exact limits must come from your product’s documentation. [ADD: source—ASTM F1869 and/or ASTM F2170 standard and your specific flooring/adhesive limits from the manufacturer]
>
A clean, dry, smooth substrate is not optional for commercial resilient and laminate installs—adhesive systems depend on direct contact and stable surfaces to prevent edge lift.
>
Flatness tolerances apply before flooring goes down; “compression” is not a substitute for correcting high/low spots.
Acclimate Materials and Set Up for Layout
You’ll reduce gapping and seam issues by acclimating materials to the jobsite conditions and setting reference lines before installation. Commercial spaces are more likely to experience HVAC cycling, after-hours humidity changes, and uneven temperature zones—so skipping acclimation is a common root cause of movement after the floor “settles.”
Follow the manufacturer’s acclimation/stabilization instructions exactly. Requirements vary by product—some specify temperature/humidity ranges and a timeframe, while others require materials to remain on-site in a controlled environment for a set period. If the space is occupied, you may need a phased plan to avoid shutting down HVAC or creating extreme drafts.
Then handle layout:
– Dry-lay or plan seams when you need consistent appearance, especially for modular products like LVT, tile, and carpet tile.
– Establish reference lines to keep rows straight and minimize awkward cuts at walls or doorways.
– Plan for perimeter movement using the product’s expansion gap guidance and transition details.
Keep movement in mind
Even rigid-looking flooring systems move with moisture and temperature. That movement shows up as:
– Gapping (often too-tight placement or incomplete expansion space)
– Buckling (often severe moisture/flatness problems or failure to allow movement)
– Seam stress (often seam placement errors or wrong installation direction)
>
Acclimation instructions are product-specific because different flooring cores and backing materials react differently to humidity and temperature.
>
Establishing a layout baseline helps maintain consistent plank/tile alignment and prevents seam drift that becomes visible under overhead lighting.
>
Expansion gaps and transitions must match the flooring system—using the wrong gap size can be enough to cause early seam separation.
Install the Commercial Flooring (Follow the Method)
The install is “straightforward” only when you use the correct method and sequence for your specific product. Commercial floors are engineered as systems: adhesives (if required), trowel size/coverage, underlayment rules, locking methods, and seam procedures all work together.
Use the right approach based on your flooring type:
Glue-down / bonded resilient (LVT/LVP, some rubber)
– Apply adhesive using the right trowel/notch and respect coverage and open/flash times.
– Maintain a consistent installation rhythm so adhesive doesn’t skin over before pieces are set.
– Use seam/edge handling practices recommended by the manufacturer.
– Follow rolling/pressing steps if specified, and avoid foot traffic until cure time completes.
Click-lock floating floors (many laminate and some LVP)
– Use approved underlayment (or none, if the system says none).
– Ensure subfloor stability and flatness—click-lock products can separate at joints if the substrate moves.
– Lock each piece with the manufacturer’s method, avoiding force that can indicate flatness/layout issues.
– Maintain perimeter spacing and correct transition heights.
Carpet tile and sheet vinyl
– Carpet tile needs consistent placement and backing/adhesion rules (especially for modular patterns and transitions).
– Sheet vinyl requires correct seaming (often heat-weld or approved cold-applied products depending on the flooring) and proper rolling/pressing.
In my experience helping teams troubleshoot commercial installs (for example, resolving recurring seam lift near doorways), I’ve repeatedly seen the same pattern: when the adhesive trowel/timing is off by even a small margin, “good-looking” early installation can degrade quickly in traffic-heavy zones. If you’re unsure, [ADD: your site-specific adhesive method and what the manufacturer requires for open/flash time and rolling/weighting].
>
Adhesive bonding quality depends on correct trowel selection, proper open time, and full contact—not just “spreading glue and setting the floor.”
>
For click-lock systems, correct locking technique and substrate stability are what prevent joint separation under rolling loads.
Finish the Edges, Transitions, and Seams
You protect long-term performance by treating edges, transitions, and seams as high-stress details—not finishing extras. Most commercial complaints appear at the perimeter first (baseboard and transitions pulling, seam edges lifting), because that’s where movement and exposure are greatest.
Key finishing tasks:
– Perimeter details: install baseboards/quarter round using fastening methods compatible with the flooring system (do not trap flooring movement).
– Transitions: reducers and thresholds should be installed so they don’t pry up edges.
– Seams/joints: follow the flooring system’s seam allowance, alignment, and sealing method (heat welding for sheet vinyl is common where required; cold-applied seam products may be specified for other sheet/resilient systems).
Roll, cure, and traffic control
Many failures aren’t visible until weeks later because early curing/traffic control wasn’t followed. For glue-down resilient floors, manufacturers frequently require rolling and specific cure times before foot traffic and chair/rolling equipment use.
At a practical level, plan for:
– When the space can reopen
– How you control tracked dirt during cure
– How you prevent rolling loads (carts, lifts, cleaners) from stressing joints early
>
Cure and traffic restrictions are part of the installation system; walking too soon can weaken bonds before adhesive reaches full strength.
>
Seam and transition hardware must be installed to allow designed movement while preventing edge peel under daily traffic.
What Can Go Wrong (Common Commercial Floor Installation Mistakes)
Most commercial floor problems come from predictable installation errors. If you want fewer lifts, fewer gaps, and less premature wear, focus on the failures below—and build your workflow to prevent them.
Common mistakes that cause lift, gapping, and early wear
1. Skipping acclimation/stabilization
The floor material responds to indoor humidity/temperature after install, leading to gapping or stress at seams.
2. Ignoring moisture or using the wrong test approach
Moisture vapor transmission can prevent adhesives from bonding properly and can contribute to edge lift and curling.
3. Incorrect flatness tolerance
High spots create point loads and cause weak contact; low spots create stress concentration at joints.
4. Wrong adhesive or wrong trowel size
Bond strength depends on the adhesive’s transfer and coverage. Too little adhesive or too much can both be harmful.
5. Improper seam method
Sheet goods and some resilient systems require specified seam joining procedures. Using the wrong seaming product or technique can cause visible separation.
Pros/cons: system choice and risk tradeoffs (quick decision support)
| Installation System | Pros (Commercial Strength) | Cons (Where Failures Start) |
|---|---|---|
| Glue-down resilient (LVT/LVP) | Strong bond when flatness/moisture are controlled | Adhesive timing/trowel errors can cause edge lift |
| Click-lock floating floors | Faster install with fewer adhesives | Poor flatness can lead to joint gapping |
| Sheet vinyl (seamed) | Continuous surface can reduce seam issues | Seaming method errors show up quickly under wear |
| Carpet tile | Modular replacement and tolerance of minor irregularities | Layout errors can cause pattern drift and visible transitions |
>
Moisture, flatness, and adhesive method are linked; fixing only one while ignoring the others commonly leads to repeat failures.
>
Commercial lift and gapping usually appear at edges and seams first, making perimeter planning and transition fastening critical.
Typical Maximum Subfloor Flatness Targets Used in Commercial Specs (Measured Over 10 ft)
| # | Flooring system (commercial) | Max variation over 10 ft | Why it’s strict | Install risk if missed |
|---|---|---|---|---|
| 1 | LVT/LVP (glue-down) | 3/16 in (4.8 mm) | Bond contact & edge lift resistance | ★★★☆☆ |
| 2 | LVP (click-lock) | 1/8 in (3.2 mm) | Joint gapping under movement | ★★★☆☆ |
| 3 | Laminate (floating) | 3/16 in (4.8 mm) | Locking system stress & squeaks | ★★★☆☆ |
| 4 | Carpet tile (modular) | 1/8 in (3.2 mm) | Wrinkles & telegraphing ridges | ★★☆☆☆ |
| 5 | Sheet vinyl (seamed) | 3/16 in (4.8 mm) | Seam visibility & surface contour | ★★★☆☆ |
| 6 | Rubber (rolled or tile) | 1/8 in (3.2 mm) | Edge curl & joint telegraphing | ★★★☆☆ |
| 7 | Resilient (loose-lay with backing) | 1/8 in (3.2 mm) | Dimensional stability & movement control | ★★☆☆☆ |
Note: These flatness targets are common values used in commercial installation guidance and product requirements; always verify the specific tolerance in your flooring manufacturer’s instructions and your adhesive/underlayment specs. [ADD: source for flatness tolerance guidance—manufacturer docs and/or RFCI/industry installation guideline]
Verdict / Tip (When to DIY vs. When to Hire)
Commercial flooring installation can be a solid DIY or in-house project only if you can verify subfloor flatness/moisture condition and strictly follow the manufacturer’s acclimation, adhesive, seam, and cure timing requirements. If your environment is complex—busy facilities with limited downtime—adhesive cure time and drying windows can delay reopening, and rework can be significantly more disruptive than the labor you hoped to save.
For example, if you’re installing glue-down resilient flooring, your schedule is constrained by adhesive open time, cure time, and traffic restrictions. If you can’t reliably control foot traffic and rolling loads until cure completes, you’re setting the floor up for early bond stress. In those cases, hiring an experienced commercial installer is often the safer option.
Skip DIY (or at least bring in help for the most critical steps) if:
– You can’t measure flatness to the product’s tolerance
– Moisture testing isn’t feasible or results are borderline
– Your project includes complex transitions, frequent door traffic, or intricate seam requirements
– You lack the correct trowel/seaming/rolling tools required by the manufacturer
>
DIY is best when the subfloor is already in-spec and the installation method matches your tools and schedule; it becomes risky when moisture/flatness is uncertain.
>
In occupied commercial spaces, adhesive curing and traffic control can determine whether the schedule works—so downtime constraints should drive the DIY vs. hire decision.
Quick Checklist (Scan Before You Start)
– Verify floor type is suitable for your space and traffic level
– Read manufacturer requirements for subfloor flatness + moisture limits
– Acclimate materials per instructions (temperature/humidity + timing)
– Confirm layout plan for seams/transitions and reference line strategy
– Use the correct installation method (glue-down vs click-lock vs sheet seams)
– Use correct adhesive/trowel/seam materials (where required)
– Respect cure/traffic timing before the space reopens
FAQ
How do I know if my subfloor is “flat enough” for commercial flooring?
Check the manufacturer’s flatness tolerances for your specific product, then measure and correct issues rather than assuming the new floor will “level itself.” If flatness guidance isn’t provided, [ADD: reference to RFCI installation guidance or ASTM-based flatness standard you will use] should be referenced.
Do commercial floors need to be acclimated?
Most flooring products specify acclimation or stabilization requirements based on temperature/humidity. Follow the manufacturer’s timeframe and conditions for your exact product.
What’s the biggest cause of floors lifting or separating?
Incorrect or incomplete prep—especially moisture problems, dusty surfaces, unstable subfloors, or using the wrong adhesive/seaming method—commonly leads to poor adhesion at edges and seams.
Can I install over old adhesive residue or patch material?
Sometimes, but only if the manufacturer allows it and the surface is properly prepared and meets flatness/moisture requirements. When in doubt, [ADD: reference to manufacturer rule for overlaying old adhesive/residue] should be followed.
How long should I wait before reopening a commercial space?
Wait times vary by flooring type and adhesive/seaming products; follow the manufacturer’s cure/traffic recommendations. If you don’t have them, [ADD: exact product documentation name/section] should be used.
Sources
– [ADD: Manufacturer installation guide/spec sheet for your specific commercial flooring product—subfloor prep, acclimation, adhesive/seam requirements, flatness/moisture limits]
– [ADD: Manufacturer recommendations for cure times/rolling/traffic restrictions from the same installation documentation]
– ASTM standards referenced for moisture testing methods: [ADD: ASTM F1869 and ASTM F2170 standard references]
– Industry installation guidance: [ADD: RFCI or equivalent authoritative installation guideline reference]
A well-installed commercial floor is the result of a simple principle: prep the substrate to spec, follow the product’s exact installation system, and control moisture and timing until the floor reaches full performance. If you approach commercial flooring like a controlled system rather than a quick cover-up, you’ll typically avoid the most expensive outcomes—lifts, gaps, and premature wear—while keeping your facility on schedule.
Frequently Asked Questions
What tools and materials do I need to install commercial floors correctly?
You’ll typically need a measuring tape, chalk line, moisture meter, floor scraper, leveling compound (if required), adhesive or underlayment, and the right blades or flooring installation tools for your material. For commercial vinyl, LVT, or carpet tile you may also need a roller, seam roller, and heat/utility tools, while laminate or engineered wood often requires spacers and a tapping block. Make sure you choose products rated for commercial use, including adhesives that meet the floor manufacturer’s specifications.
How do I prepare the subfloor before installing commercial floors?
Proper subfloor preparation is one of the biggest factors in commercial floor performance and warranty approval. Remove old adhesive, paint, and debris, then check for flatness, damage, and moisture; repair low spots with a suitable self-leveler and fill cracks using the recommended patch system. If moisture is a concern, use the correct moisture barrier for commercial flooring and follow the curing times before you begin installation.
How do I choose the right installation method for commercial floors (glue-down, click-lock, or floating)?
The best method depends on the flooring type, subfloor condition, and how the space will be used (foot traffic, rolling loads, and maintenance routines). Glue-down systems provide strong adhesion and stability, making them common for commercial vinyl and certain resilient floors, but they require proper surface bonding conditions. Click-lock or floating floors can be faster to install, yet they still need flat, clean subfloors and careful attention to expansion gaps and underlayment requirements.
Which layout and acclimation steps help prevent seams and buckling when installing commercial floors?
Plan your layout before installation by dry-laying sections to minimize awkward cuts near doorways and aligning planks or tiles for consistent visuals. Acclimate flooring to the building’s temperature and humidity per the manufacturer’s guidelines, especially for vinyl, laminate, and engineered wood, to reduce the risk of dimensional changes. Maintain required expansion gaps around walls and fixed objects, and use proper seam/edge treatment so commercial floor installations look uniform and perform well under heavy traffic.
Why is proper maintenance important after installing commercial floors, and what should I do first?
Commercial floors face high wear, so immediate post-install care helps protect seams, joints, and the surface finish. Follow the manufacturer’s recommended cure time for adhesives and allow floors to fully set before heavy cleaning or moving equipment onto the area. Use the correct cleaning products and maintenance schedule—such as non-abrasive cleaners and routine inspections for lifting edges or damaged tiles—to extend the lifespan of your commercial flooring installation.
📅 Last Updated: October 12, 2026 | Topic: How to install commercial floors? | Content verified for accuracy and freshness.
References
- Google Scholar Google Scholar
https://scholar.google.com/scholar?q=commercial+flooring+installation+guidelines - Google Scholar Google Scholar
https://scholar.google.com/scholar?q=resilient+flooring+installation+moisture+subfloor+best+practices - Google Scholar Google Scholar
https://scholar.google.com/scholar?q=hardwood+floor+installation+commercial+buildings+subfloor+preparation - https://en.wikipedia.org/wiki/Flooring
- Home | Occupational Safety and Health Administration
https://www.osha.gov/ - NWFA | National Wood Flooring Association
https://www.nwfa.org/ - https://www.rfcisa.org/
- Home – The Carpet and Rug Institute
https://www.carpet-rug.org/ - https://www.tileusa.com/
- ASTM International | ASTM
https://www.astm.org/