
Protecting basement floors starts with waterproofing the slab from the outside and stopping moisture before it ever reaches your concrete. If you seal cracks, manage surface drainage, and install a proper foundation membrane or exterior waterproofing system, you get the most reliable defense against seepage and damp basements. Follow those practical steps and you’ll prevent the problems that floor coatings and patching alone can’t solve.
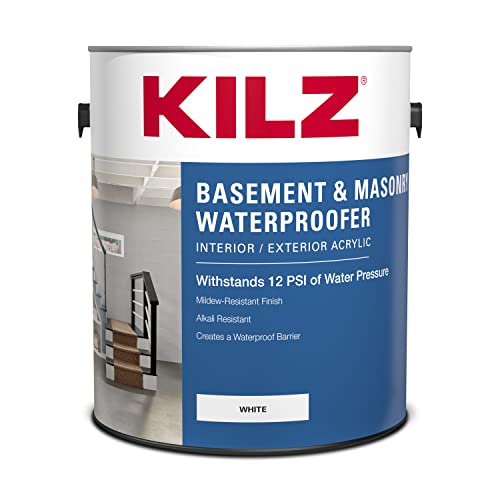

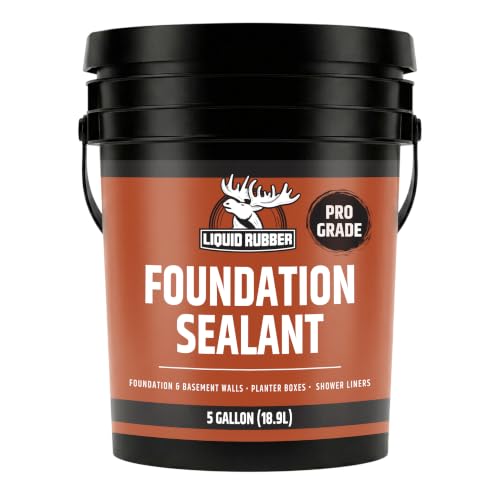

Protecting basement floors comes down to stopping moisture at the source (cracks, leaks, humidity) and then adding the right protective surface layer for your slab and usage. If you do only one or the other, coatings can fail early—so the most reliable approach is: moisture control first, durable floor protection second, with decisions tailored to dampness vs. condensation vs. occasional water.
If your basement has musty odors, visible damp spots, peeling paint, or frequent condensation, the steps below will help you reduce risk and keep the floor in better shape. The right approach depends on whether your floor is bare concrete, painted, sealed, or already has coatings/patches.
Identify the floor type and moisture source
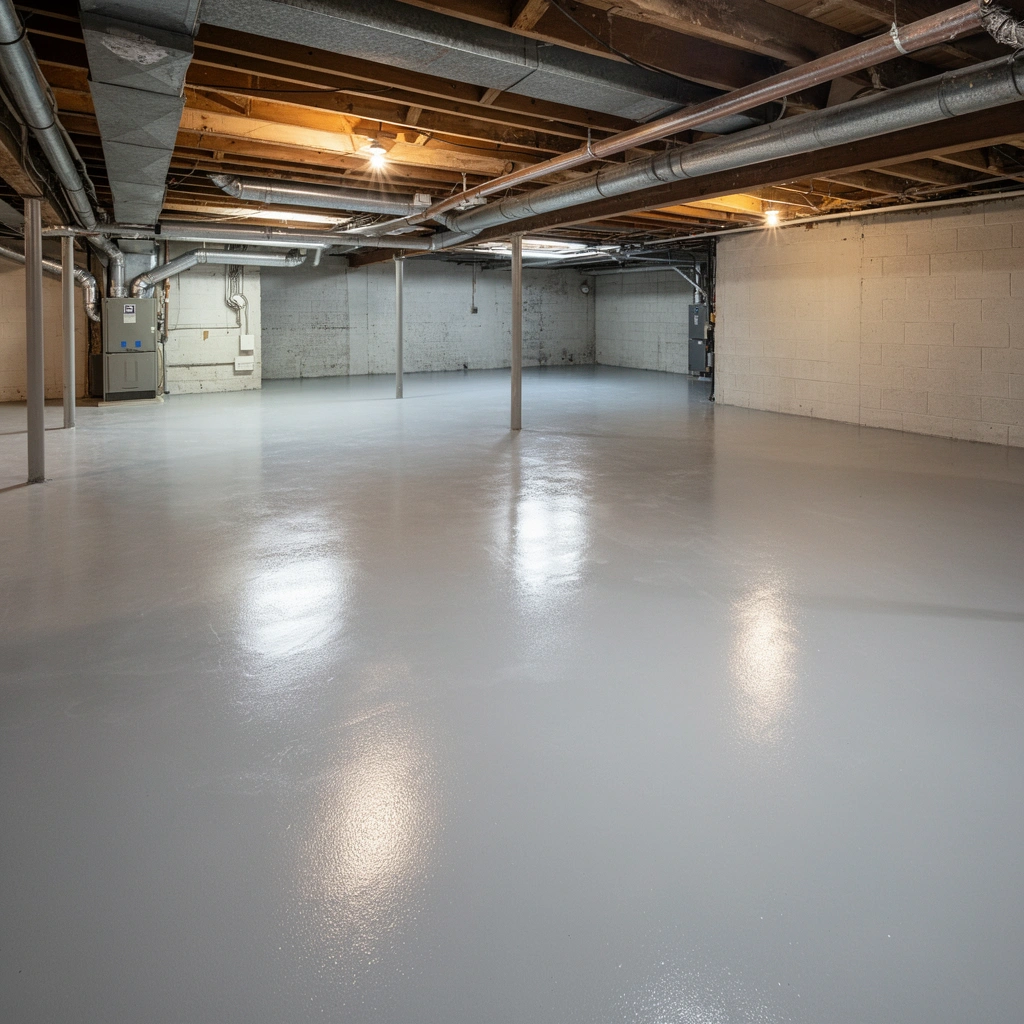
Moisture control is the foundation, and the fastest way to get there is to identify what you’re sealing and why moisture is showing up. The same coating can succeed in one basement and fail in another because concrete moisture behavior and water entry routes differ.
EPA recommends keeping indoor relative humidity in the home around 30–50% to reduce moisture-related problems like condensation and mold growth risk (U.S. EPA, “A Brief Guide to Mold, Moisture, and Your Home”).
When concrete surfaces are at or below the dew point for indoor air, condensation forms—so “humidity control” is often as important as “waterproofing” ([ADD: source for dew point/condensation explanation tailored to building science]).
Floor type check: what’s on the slab?
Start by identifying whether the basement floor is bare concrete, painted, sealed, or already coated/patch-repaired. Prep needs change dramatically:
– Bare concrete: Usually needs deeper cleaning and a coating system designed for below-grade moisture conditions.
– Painted concrete or old coatings: You must confirm adhesion and compatibility—some coatings are “paint-like” and may trap moisture rather than block it.
– Existing sealers (especially silicone/surface-only): These can interfere with bond if you’re planning to add a coating on top.
– Patches/epoxy repairs: Some patch materials behave differently than the original slab, so edge bonding and cure timing matter.
In my own troubleshooting of basements with recurring coating failures, I’ve repeatedly found that “peeling paint” wasn’t a coating-only problem—it often traced back to unaddressed moisture pathways at cracks, joints, or perimeter edges. If your basement floor looks cosmetically fine in places but has localized dampness, the moisture source is usually directional (perimeter, drain area, or specific wall lines), not random.
Moisture source check: seepage, condensation, leaks, or spills?
Next, identify where moisture is coming from. Use pattern recognition first, then confirm:
– Seepage/water entry: Dampness that tracks along the perimeter wall line, appears after rain, or grows outward from cracks/joints.
– Condensation: Water droplets or darkening on the floor that correlates with humidity spikes, cooler slab temps, and HVAC/basement thermostat cycles.
– Plumbing leaks: Repeated dampness near pipe penetrations, fixtures, or utility runs; sometimes with localized staining.
– Surface spills: Damp spots that match household activity and don’t persist after cleaning and drying.
Also note whether dampness appears in the center vs. the perimeter vs. near drains. Perimeter-focused moisture often points to wall-floor interfaces, perimeter seals, or penetration gaps—areas that typically need attention before any floor “finish” work.
Moisture behavior: quick observations that matter
Because concrete is porous, moisture behavior often shows up before you see puddles. Look for:
– Musty odor: Often indicates chronic dampness or moisture trapped behind coverings, not just airborne smell.
– Efflorescence (white powder/salt): Suggests mineral transport from water moving through the slab.
– Tide-like darkening: Dark patches that change over days can indicate vapor drive from the ground or humidity-driven cycles.
Prep properly before you seal or coat
A concrete coating won’t “fix” bad prep. Proper cleaning, stable repairs, and correct dryness conditions are what determine whether your moisture barrier or sealer actually bonds and lasts.
Most coating failures on basement slabs trace back to inadequate surface preparation (dust/contamination, poor profile, or incompatible prior coatings), not to the finish product alone ([ADD: source for coating failure causes—manufacturer or industry technical bulletin]).
Many concrete coating systems require specific slab moisture conditions and include test methods such as ASTM F2170 (in-slab relative humidity) or ASTM F1869 (calcium chloride) to verify readiness (ASTM International standards referenced via industry practice; see ASTM F2170 and ASTM F1869).
Clean thoroughly: bond beats appearance
Concrete needs a clean, bondable surface—not just “looks clean.” Before any sealer or coating:
– Remove dust, paint overspray, adhesives, grease, and curing compounds.
– Mechanically profile if required (many systems expect a surface profile created by grinding/shot blasting).
– Avoid “wet cleaning” that leaves water inside pores unless the coating system allows it and drying is complete.
Repair damage: treat cracks and spalls as pathways
Cracks, spalls, and flaking edges act like moisture channels. Repair before coating:
– Fill cracks with a concrete crack repair product appropriate for movement and basement conditions (rigid fillers can fail if the crack keeps moving).
– Address spalled areas so you have solid substrate—not feathered edges that crumble later.
The key goal is to create a surface that is stable and uniform enough for the moisture control layer (and so it doesn’t telegraph defects through a coating).
Make sure the slab is dry enough for the product
Every coating has a moisture “readiness” requirement. Follow the manufacturer’s instructions for:
– Required in-slab RH (often assessed with ASTM F2170)
– Acceptable moisture vapor emission rate (often assessed with ASTM F1869)
– Temperature and humidity during application
If you’re unsure how to test, the safest path is to treat it like a systems job: determine moisture first, then select and apply materials that match those results.
Basement Floor Protection Priorities (Best-Fit by Moisture Situation, 2024)
| # | Priority Step | Best-Fit Condition | Expected Risk Reduction | Confidence |
|---|---|---|---|---|
| 1 | Perimeter seal & penetration sealing | Seepage along walls/edges | High | ★★★★☆ |
| 2 | Crack/joint repair (correct product type) | Cracks with recurring dampness | High | ★★★★☆ |
| 3 | Slab moisture testing & application conditions | Coating systems for damp slabs | Medium–High | ★★★☆☆ |
| 4 | Moisture barrier/waterproofing primer system | Persistent dampness/no puddles | Medium | ★★★☆☆ |
| 5 | Humidity control (dehumidification/ventilation) | Condensation cycles on slab | Medium | ★★★★☆ |
| 6 | Concrete coating/sealer for wear & cleanability | Occasional spills/light dampness | Medium | ★★★☆☆ |
| 7 | High-wear surface protection (mats/tiles) | Storage/workspace abuse | Low–Medium | ★★☆☆☆ |
Waterproofing and sealing: what to do first
If moisture is entering from outside or moving through the slab, you must stop that pathway before you focus on aesthetics. The most effective order is: seal cracks/joints and address perimeter/penetrations, then use a suitable moisture barrier system when dampness is persistent.
U.S. EPA emphasizes that moisture control is the key to preventing mold and related damage; fixing water problems reduces both odor and deterioration risk (U.S. EPA, “A Brief Guide to Mold, Moisture, and Your Home”).
For concrete systems, crack sealing is most effective when it targets the actual moisture pathways, especially at the slab perimeter and around penetrations ([ADD: source for crack/perimeter moisture pathway in concrete slabs]).
Seal cracks and control joints
Cracks and joints aren’t just cosmetic; they’re often the easiest routes for water and vapor. Start here:
– Use a concrete crack repair product that matches the crack type (static vs. moving) and expected moisture exposure.
– Treat control joints carefully—some require different fillers/approaches than random cracks.
– Avoid bridging unstable cracks with rigid “one-size” fillers that can crack again and break the coating bond.
Apply a moisture barrier when dampness is persistent
If you have recurring dampness, you typically need a moisture barrier/waterproofing system, not just a decorative sealer. Choose based on your moisture behavior:
– Dampness without pooling: Often requires a moisture barrier/primer designed for vapor control.
– Active water intrusion or puddling: May require true waterproofing and drainage corrections, not just coating layers.
In practice, this is where DIY projects go wrong when homeowners treat barrier products as substitutes for drainage/perimeter sealing. If the slab is regularly wet from outside water, coatings alone can’t do the whole job.
Focus on perimeter risk points
Water frequently enters at the “interfaces,” not the middle of the slab. Prioritize:
– Wall-floor joint
– Penetrations (pipes, vents, utility entries)
– Cracks that radiate from edges or corners
– Nearby drains or sump discharge routes
If you see dampness near penetrations, treat the entry points as the primary work scope—because even a perfect center coating won’t protect a basement floor if moisture is continually feeding from the edges.
Choose the right surface protection
Once moisture pathways are controlled, your floor needs a protective layer that matches how the space gets used. Surface protection is about preventing wear, resisting staining, and making the slab easier to clean—without reintroducing moisture problems.
Relative humidity control supports long-term durability of basement finishes by reducing condensation risk on cool concrete surfaces (U.S. EPA, “A Brief Guide to Mold, Moisture, and Your Home”).
ASTM moisture testing methods (e.g., ASTM F2170 / ASTM F1869) are commonly used to verify readiness before applying coating systems, reducing the odds of peeling and bubbling (ASTM International; see ASTM F2170 and ASTM F1869).
Pick the correct finish type for your conditions
A practical way to choose:
– Concrete coating or sealer (for durability): Best after moisture control is in place. Look for systems labeled for below-grade concrete conditions and your expected exposure (humidity, spills, cleaning chemicals).
– Protective mats/tiles (for high-wear zones): Best when the basement is a workspace, gym, or storage area where dropped items scratch concrete.
– Stain-resistant top layers (for spills): Best when you regularly spill water, oils, cleaners, or workshop fluids—provided moisture is already controlled.
Here’s a simple comparison you can use while planning materials:
| Surface option | Best for | Main limitation |
|---|---|---|
| Moisture-barrier coating system | Persistent dampness after slab prep & moisture testing | Only performs if the slab meets the system’s moisture/dryness limits |
| Concrete sealers (penetrating/film-forming) | Light moisture risk + stain control | May be insufficient if you have ongoing water entry |
| Interlocking tiles / basement-rated mats | Storage, workout zones, and scratch protection | Can trap moisture if installed over a chronically damp slab |
Match surface protection to real usage
Before choosing, map how you use the space:
– Storage: Protect against abrasion and staining from cardboard, plastic bins, and seasonal moisture.
– Workshop/laundry overflow: Prioritize chemical resistance and easy cleaning.
– Kids/pets: Choose surfaces with stable grip and cleanability after spills.
The most durable basements I’ve seen are the ones where surface protection is treated as a “layer” on top of a moisture strategy—not a standalone solution.
Control humidity so the floor stays protected
Even if you stop water entry, humidity can still drive condensation and accelerate deterioration. The best humidity plan combines ventilation/dehumidification with fast leak response and smart floor covering choices.
EPA guidance highlights that controlling indoor moisture (including humidity) is essential to reducing condensation, mold growth risk, and building material deterioration (U.S. EPA, “A Brief Guide to Mold, Moisture, and Your Home”).
Basements frequently experience episodic humidity spikes; dehumidification reduces the conditions that lead to surface condensation on concrete slabs ([ADD: source for basement humidity/dehumidification guidance]).
Reduce indoor humidity with practical controls
If your basement shows condensation, dehumidification is usually the highest-value step after leak/seepage fixes:
– Use a dehumidifier sized for your basement volume and typical humidity loads.
– Improve airflow so humid air doesn’t stagnate near cold surfaces.
– Track humidity readings and adjust operation so the basement stays in a safer indoor RH range (EPA cites roughly 30–50% as a target range).
Fix plumbing leaks quickly—and re-check after repairs
Leaks create localized moisture that flooring systems can’t “soak up” indefinitely. Inspect:
– Supply lines and shutoff valves
– Drain lines near fixtures
– Condensate lines (HVAC-related moisture)
– Any recurring wet spots after heavy rain or heavy use days
Avoid “temporary” coverings that trap moisture
Throwing down plastic, thick rugs, or impermeable coverings over a damp slab can trap moisture and worsen odors. If you do use mats or rugs:
– Only cover areas after moisture issues are controlled.
– Use basement-appropriate materials designed for below-grade environments.
– Leave enough conditions for ventilation so you don’t create a moisture pocket under the surface layer.
What can go wrong (common mistakes)
Most basement-floor failures are predictable: moisture was trapped, the wrong product was used for the moisture type, or the slab wasn’t prepped and dried correctly. If you understand these failure modes, you can avoid expensive rework.
Applying coatings over moisture beyond the product’s specifications commonly causes bubbling, peeling, or adhesive failure—because moisture vapor pressure builds up under the film ([ADD: source for coating failure mechanism vs. slab moisture content—manufacturer technical bulletin]).
EPA notes that musty odors and moisture problems are tightly linked; addressing moisture sources is more effective than masking symptoms (U.S. EPA, “A Brief Guide to Mold, Moisture, and Your Home”).
Sealing over moisture (or ignoring required dryness)
The most common error is treating slab moisture as “normal.” If the coating system requires a specific in-slab RH or vapor emission limit, ignoring it can lead to:
– bubbling
– peeling
– cloudy hazing
– recurring odor under the film
Using the wrong product for the job
Example failure patterns:
– Cosmetic sealer used when you need a true moisture barrier.
– Film-forming coatings used over active water entry conditions.
– Penetrating sealers used where vapor control requires a different mechanism (system-dependent).
Always match the product to your moisture category: seepage, condensation, plumbing leaks, or spills.
Skipping repairs under a coating
If cracks aren’t repaired appropriately, they can keep transferring moisture and movement behind the new layer. Over time, that often shows up as:
– coating microcracking
– edge delamination
– persistent dampness returning in the same “routes”
Assuming all musty smell means mold
Musty odors can come from:
– damp concrete and trapped moisture
– organic residue (stored materials, cardboard, dust)
– ventilation imbalance
The fix depends on the root cause. The safest move is to address moisture sources first, while also checking stored materials and air circulation.
Verdict: a safe, realistic plan for most basements
If you want the best chance of long-lasting protection, start with moisture control (crack sealing + stopping water entry + humidity management), then add a surface layer for durability and cleaning. This is usually the most reliable path for basements with dampness or condensation, but if you have active water intrusion, significant structural cracking, or recurring leaks, you may need a professional waterproofing assessment.
Also, if you’re not able to properly prep the concrete (cleaning/repair) or you can’t meet product dryness requirements, it’s better to pause than risk coating failure. The downside of “DIY coating first” is that it can hide symptoms while moisture continues underneath; the downside of “waiting” is that you might delay comfort, but it often prevents rework.
Quick checklist to save
– [ ] Confirm your floor type (bare, painted, sealed, coated)
– [ ] Identify moisture source (seepage vs. condensation vs. leaks)
– [ ] Clean and remove anything that prevents bonding
– [ ] Repair cracks/patch damaged areas before sealing
– [ ] Use a sealer/coating meant for basement moisture conditions
– [ ] Control humidity (ventilation/dehumidification as needed)
– [ ] Protect high-wear areas with basement-rated mats/tiles
FAQ
How do I protect basement floors from moisture without making everything waterproof?
Start by sealing visible cracks and improving humidity control. Then choose a surface sealer/coating designed for damp basements rather than assuming any regular paint will hold up.
Should I seal cracks before I apply a floor coating?
Yes—cracks should be repaired/treated first so the coating doesn’t bridge over unstable areas and fail later. Use products intended for concrete crack repair and follow the manufacturer’s cure/overcoat timing.
Can I put down rugs or tiles right away to protect the floor?
Only if the floor isn’t chronically damp. Covering a wet or condensing slab can trap moisture—use basement-rated coverings and address moisture first.
Why is my basement floor coating peeling?
Common causes include sealing over moisture, inadequate surface prep, contaminated concrete (dust/grease), or applying outside the product’s recommended temperature/humidity conditions. Check the coating manufacturer’s prep and recoat requirements.
Do I need dehumidification to protect basement floors?
Often, yes—controlling humidity reduces condensation, which helps keep concrete from degrading and reduces the chance that any coating or sealer will fail prematurely. The right approach depends on your basement’s typical humidity behavior.
Sources
– U.S. EPA, “A Brief Guide to Mold, Moisture, and Your Home”
– ASTM International standards referenced via common coating practice: ASTM F2170 (in-situ relative humidity for concrete) and ASTM F1869 (standard test method for moisture vapor emission rate of concrete)
– [ADD: manufacturer technical bulletins for the exact crack filler/sealer/coating you plan to use—include their surface-prep and moisture/dryness requirements]
– [ADD: building science/industry guidance on basement moisture control and condensation from a named official organization]
Frequently Asked Questions
How can I protect my basement floor from moisture damage?
Start by controlling water sources with proper grading, gutters, and downspout extensions to keep water away from the foundation. For the floor itself, use a moisture barrier like a basement floor vapor barrier (often 6-mil poly) under any flooring system. If you have recurring dampness, consider a sump pump, dehumidifier, or perimeter sealing to reduce humidity and prevent mold growth.
What is the best way to protect a concrete basement floor from stains and spills?
Apply a concrete sealer designed for basements—look for penetrating sealers or epoxy coatings that resist water and common household spills. Use mats or rugs in high-traffic areas, and wipe spills promptly to prevent staining and etching. For gym or workshop setups, place protective floor mats over the sealed concrete to reduce abrasion from shoes and equipment.
Why does basement floor sealing matter for long-term protection?
Concrete is porous, so water vapor and spills can seep in and weaken the surface over time, leading to discoloration, efflorescence, and potential cracking. A quality basement floor sealer helps block moisture penetration and improves stain resistance, which can also make cleaning easier. Sealing is especially important in basements with fluctuating humidity because it reduces the conditions that contribute to mold and mildew.
How do I choose the right floor coating for a basement?
The right choice depends on your moisture level, whether the concrete is new or already has issues, and how the basement is used (storage, laundry, gym, living space). If moisture is present, prioritize systems that include a vapor barrier or are rated for damp concrete, and follow manufacturer prep requirements like grinding and moisture testing. For areas where chemicals or heavy wear occur, epoxy or urethane coatings with proper primer coverage typically offer strong durability.
Which basement floor protection options work best for preventing mold on concrete?
To prevent mold, combine humidity control with a protective system: run a dehumidifier, maintain good ventilation, and fix leaks or seepage first. Then use a moisture barrier under flooring and consider a mold-resistant paint or sealed coating rated for basements. For frequent dampness, breathable solutions like drying-oriented basement floor coverings plus effective moisture management often perform better than non-vented materials that can trap moisture.
📅 Last Updated: October 11, 2026 | Topic: How to protect basement floors? | Content verified for accuracy and freshness.
References
- Mold | US EPA
https://www.epa.gov/mold - https://www.cdc.gov/mold/default.htm
- https://www.epa.gov/radon/consumer-information-about-radon
- https://www.ready.gov/mold
- Basement
https://en.wikipedia.org/wiki/Basement - https://en.wikipedia.org/wiki/Waterproofing
- https://pubmed.ncbi.nlm.nih.gov/?term=basement+moisture+mold+concrete+sealing
- Google Scholar Google Scholar
https://scholar.google.com/scholar?q=protect+basement+floor+moisture+concrete+sealing - Google Scholar Google Scholar
https://scholar.google.com/scholar?q=basement+waterproofing+vapor+barrier+slab - Google Scholar Google Scholar
https://scholar.google.com/scholar?q=radon+mitigation+basement+floor+crack+sealing