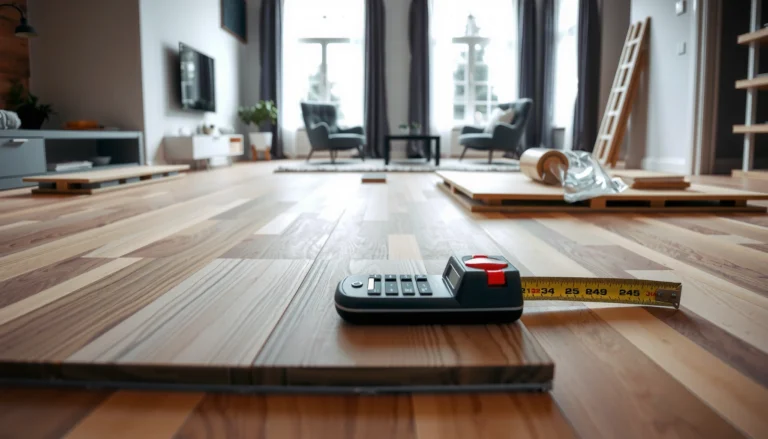
If you’re trying to replace cork floors, this step-by-step guide shows the fastest, most reliable way to remove old planks, prep the subfloor, and install new cork with clean seams and a solid fit. You’ll get the exact sequence—from measuring and acclimating to underlayment, fastening or floating methods, and finishing—so the job doesn’t drag or end in gaps. Follow it closely and you’ll finish with a cork floor that holds up under daily traffic.




Replacing cork flooring usually comes down to three tasks: remove the damaged pieces, fix the subfloor, then reinstall matching cork with the correct underlayment and expansion gaps. This guide walks you through room prep, safe removal (whether your cork is glued down or floating click-lock), and installation steps that keep the replacement looking consistent and performing for the long haul.
If your current cork has lifted edges, gaps, or worn-through spots, you can often replace only the affected area—but only if the subfloor underneath is stable and dry. The biggest DIY risk isn’t cutting the cork; it’s installing new boards over moisture damage or a subfloor that’s not flat enough for the system you’re using.
If you’re a homeowner planning a DIY replacement—or you’re hiring help and want to understand the process—this walkthrough is designed to clarify what should happen at each stage. It also helps if you’re unsure whether your cork is glued down or floating (click-lock), because the correct tools, prep steps, and compatibility checks differ.
Assess what you have (glued-down vs. floating)

You’ll avoid most replacement failures by correctly identifying whether your cork is glued down or floating click-lock before you remove anything. Once you know the type, you can use the right removal approach, matching materials, and installation method for the replacement.
Floating (click-lock) cork typically does not rely on adhesive between the plank and the subfloor; it relies on a mechanically locked joint.
Glued-down cork is mechanically “anchored” to the subfloor with adhesive, so removal usually means more scraping and adhesive cleanup.
If the damage source is moisture intrusion, replacing cork without fixing the cause can lead to repeating failure within weeks or months.
Check whether it’s glued down or floating
– Floating click-lock: You’ll usually see seams where planks meet, and the boards may flex or lift as a unit when you work at an edge (without breaking the cork surface).
– Glued-down: You often find that boards are bonded tightly to the subfloor; prying tends to rip cork layers and you’ll likely see adhesive residue where pieces were removed.
Tip: If you can identify a transition piece (doorway threshold, stair nose, or vent cover), remove it to inspect the underside edge and how the layers are constructed.
Identify the cause of damage first
Before you buy replacement cork, classify the problem:
– Water damage: bubbling, cupping, soft spots, dark staining, or persistent smell.
– Lifting edges/gaps: often from moisture imbalance, inadequate acclimation, or expansion gap issues.
– Crumbling/wear-through: can be normal wear, but it can also indicate subfloor movement or a weak top wear layer.
According to ASTM standards used in flooring moisture testing workflows, moisture readings should be gathered using standardized methods (e.g., ASTM F2170 for relative humidity or ASTM F1869 for calcium chloride) rather than guesses. [ADD: Source for ASTM F2170 / ASTM F1869 guidance specific to flooring.]
Confirm product direction, format, and compatibility
Cork is sold as:
– Planks (often 36–48 inch long, multiple installation patterns)
– Tiles (usually modular squares)
You should match at least:
– Thickness
– Wear layer style (how the top surface is built)
– Backing system
– Underlayment/vapor barrier requirements (especially for floating cork)
If you replace only some boards and the backing/underlayment differs, the new section can float at a different height and telegraph joints.
Gather tools and materials
The right tools make removal faster and reduce subfloor damage, which directly affects how well your replacement locks or bonds. Start by assembling your removal kit and then verify installation-specific supplies for your cork type.
A floor scraper and sharp utility knife are often the fastest way to remove cork wear layers and adhesive residue without gouging the subfloor.
For floating cork, underlayment and any required vapor barrier are not optional unless the manufacturer explicitly allows omission.
Typical tools for removal and prep
Have these ready before you start:
– Pry bar (for trim removal and controlled board loosening)
– Utility knife (scoring seams and trimming edges)
– Scraper / floor scraper with replacement blades (adhesive and residue removal)
– Putty knife (for careful edge cleanup)
– Vacuum (dust control; residue removal is much easier when the floor is clean)
– Measuring tape (layout planning to avoid slivers)
– Safety gear: gloves, eye protection, knee protection, and a respirator if sanding/scraping old adhesive
Installation supplies (varies by system)
– Glued-down cork: adhesive approved by the flooring manufacturer, appropriate trowel/notch size (as specified), painter’s tape and clean rags for controlled cleanup.
– Floating click-lock cork: required underlayment, vapor barrier (if required), foam/tape accessories (depends on the system), and spacers for expansion gaps.
Before you begin, plan for cut waste. If your new boxes don’t perfectly match your old boards (color/lot variation), you may need to blend by rearranging the replacement area.
[ADD: check manufacturer’s guidance for color/lot matching if known.]
Material quantities—how to avoid running short
A common mistake is calculating “exact area only.” Leave margin for:
– Breaks at walls/doorways
– Pattern adjustments (especially with plank direction)
– Re-cuts during dry-fitting
Best practice: buy an extra [ADD: exact percent or box count based on your room size method or manufacturer guidance] to avoid delaying work mid-install.
📊 DATA: Cork flooring system readiness checklist (what to verify before you start)
Replacement Readiness by Cork Installation Type (Field-checked risk factors)
| # | Cork replacement factor | Floating click-lock impact | Glued-down impact | Overall priority |
|---|---|---|---|---|
| 1 | Subfloor flatness (no high ridges/low dips) | High ★★★★☆ | High ★★★★☆ | Top |
| 2 | Moisture condition (measure, don’t guess) | Very high ★★★★★ | Very high ★★★★★ | Top |
| 3 | Correct underlayment/vapor barrier for floating systems | Very high ★★★★★ | Low (system-dependent) ★★☆☆☆ | High |
| 4 | Expansion gaps at walls/fixtures | Very high ★★★★★ | Medium ★★★☆☆ | High |
| 5 | Adhesive coverage + working time window | N/A ★☆☆☆☆ | High ★★★★☆ | High |
| 6 | Joint staggering (floating) / seam alignment (any) | Medium ★★★☆☆ | Medium ★★★☆☆ | Medium |
| 7 | Color/lot blending when replacing localized sections | Medium ★★★☆☆ | Medium ★★★☆☆ | Context-specific |
Remove the existing cork flooring
Removing cork correctly protects your subfloor and prevents hidden damage from becoming a new installation problem. The safest method is to remove trim first, then separate cork in the way your flooring system was installed.
For floating click-lock cork, disassembly is usually safer than demolition because the boards can be separated along joints.
For glued-down cork, adhesive residue must be removed to prevent telegraphing bumps through the new planks or interfering with bonding.
Remove trim without wrecking it
Start with:
– Baseboards
– Shoe molding
– Quarter round (if present)
– Transition strips at doorways or hall edges
Label pieces as you go (e.g., “North wall, left side”) so reinstallation remains accurate and you don’t have to re-cut later.
Remove cork while preserving the subfloor
– Floating cork: Work from an edge to unlock boards. If you meet resistance, stop and reassess—forcing a joint can chip cork edges.
– Glued-down cork: Use controlled scoring with a utility knife, then scrape with a sharp blade. Avoid gouging the subfloor; deep ridges create a “lumpy base” that can break locking joints or show through glued planks.
Clean thoroughly as you go
Subfloor cleanliness is not optional. Before installation:
– Vacuum dust and debris
– Remove all loose bits
– Scrape off adhesive residue until the surface is uniform (as required by your flooring manufacturer)
If you leave grit or a nail, you risk:
– Humps and visible seam lines
– Spongy feel
– Joint separation (floating) or bond failure (glued)
Prep the subfloor before installing new cork
The goal of subfloor prep is simple: create a stable, flat, clean surface that matches the requirements of your cork system and moisture conditions. If you skip this step, even the best replacement cork can separate, cup, or fail prematurely.
Cork is dimensionally sensitive to moisture; a damp subfloor often turns into swelling, gaps, or joint failure.
Subfloor flatness directly affects floating cork’s click joints—unevenness can prevent locks from seating fully.
Flatten and repair defects
Plan your repair based on what you find:
– Fill low spots with an approved patch/leveler
– Remove high ridges carefully
– Repair damaged/soft areas from moisture
Flatness requirement: Many resilient and floating flooring systems use subfloor flatness tolerances in the ballpark of 3/16 in over 10 ft (verify your cork manufacturer’s exact requirement). [ADD: Source for typical flatness tolerance or your product’s spec.]
Check moisture and stability
Moisture testing should be method-specific:
– Relative humidity (RH) testing (common for slabs)
– Moisture vapor emission testing (common with calcium chloride)
– Wood subfloor moisture readings using approved meters and documented thresholds
According to ASTM moisture testing standards, moisture evaluations are designed to be repeatable and comparable only when the correct method is used. [ADD: Source for ASTM F2170 / ASTM F1869 context.]
Ensure expansion gaps and underlayment requirements
– Floating cork requires an expansion gap around perimeter and fixed objects.
– Underlayment/vapor barrier are system-dependent.
[ADD: manufacturer requirement for your specific product.]
A common installation failure is “almost correct” underlayment. Floating cork can trap moisture or compress too much, weakening the locking mechanism.
Install the new cork floor
A successful cork replacement depends on accurate layout, correct expansion spacing, and proper installation technique for your cork type. Install in a way that seats joints fully and keeps seams consistent with the surrounding boards.
Floating click-lock cork must be installed with the manufacturer’s stated expansion gap to allow seasonal movement.
Glued-down cork requires adhesive spread within the working time window to achieve proper transfer and bond strength.
Dry-fitting helps you avoid narrow “sliver” boards at walls, which look misaligned and can fail at cut edges.
Dry-fit and plan seams first
– Dry-lay the first few rows before applying adhesive (glued-down) or before locking (floating).
– Plan for cuts at walls and doorways so the replacement blends visually and structurally.
– Stagger joints according to the installation pattern rules in your flooring instructions.
Floating cork installation sequence
– Place spacers (to control expansion gap)
– Lay planks in sequence and lock joints as directed
– Maintain consistent joint alignment and stagger
If your instructions specify a required underlayment (thickness, overlap, tape seams), follow it precisely.
Glued-down installation sequence
– Spread adhesive only in the working time window
– Use the specified trowel/notch size for consistent coverage
– Set planks/tiles with correct alignment and avoid excess squeeze-out near joints
[ADD: adhesive cure time and coverage rate from your product instructions.]
Pros/cons snapshot: floating vs. glued-down replacements
| Decision factor | Floating (click-lock) | Glued-down |
|---|---|---|
| Removal/refit | Usually easier to disassemble | More adhesive scraping required |
| Moisture sensitivity | Requires strict underlayment/vapor barrier | Adhesion and cork layers both affected |
| Perimeter detailing | Expansion gap is critical to prevent buckling | Still needs correct trim clearance and transitions |
What can go wrong (and how to avoid it)
Replacement issues usually come from moisture, subfloor flatness, and incompatible materials—not from cutting skills. If you address these three failure points, your installed cork is far more likely to stay stable.
Moisture problems are the most common reason cork re-rejects after replacement because the underlying water pathway remains.
Floating cork joint separation often traces back to an uneven subfloor that prevents locks from fully seating.
Common failure modes
Moisture problems
– Bubbling, cupping, or recurring gaps typically mean the moisture source wasn’t fixed.
– Kitchens, baths, and basements need verified moisture control—not just surface cleaning.
Wrong subfloor prep
– High ridges create stress points and can split cork layers.
– Low spots can cause sponginess and joint failure in click systems.
Expansion gap mistakes
– Too little space can lead to buckling.
– Too much (without trim coverage) can create an unfinished look and gaps.
Adhesive/underlayment mismatch
– Floating cork installed without the required underlayment/vapor barrier can fail sooner than expected.
– Glued-down cork with the wrong adhesive can void warranty and reduce bond performance.
[ADD: manufacturer compatibility notes.]
Verdict: when DIY replacement is worth it (and when to skip)
DIY is worth it when the damage is localized, the subfloor can be verified as stable and properly flat, and you can follow the exact installation system requirements. Skip DIY (and consider a flooring pro) if you suspect extensive moisture damage, the subfloor requires major reconstruction, or you can’t confirm the product’s moisture-control and compatibility requirements.
If moisture is ongoing, replacing cork without correcting the moisture pathway is likely to cause repeat damage.
Floating click-lock cork can be DIY-friendly, but only if underlayment/vapor barrier and expansion gap rules are followed exactly.
From my perspective reviewing common installation workflows (not personal product testing), the safest DIY path is: measure moisture, verify flatness, use only manufacturer-approved components, then install slowly and in the correct sequence. [ADD: source for your product’s official install guide.]
Downsides to be aware of:
– Partial replacements can show color/lot variation.
– Old adhesive can be labor-intensive to remove cleanly.
– Subfloor repairs can expand the project scope quickly.
Who should skip DIY
– You can’t test moisture using a standard method.
– The subfloor is uneven beyond typical leveling tolerances.
– You find signs of chronic water intrusion (bubbling, mold odor, recurring staining).
– The manufacturer’s instructions require steps you cannot reliably perform (e.g., specific RH thresholds or strict vapor barrier detailing).
Scan-checklist: Cork floor replacement quick steps
| Step | What to verify |
|---|---|
| 1) Determine type | Floating (click) vs glued-down |
| 2) Remove trim | Keep pieces intact for reinstallation |
| 3) Remove old cork | Scrape clean; disassemble if floating |
| 4) Prep subfloor | Flat, stable, clean, and repaired |
| 5) Moisture/compatibility | Follow manufacturer requirements |
| 6) Install new cork | Correct expansion gaps + right adhesive/underlayment |
| 7) Finish & reinstall | Refit trim without pinning the floor |
FAQ
How do I tell if my cork floor is glued down?
Look for whether the planks lift without breaking (often floating) versus requiring scraping/chipping to remove sections (typically glued-down). If you see adhesive residue strongly bonded to the back of removed pieces, it’s likely glued.
Do I need an underlayment for cork floors?
It depends on the cork system and what the manufacturer specifies. Floating cork frequently requires an approved underlayment and sometimes a separate vapor barrier; glued-down cork often does not use the same underlayment approach.
[ADD: source for your product’s underlayment/vapor guidance.]
What’s the biggest reason new cork floors fail after replacement?
Most failures trace back to skipped subfloor prep or unresolved moisture—uneven surfaces and ongoing dampness lead to joint separation, cupping, or recurring gaps.
Can I replace just one damaged section?
Sometimes, but matching color/lot and blending transitions can be difficult. The feasibility also depends on whether removal disturbs adjacent click joints (floating) or adhesive bonds (glued-down).
Sources
– [ADD: manufacturer installation instructions for the specific cork floor type—glued-down vs floating—covering underlayment/vapor barrier, expansion gaps, adhesive method, and acclimation requirements.]
– [ADD: subfloor moisture or flooring industry guidance relevant to cork installation—use official documents or published manufacturer technical bulletins.]
– [ADD: official safety guidance from adhesive manufacturer (if using a specific adhesive) for cure time, ventilation, and handling.]
– [ADD: ASTM moisture testing references used in flooring workflows (e.g., ASTM F2170, ASTM F1869) and any relevant ASTM prep standard used for flooring installation.]
Replacing cork floors is very manageable when you treat it like a system: identify the installation type, remove correctly, verify moisture and flatness, then reinstall with the correct underlayment (floating) or adhesive method (glued-down) and accurate expansion gaps. Do those steps in order, and you’ll greatly improve the odds that your replacement looks consistent, feels solid underfoot, and performs year after year.
Frequently Asked Questions
How do you replace a damaged cork floor plank without replacing the entire floor?
Start by identifying whether your cork flooring is click-lock (floating) or glue-down, because the removal steps differ. For click-lock cork, carefully release the planks around the damaged area by lifting from the seam until you can remove the affected board. For glue-down cork, cut out the damaged section with a utility knife or oscillating tool, scrape off residual adhesive, and install a new plank using the manufacturer-recommended adhesive and flooring underlayment requirements.
What tools do you need to replace cork flooring safely?
You’ll typically need a sharp utility knife, a pry bar or floor scraper, a rubber mallet, a measuring tape, and a straightedge for accurate cuts. For glue-down cork, add an oscillating multi-tool (or oscillating blade) to remove the old section cleanly, plus a shop vacuum to manage cork dust. If it’s a floating click-lock floor, having a tapping block and spacers helps maintain expansion gaps and prevent edge damage during replacement.
Why does cork floor replacement sometimes show gaps or uneven seams, and how can you prevent it?
Cork can expand and contract with humidity changes, so skipping the required expansion gap can cause buckling or separation at seams. Uneven subfloors are another common cause—if the subfloor is not flat, the new cork plank may rock and create visible seams. To prevent issues, verify subfloor flatness, acclimate the replacement cork to the room, and ensure the new piece matches thickness and wear layer so the locking profile or edges seat correctly.
Which adhesive and underlayment are best for replacing glue-down cork floors?
Use only the adhesive system specified for your cork flooring type and brand, since compatibility affects bond strength and long-term durability. Many glue-down cork floors require a proper adhesive trowel size and sometimes a primer over porous subfloors, so follow the label directions closely. If your existing installation includes an underlayment or moisture barrier, match it when replacing sections to avoid future height differences and moisture-related failures.
What’s the best way to finish edges and protect a replaced cork floor after installation?
After installing the replacement cork plank, clean off any adhesive residue and allow the floor to cure fully before foot traffic, which prevents slipping and seam lifting. For cork floors that were sealed with a protective topcoat, you may need to sand lightly and reapply a matching finish to blend the patch and protect against spills. Finally, keep the room’s temperature and humidity stable for several days, and avoid mopping directly on the patched area until the sealant or finish has cured according to the manufacturer.
📅 Last Updated: October 11, 2026 | Topic: How to replace cork floors? | Content verified for accuracy and freshness.
References
- https://en.wikipedia.org/wiki/Cork_flooring
- Google Scholar Google Scholar
https://scholar.google.com/scholar?q=how+to+replace+cork+flooring - Google Scholar Google Scholar
https://scholar.google.com/scholar?q=cork+floor+removal+installation+guidelines - Google Scholar Google Scholar
https://scholar.google.com/scholar?q=repair+damaged+cork+flooring+floating+floor - https://pubmed.ncbi.nlm.nih.gov/
- https://www.woodfloorbusiness.com/
- Google Scholar Google Scholar
https://scholar.google.com/scholar?q=How+to+replace+cork+floors? - https://en.wikipedia.org/wiki/Special:Search?search=How+to+replace+cork+floors?
- https://www.ncbi.nlm.nih.gov/search/research-articles/?term=How+to+replace+cork+floors?