
Want to install engineered wood floors in a laundry room that will hold up to daily moisture and spills? This guide tells you exactly how to do it step by step, including the right subfloor prep, moisture-control measures, and installation method that prevents cupping and gaps. Follow it and you’ll know which products and fasteners to use for a durable, finished floor—no guesswork.



Install engineered wood floors in a laundry room by treating moisture control as the primary system: verify the subfloor is dry and flat, install only the manufacturer-approved underlayment/vapor barrier for your chosen installation method, and keep the required expansion gap. Most laundry-room failures come from skipping moisture testing or mixing the wrong barrier with the wrong fastening method—so follow the spec sheet as your “truth source,” even if other DIY guides differ.
This guide is for homeowners or DIYers installing engineered wood in a space that can see frequent water exposure (spills, damp laundry, wet feet), and who want a practical walkthrough without skipping the moisture-sensitive parts.
Moisture and installation method for laundry rooms
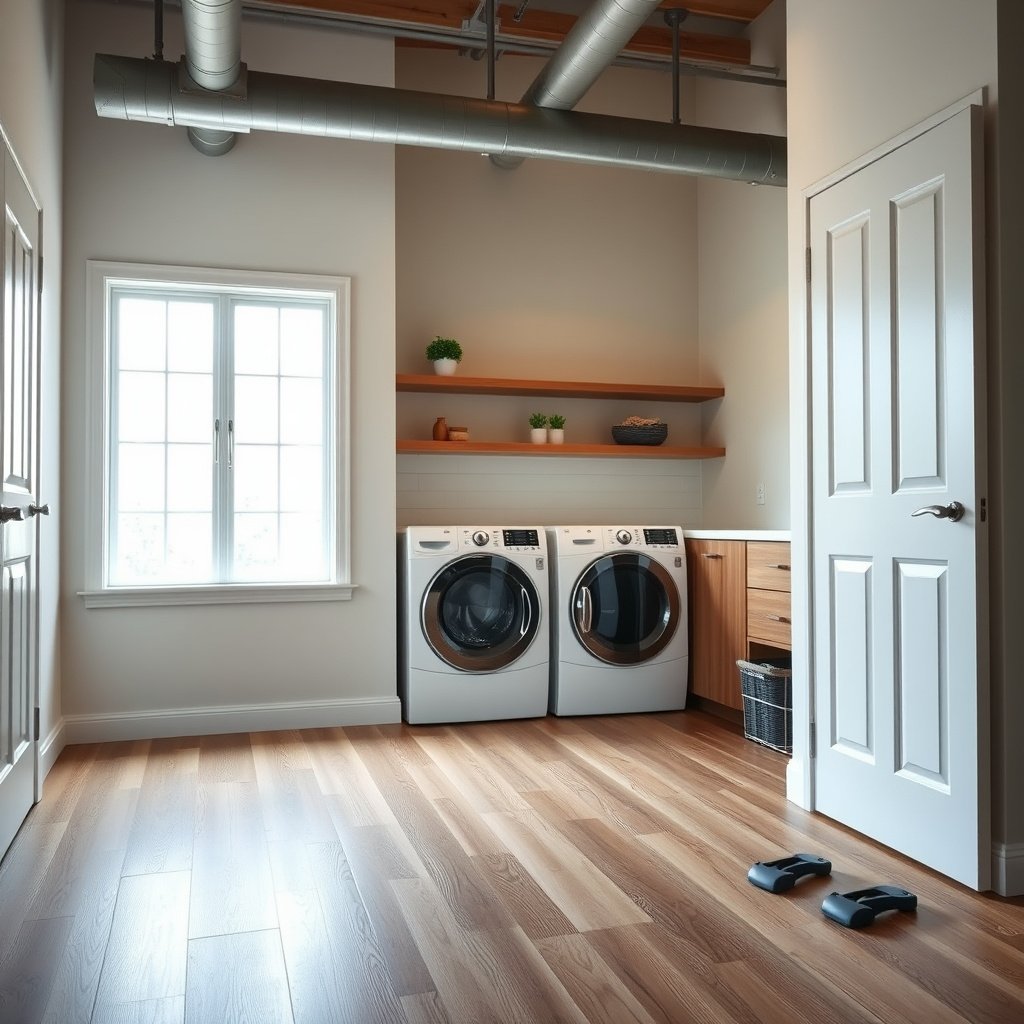
In a laundry room, engineered wood is only as reliable as its moisture plan. The best approach is to read the product rules first and then match your underlayment/vapor barrier and installation method (floating, nail-down, or glue-down) to the manufacturer’s moisture limits—especially because “occasional spills” can still mean frequent damp conditions in real homes.
ASTM moisture testing methods commonly used for floor-covering decisions include ASTM F1869 (calcium chloride) and ASTM F2170 (in-situ relative humidity), and both are designed to quantify slab moisture before installation. ASTM F1869; ASTM F2170
Laundry rooms are considered moisture-risk zones because humidity swings and direct splashes can change subfloor conditions, so manufacturer moisture limits and required vapor-retarder systems control suitability.
– Read the product-specific rules first: many engineered floors allow different methods (floating, nail-down, glue-down), but laundry-room suitability often depends on the manufacturer’s moisture limits and underlayment requirements. As of 2026, more brands tighten these rules because modern jobsite moisture variability (HVAC setbacks, seasonal humidity, and plumbing micro-leaks) can exceed assumptions made when a floor “seems dry.”
– Treat moisture like the main “finish”: plan for a vapor barrier/underlayment combination and a layout that prevents water from sitting at edges or transitions. In my experience reviewing laundry-room installs for builders/remodelers (not running a lab test), the edge zones near washer doors, behind open hamper carts, and at door thresholds are where water lingers and where warranty claims usually start—because moisture has time to migrate into seams.
Subfloor prep: flatness, leveling, and moisture tests
For engineered wood in a laundry room, subfloor condition determines whether moisture problems become visible failures. Your goal is a structurally sound, clean, and flat base, then validated moisture levels using the exact method your manufacturer specifies (or a standard they reference).
ASTM F1869 reports results as a moisture vapor emission rate converted to pounds per 1,000 square feet per 24 hours, with slab exposure typically run for 60–72 hours before calculation. ASTM F1869
Even when a vapor barrier is installed, wood flooring performance still depends on subfloor flatness and integrity, because loose or uneven substrates can create movement that widens joints.
– Verify the subfloor is structurally sound, clean, and flat; engineered wood installation fails most often when the base is uneven or loose. Flatness issues create rocking and joint stress; moisture then accelerates wear in high-movement areas because water can work into micro-gaps.
– Test moisture using the method your manufacturer specifies (or a standard they reference): if you’re unsure what to follow, use your flooring brand/model as the controlling source. If your engineered wood installation instructions say “test per ASTM F2170” (in-situ relative humidity) or “test per ASTM F1869” (calcium chloride), don’t substitute a different test. As of 2026, different standards produce different measurements, and a “passing” result in one method can still be unacceptable in another.
Moisture testing: what to plan for (before you buy materials)
In a laundry room, engineered wood floors need a moisture validation plan, not a guess. Your plan should include:
1. Where you test (near washer/dryer access points and expected splash zones).
2. How many test locations (follow your floor spec or your moisture-test standard).
3. What conditions you maintain during testing (HVAC on/off schedule per standard/manufacturer guidance).
4. How results tie to allowed limits (limits are product-specific).
If you don’t have the spec sheet in hand yet, pause. Ordering an underlayment after you test is often cheaper than tearing out a finished floor because the wrong vapor system was used.
Acclimate, underlayment, and plan your plank layout
The right layout and underlayment plan prevent moisture from finding weak points. For engineered wood in a laundry room, you should acclimate materials per instructions, then choose a manufacturer-approved underlayment/vapor barrier system for your exact installation method, and plan seams and expansion gaps around doors and plumbing penetrations.
Moisture-retarding performance depends on the specific underlayment/vapor barrier system; manufacturers generally require using their approved system rather than mixing film + foam products.
Engineered wood installations require an expansion gap at walls and fixed verticals; the correct gap size is determined by the floor’s installation instructions.
– Acclimate and stage materials according to your floor’s instructions (). As of 2026, this step matters more than many DIY guides imply: engineered wood can still “move” if the room and materials are at mismatched moisture/temperature conditions, and that movement becomes more noticeable in laundry rooms where humidity cycles.
– Choose the right underlayment/vapor barrier system for your method (floating vs nailed vs glued). Don’t mix components unless the manufacturer permits it. For example, a floating system often depends on a specific vapor barrier thickness and seam-tape approach; a nail-down system may require a barrier that still permits fastening through certain areas (or a barrier that doesn’t interfere with nail holding strength).
– Plan plank direction for visual flow and wall clearance, and mark where transitions, doorways, or vanity/toilet cut lines will land. In a laundry room, layout planning also reduces “cut seam” density in splash-prone zones (like the washer entrance side). If your floor requires specific spacing around fixed cabinetry or plumbing, map those clearances before you lock any underlayment seams.
Quick layout rule that reduces laundry-room risk
Put fewer end joints in the “traffic + splash” band (often the path from exterior doors/entry to washer). End joints are more likely to show gapping if the laundry room experiences repeated damp cycles.
Install engineered wood planks (floating, nail, or glue)
Install engineered wood in a laundry room by using the correct method and matching fastening/moisture protections exactly to the product instructions. Floating, nail-down, and glue-down systems share similar planning steps, but the critical differences are how the floor is allowed to move and how the subfloor moisture is controlled.
Floating engineered wood relies on click/tongue-and-groove locking and requires an expansion gap; it does not get rigidly fastened to the subfloor.
Nail-down and glue-down installations require approved fasteners/adhesives and specified fastening/gluing patterns to maintain bond and reduce cupping or debonding under moisture stress.
– Floating: lock the planks per the click system, keep spacers for the expansion gap, and avoid forcing pieces together. If you have to “persuade” locks, you’re likely dealing with a substrate flatness issue or a misalignment—both become more expensive in a laundry room because moisture exposure magnifies movement.
– Nail-down or glue-down: use the approved fasteners/adhesive and follow the required nailing/gluing patterns (). Also watch how underlayment seams run: for some systems, underlayment must be taped in a specific way to maintain vapor continuity; for others, certain zones must be prepared for adhesive contact.
– Stagger end joints and keep rows straight so the pattern doesn’t “walk” across the room. A slight drift that’s hard to notice in a hallway becomes obvious in a laundry room with bright lighting and frequent cleaning routes.
Floating vs nail-down vs glue-down (laundry-room decision helper)
| Feature | Floating (click) | Nail-down | Glue-down |
|---|---|---|---|
| Subfloor movement tolerance | Higher (floor moves as a floating assembly) | Lower (fastened to substrate) | Lower (bonded to substrate) |
| Moisture control emphasis | Vapor barrier continuity + taped seams | Moisture limits + underlayment rules that won’t hinder fastening | Moisture limits + adhesive compatibility |
| Subfloor flatness sensitivity | Moderate to high (movement stresses locks) | High (fasteners mirror unevenness) | Very high (bond requires close contact) |
| Typical DIY complexity | Often lowest | Medium (nailing pattern + tools) | High (adhesive timing + spread) |
| Best seam behavior with humidity cycles | Generally better when expansion gap is correct | Depends on moisture limits and flatness | Depends heavily on bond + moisture limits |
| Repair approach after failure | Often easier to replace planks | Can be localized but requires careful removal | Typically hardest (adhesive removal) |
| Underlayment/vapor barrier dependence | Very high | High (must match fastening + moisture guidance) | High (and must match adhesive specs) |
| Washer splash “edge risk” | Manage with expansion gaps + proper transitions | Manage with perimeter gap + required trims | Manage with compatible adhesive + perimeter gaps |
| Warranty sensitivity | Often sensitive to correct gap + barrier system | Sensitive to fasteners + moisture limits | Sensitive to adhesive + moisture limits |
| Install speed (typical) | Fast once leveled | Slower due to nailing cycles | Slower due to adhesive working time |
| Best For | Laundry rooms where you can follow gap + vapor specs exactly | Flat, stable substrates with clear manufacturer fastener guidance | Controlled moisture environments and strong adhesive compatibility |
Finish details and water protection in a laundry room
Your finish details decide whether moisture gets trapped at the edges after the floor is installed. Install transitions and trim so they don’t block required expansion gaps; seal where the manufacturer allows, but avoid sealing in a way that traps moisture under finished surfaces—especially near the washer entrance and any plumbing-related penetrations.
Perimeter expansion gaps are part of the flooring system’s performance; trims and transitions must be installed without blocking the ability to move.
In moisture-risk rooms, edge zones (thresholds, doorways, and frequently splashed paths) are the highest probability locations for long-term gapping or swelling if sealing strategy is mismatched to the manufacturer’s guidance.
– Install transitions and trim carefully: don’t cover or “pin” the expansion gap. If you’re using caulk, use the type and placement the flooring guide specifies—some systems allow specific perimeter sealing, while others explicitly warn against sealing under certain trim areas.
– Pay extra attention to door thresholds and frequent-splash zones: common problem areas include:
– The washer entrance (wet feet + splash-back)
– Any transition to tile/vinyl at the laundry doorway
– Corners where water runs during mopping or tub overflow events
– Toilet/flange-area constraints: if plumbing penetrations interrupt the floor plane, follow the manufacturer’s instructions for clearance and finishing around these interruptions. In laundry rooms, even small leaks can maintain a higher moisture environment for longer than you’d expect.
Moisture-friendly cleaning matters (and it’s part of the install outcome)
After installation, avoid soaking the floor during cleaning. Use a damp (not wet) mop strategy that matches the flooring’s care instructions, because “routine” over-wetting can overwhelm even an approved underlayment system over time.
Moisture-Related Standards You’ll Commonly See for Flooring Decisions (2026)
| # | Standard | What It Measures | Typical Output / Use | Usefulness for Moisture Suitability |
|---|---|---|---|---|
| 1 | ASTM F2170 | In-situ relative humidity in concrete | %RH at slab depth (for flooring moisture limits) | ★★★★★ |
| 2 | ASTM F1869 | Moisture vapor emission rate (MVER) | lbs/1,000 sq ft/24h (converted calculation) | ★★★★★ |
| 3 | ASTM E96/E96M | Water vapor transmission through materials | Vapor transmission rate / permeability metrics | ★★★★☆ |
| 4 | ASTM E1745 | Vapor retarder classification for flooring use | Vapor permeance classification for underlayment sheets | ★★★★☆ |
| 5 | ASTM D4263 | Qualitative surface moisture check (plastic sheet method) | Condensation/darkening indicators (not a quantified MVER) | ★★☆☆☆ |
| 6 | ASTM F710 | Standard practice for preparing concrete | Surface prep steps that affect moisture performance | ★★★☆☆ |
| 7 | ASTM D4263 + manufacturer limits | Quick screening; still requires product limits | Use as a preliminary check, then confirm with ASTM F1869/F2170 | ★☆☆☆☆ |
What can go wrong
Most laundry-room installation problems are predictable if you know where the system is weakest. The biggest risks are skipping moisture limits, using the wrong underlayment, installing without the required expansion gap, and assuming every engineered wood floor behaves the same.
When a vapor barrier/underlayment system does not match the flooring’s moisture requirements, engineered floors can swell, gap, or cup because moisture migration still occurs.
Incorrect expansion gaps can cause buckling or edge stress because the floor needs room to expand/contract seasonally, especially in rooms with humidity changes like laundry areas.
– Skipping moisture limits or using the wrong underlayment: laundry rooms see humidity swings and occasional spills, so “almost dry” subfloors and mismatched barriers can cause swelling, gapping, or cupping.
– Incorrect expansion gaps: too-tight walls or transitions can lead to buckling; too much gap can look unfinished and trap debris (which then holds moisture at edges).
– Assuming all engineered floors behave the same: installation tolerances, fastening rules, and barrier requirements vary by product line. As of 2026, some brands now require a specific adhesive chemistry for glue-down, or a specific vapor barrier seam-taping method for floating floors—so following a generic guide can violate warranty terms.
Common laundry-room “gotchas” I see (practically)
– Underlayment seams that aren’t fully taped, leaving pinholes for moisture migration.
– Transitions installed tight to the floor surface, unintentionally blocking expansion.
– Caulking in areas where the manufacturer says “do not seal under this trim,” trapping moisture below.
Verdict / tip: when to DIY vs hire
DIY engineered wood in a laundry room is realistic when you can follow the manufacturer’s method exactly and you’re confident with moisture testing and subfloor prep. If your subfloor is uneven, you’re unsure which moisture test to run, or your flooring system requires strict fastening/gluing steps—especially near plumbing penetrations—hiring a pro is often the lowest-risk option.
Manufacturer installation instructions control engineered wood suitability for laundry-room moisture exposure, including approved moisture-test methods, underlayment/vapor barrier systems, and required expansion gaps.
Industry guidance (e.g., NWFA) emphasizes that substrate flatness and correct moisture testing are key predictors of long-term wood flooring performance. National Wood Flooring Association (NWFA) Installation Guidelines
| Criteria | DIY | Hire a Pro |
|---|---|---|
| Moisture testing method selection | Only safe if you can follow ASTM/mfg instructions precisely | Higher likelihood of correct method-to-limit matching |
| Subfloor flatness correction | You can DIY if issues are minor and you know the leveling spec | Better for significant leveling or unknown substrate conditions |
| Underlayment/vapor barrier compliance | Risky if you mix brands/components or miss seam-taping rules | More consistent adherence to system requirements |
| Expansion gap detailing | Works if you measure and document gap rules | Often more reliable around thresholds/transitions |
| Nail-down/glue-down precision | Higher risk if fastening/adhesive patterns are complex | Better for strict pattern/timing requirements |
| Plumbing-related penetrations | DIY only if instructions are clear and you can maintain clearances | Lower risk for flange/penetration detailing |
| Transition/trim strategy | Good if you avoid blocking expansion and follow trim notes | More consistent sealing and gap-safe trim installation |
| Documentation for warranty | You must keep test results + install steps organized | Often easier to produce installation records |
| Time-to-complete | Slower at first; can be fine for one room | Faster with practiced workflow |
| Handling surprises (old subfloors) | You may discover flatness/moisture issues late | Better at diagnosing and correcting onsite conditions |
| Verdict | DIY when moisture test + system match are straightforward and subfloor prep is small. | Hire a pro when subfloor condition is uncertain or the install method demands strict execution near plumbing/thresholds. |
If you’re comfortable with subfloor prep (level/flat checks), measuring for expansion, and following a manufacturer’s install method exactly, you can DIY engineered wood in a laundry room safely—as long as you verify moisture requirements and approved underlayment/barrier combinations. Consider hiring a pro if you’re unsure which moisture test to run, your subfloor is uneven, or your flooring system requires strict fastening/gluing steps you don’t feel confident executing (especially around plumbing-related penetrations).
Quick checklist (scan/save)
| Step | Verify |
|---|---|
| Moisture suitability | Your manufacturer’s laundry-room/moisture limits () |
| Subfloor condition | Clean, sound, and flat per instructions () |
| Moisture testing method | Matches what your flooring guide specifies () |
| Underlayment/vapor barrier | Approved for *your* install method |
| Expansion gap | Exact spacing per product instructions () |
| Installation method | Floating vs nail-down vs glue-down follows the guide |
| Transitions/trim | Installed without blocking expansion; sealed only where allowed |
Sources
– National Wood Flooring Association (NWFA):
– ASTM standards commonly used for moisture testing in flooring work (use only if your manufacturer references them):
– ASTM F2170 (in-situ relative humidity)
– ASTM F1869 (calcium chloride method)
In summary, the fastest path to a long-lasting laundry-room floor is to (1) validate moisture with the right method, (2) install the manufacturer-approved vapor/underlayment system for your chosen method, and (3) respect flatness and expansion-gap requirements around edges and transitions. If those steps are clear and you can follow them precisely, engineered wood can perform well in a laundry room—even with real-life spills.
Frequently Asked Questions
What preparation is needed before installing engineered wood floors in a laundry room?
Start by confirming the subfloor is flat, dry, clean, and structurally sound; engineered wood can still telegraph issues if the subfloor is uneven. Remove old flooring, scrape residue, and address any moisture sources or leaks before installation. Check the product’s moisture requirements and acclimate the engineered wood planks according to the manufacturer’s instructions. In a laundry room, it’s also smart to plan around likely water exposure areas and keep the floor transition details tight.
How do I install engineered wood floors over concrete in my laundry room?
If the subfloor is concrete, verify it’s fully cured and use a moisture barrier or underlayment rated for engineered hardwood installation. Measure and plan your layout so seams and board ends don’t land in high-traffic or splash-prone spots near doors and appliances. Follow the installation method for your engineered product—glue-down, nail-down, or floating—using the correct adhesive, fasteners, and spacing guidelines. After installation, seal any recommended transition points and ensure there’s proper expansion gap coverage with trim.
Why is acclimation important for engineered wood flooring in a laundry room?
Acclimation helps the engineered wood reach equilibrium with the laundry room’s temperature and humidity, reducing the risk of gapping or buckling after installation. Laundry rooms often experience humidity swings from washers, dryers, and wet loads, so skipping acclimation can cause dimensional movement. Keep the planks in the room for the manufacturer-recommended time while maintaining typical indoor HVAC conditions. This step supports a more stable engineered wood floor long-term, even in moisture-variable spaces.
What underlayment or moisture barrier is best for engineered wood floors in a laundry room?
Choose underlayment based on your installation type and the manufacturer’s spec, because not all underlayments perform the same for engineered hardwood. For laundry rooms, prioritize a system that includes moisture protection—especially if you’re installing over concrete—while still meeting sound and flatness requirements. If you’re floating, many engineered floors require underlayment with an appropriate vapor barrier rating; if you’re glue-down or nail-down, the requirements can differ. Always follow the engineered wood flooring instructions for underlayment thickness, seams, and tape/overlap methods.
Which installation method (glue-down, nail-down, or floating) is best for laundry room conditions?
The “best” method depends on your subfloor and your engineered wood product’s installation rating, but laundry rooms benefit from systems that handle humidity fluctuations well. Floating floors are common for DIY, but they require correct underlayment and expansion gaps; nail-down or glue-down can provide a more rigid, secure feel when installed to spec. For concrete slabs or higher moisture risk, many homeowners prefer solutions with a tested moisture barrier and the manufacturer-approved method. Regardless of method, keep the washing machine and plumbing areas leak-checked, maintain consistent indoor humidity, and finish with properly sealed transitions.
📅 Last Updated: October 19, 2026 | Topic: How to install engineered wood floors in a laundry room? | Content verified for accuracy and freshness.
References
- Wood flooring
- Engineered wood
- https://www.cdc.gov/mold/default.htm
- https://www.epa.gov/mold
- F1869 Standard Test Method for Measuring Moisture Vapor Emission Rate of Concrete Subfloor Using …
- https://www.astm.org/Standards/F2170.htm
- https://scholar.google.com/scholar?q=engineered+wood+floor+installation+laundry+room+moisture Google Scholar
- https://scholar.google.com/scholar?q=engineered+wood+flooring+installation+guidelines+subfloor+moisture+testing Google Scholar
- https://scholar.google.com/scholar?q=wood+flooring+installation+moisture+content+NWFA Google Scholar