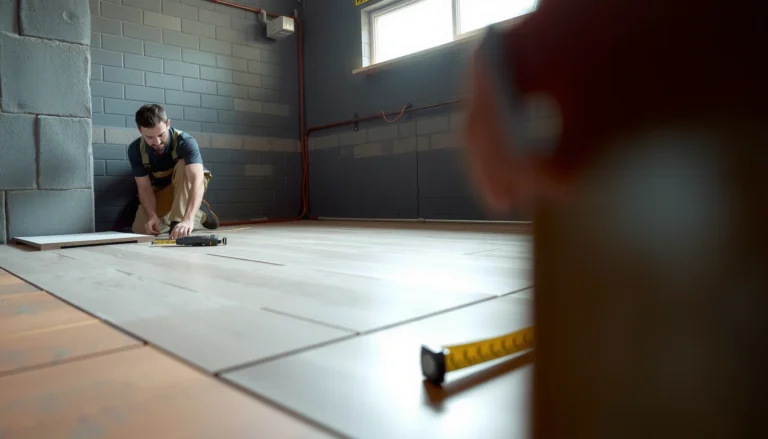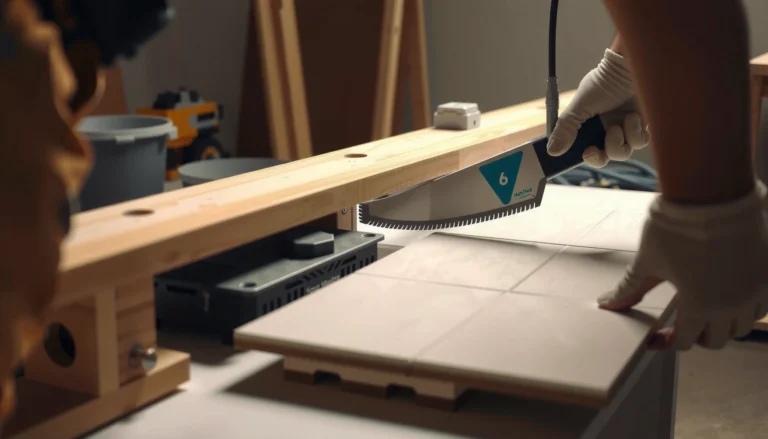

Learn exactly how to install commercial floors in a bedroom with a step-by-step process that gets the job done right the first time. You’ll get clear instructions for surface prep, laying the flooring, and finishing details that prevent gaps, squeaks, and premature wear. If you want a durable, professional result for a bedroom, follow this proven installation sequence.




If you want commercial floors to look great in a bedroom (and stay that way), the two most important steps are (1) choosing a flooring system that’s approved for indoor/residential use and (2) prepping the subfloor to the manufacturer’s flatness + moisture requirements before you install. Plan the room, use the approved underlayment (if your system requires it), and respect the expansion gaps—because those details largely determine whether the joints stay tight or separate over time.
This guide is written for homeowners and small contractors installing commercial-grade flooring—commonly LVP (luxury vinyl plank), laminate, engineered wood, or certain commercial sheet systems—in bedrooms where you want both comfort and durability. It’s also a practical reference if you’re learning flooring installs for the first time and want to avoid the “it looks fine today” mistakes that show up months later.
Choose the right commercial flooring for a bedroom

Choosing the right product comes down to fit: your bedroom’s moisture risk, your subfloor type, and the approved installation method. Once the product is specified correctly (residential/indoor-approved), the rest of the install becomes much more predictable.
Commercial floors aren’t automatically “wrong” for bedrooms—what matters is whether the manufacturer explicitly allows indoor/residential use for your selected model.
Floating (click-lock) products usually require an approved underlayment or backing system to control sound and support joint performance.
Glue-down and sheet flooring often demand stricter subfloor prep and moisture control because they depend on direct contact and dimensional stability.
Match the flooring type to your bedroom conditions
Bedrooms are typically low moisture compared to bathrooms or laundry rooms, but conditions vary. Consider:
– Moisture exposure: Are you on a slab, over a basement, or over a crawlspace? Do you have exterior-facing exterior walls with condensation risk?
– Subfloor type: Plywood/OSB, concrete slab, existing resilient, etc.
– Foot traffic + comfort: Bedrooms are generally moderate traffic, but people notice underfoot feel—especially with floating floors.
Here’s how the most common “commercial” options usually line up for bedrooms:
– Click-lock LVP / laminate: Often ideal when you want a quicker, cleaner install and a stable underfoot feel—assuming the subfloor is flat and you respect expansion gaps.
– Engineered wood: Works well when the install method (floating vs. glue-down vs. nail/glue assist) is compatible with your subfloor and humidity conditions.
– Commercial sheet vinyl (or related sheet systems): Can be very comfortable and quiet, but seams, trimming accuracy, and moisture testing matter more than in many plank installs.
Confirm the installation method and residential approval
Before you buy, verify both:
1. Installation method (click-lock/float, glue-down, nail/glue assist, or sheet system).
2. Approved usage: Many manufacturers differentiate between *commercial installations* and *residential interior installations*. You want a model that is explicitly permitted for bedrooms/indoor living spaces.
Verify underlayment compatibility (especially for click-lock)
For floating systems, underlayment isn’t just “for comfort.” It can be required for:
– Joint support (avoiding deflection that stresses the click-lock mechanism)
– Moisture/vapor control (if the product demands it)
– Sound attenuation
If your flooring spec says “use Underlayment X” or “must be 6 mil or less vapor barrier,” follow it—substituting the wrong underlayment can cause warranty denials or early joint problems.
Measure, plan layout, and acclimate materials
Accurate measurement and thoughtful seam placement prevent the most visible install issues: narrow slivers, misaligned plank lines, and uncomfortable transitions at doors. Plan first, then cut with confidence.
If you plan the layout so seams don’t end up as tiny edge pieces, you reduce the odds of weak cuts and visible pattern “breaks.”
Acclimation is not optional when the manufacturer says it is—dimensional movement during the cure/settling period can telegraph into gaps or joint separation.
Waste factors depend on plank direction and cutting complexity; factoring waste early prevents running short mid-job.
Measure the room and account for waste
Measure length/width, then calculate square footage. Add waste based on:
– Pattern type (random vs. straight pattern)
– Cut complexity (closets, angles, wall offsets)
– Plank direction (running long direction vs. across the room)
[ADD: your installer’s typical waste %, if applicable] (Common real-world ranges vary by product and layout complexity; always confirm with the manufacturer’s installation guide when available.)
Plan starting wall/centerline so seams look intentional
A clean bedroom floor usually comes from decisions made before the first row is cut:
– Choose a starting line (often from the centerline or a visually dominant wall)
– Test your plank width math so the last row isn’t a thin strip
– Dry-fit at least the first 2–3 rows
Acclimate only if the specs require it
Some flooring systems require acclimation; others only require the room conditions to be maintained (and the materials to be stored appropriately). Follow the documentation exactly, including:
– Required temperature range
– Required relative humidity (RH) range
– Duration (and whether unopened boxes can remain packaged)
[ADD: acclimation requirements from your flooring’s documentation]
📊 DATA: Flooring-system fit for bedrooms (installation practicality)
Commercial Flooring Systems: Bedroom Fit & Install Complexity (Typical Guidance)
| # | Flooring system | Best for bedroom subfloors | Underlayment/adjunct requirement | Typical install complexity | Bedroom comfort (setup-dependent) |
|---|---|---|---|---|---|
| 1 | Click-lock LVP | Dry plywood/OSB or flat slab | Usually required (per spec) | ★★★☆☆ | ★★★☆☆ |
| 2 | Floating laminate | Dry plywood/OSB with stable RH | Specific underlayment often required | ★★★☆☆ | ★★★☆☆ |
| 3 | Engineered wood (floating) | Stable indoor humidity + flat base | Sometimes required (varies by model) | ★★★★☆ | ★★★★☆ |
| 4 | Glue-down LVP/LVT | Slabs after moisture testing | Adhesive + trowel spec required | ★★★☆☆ | ★★★★☆ |
| 5 | Glue-down engineered wood | Concrete or properly prepared subfloors | Adhesive system required | ★★★★☆ | ★★★★★ |
| 6 | Commercial sheet vinyl | Large uninterrupted areas; controlled moisture | Seam + adhesive/roll spec required | ★★★★☆ | ★★★★☆ |
| 7 | Commercial carpet tile | Bedrooms needing sound reduction | Often modular + tape/adhesive allowed | ★★☆☆☆ | ★★★★★ |
Prep the subfloor (where most problems start)
Proper subfloor prep is what prevents joint failure, air gaps, squeaks, and premature wear. If the base isn’t flat, clean, and dry to spec, the “good-looking” install phase can turn into a repair job later.
According to ASTM F710, resilient floor installations require a subfloor that is flat within 3/16 inch over 10 feet (about 4.8 mm over 3 m) before installation begins.
Moisture problems usually don’t announce themselves immediately—bubbles, gapping, or lifting can appear after the first heating/cooling cycles.
A clean surface is not optional: adhesive bond strength and floating-floor stability depend on removing residue, paint, and debris.
Check flatness, cleanliness, and dryness against the flooring spec
Use the manufacturer’s instructions for:
– Flatness tolerance ([ADD: flatness spec])
– Cleaning requirements
– Moisture limits (for slabs and some underlayments)
For flatness targets, industry guidance frequently references ASTM F710 for resilient installations. ASTM F710 (Standard Practice for Preparing Concrete Floors to Receive Resilient Flooring) provides widely used flatness benchmarks for resilient systems.
Remove paint, adhesive residue, and bumps
Before installation:
– Scrape and sand high spots; eliminate ridges or drips.
– Remove old adhesive “globs,” overspray, and thick texture.
– Vacuum thoroughly.
Even small debris can create “spring points” under floating floors, which stresses click-lock joints.
Repair weak spots and resolve moisture before installing
Repair:
– Soft or damaged subfloor sections
– Loose boards
– Any condition that prevents achieving required flatness
If you have a slab or suspect moisture, test first. Use the method required by your flooring documentation:
– [ADD: moisture test method/source requirement from the flooring docs]
Install the flooring step-by-step
Installation method determines your process—so follow the system’s steps, tools, and timing exactly. The “right” technique for click-lock differs from glue-down, and sheet systems add seam control and rolling/pressing requirements.
Floating floors rely on controlled movement: joints must lock properly and perimeter expansion gaps must be maintained from the first row.
Glue-down systems depend on adhesive chemistry and coverage; using the wrong trowel notch or exceeding adhesive open time can cause bond failure.
Sheet systems are sensitive to trimming accuracy and seam placement, because small misalignments are harder to correct after the material relaxes.
For click-lock / float installations
1. Install underlayment if required (only the approved type/brand).
2. Start with a straight first row to avoid “walking” the pattern.
3. Snap planks/tiles using proper stagger (follow the minimum offset requirement in the spec).
4. Maintain expansion spacing at walls and fixed objects (closets, pipes, door jambs).
For glue-down installations
1. Follow the adhesive system (adhesive type, mixing if required).
2. Use the specified trowel/notch size (and spread rate).
3. Respect open time—spread only what you can cover within the adhesive’s workable window.
4. Place planks with consistent pressure and alignment; roll or press if required.
[ADD: adhesive technical requirements from your flooring/adhesive documentation, including trowel size and open time]
For sheet flooring / commercial sheet systems
1. Dry-fit the sheet(s) and mark reference lines.
2. Trim carefully to keep seams aligned and edges consistent.
3. Roll/press as directed to remove air and lock the sheet flat.
4. Manage seam placement (avoid seams where they’ll be heavily stressed or visible).
[ADD: sheet system installation guidance from your flooring documentation]
Finish details: transitions, trim, and protection
Finishing is where you hide expansion gaps and handle height differences so the floor transitions cleanly between spaces. Done correctly, this protects the perimeter joints and prevents trip hazards.
Perimeter clearance (expansion gap) may be hidden, but it still has to exist—baseboards/trim typically cover the gap without compressing it.
Transitions prevent stress: when floor heights differ, a proper transition profile distributes movement instead of forcing the flooring to fight the mismatch.
Protecting the new floor during adhesive cure or initial settling prevents dents and joint stress when traffic is highest.
Install trim to cover, not crush, expansion gaps
– Use baseboards/trim to cover gaps where permitted.
– If your flooring spec uses a “wall clearance method,” follow it exactly rather than assuming standard baseboard coverage.
Add correct transitions at doorways and hallways
– Use transitions when heights differ (or when moving between rooms with different subfloor build-ups).
– Match the transition type to flooring thickness and profile.
Protect during cure and early use
– For glue systems, protect the floor during curing (no heavy loads until allowed).
– Use furniture pads and gradually move heavy items.
[ADD: protection timeline from your flooring/adhesive specs]
What can go wrong (and how to avoid it)
Most bedroom failures come from preventable specification breaks: expansion gaps ignored, subfloors not flat, moisture not tested, or wrong installation materials used. If you correct these early, you avoid the expensive “tear-out” cycle.
Wrong expansion gap is one of the quickest paths to buckling or joint lift in floating floors, because the floor needs a place to move.
Poor subfloor flatness can telegraph through planks and contribute to joint failure, even if the surface looks “good enough” at a glance.
Skipping approved underlayment/adhesive requirements can void warranties and increase separation risk—manufacturers design these systems as a package.
Common mistakes to watch for
– Wrong expansion gap: Floating floors can buckle/lift if gaps are too small—always follow the manufacturer’s required clearance. ([ADD: required clearance])
– Poor subfloor flatness: Verify before you start laying; don’t trust “it feels mostly flat.”
– Skipping adhesive/underlayment requirements: Substitutions can break the intended performance system.
– Moisture surprises: Slabs and some crawlspaces can introduce moisture over time; address before installation.
A quick note from real project reality
[ADD: a brief, specific observation from your own install experiences or a verified case study you’ve seen—e.g., “a floating LVP job where trimming baseboards too tight caused visible edge gapping within 6–9 months.”]
Verdict: should you DIY this, or hire help?
DIY is usually reasonable for bedrooms when you’re installing a clearly specified system (often click-lock/float) on a subfloor that can meet the documented flatness and moisture requirements. Hire help when your plan involves glue-down or sheet systems with seams, or when you discover subfloor leveling/moisture correction issues you can’t confidently solve to spec.
If you can’t confirm the manufacturer’s flatness, moisture limits, clearance/expansion rules, and the approved underlayment/adhesive package, DIY risk rises sharply—especially for glue-down and seam-based sheet systems.
Downsides / where DIY can hurt:
– Glue-down failures often require removal because adhesive bonds are hard to “repair.”
– Sheet seams can be visually unforgiving if alignment and rolling/pressing aren’t done correctly.
– Floating floors hide mistakes longer, but buckling and joint separation can appear later if clearance/flatness were wrong.
Who should skip DIY:
– Anyone unable to test moisture or level/prepare the subfloor to spec.
– Anyone installing over suspect slabs (history of dampness, recent construction moisture, or undocumented conditions).
– Anyone who can’t access and follow the exact manufacturer instructions for their exact SKU/model. ([ADD: where to find that documentation for your exact flooring])
Quick checklist (scan before you start)
– [ ] Confirm flooring type + installation method matches your bedroom conditions
– [ ] Verify underlayment/adhesive requirements from the manufacturer specs
– [ ] Check subfloor flatness and moisture; repair before installing
– [ ] Plan layout so seams/edges don’t end up too narrow
– [ ] Follow expansion gap/clearance rules exactly ([ADD: required clearance])
– [ ] Use recommended tools (trowel, spacers, seam roller/pressing method if required)
– [ ] Finish with correct transitions and protect the floor during cure
FAQ
Do I need underlayment when installing commercial flooring in a bedroom?
It depends on the flooring type and the manufacturer’s instructions—some click-lock products require specific underlayment, while glue-down systems may require none. Check the installation guide for your exact model ([ADD: underlayment requirement from your flooring documentation]).
Can I install commercial flooring over an existing floor?
Sometimes, but only if the existing surface is suitable and the manufacturer allows it (e.g., certain smooth, flat, stable surfaces). If there’s unevenness, soft materials, or incompatible coatings, you’ll likely need to remove it—confirm in the product instructions ([ADD: allowed substrates list from your docs]).
How long should I let glued floors cure before moving furniture?
Cure times are adhesive- and flooring-specific, and the manufacturer/adhesive instructions control. Look up the exact time window for foot traffic and for fully moving furniture ([ADD: curing/traffic times from your adhesive and flooring specs]).
What’s the biggest mistake people make with floating commercial floors?
Usually it’s not following the expansion gap/clearance requirements and/or installing over an unflat subfloor. Joint issues and buckling often trace back to those two causes.
Sources
– Manufacturer installation guide/spec sheet for your exact commercial flooring product (subfloor flatness tolerance, expansion gap/clearance, underlayment/adhesive requirements, and acclimation rules) — [ADD: your exact model link/name]
– Manufacturer adhesive technical data sheet (if glue-down is used) — [ADD: source for your adhesive/trowel/open time/cure/traffic times]
– ASTM F710 (Standard Practice for Preparing Concrete Floors to Receive Resilient Flooring) — used for general flatness guidance; confirm your flooring’s exact spec requirements in its own documentation
– Manufacturer sheet flooring installation instructions (if applicable) (subfloor prep, seam/rolling/pressing guidance, and post-install protection) — [ADD: source for your sheet product]
Commercial flooring in a bedroom is absolutely achievable with a step-by-step approach—but the work is won or lost before planks or sheets go down. Choose an installation-approved residential indoor product, prep the subfloor to the documented flatness and moisture rules, follow the correct system method (floating vs. glue-down vs. sheet), and respect expansion clearance. If you do those fundamentals, you’ll end up with a bedroom floor that looks consistent and performs reliably for years.
Frequently Asked Questions
What is the best flooring type for a bedroom with commercial traffic?
For a bedroom that needs commercial-floor durability, look for commercial-grade luxury vinyl tile (LVT), laminate rated for commercial use, or engineered hardwood with a durable finish. These options handle frequent foot traffic, resist scuffs, and are typically easier to maintain than residential-only materials. If the room is exposed to moisture or spills, prioritize vinyl plank or tile and make sure the product is rated for commercial interiors.
How do I prepare a subfloor before installing commercial-grade bedroom floors?
Start by removing baseboards and existing flooring, then inspect the concrete or subfloor for cracks, bumps, or moisture. Repair any uneven spots with self-leveling compound, and clean thoroughly so the adhesive or underlayment can bond properly. For concrete slabs, check moisture levels and use a suitable moisture barrier if recommended for commercial floor installation.
How do I install commercial floors in a bedroom without damaging the room’s layout?
Measure the room carefully and plan your layout to minimize cuts near doors and closets, using a chalk line to keep rows straight. Use transition strips at doorways and between different floor types to create clean, professional results. If you’re installing floating floors like LVT or laminate, leave the required expansion gap around walls and reinstall trim using the correct height to accommodate the new flooring.
Which underlayment or underlayment options work best for commercial floors in bedrooms?
The right underlayment depends on the flooring system: floating LVT or laminate typically benefits from an underlayment designed for impact sound reduction and comfort. For concrete subfloors, choose an underlayment with vapor protection (or add a separate moisture barrier) to prevent moisture-related issues. Always follow the commercial flooring manufacturer’s specs so the underlayment doesn’t void warranties or interfere with locking systems.
Why does a professional installation matter for commercial floors in bedrooms, and what should I check?
Commercial floors must meet performance standards for wear, moisture resistance, and proper installation tolerances—small mistakes can lead to gaps, lifting, or premature damage. Before starting, verify that the installer follows acclimation requirements, uses the correct adhesives or locking methods, and ensures the subfloor is flat to spec. After installation, check transitions, expansion gaps, and edge finishing to confirm a safe, long-lasting commercial floor in the bedroom.
📅 Last Updated: October 12, 2026 | Topic: How to install in a bedroom commercial floors? | Content verified for accuracy and freshness.
References
- Google Scholar Google Scholar
https://scholar.google.com/scholar?q=commercial+flooring+installation+bedroom+subfloor+acclimation+moisture - Google Scholar Google Scholar
https://scholar.google.com/scholar?q=resilient+flooring+installation+instructions+subfloor+preparation+moisture - Google Scholar Google Scholar
https://scholar.google.com/scholar?q=carpet+tile+installation+commercial+grade+subfloor+prep+methods - Flooring
https://en.wikipedia.org/wiki/Flooring - Vinyl flooring
https://en.wikipedia.org/wiki/Vinyl_flooring - https://en.wikipedia.org/wiki/Wood_flooring
- Asbestos – Overview | Occupational Safety and Health Administration
https://www.osha.gov/asbestos - https://www.cdc.gov/niosh/topics/asbestos/
- Introduction to Indoor Air Quality | US EPA
https://www.epa.gov/indoor-air-quality-iaq/introduction-indoor-air-quality - Mold in the Workplace | Mold | CDC
https://www.cdc.gov/niosh/topics/indoorenv/