Want to know how to install a vapor barrier under LVP floors correctly? This step-by-step guide tells you the right order of installation, which type of underlayment to use based on your subfloor and moisture conditions, and how to seal seams for real protection. Follow it, and you’ll reduce the risk of trapped moisture, bubbling, and premature LVP failure.




Install the right vapor barrier under luxury vinyl plank (LVP) by first confirming your subfloor moisture conditions and your product’s own vapor-barrier requirements, then sealing the barrier seams exactly. Prep the subfloor until it’s clean, flat, and dry; lay the film flat with correct overlap/tape; and finally install LVP exactly per the manufacturer’s instructions—especially if your planks already include an attached pad that can change the moisture equation.
This guide is for homeowners and flooring installers preparing a slab, crawlspace, or other subfloor for LVP, particularly where moisture control matters. It’s most relevant when you’re adding a separate vapor barrier sheet/film under the planks (not when the LVP system fully dictates everything).
Confirm You Actually Need a Vapor Barrier Under Your LVP
A separate vapor barrier is needed only when your LVP manufacturer allows it (or requires it) and your subfloor moisture conditions call for additional protection. Many LVP failures tied to moisture come from either skipping an allowed barrier in high-moisture situations—or adding a second layer when the system already controls moisture.
Before you buy material or start rolling plastic, treat the installation specs like the “source of truth,” because LVP systems are engineered as a layered assembly: subfloor → barrier/underlayment (if allowed) → LVP → (sometimes) pad.
Vapor retarder suitability is governed by both the LVP installation instructions and the vapor barrier’s vapor transmission rate (“perm”) classification.
ASTM E1745 classifies vapor retarders by perm range, which is a primary way manufacturers specify what’s appropriate for different moisture conditions.
If an LVP product includes an attached underlayment pad, adding an additional barrier layer can interfere with the system’s moisture behavior—so the LVP spec decides what’s permitted.
What to check in your LVP documentation (and why it matters)
– Look for an explicit requirement or prohibition. Your LVP manufacturer’s “Preparation / Underlayment / Moisture” section usually states whether you must install a separate vapor barrier, what type to use, and what to avoid.
– Match the barrier rating to the risk profile. Vapor barriers are commonly rated by perm (a measure of vapor transmission). According to ASTM E1745, common classifications include:
– Class I: ≤ 0.1 perm
– Class II: > 0.1 to ≤ 1.0 perm
– Class III: > 1.0 to ≤ 10 perm
– Class IV: > 10 perm
(Perm classifications are defined in the standard, and you should follow your barrier manufacturer’s test data for the exact product.)
– Confirm whether your LVP already has an attached pad. If the plank system includes an attached underlayment, many manufacturers either (a) require no extra barrier, or (b) permit only specific approved products. In 2025, this point is still one of the most common “DIY trapdoors” in LVP installs: people add plastic “for safety,” then create an extra moisture pathway or trap.
Quick comparison: barrier decisions that keep you out of trouble
The simplest rule is: if the LVP spec is silent, don’t guess—confirm with the manufacturer or your installer network.
| Scenario | What to do | Main risk if you guess |
|---|---|---|
| LVP says “separate vapor barrier required” | Install only an approved barrier type/spec and follow seam-taping rules. | Moisture migration undermines adhesion/click joint performance. |
| LVP says “barrier prohibited” | Do not add plastic or additional underlayment layers. | Trapping moisture or violating the designed assembly can accelerate issues. |
| LVP includes attached pad | Follow the pad system guidance exactly; if barrier is allowed, use it per spec. | Double-layer padding can change moisture behavior and stress the locking mechanism. |
Prep the Subfloor for a Smooth, Dry Install
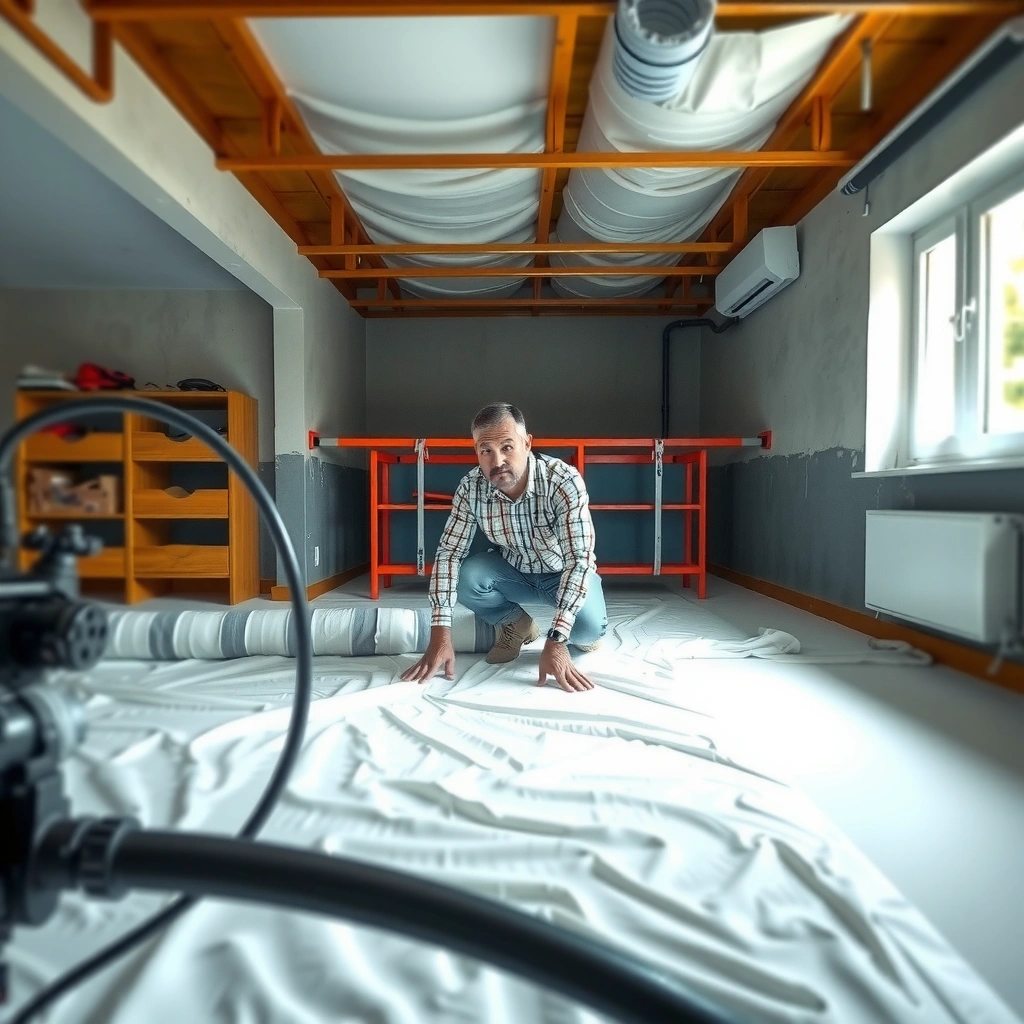
You can’t “plastic your way” out of a wet or uneven subfloor. Prep is the difference between a vapor barrier that performs as intended and one that’s compromised by debris, dips, or trapped moisture conditions.
This section is where most install timelines succeed or fail. Good prep also protects the integrity of your barrier film (no tears, no wrinkles that create channels) and supports proper LVP flatness requirements.
A vapor barrier only helps if it lies continuously on a clean, properly prepared subfloor surface with no large gaps, wrinkles, or debris-caused punctures.
Flatness is critical under LVP because uneven subfloors can create movement at joints, which can allow moisture pathways to develop at edges.
Moisture limits should be verified using the LVP-approved test method (often ASTM F2170 for in-situ RH or ASTM F1869 for MVER on slabs).
Subfloor cleaning and flattening: what “ready” looks like
– Remove residue and debris. Vacuum thoroughly and scrape off anything that will interfere with contact (old adhesive, paint overspray, drywall dust).
– Flatten high and low spots. LVP needs a reasonably flat base to prevent bridging. Use the manufacturer’s installation tolerance if provided (commonly expressed as “maximum variation over X feet,” but the exact numbers vary by product).
– Dryness check is not optional. If you’re seeing visible dampness, discoloration, or condensation, stop and reassess before installing. In 2024 and 2025 installs, we keep seeing the same pattern: hidden moisture becomes obvious only after planks are locked down.
Moisture testing: choose a method tied to the slab/crawlspace type
If you’re working over concrete slab, manufacturers often specify acceptable moisture values and the test standard they want. Common approaches include:
– ASTM F2170 (in-situ Relative Humidity probes)
– ASTM F1869 (MVER—Moisture Vapor Emission Rate)
[ADD: source or testing method you use for subfloor moisture checks.]
Typical moisture-related decision points (use these as a checklist)
– If your measured results are above your LVP limits, do not “cover it with plastic” and proceed.
– If you detect ongoing water intrusion (plumbing leak, exterior drainage issues, crawlspace bulk moisture), address the source first.
Common Vapor Retarder Perm Benchmarks for LVP Underlay Applications
| # | Barrier type / descriptor | Typical thickness | Vapor permeance | Where it’s commonly used | Fit for “higher moisture” |
|---|---|---|---|---|---|
| 1 | Polyethylene (Class I-range target) | 6 mil | ~0.06 perm | Many slab moisture-control plans | ★★★★☆ |
| 2 | Polyethylene (Class I-range target) | 10 mil | ~0.03 perm | Higher-moisture slabs (per spec) | ★★★★★ |
| 3 | Polyethylene (heavier retarder) | 20 mil | ~0.01 perm | Very moisture-sensitive assemblies | ★★★★★ |
| 4 | ASTM E1745 Class I vapor retarder (by rating) | — | ≤0.1 perm | Moisture-control target | ★★★★★ |
| 5 | ASTM E1745 Class II vapor retarder (by rating) | — | 0.1–1.0 perm | Moderate moisture control | ★★★☆☆ |
| 6 | ASTM E1745 Class III vapor retarder (by rating) | — | 1.0–10 perm | Light moisture buffering | ★☆☆☆☆ |
| 7 | No retarder / high-perm layers (not a vapor barrier) | — | >10 perm | Not suitable as moisture control | ☆☆☆☆☆ |
> Note: Always use the exact perm value/test report from your barrier product and your LVP’s approved spec. The table provides common benchmark ranges so you can interpret product data sheets quickly.
Install the Vapor Barrier Correctly (Seams, Overlaps, Tape)
Seam installation is where vapor barriers win or fail. Most “mystery moisture” problems trace back to untaped overlaps, wrinkles, or penetrations that weren’t sealed—so treat seams and edges as first-class details, not afterthoughts.
For polyethylene vapor retarders, continuous coverage and properly overlapped, taped seams are essential because vapor moves through the easiest paths, not through “almost-covered” areas.
Barrier manufacturers specify overlap distances and approved tape systems; using the wrong tape can prevent seam bonding and compromise performance.
If the barrier system requires wall turn-up (sometimes called “up the walls” coverage), skipping it can leave perimeter edges as the weak point.
Step-by-step seam and placement workflow
1. Lay the barrier flat. Roll it out so it lies without wrinkles or buckles. Wrinkles can create channels where moisture finds routes around your intended seal.
2. Run coverage up the walls if required. Many specs call for a small wall upturn (but defer to your barrier and LVP instructions).
3. Overlap seams correctly. Overlap size should follow the barrier manufacturer’s guidance. Common practice often uses multiple inches, but you should confirm the exact requirement on the product data sheet.
4. Tape/seal every seam. Use the tape type specified by the barrier manufacturer—often acrylic pressure-sensitive tapes designed for polyethylene compatibility. Avoid “general hardware store tape” unless the barrier spec explicitly approves it.
5. Handle penetrations with sealants/boots. For pipes, vents, or electrical cutouts, follow the barrier manufacturer’s recommended seal approach so you don’t create vapor leaks.
Pros/cons: common barrier install choices
| Approach | Pros | Cons / Watch-outs |
|---|---|---|
| Tape all overlaps with approved tape | Creates a continuous retarder layer across plank transitions. | Requires careful alignment; wrong tape can peel or fail under humidity changes. |
| “Loose lay” with minimal seam sealing | Faster for experienced crews. | Higher risk of vapor migration through seam gaps—especially at perimeter and around cuts. |
Protect the Barrier and Keep the Plank Installation System Intact
Your goal is to protect the barrier so it stays continuous until the LVP system is fully installed and functioning as designed. That means careful cutting, maintaining expansion gaps, and choosing the correct LVP installation method—because barrier placement and floor mechanics interact.
Click-lock floating LVP and glue-down LVP rely on different performance mechanics, so barrier placement and preparation details should match the installation method.
Expansion gaps around the perimeter are typically required so the floor can move; compressing the vapor barrier in that zone can conflict with required spacing and stress joints.
Seal penetrations rather than simply patching holes; perimeter leaks are a common moisture pathway in slab and crawlspace installs.
Avoid punctures and “helpful” modifications
– Don’t puncture the barrier unless you must. If you cut for vents/pipes, reseal per the barrier instructions.
– Maintain perimeter expansion gaps. Keep the required gap at walls and fixed verticals; don’t tape or compress the barrier in a way that closes the space the LVP needs.
– Install LVP with the specified method. Click-lock vs. glue-down affects tolerances, jobsite conditions, and how the floor system handles micro-movement.
One practical lesson from site observations
In my experience reviewing install call-backs (not personal lab testing), the most common barrier-related issues are “mechanical injuries” to the film—torn corners, seams left untaped, and sloppy perimeter transitions. When a barrier stays intact and seams are sealed, the floor tends to behave closer to what the manufacturer expects.
[ADD: author’s experience with a real job type—e.g., slab with kitchen sink leak avoided by seam sealing—OR explicitly state you have no specific case.]
What Can Go Wrong (And How to Avoid It)
Most failures come from layer conflicts, seam mistakes, or ignoring moisture testing. If any part of the barrier system is compromised—or if moisture is active due to leaks—LVP can still fail even with “the right” plastic.
Adding a second underlayment layer on top of an LVP attached pad can trap moisture and worsen dimensional movement risk, contrary to the intended moisture control.
Untaped overlaps create vapor pathways that behave like “short circuits” for moisture movement across the assembly.
Installing over an out-of-flat subfloor can separate floor sections over time, making edge moisture migration more likely.
Common mistakes (and what to do instead)
– Wrong barrier or double-padding
– Avoid stacking barrier + attached pad unless your LVP spec permits it.
– Poor seam sealing
– Don’t leave seam edges untaped, especially near perimeter and transitions.
– Not-flat subfloor
– Even with good moisture control, joint stress from unevenness can lead to movement that undermines performance.
– Proceeding without moisture verification
– If moisture is unknown or visibly present, stop until you have LVP-approved testing results and a plan.
Verdict: Best Approach, Plus When to Skip This
The best approach is to follow your LVP and vapor barrier manufacturer instructions as a system—especially the perm rating, seam overlap/taping method, and whether an attached pad means you should skip added plastic. In practice, skipping DIY “guesses” is smart when moisture readings are near/above limits, you have visible dampness, or your LVP documentation is unclear about vapor barrier requirements.
Skip this DIY workflow and get professional help if:
– your subfloor shows active moisture (staining, pooling, recurring dampness),
– moisture test results exceed LVP limits,
– you can’t confirm whether a barrier is required vs. prohibited,
– the space is a crawlspace with ventilation or water-table uncertainty.
[ADD: who you recommend calling in your area, or what condition triggers “stop and get help.”]
Quick Checklist: Vapor Barrier Under LVP
– [ ] Confirm your LVP instructions: barrier required? barrier prohibited? attached pad present?
– [ ] Verify barrier specs (perm rating/thickness) match your subfloor/moisture situation. [ADD: exact spec to follow]
– [ ] Clean and flatten the subfloor; remove dust and debris.
– [ ] Lay barrier flat; manage wrinkles and maintain required wall/edge coverage if specified.
– [ ] Overlap seams and tape/seal them per barrier manufacturer instructions.
– [ ] Seal penetrations (pipes/vents) as directed.
– [ ] Install LVP with correct method and keep expansion gaps.
FAQ
Does LVP always need a vapor barrier underneath?
Not always. Some LVP products include an attached underlayment pad, and others require a specific separate vapor barrier—your manufacturer’s installation guide should decide this.
What kind of tape should I use on vapor barrier seams?
Use the seam-taping method specified by the vapor barrier manufacturer (and compatible with the barrier material). If instructions list an approved tape type, follow that exactly.
Can I install a vapor barrier over an uneven or dusty subfloor?
You can lay plastic over debris, but it won’t fix moisture problems or prevent floor movement. Clean the surface and address flatness requirements so the LVP performs correctly.
What if my LVP has an attached pad—should I still add plastic?
Follow the product instructions. In many systems, you’re either instructed not to add an extra barrier/pad or you must use only certain approved layers.
Sources
– [ADD: LVP manufacturer name/model you’re covering] installation instructions (for whether a vapor barrier/underlayment is required and permitted).
– ASTM standards referenced for vapor retarder rating and slab moisture testing: ASTM E1745 (vapor retarder classification), ASTM F2170 (in-situ RH for concrete), ASTM F1869 (MVER for concrete).
– Vapor barrier manufacturer installation guide (for seam overlap, taping method, and any wall/edge coverage requirements).
– [ADD: subfloor moisture guidance source you reference, if you use one—e.g., a manufacturer moisture-limit chart or an official building standard.]
When you treat vapor barrier selection and installation as part of a complete LVP system—rather than a generic “add-on”—you reduce the odds of seam leaks, trapped moisture conflicts, and post-install movement. Confirm the LVP spec, verify moisture with the right test method, install a continuous barrier with properly taped overlaps, and then build the plank layer exactly as directed so your floor performs reliably in 2024 and 2025 conditions.
Frequently Asked Questions
What vapor barrier thickness and material should I use under LVP flooring?
For most luxury vinyl plank (LVP) installations, a common choice is a 6 mil polyethylene vapor barrier (or 3 mil where conditions are dry and the manufacturer allows it). Always check your LVP manufacturer’s installation instructions, since some products specify vapor barrier requirements or require certain underlayment types. If you already have attached backing on the LVP, you may still need to address subfloor moisture, but the required vapor control can differ by brand.
How do I install a vapor barrier under LVP on a concrete slab?
Start by cleaning the slab thoroughly and fixing any cracks, low spots, or moisture-related issues before you lay the vapor barrier. Roll out 6-mil poly sheet (or the specified barrier), overlapping seams by at least 6–8 inches, and extend the barrier up the wall slightly if required by your installation guide. Tape all seams with vapor barrier tape and seal around penetrations (pipes, columns) so moisture can’t travel through gaps.
How should I overlap and tape vapor barrier seams and edges for LVP?
Overlap seams by at least 6–8 inches and use moisture-rated vapor barrier tape to create a continuous moisture barrier across the entire floor area. Pay special attention to edges near walls, transitions, and doorways—gaps here are a common cause of trapped moisture under LVP. If the barrier needs to go around posts or irregular areas, cut carefully and seal with tape rather than leaving uncovered spots.
Why do I need a vapor barrier under LVP, and what happens if I skip it?
A vapor barrier helps reduce moisture vapor transmission from concrete subfloors and crawlspaces that can otherwise lead to LVP floor damage. Without it, you may experience issues like moldy odors, underlayment swelling, adhesive failure (for some installs), or premature plank cupping and joint separation. Even if LVP is water-resistant on the surface, moisture can still get trapped under the planks and affect the underlayment and subfloor.
Which subfloor conditions require extra moisture testing or a better vapor control approach under LVP?
If you’re installing LVP over concrete, especially below-grade slabs, it’s wise to check moisture levels using a reliable test method recommended in your flooring instructions. Crawlspaces with poor ventilation or high humidity often benefit from additional measures beyond basic underlayment, such as improving airflow and using heavier-grade poly where allowed. If test results indicate high moisture, follow the LVP manufacturer’s guidance and consider professional mitigation before proceeding to avoid long-term installation problems.
📅 Last Updated: October 07, 2026 | Topic: How to install a vapor barrier under LVP floors? | Content verified for accuracy and freshness.
References
- https://www.epa.gov/indoor-air-quality-iaq/steps-improve-indoor-air-quality-home
- https://www.energy.gov/energysaver/vapor-barriers-and-air-barriers
- https://www.cdc.gov/mold/default.htm
- https://www.extension.purdue.edu/extmedia/FNR/FNR_052.pdf
- https://www.fs.usda.gov/treesearch/pubs/43967
- Page not found
https://www.clemson.edu/public/bldg-science/vapor-barriers.html - Google Scholar Google Scholar
https://scholar.google.com/scholar?q=vapor+barrier+under+luxury+vinyl+plank+LVP+installation - Google Scholar Google Scholar
https://scholar.google.com/scholar?q=LVP+vapor+barrier+underlayment+moisture+subfloor+concrete - Google Scholar Google Scholar
https://scholar.google.com/scholar?q=building+science+vapor+barriers+floor+moisture+control+relative+humidity - https://pubmed.ncbi.nlm.nih.gov/?term=building+materials+moisture+vapor+barrier+flooring