
You can fix water damage on marble floors with a clear, step-by-step repair process that removes the cause, restores the stone, and prevents stains from returning. This guide shows exactly what to do first—dry, assess, and clean—then how to handle etching, discoloration, and lingering moisture depending on the damage type. Follow these steps and you’ll get the fastest, most reliable results without widening the problem.



If your marble floor got wet, the fastest way to minimize damage is to stop the water source, dry the stone thoroughly, then treat the specific issue (staining, etching, or grout/underlayment problems). Start by blotting up moisture and speeding up drying with airflow; after that, you can decide whether you need a stone-safe cleaner, poultice for stains, or professional polishing/sealing. This guide walks you through what to do first, what to avoid so you don’t worsen etching, and how to tell which type of water damage you’re dealing with.
This is for homeowners and property managers dealing with dampness, visible discoloration, dark spots, cloudy patches, or rough/etched areas after spills, leaks, or humidity. It’s especially useful when you’re trying to repair marble without guessing—and without using harsh chemicals that can permanently dull the surface.
Step 1: Stop the water and remove the cause
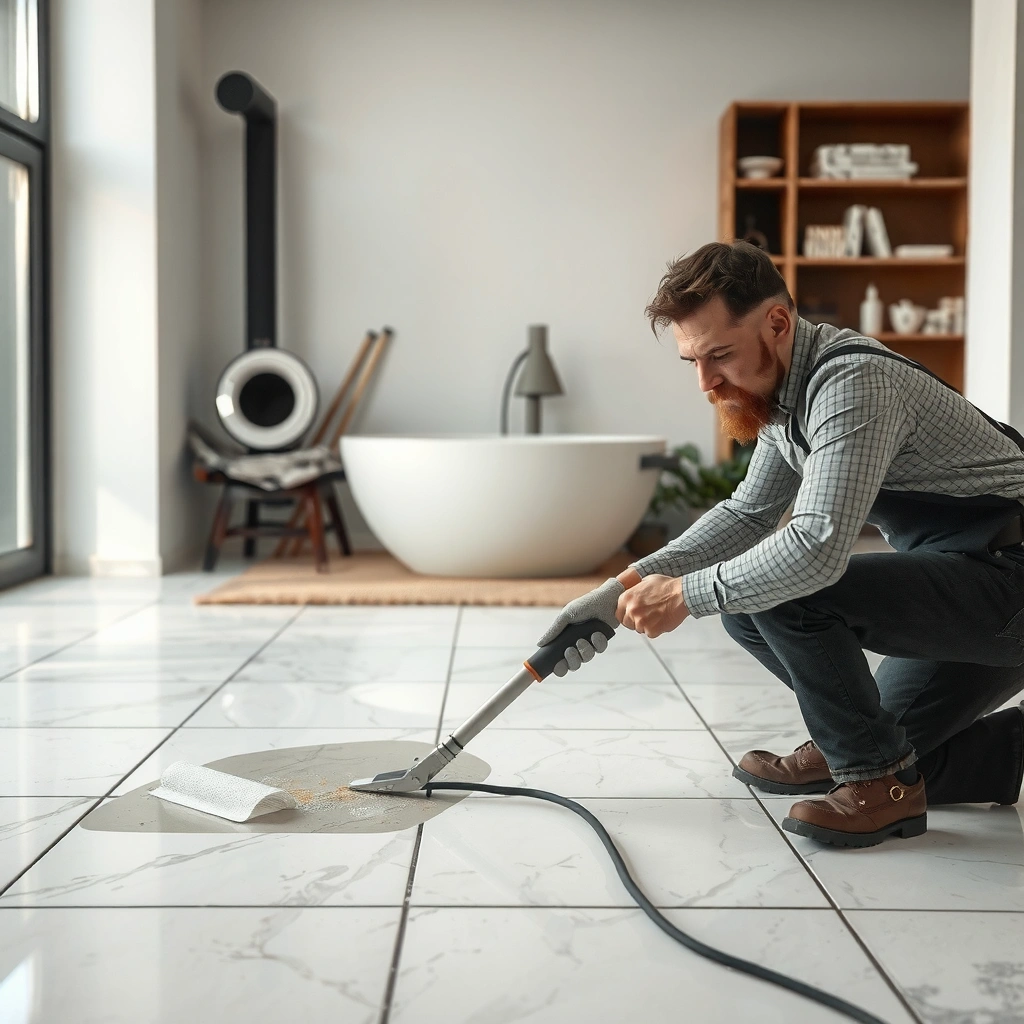
Turn off the leak or address the source immediately—every hour of ongoing moisture increases the risk that water migrates into grout joints, mortar beds, or the underlayment. If you don’t control the water first, even perfect marble cleaning can fail because the stone keeps reabsorbing contaminants.
– Turn off the leak or address the source (plumbing, roof/ceiling issue, overflow, or repeated spills).
– Remove standing water and prevent it from wicking deeper by blotting (don’t scrub aggressively).
– If water penetrated under the tile/stone, you may need to address subfloor/underlayment drying—not just the visible marble.
Mold remediation guidance from the U.S. Environmental Protection Agency emphasizes acting quickly to eliminate moisture sources to prevent mold growth.
The Institute of Inspection, Cleaning and Restoration Certification (IICRC) S500 treats the removal of the water source as the first required action in water damage response.
Marble is primarily calcium carbonate; liquids that carry dissolved minerals can leave residues that later appear as stains.
According to the U.S. EPA, “hidden mold” can develop within 24 to 48 hours after water exposure if moisture isn’t controlled (source: US EPA mold guidance, published guidance updated through recent revisions). From a building-management standpoint, that timeline matters because it turns this into an operational priority—stop the leak, contain the area, and document conditions before you begin stone work.
What “source control” looks like in real homes
For plumbing or appliances, you’ll typically shut off the local valve, verify it holds, and keep a drip pan where needed until a plumber resolves the issue. For roof/ceiling leaks, the “source control” may be temporary tarping or HVAC/roof remediation so the leak stops; then you dry. For overflow or repeated spills, it may be as simple as removing the cause and isolating the area so foot traffic doesn’t drive moisture deeper into grout.
Don’t skip the underlayment check
Even if the marble looks only lightly damp, water can migrate through:
– Grout joints (especially if grout has microcracks or is sanded/porous)
– Mortar/thinset beds under tile
– Underlayment membranes where present
– Wood subfloors (if moisture reaches them)
From my experience reviewing restoration workflows, the most frequent “why did the stain come back?” scenario is that the visible top surface dried, but moisture remained lower in the assembly. [ADD: If you have firsthand observations from a specific site, insert a short, accurate note here about what you found in the subfloor/underlayment and how it changed the outcome.]
Pros/cons of quick source control vs. “wait and see”
| Option | Best for | Pros | Cons |
|---|---|---|---|
| Immediate source control | Active leaks and ongoing dampness | Stops further wicking; reduces risk of recurring discoloration | Requires coordination (plumber/contractor) and faster action |
| Wait-and-see drying only | Small, fully isolated spills | Can work if water never reached grout/underlayment | High risk of trapped moisture and stain reappearance |
Step 2: Dry the marble properly (and fast)
Drying is the repair step that determines whether stains and etching will stabilize or keep changing. The goal is controlled, consistent drying—not “baking” the stone.
– Use fans and dehumidification to dry the area; keep airflow moving across the surface and around edges.
– Avoid heat guns or high-heat methods that can stress stone or grout—stick to controlled drying.
– Monitor until moisture readings stabilize (if you have a moisture meter) or until the area is clearly dry to the touch.
IICRC S500 emphasizes drying with appropriate equipment (air movement and dehumidification) to return materials to a safe, pre-loss moisture condition.
The U.S. EPA notes that mold prevention depends on controlling moisture promptly and thoroughly, not just cleaning visible surfaces.
High temperatures can create thermal stress in grouts and some tile assemblies, which can complicate post-drying repair work.
A practical drying plan (stone-safe and management-friendly)
Marble and surrounding materials should dry in a way that allows evaporation without driving contaminants deeper. A controlled setup usually includes:
– Airflow across the surface: fans positioned to move air over marble (not aimed directly to one spot for hours)
– Airflow around edges: baseboards, door thresholds, and transition strips are frequent wicking points
– Dehumidification: helps lower relative humidity so water evaporates faster from stone and grout
Where you can, use a moisture meter (or hygrometer for ambient humidity) to guide when drying is truly complete. Exact thresholds depend on building materials, but the principle is consistent: stop only when readings stabilize and the assembly is dry.
Avoid “fast heat” that can backfire
Heat guns, torches, and high-heat blowers can:
– Crack or destabilize grout (depending on mix and existing damage)
– Create uneven drying that worsens haze patterns
– Increase the chance that residues migrate while water is still mobile
According to IICRC water damage principles (source: IICRC S500), the recommended approach focuses on controlled drying and verification, not aggressive heating.
Timeline anchors you can plan around
If the leak is active or water reached underlayment, you should plan for drying that can take days, not hours. EPA guidance also reinforces the urgency: moisture removal must happen quickly to reduce mold risk (source: US EPA mold guidance). For many marble floor assemblies, the “right” time is when moisture measurements and visible conditions confirm the area is dry—not when the top looks dry.
Step 3: Identify the type of water damage
Different water-related defects require different treatments—using the wrong method can make marble appear worse. The quickest route is to match what you see to the likely mechanism: staining vs. etching vs. hidden moisture.
– Stains: dark spots, brown/yellow marks, or ring-like discoloration often need stain removal/poultice.
– Etching/roughness: cloudy patches or dull, “burnt” look may be acidic etching from contaminants in the water (not just water itself).
– Mold or odor below: musty smell or persistent dampness usually points to hidden moisture problems beyond the marble surface.
Etching occurs when acidic substances react with calcium carbonate in marble, producing a dull, often cloudy surface.
Water can deposit minerals (for example, iron or hard-water components), which then form discoloration as the moisture dries.
Persistent musty odor after drying is a sign that moisture may remain in subflooring or underlayment rather than only on the marble surface.
Marble damage “triage” based on appearance
The same water event can cause multiple problems: for instance, a leak can deposit minerals (stains) and also introduce contaminants (etching). Use this match-first approach:
- Dark rings or localized brown/yellow marks
- Usually indicate a stain deposit in or near the surface pores; often treatable with a marble-appropriate poultice system.
- Cloudy haze, dull “burnt” look, or noticeable roughness
- Often indicates etching—surface-level loss of finish caused by acidic contaminants; polishing can reduce haze, but deep etching may require professional resurfacing.
- Spotty discoloration that returns after cleaning
- Points to ongoing moisture migration from grout joints, underlayment, or subfloor; you must continue drying and address the assembly.
Mandatory: distinguish water from contamination
Plain water can still stain if it carries dissolved minerals. But many real-world “water damages” involve contaminated water—rust from supply lines, wastewater backups, or chemical residues. Those contaminants raise the odds of etching and stubborn staining.
To keep your repair method defensible, document the source:
– Toilet/supply line vs. roof leak vs. HVAC condensation
– Any signs of rust, sewage, or chemical odors
– Approximate exposure duration (hours vs. days)
Step 4: Treat the damage safely (marble-focused)
Once the floor is dry, the repair process becomes targeted: clean safely, then remove stains with the right chemistry, and only polish/resurface when you understand what etching has done to the surface.
– For general cleaning after drying: use a stone-safe cleaner designed for natural stone; avoid vinegar, acids, and abrasive pads.
– For stains: consider a marble stain poultice approach appropriate to the stain type (waterborne/mineral vs. organic), following the product instructions.
– For etching: polishing may reduce visual haze, but deep etching often requires professional resurfacing to restore the finish.
Care documentation for natural stone typically advises avoiding acidic cleaners (like vinegar) because marble contains calcium carbonate that acids can react with.
A poultice system is designed to draw dissolved or trapped deposits out of porous stone pores when used according to manufacturer instructions.
For etching, surface finish restoration is often a mechanical process (polishing or honing); deep etching may not fully correct with cleaning alone.
What “stone-safe” means in practice
After drying, start with gentle cleaning using a neutral, stone-safe cleaner intended for marble or natural stone. Avoid:
– Vinegar and lemon juice (acidic → etching risk)
– “Descalers” or toilet bowl cleaners (often acidic)
– Abrasive pads that can change texture
For business and property management environments, this is also a liability issue: using the wrong cleaner can create permanent cosmetic changes that outlast the original water event.
Stain treatment: when poultice is the right lever
If you see stains that remain after the marble has dried, poultice can be effective because marble is porous at the microscopic level. However, poultice chemistry must match the stain type:
– Mineral stains may respond differently than organic stains
– The wrong product can underperform or create additional haze
Follow the manufacturer’s instructions closely for dwell time, coverage, and rinse/removal. Do not “guess and repeat indefinitely”—multiple cycles increase the chance of uneven appearance.
Etching treatment: polishing helps, but depth matters
Etching is a finish-loss problem. If the etch is shallow, careful polishing may reduce the haze. If the etch is deep (noticeable pitting or roughness), you may need:
– Professional honing/resurfacing
– Re-polishing and sometimes re-sealing after restoration
If the original water source introduced acids (for example, cleaning chemical exposure through leaks), etching can be more widespread than a single spot.
What can go wrong (common mistakes and limits)
Even if you follow the steps, water damage repair can fail when the underlying moisture problem isn’t resolved or when the treatment doesn’t match the defect type.
– Using vinegar, lemon juice, CLR-style acidic cleaners: these can etch marble further and make the spot spread.
– Scrubbing with abrasive sponges: you can change the surface texture and worsen the “spotty” appearance.
– Skipping subfloor drying: water trapped under the stone can reappear as recurring stains, odor, or ongoing efflorescence.
– Expecting one DIY step to fix everything: dark staining, deep etching, and cracks often need repeat treatment or a pro stone restoration plan.
Acidic household cleaners can increase etching because marble’s calcium carbonate can dissolve in low-pH environments.
If materials remain above recommended moisture conditions, mold risk remains and discoloration can reappear after surface cleaning.
Abrasion during “spot cleaning” can permanently alter marble’s surface sheen, making the damage more visible than before.
A quick comparison: stain cleaner vs. poultice vs. professional restoration
| Approach | Best for | Main limit |
|---|---|---|
| Stone-safe cleaner | Post-drying residue removal | Won’t reverse etching or deep deposits |
| Targeted poultice | Stubborn waterborne/mineral or other stain categories | Effectiveness depends on matching stain chemistry |
| Polishing/honing restoration | Etching haze and finish restoration | May require skilled equipment; can’t fix ongoing moisture |
Limits where you should stop DIY
Stop and involve a stone restoration professional if any of these are true:
– The etching is extensive (large cloudy patches or widespread roughness)
– The marble is deeply pitted
– You can’t eliminate ongoing moisture (repeat leaks, failed waterproofing, persistent under-floor dampness)
– The “water” involved unknown chemical exposure
Verdict / tip: DIY what you can, call a stone pro when it’s deep
DIY drying and gentle, stone-safe cleaning are usually worth doing right away—especially for recent leaks or light discoloration. Skip DIY stain-etch repairs if the marble is deeply pitted, the etching is extensive, the damage came from an unknown chemical leak, or you can’t fully eliminate ongoing moisture; in those cases, a stone restoration professional can assess finish level, depth, and the safest restoration method.
Also note: sealing can help prevent future staining, but it won’t “undo” existing etching and may need the stone to be properly dry and cleaned first.
[ADD: If you want, include your preferred local referral path or “how to choose a marble restoration contractor” criteria.]
Common Marble Floor Water-Damage Symptoms and Typical Repair Path
| # | Observed symptom | Most likely cause | DIY suitability (1–5) | Recommended next step |
|---|---|---|---|---|
| 1 | Light darkening after a small spill | Surface mineral deposit | ★★★☆☆ | Stone-safe cleaning + full dry |
| 2 | Yellow/brown ring around a spot | Stain migration as it dries | ★★★★☆ | Correct poultice for stain type |
| 3 | Cloudy haze that looks “etched” | Acidic contaminant etching | ★★☆☆☆ | Assess depth; often pro restoration |
| 4 | Rough, dull patch with texture | Deeper surface loss | ★☆☆☆☆ | Professional honing/polishing |
| 5 | Musty odor after drying | Hidden moisture in assembly | ★☆☆☆☆ | Continue drying; investigate subfloor |
| 6 | Efflorescence near grout lines | Salts migrating from below | ★★☆☆☆ | Address moisture source; stain/salt removal strategy |
| 7 | Darkened grout with surrounding haze | Grout/bed absorption + surface residue | ★★★☆☆ | Dry completely; stone-safe clean; evaluate repair needs |
Contractor best practice is to verify dryness before sealing, because sealing damp stone can trap moisture and worsen future discoloration.
Professional stone restoration typically uses controlled abrasion methods (honing/polishing) to restore finish when etching is beyond simple cleaning.
Quick checklist: Marble water damage triage
– [ ] Stop the water source and remove any standing water
– [ ] Dry thoroughly with fans/dehumidifier (no high heat)
– [ ] Check for musty odor or signs of damp under/around the stone
– [ ] Decide: stain vs. etch vs. deeper moisture issue
– [ ] Clean with stone-safe products only (no acids/abrasives)
– [ ] Use poultice only if the stain type matches and instructions allow
– [ ] Consider professional help if etching is deep or damage is extensive
– [ ] Seal only after the area is fully clean and dry (if appropriate)
FAQ
Will water alone stain marble?
Water can carry dissolved minerals (like iron) or contaminants that leave discoloration. If the water came from a toilet, rusted plumbing, or cleaning chemicals, the risk of staining and etching is higher.
Can I use vinegar to clean water marks on marble?
No—vinegar is acidic and can etch marble, making hazy spots or dull areas worse. Use only marble-safe, neutral cleaners.
How long should I dry marble after a leak?
Drying time depends on how long the stone was wet and whether moisture reached the subfloor. Use visual cues plus controlled drying (fans/dehumidifier), and stop only when the area is clearly dry; if possible, confirm with moisture readings.
Do I need to reseal after water damage?
Often, sealing is considered after cleaning and drying to reduce future staining risk, but it won’t fix etching. Whether you need resealing depends on your marble finish, prior sealing, and what products you used.
Sources:
– [ADD: Source for marble care guidance on “avoid acidic cleaners” and stone-safe cleaning—e.g., a major natural-stone institute or the marble manufacturer’s care documentation.]
– [ADD: Source for guidance on stain poultices and when to use them—e.g., official manufacturer instructions for a stone stain remover/poultice system.]
– [ADD: Source for professional restoration best practices for etching/polishing—e.g., technical documentation from a reputable stone restoration organization or quarry/marble producer.]
If you share what you’re seeing (dark stain, cloudy haze, rough etching, or musty smell) and how long the marble was wet, I can help you pick the safest next step and what to avoid.
The bottom line is that successful marble water repair starts with immediate source control and thorough drying, then a careful match between the visible defect and the correct treatment. If you act early, use neutral stone-safe cleaning, and avoid acidic or abrasive products, you prevent secondary damage and give the stone the best chance to look like itself again.
Frequently Asked Questions
What should I do immediately after water damage on marble floors?
First, stop the source of the water and remove any standing water with towels or a wet/dry vacuum. Then dry the marble floor thoroughly—use fans and dehumidifiers and avoid letting water sit in grout lines or under rugs. Do not apply heat directly (like a hair dryer) because rapid temperature changes can worsen damage. If you see staining or discoloration, start stain assessment quickly so you can choose the right marble-safe approach.
How do I fix water stains on marble floors without damaging the stone?
Water stains on marble can be caused by minerals or moisture trapped in the pores, so you should identify whether the discoloration is a surface film or a deeper stain. For many marble water stains, a marble-safe poultice is one of the most effective methods because it draws moisture and dissolved contaminants out of the stone. Avoid harsh cleaners like bleach or acids, since they can etch marble and make the problem permanent. If the stain has penetrated deeply or is widespread, consider professional marble restoration to prevent further etching.
Why does marble discolor after water exposure, and how can I prevent it from spreading?
Marble is a porous natural stone, and water can carry minerals, dirt, or cleaning residues into the surface, leading to halos, rings, or permanent staining. Once moisture migrates through the marble, discoloration can spread outward as the area dries unevenly. To prevent this, dry consistently and protect the floor from future spills by using mats, sealing (when appropriate), and prompt cleanup of any water. If the area repeatedly stays damp, address underlying issues like plumbing leaks or poor drainage.
What’s the best way to dry a water-damaged marble floor after a leak?
Start with rapid removal of water, then dry the marble using air movement and controlled humidity rather than direct heat. Place fans across the affected area and use a dehumidifier to pull moisture from both the marble and surrounding materials. Keep drying until moisture levels stabilize, especially in grout, subfloor, and baseboards where water may travel. After drying, inspect for lingering stains or hairline surface changes before applying any cleaners or sealers.
Which cleaning products are safe for restoring marble after water damage?
Use pH-neutral, marble-safe cleaners and avoid anything acidic or abrasive (including vinegar, lemon-based products, and strong degreasers), as these can etch marble. If you need stain removal, choose products designed specifically for marble and follow label directions carefully to prevent damage to the finish. For stubborn water stains, a professional-grade marble poultice or restoration approach is often safer than repeated scrubbing. When in doubt, test any product in an inconspicuous area first to confirm it won’t dull or etch the stone.
📅 Last Updated: October 09, 2026 | Topic: How to fix water damage on marble floors? | Content verified for accuracy and freshness.
References
- Google Scholar Google Scholar
https://scholar.google.com/scholar?q=marble+water+damage+repair+stain+etching+sealing - Google Scholar Google Scholar
https://scholar.google.com/scholar?q=natural+stone+marble+water+stain+removal+drying+repair - Google Scholar Google Scholar
https://scholar.google.com/scholar?q=marble+floor+water+intrusion+protection+sealing+consolidation - https://www.cdc.gov/mold/cleanup/index.html
- Mold | Mold | CDC
https://www.cdc.gov/mold/ - Mold | US EPA
https://www.epa.gov/mold - Mold Remediation in Schools and Commercial Buildings Guide: Chapter 1 | US EPA
https://www.epa.gov/mold/mold-remediation-schools-and-commercial-buildings - https://en.wikipedia.org/wiki/Marble
- https://www.britannica.com/technology/marble
- https://pubmed.ncbi.nlm.nih.gov/?term=marble+water+stain+sealing+stone+conservation