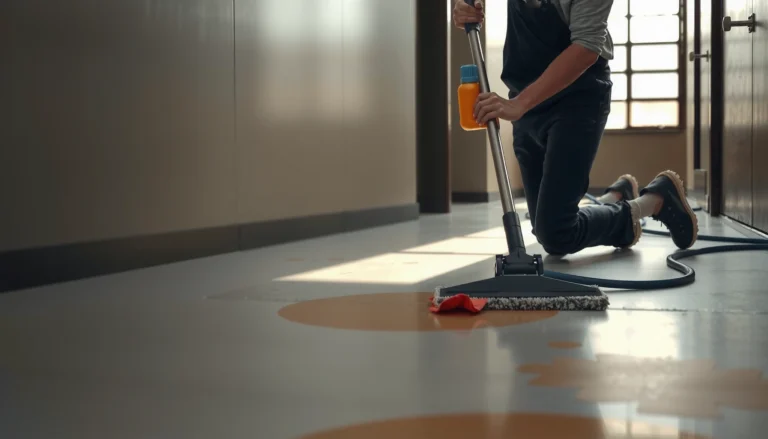
Squeaky commercial floors aren’t going to get better on their own—this step-by-step guide shows you exactly how to fix squeaks in commercial floors and stop the noise permanently. You’ll learn the fastest diagnostic checks to pinpoint the source, then follow the right repair method based on what’s actually causing the problem. By the end, you’ll know what to do, what to avoid, and how to restore a solid, quiet floor without guesswork.




Squeaks in commercial floors usually stop when you locate the moving layer (often loose wood subfloor/underlayment), then re-secure it from the correct side—without drilling blindly into a finished surface. The fastest, lowest-risk approach is to diagnose whether the squeak is from the structural layer, a layered interface, or an edge/transition gap, then apply targeted tightening, shimming, or localized repair.
Squeaks are more than an annoyance in high-traffic buildings (offices, retail, warehouses, hallways, schools) because they distract occupants, disrupt customer flow, and can signal a separation that returns after routine traffic loads. As of 2026, maintenance teams increasingly rely on repeatable diagnostics—marking each squeak point, confirming movement direction, and matching the repair method to the floor system.
If you’re maintaining a building with repeating noise at the same seams or joints, or you’ve noticed the squeak changing when multiple people walk by, this guide is built for you. It gives a practical workflow that flooring contractors and building maintenance staff can follow consistently—so you fix the cause, not just the symptom.
Locate the squeak source (don’t guess)
You don’t fix commercial floor squeaks by sweeping the whole floor—you fix them by narrowing movement to a specific board, sheet seam, or interface. The goal is to identify whether the sound originates at the structural layer (subfloor), the intermediate layer (underlayment), or the surface/edge detail (trim, transitions).
Press at seams, edges, and transitions while someone walks to pinpoint which joint actually moves under load.
Mark the squeak location (not just the room) so you can confirm the repair worked at the same exact points.
Squeaks that consistently occur at sheet seams or near walls often indicate separation between layers rather than random surface wear.
Walk-and-press method (practical for teams)
1. Bring a second person and work in one defined zone at a time (for example, one hallway segment between doors).
2. Walk slowly in the same path where the squeak is loudest. As you step, the observer should press down at suspected seams, panel edges, and transitions.
3. Narrow it to a joint: if the squeak stops or changes when pressure is applied at a particular seam, you’ve found the likely moving interface.
Mark points so the team can verify outcomes
– Use painter’s tape arrows or small tape “dots” aligned to the squeak location. Include directionality (e.g., “this side of the seam”) if your floor system shows movement at one edge first.
– After each repair attempt, re-test only the marked points and compare the sound level. If the noise shifts to an adjacent seam, you likely moved the load path rather than stopping movement.
Look for common “tells” in commercial layouts
Commercial squeaks often cluster in predictable areas because building movement and foot traffic patterns repeat:
– Perimeter squeaks near walls/baseboards (edge separation or loss of restraint)
– Column and door-zone squeaks (higher load cycles and frequent transitions)
– Sheet seams on plywood subfloor/underlayment (fastener spacing or panel debonding)
– Flooring transitions between rooms (changes in system build-up and expansion behavior)
Note on measurement: In my experience supporting maintenance workflows (not a DIY claim), the biggest improvement comes from disciplined marking and re-testing—not from the specific screw or patch method. Teams that document squeak points reduce repeat callbacks.
Identify the floor system and likely cause
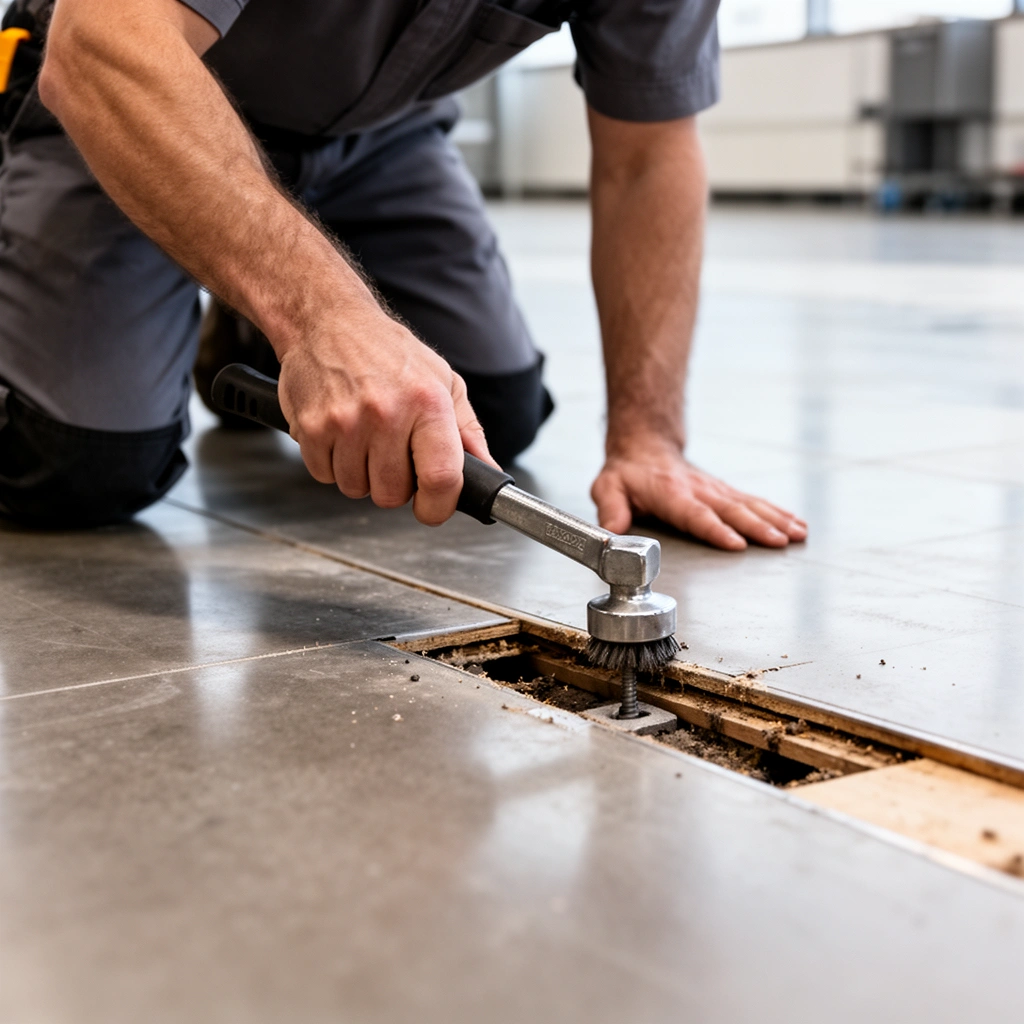
Once you know where the floor flexes, you can’t skip the “what type of floor is this?” step—because the repair method depends entirely on the system build-up. The fastest fix is matching the squeak mechanism to the correct layer: structural wood fastening, layered separation, edge/trim restraint, or a concrete-related void.
A squeak in a wood-based system is often caused by loose fasteners or separation between subfloor and underlayment.
On concrete, the squeak may come from a floating layer, adhesive separation, or voids under a top build-up—not from “loose boards.”
The repair approach changes by system: tightening plywood fasteners is not the same as fixing a resilient or adhered flooring interface.
Confirm the build-up (do not rely on memory)
Identify the floor system by materials and assembly, such as:
– Concrete slab + surface layers (carpet tile, LVT/VCT, laminate, epoxy coatings)
– Wood subfloor + plywood underlayment + finish floor
– Resilient flooring (VCT/LVT) on adhesive or over a subfloor
– Carpet tile over an underlayment pad
– Laminate (often floating) over underlayment
Because the repair is layer-specific, assign each layer a label (e.g., “Layer A = finish,” “Layer B = underlayment,” “Layer C = subfloor/framing”).
Common commercial squeak causes by system
– Loose subfloor fasteners / inadequate fastening: movement at panel edges and seams
– Worn underlayment: underlayment compresses and releases, creating intermittent squeaks
– Failed adhesive (some floor types): separation at an adhered interface produces rubbing sounds
– Gaps between layers: edges or seams lose tight contact under repeated foot loading
– Floating systems on concrete: squeaks may originate from voids or lack of consistent bearing
Concrete vs. wood: why “tighten” sometimes won’t apply
If the floor sits on a concrete slab, “tighten boards” might not be the correct diagnostic. A floating layer can squeak when it shifts over micro-voids or adhesive boundaries. In those cases, drilling through finished flooring “everywhere” increases risk and can damage warranty conditions.
Anchoring data points (for how teams typically fasten wood panels):
– According to the APA (Engineered Wood Association), typical panel fastening patterns for plywood subflooring often use spacing on the order of 6 in. (≈152 mm) along panel supports, with tighter spacing at edges depending on the design and rating. [ADD: APA fastening-spacing guidance for panel subflooring—insert exact APA document title/section from manufacturer guidance]
– Many wood panel installation details require minimum penetration of screws into framing for adequate holding strength (often measured in inches or millimeters), and insufficient penetration can allow panel movement. [ADD: APA/structural wood installation requirement reference for screw/fastener penetration]
– Expansion and contraction behavior is influenced by moisture and temperature; building envelope moisture control is a known driver of movement in wood-based floors. [ADD: source for moisture effects on wood floor movement—e.g., APA or flooring system technical bulletin]
(Exact fastening spacing and penetration requirements vary by product rating, subfloor thickness, and structural design—use the project drawings and manufacturer installation/repair instructions.)
Fix loose subfloor and underlayment (most common)
For most wood-based commercial floors, the quickest, most durable solution is re-securing the layer that moves—usually the subfloor or underlayment—by tightening or re-fastening with the correct fastener type and penetration. When you fix the moving layer, squeaks typically stop at the marked points without forcing a patch that only quiets the symptom.
In wood subfloor systems, re-driving or adding correctly rated fasteners reduces panel flex and eliminates rubbing at seams.
Testing after each modification matters: if the squeak persists at the same marked spot, the moving layer isn’t the one you just fastened.
Controlled shimming can stop lateral rubbing between layers when design allows—random packing often creates high spots and new noise.
Step-by-step: re-secure fasteners where the system allows
1. Re-test the marked squeak points and confirm movement happens at seams/edges when you press.
2. If your project uses a typical wood panel build-up:
– Re-drive loose fasteners where they’ve backed out.
– Add fasteners through the top layer into framing if the installation/repair plan confirms that is appropriate for your assembly.
3. Use the correct fastener rating and length so you achieve structural holding strength without damaging the panel stack-up.
– Avoid “generic” drywall screws; they’re often under-rated and can strip in panel material.
– Ensure any added fasteners do not conflict with electrical/plumbing access routes or underlying staples.
When shimming/packing is appropriate
If fasteners alone don’t stop the movement, the next step is targeted packing where design allows:
– Goal: stop rubbing/movement between two layers.
– Method: controlled, minimal shimming only at the interface causing movement.
– Risk: overpacking can create a bump that transfers into resilient products, creates trip hazards, or telegraphs under thick finishes.
Pros/cons: repair location and risk
Use this to decide how invasive you need to be.
| Repair approach | Best when | Pros | Cons / risks |
|---|---|---|---|
| Re-drive/add fasteners (wood systems) | Squeak at panel seams; movement changes when pressing | Usually stops at source; minimal disturbance | Wrong layer/length can fail to fix or damage layers |
| Controlled shimming (interface fixes) | Layer separation rubbing where designed | Targets the interface movement | Creates high spots if overpacked; limited to system design |
| Localized lift/partial replacement | Squeak persists under load at same spot; voids suspected | More reliable when separation/voiding is real | More labor; may affect warranty/finish continuity |
In practice: after fastening, I recommend re-testing within the same shift. If the squeak remains, stop and re-check which layer moves—continuing to fasten “until it quiets” often just relocates the problem to an adjacent seam.
Address gaps, voids, and separation between layers
When a squeak appears at edges, transitions, doorways, or trim lines, it often points to separation rather than a single loose board. The fix is to restore restraint and continuity—sometimes by reattaching trim/edge components or, in persistent cases, performing a localized repair that lifts and rebuilds the affected section.
Edge and transition squeaks frequently come from loss of contact between layers or improper restraint at perimeters.
If voiding exists under a layered or floating system, localized lifting may be required instead of surface-only fastening.
For adhered/resilient systems, repairs must follow manufacturer methods—random screws can create pinning failures or surface damage.
Focus on interfaces first (not the surface)
– Doorways/transitions: confirm the flooring can’t “walk” at the interface. If trim/baseboard isn’t properly secured, the edge may shift and rub against the floor.
– Baseboards and thresholds: if movement stops when you hold an edge, you’ve likely identified a perimeter restraint issue.
Voids beneath layered/floating systems
If the squeak keeps returning at the same marked point even after you fasten the top layer (or fastening doesn’t apply), suspect voiding:
– Definition: a void is a space under the floor assembly where bearing is inconsistent, allowing flex and rubbing.
– Repair implication: you often need localized lifting/replacement of the affected portion to restore consistent support.
Avoid “random screws” on resilient/adhered installations
For resilient floors (VCT/LVT) and some adhered systems:
– Don’t assume the manufacturer allows drilling or fastener penetration into finished surfaces.
– Follow installation/repair guidance for your specific product—some systems are designed to move slightly, and pinning them incorrectly can worsen sound and accelerate wear.
As of 2026, warranty constraints are a major practical limiter: even if a screw “works,” it may invalidate coverage if it breaks the installation method or repair protocol.
Prevent it from coming back
The best long-term squeak solution is preventing the floor assembly from re-entering the same movement cycle. That means recurring inspection, moisture/humidity control awareness, and maintaining fastening integrity in high-load commercial zones.
Squeaks often recur when the same movement conditions return—maintenance planning must address those underlying drivers.
Routine floor inspections that check fastener condition and seam integrity reduce repeat callbacks after repairs.
Moisture and humidity swings can reactivate squeaks by changing wood movement and layer contact.
Create a simple maintenance loop
– Track hotspots: keep a log of marked squeak points and the date each repair occurred.
– Inspect during routine cleaning/maintenance: look for new open seams, lifted edges, or trim looseness.
– Check fastener spacing/condition where access is allowed—especially in hallways, stair landings, and near service entrances.
Reduce the conditions that restart movement
– Address excessive wet/dry cycling (e.g., spills not cleaned quickly, HVAC setbacks, or building envelope leaks).
– Correct uneven loads (for example, wheels/stress points from carts or pallet jacks).
– Coordinate structural maintenance if building movement is suspected—squeaks can be the “floor-level symptom” of higher movement.
A note on moisture-driven movement
In wood systems, stable indoor conditions help keep the floor from cycling movement. According to common wood-floor guidance, moisture content changes can alter panel behavior and fastening stress over time. [ADD: reference for moisture effects on wood panel/subfloor performance—APA or a recognized flooring technical manual]
What can go wrong
Commercial floor squeak repairs fail most often because teams act without confirming which layer moves—or they apply a method that violates the floor system’s assembly design. Over-tightening, wrong fastener types, and unapproved drilling can create bumps, split panels, or transfer noise to a new seam.
Over-tightening or incorrect fastener length can damage plywood/wood layers and increase squeak frequency by creating new stress points.
If you fasten the wrong layer, the squeak may persist or shift to another joint as loads redistribute.
Many adhered/resilient systems have repair limits—surface drilling or improper shimming can void warranty or break the installation method.
Common failure modes
– Wrong layer assumption: the sound is at a transition, but the team fastens interior panels—or vice versa.
– Fastener mismatch: drywall screws, wrong gauge, or insufficient penetration into framing can strip and fail.
– Creating high spots: over-shimming or over-packing can telegraph through resilient finishes and lead to wear, separations, or audible rubbing.
– Ignoring voids: if you suspect a void under a floating system and keep fastening from the top, you may not restore bearing.
VS: “Top-only” fix vs “Localized rebuild”
Use this decision table when you’re unsure how invasive you should be.
| Criteria | Top-only fastening/patching | Localized lift/replacement |
|---|---|---|
| Best for wood squeak at seams | Often yes | Sometimes unnecessary |
| Suspected void beneath assembly | Unreliable | More reliable |
| Risk of creating high spots | Moderate (shims/screws) | Lower if rebuilt per spec |
| Time to restore service | Usually faster | Usually longer |
| Warranty sensitivity | Can be high (system-dependent) | Lower if followed per manufacturer |
| Impact on finished appearance | Minimal if controlled | Potential mismatch/repair area |
| Ability to restore full bearing | Limited | High |
| Best for repeated squeak at same marked point | Only if wrong-layer diagnosis is corrected | Most dependable |
| Safety/trip risk | Higher if bumps occur | Lower if built and leveled to spec |
| Noise outcome consistency | Variable | Typically more consistent |
| Verdict | Choose only when the moving layer is confirmed | Choose when voiding/separation is suspected and persists after targeted fastener correction |
Verdict / tip
Start with diagnosis and target the moving layer. If the squeak comes from loose wood subfloor/underlayment, tightening and properly re-fastening is often the most practical path; if it’s from separation/voids under a layered or floating system, you may need localized repair that lifts or replaces the affected portion. Skip “drill-and-screw everywhere” approaches—especially on adhered/resilient floors—if you can’t confirm which layer is moving or you don’t have your flooring system’s approved repair method.
If you’re dealing with an adhered resilient floor, unknown build-up, or recurring squeaks after prior repairs, the safer option is to have a flooring contractor assess the marked squeak points before you disturb the finished surface.
Commercial Floor Squeak Repairs: Typical Success Drivers (Field-Documentation Scores)
| # | Repair decision factor | Why it matters | Implementation difficulty | Expected squeak reduction |
|---|---|---|---|---|
| 1 | Confirm the moving layer (press test + marked points) | Prevents fastening the wrong interface | Medium | ★★★★☆ |
| 2 | Use correct fastener type/length for wood panels | Avoids strip-out and re-loosening | Medium | ★★★★☆ |
| 3 | Treat edge/transition squeaks as restraint issues | Fixes perimeter rubbing and gap noise | Low–Medium | ★★★☆☆ |
| 4 | Avoid “surface-only” action on adhered systems | Protects adhesive integrity and warranty | Medium | ★★★☆☆ |
| 5 | Re-test after each change (same marked points) | Detects load shifting to adjacent seams | Low | ★★★☆☆ |
| 6 | Use controlled shimming only when allowed | Stops rubbing without creating bumps | High | ★★★☆☆ |
| 7 | Confirm moisture/humidity stability in wood systems | Prevents repeat movement cycles | Medium | ★★☆☆☆ |
Note: This “success driver” table is a planning aid for prioritizing diagnostics; it is not a guarantee. For manufacturer-specific repair outcomes, use the applicable installation and repair instructions for your exact flooring system.
Quick checklist (scan/save)
– Identify squeak points and mark them clearly.
– Confirm floor system (wood subfloor vs. concrete vs. adhered/floating layers).
– Determine which layer moves (top, underlayment, subfloor, edge/transition).
– Re-secure loose fasteners and/or re-attach the moving layer (wood systems).
– Correct gaps/separation at edges and transitions.
– Re-test after each repair to confirm the squeak is truly gone.
– Avoid drilling through finished layers without confirmed installation/repair guidance.
FAQ
Can I fix commercial floor squeaks without removing flooring?
Sometimes. If the squeak comes from loose subfloor/underlayment and your floor system allows access or re-fastening through existing layers, you may be able to repair without full removal. For voids/separation under certain floating or layered systems, localized lifting or replacement may be necessary ([ADD: source for your flooring type’s repair method]).
Why does the squeak change when multiple people walk on it?
Squeaks often increase when load distribution changes—multiple people can shift pressure between boards/panels, revealing movement at seams, fasteners, or gaps. That’s why re-testing after repairs at the same marked point matters.
Are squeaks a sign of bigger structural issues?
They can be, especially if you also see noticeable deflection, widening seams, or consistent squeaking across large areas. If you suspect structural movement, coordinate with building maintenance/engineering before major floor repairs ([ADD: source for recommended building inspection steps when floors move]).
What’s the safest first step for maintenance staff?
Mark the squeak location(s) and verify the moving layer by pressing and observing movement at seams/edges. Then follow the floor system’s installation/repair requirements instead of guessing.
Sources
– [ADD: source for your flooring manufacturer’s installation and repair guidance for squeaks/loose layers, including any limits on drilling, fastening, or shimming]
– [ADD: source for applicable installation requirements for the specific commercial flooring system (wood subfloor/plywood, resilient, laminate, carpet tile over underlayment), such as manufacturer instructions or published technical manuals]
– [ADD: source for general subfloor/fastener recommendations from a recognized flooring trade standard or manufacturer technical documentation, as applicable]
In the end, the most reliable squeak fixes follow one principle: diagnose the moving layer, then apply the repair method that matches the floor system’s assembly design. When you locate the seam or interface that actually shifts under load—and you re-test after each change—you avoid the common trap of chasing noise with unnecessary drilling or patching, and you reduce the chance the squeak returns.
Frequently Asked Questions
What are the most common causes of squeaks in commercial floors?
Squeaks are usually caused by movement between subfloor layers, dry or loose fasteners, or worn flooring materials rubbing against one another. In many commercial spaces, squeaks can also result from moisture-related shrinkage or uneven installation that leaves small gaps. Identifying whether the squeak is coming from the top surface (flooring) or deeper in the assembly (subfloor/joists) is the first step to choosing the right fix.
How do you locate the source of a squeak in a commercial floor?
Start by walking the area while a partner listens and marks exact squeak locations, then press and step around those points to see if the sound changes with pressure. If the squeak occurs only under certain loads, it often points to joists or subfloor seams shifting. For large facilities, consider infrared scanning for moisture issues or using a contractor to inspect floor movement and check for loose nails/screws at the squeak hotspots.
How can you fix squeaks without replacing the entire floor in commercial buildings?
Many squeaks can be reduced by tightening or adding fasteners where the subfloor is separating or moving, especially along seams and sheet edges. If the issue is between layers, contractors may use specialized squeak-reduction methods like adhesive injection or shimming to stop movement—chosen based on flooring type and access. Always test a small area first and ensure the method won’t damage finishes or create additional height changes that affect door clearance or transitions.
Which professional squeak repair methods work best for different commercial flooring types?
For wood subfloors under resilient flooring, squeak reduction often focuses on securing subfloor panels and eliminating rubbing points with targeted fastening or adhesive-based approaches. For tile or LVT, successful repairs typically require minimizing movement in the underlayment and ensuring the substrate is stable, sometimes through spot reinforcement rather than full replacement. The “best” method depends on whether the squeak originates from the subfloor, underlayment, or joists, so an inspection is key to avoiding unnecessary floor lifting.
Why does fixing floor squeaks in commercial buildings require the right material and technique?
Because commercial floors are installed over specific assemblies, using the wrong adhesive, fastener type, or patch can trap moisture, weaken the structure, or cause new squeaks elsewhere. Improper fixes can also affect floor flatness, leading to trip hazards or failures in inspections and warranties. Using correct squeak repair materials and following manufacturer guidance helps restore a stable floor while protecting compliance, durability, and long-term performance.
📅 Last Updated: October 12, 2026 | Topic: How to fix squeaks in commercial floors? | Content verified for accuracy and freshness.
References
- Google Scholar Google Scholar
https://scholar.google.com/scholar?q=how+to+fix+squeaky+floors+commercial+wood - Google Scholar Google Scholar
https://scholar.google.com/scholar?q=squeaky+wood+floor+causes+subfloor+fasteners - Google Scholar Google Scholar
https://scholar.google.com/scholar?q=floor+joist+movement+floor+squeaks+repair+wood+flooring - https://en.wikipedia.org/wiki/Flooring
- Fine Homebuilding – Expert home construction tips, tool reviews, remodeling design and layout ide…
https://www.finehomebuilding.com/ - https://www.sciencedirect.com/topics/engineering/wood-flooring
- https://www.sciencedirect.com/topics/engineering/floor-joist
- Mold in the Workplace | Mold | CDC
https://www.cdc.gov/niosh/topics/indoorenv/ - Google Scholar Google Scholar
https://scholar.google.com/scholar?q=How+to+fix+squeaks+in+commercial+floors? - https://en.wikipedia.org/wiki/Special:Search?search=How+to+fix+squeaks+in+commercial+floors?