
Scratched outdoor floors don’t have to be replaced—this step-by-step repair guide shows exactly how to fix scratches on outdoor floors and restore a smooth, weather-ready surface. You’ll learn how to clean and assess the damage, choose the right filler or repair method, and finish the area so it blends and holds up outdoors. By the end, you’ll know the fastest, most reliable way to repair the scratch for your specific floor type.




If you want scratches to look better (and stay protected), you should match your repair method to the floor’s material and surface finish—sealed wood, composite, concrete, stone, or tile. Clean thoroughly first, then use the right exterior-rated touch-up, filler/patch, and a compatible sealer so the repair bonds and blends instead of peeling.
Outdoor floor scratches happen from patio furniture feet, foot traffic, toys, grill moves, and seasonal debris. The good news: most visible damage can be reduced without replacement if you repair the right layer (surface finish vs. substrate) and follow cure/dry requirements.
Identify the type of outdoor floor (and finish)
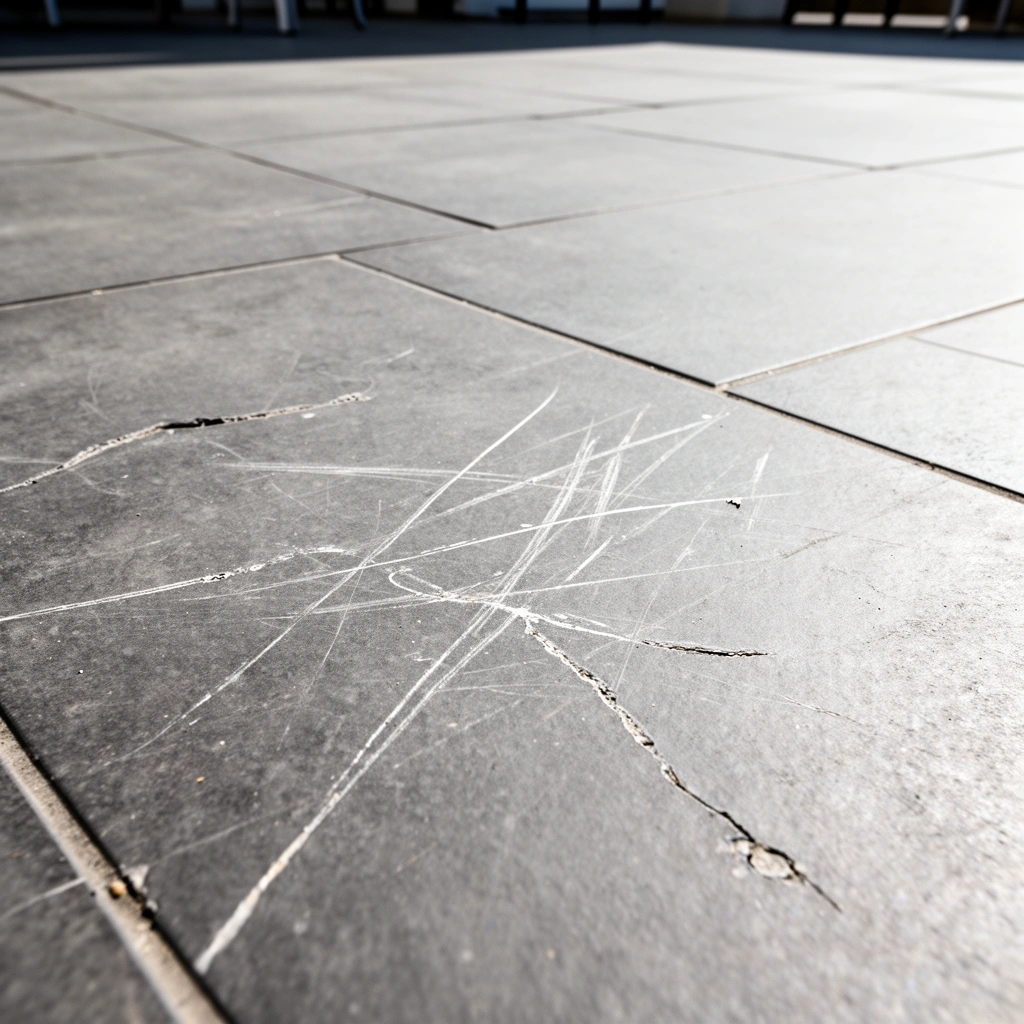
The fastest way to choose the correct repair plan is to identify the floor material first, then confirm whether it’s sealed or stained. Once you know “wood/composite vs. concrete/stone/pavers/tile” and whether there’s a protective film, you can pick products that adhere properly and accept color without dramatic mismatch.
Outdoor floor repairs fail most often because the homeowner treats all scratches the same; adhesion and blend depend on whether the surface is sealed or bare.
A simple water behavior test in a hidden area helps determine whether the surface finish is intact (sealed) or porous (unsealed).
When a scratch is raised or frayed, you’re often dealing with loose finish fibers—not just a “mark”—so prep determines how well filler grips.
To identify the type of outdoor floor:
– Look for the material:
– Wood decking (natural boards with grain)
– Composite decking (often uniform-looking, less grain variation)
– Concrete (trowel marks, broom finish, or stained overlays)
– Stone/pavers (individual units, visible joints, different stone textures)
– Exterior tile (tile units and grout lines)
– Check whether it’s sealed/stained:
– Sealed/stained surfaces usually feel smoother and may repel water longer.
– Unsealed/aged surfaces tend to darken quickly when wet and feel more absorbent.
– Test in a hidden spot:
– Clean a small area, let it dry, then lightly sprinkle a few drops of water.
– If water darkens quickly and absorbs, the surface is more porous/unsealed.
– If water sits on the surface briefly, a sealer/film is likely present.
This matters because exterior touch-up markers and deck stains only blend into an existing finish layer; if you apply them to raw porous substrate without the right primer or sealer system, the repair often looks like a “halo” or patch.
Also keep an eye on what the scratch is exposing:
– If it looks like the top color film is scuffed, you’re likely repairing the finish.
– If you see bare wood fibers, a rough gouge, or exposed concrete aggregate, you’re repairing (and possibly building back) the substrate level.
Clean first so the repair actually sticks
You should clean the scratched area before doing anything else because dirt and oxidized residue prevent product from bonding. In practice, repairs lift or peel when grime is trapped under filler or when sealers are applied over moisture.
Proper cleaning removes contaminates that block adhesion, which is why most reputable deck and patch manufacturers require a clean, dry surface.
Even if the scratch “looks ready,” waiting for the area to fully dry is often the difference between a repair that lasts and one that flakes.
For rough scratches, removing loose, flaking finish prevents you from filling over detached material.
Use the right cleaning approach for the substrate you identified:
1. Wash
– Use a deck/floor-safe cleaner appropriate for outdoor surfaces (wood-safe for wood/composite; concrete/stone-safe for masonry; tile-appropriate for tile).
– Scrub with a stiff nylon brush to work cleaner into the scratch channel.
2. Rinse thoroughly
– Rinse until runoff water looks clear.
– Avoid pressure blasting near wood grain—high pressure can widen damage.
3. Dry completely
– Let the surface dry based on weather conditions and airflow.
– Repairs applied over residual moisture commonly fail later when the repair layer expands/contracts.
Concrete, stone, and paver areas also hold moisture in pores and microcracks. According to the US EPA, mold growth can occur when indoor moisture conditions are high; for mold prevention targets, many guidance documents reference keeping humidity below ~60% as a moisture-control threshold U.S. EPA (mold/moisture guidance referenced by many building-health resources). Outdoor conditions vary, but the principle remains: trapped moisture under patch layers can undermine adhesion and long-term appearance.
Quick prep “decision points” after cleaning:
– Loose flaking finish? Gently scrape or abrade until you remove anything that’s detached.
– Dusty chalking on concrete/stone? Sweep and re-clean; you need a surface that’s ready to bond, not powdery.
Fix scratches in wood or composite decking
You can often make wood and composite scratches look significantly better by matching a color touch-up for shallow scuffs and using sanding + exterior filler for deeper gouges. The rule of thumb is simple: blend color at the finish level for light damage, but rebuild material for gouges before you reseal.
For shallow deck scuffs, color-matched exterior stain or repair markers blend best because they restore the finish layer rather than forcing filler into intact fibers.
For deeper scratches, you need feathered sanding so filler bonds and the repaired surface doesn’t create a raised “ridge.”
After curing, recoat with a compatible exterior deck stain or sealer so the repaired zone matches the surrounding protection system.
Light scuffs (finish-only damage)
1. Clean first (don’t skip this step).
2. Let the area dry completely.
3. Use a matching exterior deck stain/repair marker:
– Apply in thin passes along the scratch line.
– Wipe any excess immediately so the marker doesn’t create a glossy edge.
When blending works:
– The scratch is mostly cosmetic (top film scuffed).
– The surrounding deck finish is still intact and evenly protected.
Deeper scratches (gouges / exposed substrate)
1. Sand just the damaged area
– Feather the edges so you create a smooth transition from scratch to surrounding surface.
– Don’t try to sand the entire board unless you plan a full-board refinishing pass.
2. Apply an exterior-rated wood/composite filler
– Use the product’s specified exterior formulation.
– Overfill slightly if the filler shrinks; many exterior fillers do settle after curing.
3. Let it cure fully
– Follow the manufacturer’s cure window before sanding or coating.
4. Sand lightly
– Level the filler so it sits flush with the deck surface.
5. Top-coat with the same system
– Reapply stain/sealer consistent with what the deck uses (oil-based vs. water-based matters).
– If the rest of the deck is unevenly weathered, your patch may still “read” slightly—this is normal and avoidable only by larger-area refinishing.
Seal for protection
Deck protection isn’t just aesthetic; sealers reduce water intrusion and slow deterioration of wood fibers or surface polymer layers in composites. If you use the wrong top-coat chemistry, you can get adhesion problems or inconsistent sheen.
Note: If your deck has a semi-transparent stain, a solid stain repair may look darker. If your deck is fully sealed, switching to a different stain type without compatible systems can also create uneven texture.
Repair scratches in concrete, stone, or pavers
You should treat concrete/stone/paver scratches as surface-depth repairs: clean and refine hairline damage, but use exterior patch materials for chips and gouges, then seal to restore the existing protection level. The goal is bond + match + compatible sealing, not “one product fixes everything.”
Hairline concrete scratches usually improve by cleaning and using a color-matched repair product or resurfacer designed for exterior masonry.
Chips and gouges require an exterior-rated patch so the repair can cure without cracking, flaking, or washing out.
If your slab or pavers are sealed, applying a compatible sealant after patching is critical for uniform water resistance.
Hairline scratches
1. Clean thoroughly and remove loose particles.
2. If the scratch is primarily a surface mark (not a missing chunk), consider:
– a color-matched concrete repair product, or
– a topical resurfacer if the surrounding finish needs uniformity.
3. Let it cure per instructions, then seal if needed.
Hairline scratches can be subtle but visible if the surface sheen or color has aged. In many cases, restoring a consistent top surface layer makes the “difference” disappear.
Gouges, chips, and spalled edges
1. Clean and remove weak/crumbly material.
2. Use an exterior concrete patch/filler formulated for masonry.
3. Follow curing instructions closely:
– Patch materials need time to develop strength and reduce shrink-related mismatch.
– Standard practice for cementitious materials relies on strength testing around 28 days (commonly for Portland cement concrete) ASTM C39 / standard concrete compressive strength testing basis.
4. Finish-level if required:
– Some patch systems require smoothing before the final cure stage.
5. Seal after curing if the original surface is sealed:
– Match the sealant type as closely as possible to avoid spotty water behavior.
Stone and pavers
Because stone and pavers vary widely, focus on:
– Cleaning and joint cleanliness (if grout or mortar edges are involved).
– Using compatible patch/repair fillers designed for stone or masonry.
– Sealing to protect both the repair and the surrounding units from water cycling.
Moisture cycling is a major driver of future cracks. Repairs that aren’t sealed (or that seal unevenly) can allow water to get into the repaired zone while the rest stays protected.
Concrete vs. tile caution
Exterior tile usually needs grout-compatible repair and appropriate sealants. If the scratch hits only the glaze, color touch-up may work. If it reaches cementitious grout or the tile body, you may need a repair system designed for exterior tile assemblies.
What can go wrong (and how to avoid it)
Most repair problems come from product mismatch, incomplete prep, or ignoring cure timing. If you avoid those three failure modes, you’ll get the best chance of a blended, durable repair instead of a brighter “patch.”
Color mismatch happens when you apply too much stain/marker at once—thin layers and blending reduce visible edges.
Using an indoor-only filler or incompatible coating can cause peeling, loss of adhesion, or rapid wear under UV and rain exposure.
Over-sanding is common on decks: aggressive abrasion changes texture and can make the repaired area stand out.
Fast failure-mode guide (pros/cons style)
| Approach | Pros | Cons / Failure Risk | Best When |
|---|---|---|---|
| Color-matched touch-up (stain/marker) | Quick, minimal prep | Can look patchy if overapplied; won’t fill true gouges | Scratch is a scuff or surface-only |
| Sand + exterior filler | Rebuilds missing material | Requires feathering; wrong filler can shrink or crack | Scratch is a gouge/exposed substrate |
| Patch/resurfacer on masonry | Restores surface continuity | Can mismatch texture/color; needs proper cure and sealing | Chips, spalls, or deep masonry defects |
| Reseal/top-coat with matching chemistry | Uniform protection and sheen | Incompatible coatings may peel or repel unevenly | Existing surface is sealed or recently coated |
Common mistakes to avoid
– Color mismatch
– Fix: apply thin layers; blend outward from the scratch line rather than flooding the channel.
– Wrong product for the surface
– Fix: choose products explicitly rated for exterior use and the correct substrate (wood/composite vs. masonry vs. tile).
– Skipping drying/cure time
– Fix: respect dry windows; don’t coat over moisture or dust. If weather turns wet, delay application.
– Over-sanding
– Fix: feather the edges; don’t sand an entire board unless you’re prepared to refinish a larger section.
Edge cases that may require escalation
– The scratch keeps “growing” after cleaning—often a sign of underlying movement, rot, delamination, or continuing water intrusion.
– The repaired area turns visibly different after the next wet cycle—often indicates seal mismatch or uneven moisture absorption.
– Structural surface failure (e.g., flaking coating across large zones) usually isn’t solved by spot repairs.
Verdict / tip (honest limits on DIY scratch repair)
For most outdoor floors, the most reliable DIY approach is: clean thoroughly, identify the material and finish, use an exterior-rated repair product that matches the damage depth, and top-coat with a compatible sealant/stain. That combination maximizes adhesion and minimizes the “patch edge” effect that homeowners hate.
That said, deep gouges, widespread weathering, or severely aged finishes may never fully “disappear”—you can usually make damage less noticeable and better protected, but perfect invisibility often requires larger-area refinishing or replacement. If the scratch is exposing bare substrate in a way that keeps getting worse, or if you see structural problems (rot, delamination, persistent crumbling), it’s wiser to stop spot-repair attempts and consider professional assessment.
Outdoor Scratch Repair Fit by Surface Type (Typical DIY Outcomes)
| # | Repair scenario | Prep level | Blend potential | Time to recoat | DIY difficulty | Best overall fit |
|---|---|---|---|---|---|---|
| 1 | Sealed wood deck scuff (surface-only) | Clean only | ★★★★★ | Same day–24h* | Low | Use touch-up marker/stain |
| 2 | Sealed composite deck scratch (shallow groove) | Clean + light feather | ★★★★☆ | 24h–48h* | Low–Med | Use compatible filler + sealer |
| 3 | Exposed wood fibers (deep gouge) | Sand + fill | ★★★☆☆ | 24h–72h* | Med | Feather edges + re-stain |
| 4 | Concrete hairline scratch (broom finish) | Clean only | ★★★☆☆ | 4h–24h* | Low | Resurfacer/color-matched product |
| 5 | Concrete chip/gouge (missing edge) | Cutout + patch | ★★☆☆☆ | 24h–72h* | Med–High | Exterior patch + seal |
| 6 | Paver scratch with joint impact | Clean + spot repair | ★★★☆☆ | 12h–48h* | Med | Exterior filler + reseal (if used) |
| 7 | Exterior tile scratch (glaze scuff vs. body damage) | Clean + matching repair | ★★★☆☆ | Same day–48h* | Med | Skip if grout/tile is cracked |
Recoat/time-to-next-step varies by product chemistry, temperature, and humidity; always defer to your specific manufacturer’s label and technical data sheet.
Quick checklist you can save
– Identify material + finish (wood/composite vs concrete/stone/tile; sealed vs porous)
– Clean thoroughly and remove loose/flaking finish
– Let it dry completely before touching up or filling
– Light scratch? Use color-matched exterior touch-up (thin layers)
– Deep scratch? Sand/feather edges + apply exterior-rated filler/patch
– Cure first—then sand/level if needed
– Top-coat with compatible exterior sealer/stain/finish system
– Inspect after the next dry/wet cycle (look for lifting, color halos, and raised edges)
FAQ
Can I fix outdoor floor scratches without sanding?
Often, yes for light scuffs and surface marks—especially on sealed wood decks—because you can clean first and then use a matching exterior stain or repair marker. For deeper gouges that expose raw material or loose fibers, sanding or surface prep is usually needed to improve adhesion and blending.
Will stain or filler be waterproof outdoors?
Stain and sealers can be water-resistant when applied over properly cleaned, dry surfaces using compatible exterior products. Fillers and patches can be exterior-rated, but they’re still best protected with an appropriate top seal depending on the substrate and the condition of the surrounding finish.
How do I prevent the repair from peeling later?
Use compatible exterior products, respect the surface prep steps (cleaning/removing loose material), and follow manufacturer cure/dry times. Also avoid applying over damp spots—especially on concrete/stone where moisture can linger in pores.
Is there a “best” product for every outdoor floor?
No—repairs differ by substrate. Wood/composite repairs typically use exterior stain systems and wood/composite fillers, while concrete/stone repairs use exterior masonry patches and then compatible sealants. “Universal” products can sometimes work, but mismatched chemistry is a common reason repairs fail.
Sources
– [ADD: manufacturer instructions/specs for your specific exterior deck stain/touch-up product and its compatibility with fillers and sealers]
– [ADD: manufacturer instructions/specs for your chosen exterior-rated wood/composite filler or concrete patch product]
– [ADD: official guidance from your decking/coating/sealant manufacturer on prep steps (cleaning, drying time, and recoat/cure requirements)]
– ASTM C39 (standard test method basis for concrete compressive strength timing, commonly reported at 28 days)
– U.S. EPA (mold/moisture guidance used broadly for humidity/moisture control principles)
Scratch repair on outdoor floors works best when you treat it as a materials-and-finish problem, not a “cosmetic scratch” problem. Identify the floor type and whether it’s sealed, clean until adhesion-ready, choose the right touch-up vs. filler/patch depth, and finish with a compatible exterior sealer/stain system—then let everything cure before the next weather cycle.
Frequently Asked Questions
How do I fix scratches on outdoor concrete floors without making them worse?
Clean the scratched area thoroughly and let it dry completely so repairs bond properly. For shallow marks, you can use a concrete scratch filler or a cement-based patch, smoothing it with a trowel and feathering the edges. If the damage is deeper or uneven, re-level with a small patch mix, cure it per the product instructions, then seal with an exterior concrete sealer to protect from moisture and UV.
What is the best way to repair scratches on stamped or decorative outdoor concrete?
Start by cleaning and lightly profiling the scratched surface if the top layer is damaged, then fill the scratch with a concrete patch formulated for exterior use. After curing, match the texture using a stamping texture skin, finishing sponge, or specialized resurfacing tool to blend the repair into the existing pattern. Finally, apply an outdoor concrete stain or color-matched coating and seal with a UV-resistant sealer to keep the repaired area from standing out.
Why do outdoor floor scratches keep showing up after repairs?
Scratches often return because the underlying cause—abrasive dirt, poor surface preparation, or lack of sealing—wasn’t addressed. Repairs may fail if the surface still has moisture, chalky residue, or old loose coatings, preventing proper adhesion. Use a durable exterior floor repair product, prep correctly, and finish with a high-quality outdoor sealer designed for freeze-thaw cycles, water exposure, and foot or vehicle traffic.
How do I fix scratches on outdoor wood decking safely and effectively?
Wash the deck with an exterior cleaner, remove any loose or splintered wood, and sand along the grain to smooth the scratch before dusting off thoroughly. For shallow surface scratches, apply a wood filler or exterior wood putty, let it cure, then sand again for a flush finish. Seal or stain the deck with a weather-resistant outdoor deck finish to reduce future scratching and protect against water damage and fading.
Which products should I use to repair scratches on outdoor tile, pavers, or stone floors?
For small surface scratches on outdoor tile, use a grout and tile repair kit or color-matched epoxy-based filler, then wipe and cure as directed. For pavers and natural stone, choose a stone-safe scratch filler, patch compound, or resin repair system that won’t discolor when exposed to sunlight and water. Always clean the surface first and finish with a penetrating stone sealer or exterior coating to improve durability and reduce visible wear.
📅 Last Updated: October 12, 2026 | Topic: How to fix scratches on outdoor floors? | Content verified for accuracy and freshness.
References
- https://en.wikipedia.org/wiki/Wood_deck
- https://en.wikipedia.org/wiki/Sanding
- Wood putty
https://en.wikipedia.org/wiki/Wood_filler - https://en.wikipedia.org/wiki/Concrete_repair
- https://en.wikipedia.org/wiki/Concrete_resurfacing
- https://en.wikipedia.org/wiki/Epoxy_(material
- Grout
https://en.wikipedia.org/wiki/Grout - Google Scholar Google Scholar
https://scholar.google.com/scholar?q=how+to+repair+scratches+on+wood+outdoor+deck - Google Scholar Google Scholar
https://scholar.google.com/scholar?q=concrete+pavement+surface+abrasion+repair+method - Google Scholar Google Scholar
https://scholar.google.com/scholar?q=repairing+scratched+outdoor+stone+tile+floor+regrouting+techniques