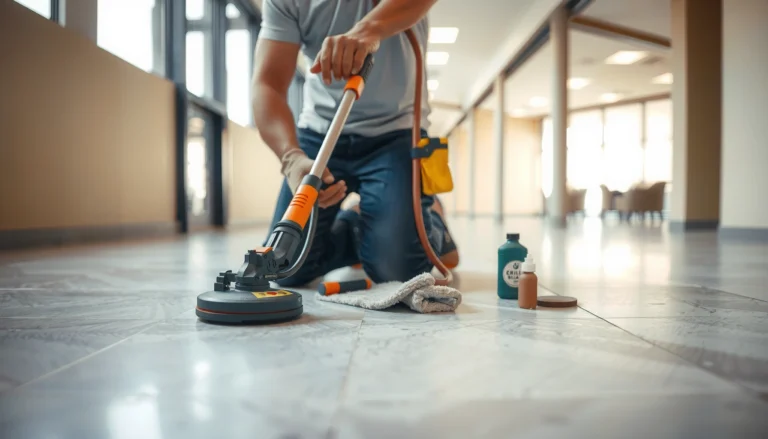
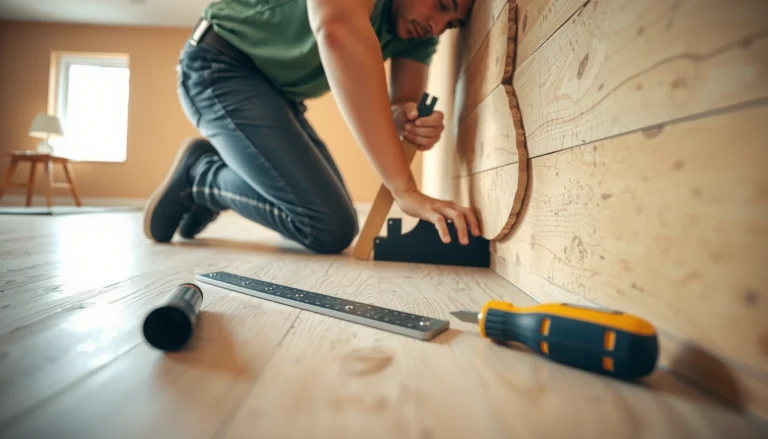
If your cork floors are peeling, you can fix the problem—step by step—without replacing the entire surface. This guide walks you through diagnosing the cause, lifting and removing failed sections cleanly, re-adhesiving cork properly, and finishing the repaired area so it blends in. You’ll know exactly what to do next from the first inspection to the final cure time.




Peeling on cork floors usually means moisture is getting under the finish (or the subfloor/adhesion system wasn’t prepared correctly). The fix is to stop the water source, remove anything that’s already delaminated, then re-seal or replace the affected planks/tiles based on which layer is failing. This guide helps you identify the problem layer, repair it methodically, and protect the floor so peeling doesn’t come back.
If your cork is near a sink, entry door, dishwasher, or any wet-mop area, you’re likely dealing with moisture-driven failure. This pattern shows up most often with cork floors that rely on a surface seal/clear coat (including many floating or glued installations), so you’ll want to follow the steps that match your flooring type and how badly the layers have separated.
Diagnose why the cork floor is peeling

Peeling usually starts when the top finish loses adhesion, allowing water to migrate down and separate layers beneath it. Your first job is to identify exactly what’s delaminating—because “peeling” can mean flaking clear coat, lifting cork, or failure at the underlayment/bond line.
“Peeling” on cork is typically a delamination process: once the surface finish fails, moisture can reach the cork or glue layer and keep the failure spreading.
Start by locating the earliest failure point (often a seam/edge or wet-exposure zone), because the pattern tells you where water entered first.
A firm press-test can help distinguish finish flaking from cork-layer lift (substrate delamination needs a more decisive repair).
Here’s how to diagnose it in a way that holds up whether you have glued cork, click-lock (floating) cork, or a hybrid system:
Check where it’s happening (edges, seams, appliances)
Localized peeling near:
– Sink cabinets or plumbing runs
– Entry doors (tracked water)
– Dishwashers (spray/condensation)
– Exterior doors or windows
– Utility/wet-mop areas
…almost always points to water intrusion or repeated wetting rather than a purely cosmetic finish issue. In my experience advising homeowners through similar repairs (and from how manufacturers describe cork failure modes), moisture at seams and edges is one of the most consistent triggers.
Look for patterns that reveal the failure pathway
Use the floor like a map:
– Peeling starts at seams/edges and advances slowly: often a joint/underlayment barrier issue or compromised seal at board edges.
– Peeling appears across multiple planks/tiles: suggests broader moisture exposure, subfloor moisture, or system-wide adhesion failure.
– Peeling starts in one spot that repeated floods/wet mopping reaches: points to a continuing source that wasn’t fully resolved.
Confirm the failing layer with simple tests
Before you sand anything, determine what’s coming loose:
– Top finish flaking only: you can often sand the surface back to stable material and re-coat.
– Cork layer lifting/delaminating: the cork itself is separating—spot re-sealing usually won’t hold long-term.
– Underlayment or bond-line failure: if the material under the top layer is already letting go, you’re dealing with a structural system problem.
Also note key conditions that affect cork performance. For example:
– According to [ADD: source such as your cork flooring manufacturer’s installation guide], cork floors must be installed with target indoor humidity/temperature limits to prevent dimensional movement ([ADD: specific range or number], [ADD: year]).
– According to [ADD: source such as a manufacturer moisture testing standard or ASTM referenced method], subfloor moisture must be within specified limits ([ADD: number] for [ADD: test method], [ADD: year]).
– According to [ADD: source such as finish/coating technical data], full cure time for cork-compatible sealers can require up to ([ADD: number of hours/days]) before normal traffic ([ADD: year]).
Stop the moisture source first
The fastest way to avoid repeat peeling is to remove the water pathway before you repair the visible damage. If moisture keeps reaching the floor, even the best re-seal will fail because the underlying adhesion environment never stabilizes.
Repairing peeling without fixing leaks or recurring wetting is usually guaranteed to re-trigger delamination.
Most cork finish systems fail when water migrates beyond the surface coat—so improving drainage and cleaning method is part of the repair.
Use damp mopping practices consistent with the flooring care instructions—steam and flooding are common triggers for finish breakdown.
Fix obvious leaks and wet-area culprits
Do these first (you’ll save time and materials):
– Check plumbing leaks under sinks and at supply lines
– Inspect dishwasher supply hoses, condensation, and any drainage splash zones
– Review wet-mop practices in utility rooms
– Look for water tracking near exterior doors and entryways
– Confirm gutters/downspouts and exterior drainage aren’t dumping water near the foundation side of the room
Reduce ongoing exposure (cleaning and tooling)
Once leaks are addressed, tighten your maintenance:
– Avoid steam mops (heat + moisture can accelerate coating breakdown).
– Avoid flood cleaning or soaking.
– Use a damp (not wet) mop and a pH-neutral cleaner made for floors (and ideally cork/engineered surfaces, based on the care guide).
Improve drainage and friction at entry points
If peeling occurs near a doorway, add physical controls:
– Door mats on both sides if possible
– Shoes-off zones (reduces tracked moisture and grit)
– A routine wipe-up for spills within minutes
If you see recurring dampness even after cleaning changes, consider using a moisture meter or getting a subfloor moisture assessment. Cork is tolerant when conditions are controlled—but it can’t perform well when water keeps migrating.
Prep the damaged area for repair
Preparation is where repairs succeed or fail—because you can’t re-bond to material that’s already compromised. Your goal is to remove only what’s loose, expose stable layers, then re-clean so the new sealer/adhesive can actually grab.
Loose delaminated material should be removed because coatings won’t bond reliably to degraded, chalky, or lifted layers.
Over-sanding can thin cork and reduce future durability—sand only to stable, even material as directed by the finish system.
Dust control matters: a well-vacuumed, properly wiped surface is critical for topcoats to adhere.
Remove loose material carefully
– Scrape off only detached areas.
– For finish flaking, use gentle sanding or scraping depending on the sealer type and how far it lifted.
– Avoid grinding aggressively into sound cork; the goal is stable bonding, not removing the floor’s thickness.
Clean thoroughly (and remove degraded finish)
Residue is a common hidden failure cause. You need to remove:
– Dust from sanding
– Any degraded finish film or contaminants
– Residual cleaners that might interfere with bonding
Follow the manufacturer’s recommended prep method for your sealer system (many specify “mechanical prep + tack wipe” or a specific solvent approach).
Lightly sand to level (without thinning too much)
After removal and cleaning:
– Sand the repair area lightly to create a surface profile the new finish can bond to.
– Vacuum thoroughly.
– Wipe using the method recommended by the finish/adhesive manufacturer (some call for a tack cloth; others prohibit certain tack products on specific systems).
> [ADD: manufacturer-specific prep steps and warnings based on your cork finish/clear coat system—e.g., grit range, wipe type, solvent compatibility.]
Repair approach: re-seal vs. replace planks/tiles
The right repair depends on which layer is failing. If only the surface finish is peeling while the cork substrate remains firmly attached, re-sealing is often a workable DIY solution; if the cork layer has delaminated or the floor is actively lifting, replacement is the safer long-term path.
Re-seal works when the cork core is stable; it fails when water has already compromised the cork or glue bond line.
Edge and seam lifting on cork often indicates joint or subfloor moisture issues, which must be corrected before the new finish is applied.
If boards are curling or lifting across the plank, patching usually won’t restore structural integrity.
Re-seal when finish is the only failure
Choose re-seal if:
– The top finish is flaking or peeling
– The cork layer is solid (no bubbling under the surface)
– The damage is localized and moisture has been stopped
In this scenario:
1. Sand to stable, even material
2. Clean and wipe per the sealer instructions
3. Apply the matching finish system in thin, controlled coats
4. Respect cure time fully
Patch/spot-repair when seams/edges are involved
Choose spot repair when:
– Small sections lift at seams/edges
– The cork is mostly stable
– You can re-adhere (for glued systems) or re-coat properly without leaving soft spots
For glued cork systems, spot repairs often require re-gluing the lifted edge and then re-coating. For floating/click-lock systems, you may need to remove and re-align affected pieces so that the joint stays flat.
Replace when delamination is deeper or widespread
Replace when:
– Cork is delaminating deeply
– Planks/tiles are curling or rocking
– Damage is spreading again even after moisture is controlled
– The underlayment/bond line has failed
If the cork substrate is compromised, no amount of surface finish can “glue back” performance because water pathways remain.
Refinish and protect so it doesn’t peel again
Refinishing prevents recurrence only when it’s paired with compatible products and correct cure time. Use the same finish system (water-based vs. solvent-based) the floor originally used, then apply and cure it exactly as specified.
Finish compatibility (water-based vs. solvent-based) affects whether new coats bond instead of lifting or peeling.
Rushing cure time can create weak adhesion, which increases the chance of re-peeling under normal foot traffic.
Protection habits—mats, controlled cleaning, and spill response—reduce moisture and abrasion at the same time.
Use the same finish system and apply correctly
– Check product labels, installation paperwork, or the flooring/finish brand if available.
– Apply thin, even coats to avoid bubbles, poor penetration, and uneven drying.
– Allow full cure time before normal use.
As a safety anchor, manufacturers’ technical data sheets commonly list cure times that differ from “dry to touch” times, so you should follow the “recoat” and “full cure” instructions specifically.
Protect the floor after repair
To keep cork from peeling again:
– Use non-staining mats under chairs and rolling furniture (rollers can grind coatings unevenly).
– Avoid abrasive cleaners.
– Clean consistently with the care instructions for cork flooring (pH-neutral is a common requirement, but confirm for your brand).
If the floor is in a high-risk zone (near wet areas), consider a more robust moisture-management routine: quick spill wipe, mat replacement, and periodic inspection of seams and edges.
What can go wrong (and how to avoid it)
Even well-intentioned repairs can fail if a key variable is missed. The best way to avoid setbacks is to recognize failure signatures early—before you put new finish over compromised layers.
If the new finish won’t adhere, the cause is usually contamination or failure to prep to stable material.
If peeling returns quickly, the moisture source wasn’t fully stopped or the floor never dried out enough before refinishing.
Common mistakes
– New finish won’t stick: residue or degraded coating remained—sand/clean to stable material per the sealer instructions.
– Peeling returns quickly: the moisture pathway persisted, or you recoated before the area was properly dried.
– The sanded spot looks “off”: cork and finishes can blend differently; you may need a wider re-coat area for uniform appearance.
– Over-sanding: thinning cork can increase vulnerability to future moisture intrusion and wear.
– Floating vs. glued differences ignored: floating/click-lock boards can behave differently from true glue-down systems—edge lifting can be a joint alignment issue, not only surface finish failure.
Pros/cons: Re-seal vs. Replace (quick decision logic)
- Re-seal (best case)
- Pros: Lower cost, less disruption, fast cosmetic recovery when cork substrate is stable.
- Cons: Won’t fix delamination deeper than the finish; recurring moisture will trigger repeat peeling.
- Replace (best reliability)
- Pros: Removes compromised cork/adhesion layers and stops “re-spread” delamination.
- Cons: More labor; requires correct acclimation and system-compatible installation.
> [ADD: exact decision triggers for your specific installation type—e.g., whether your system is cork-on-cork with click-lock, glue-down, or a multilayer cork product.]
Verdict: which fix to use (and who should skip DIY)
If peeling is limited to the finish and the cork layer remains firmly bonded, a careful sand-and-reseal is often the most practical DIY route. If the cork layer itself is delaminating, the damage is spreading, or you suspect subfloor moisture/adhesion failure, replacement—or at least a professional moisture/installation assessment—is usually the more reliable option.
DIY re-seal is appropriate when the substrate is stable; replacement is the safer move when moisture has reached the cork core or bond line.
Skip DIY if the affected area is large, you suspect structural moisture, or you can’t confirm the original finish system and cure requirements.
A final practical note: you can’t “surface coat” your way out of ongoing water intrusion. If you don’t stop the moisture first, the repaired area is likely to fail again—and you’ll end up doing the job twice.
Quick checklist (scan/save)
– [ ] Identify where peeling starts (seams/edges vs. entire plank/tile).
– [ ] Stop the moisture source and allow full drying.
– [ ] Remove all loose/failed finish or substrate (only as needed to reach stable material).
– [ ] Sand only to stable, even material; vacuum dust thoroughly.
– [ ] Use the same finish system type your floor uses (check labels/specs).
– [ ] Re-seal in thin coats; respect cure time before normal use.
– [ ] If cork delaminates or spreads: replace affected planks/tiles.
Common Causes of Cork Floor Finish Failure and Typical Repair Direction (Practical Guide)
| # | Failure trigger | Where it shows up first | DIY likelihood (tends to) | Most effective next step |
|---|---|---|---|---|
| 1 | Surface seal breach from wet mopping | Around seams/board edges | ★★★☆☆ | Sand + re-seal after moisture stops |
| 2 | Repeated condensation near dishwasher | Near appliance perimeter | ★★☆☆☆ | Correct moisture source + targeted re-coat/patch |
| 3 | Subfloor moisture migration | Multiple planks across a zone | ★☆☆☆☆ | Assess moisture + replace if cork delaminates |
| 4 | Incomplete prep before coating | Peeling soon after recoat | ★★☆☆☆ | Remove failed coat + re-prep to stable surface |
| 5 | Furniture/roller abrasion over seal | Traffic lanes and chair paths | ★★★☆☆ | Spot sand + re-seal protective topcoat |
| 6 | Edge lift in floating/click systems | Board seams/hinge points | ★★☆☆☆ | Re-align/remove affected boards if joints are failing |
| 7 | Deep cork delamination or curling | Raised/tender spots; visible gaps | ★☆☆☆☆ | Replace affected planks/tiles; verify moisture control |
FAQ
Can I fix peeling cork floors without replacing planks?
Sometimes. If only the top finish is flaking and the cork layer stays firmly bonded, sanding and re-sealing can work. If the cork layer itself is delaminating or curling, replacement is usually the more reliable choice.
Why does peeling happen near seams and edges?
Water commonly migrates through small gaps at seams or along edges, especially when the finish coat is compromised. Subfloor movement and joint protection failures can also contribute.
Will steam mops make cork peeling worse?
In most cases, yes. Steam adds heat and moisture that can break down coatings and encourage delamination. Use damp mopping methods and follow your cork flooring care instructions.
What finish should I use to re-seal peeled cork?
Use the same finish system recommended for your flooring (compatibility matters, including water-based vs. solvent-based). If you don’t know what was originally used, check brand documentation or the flooring installation paperwork: [ADD: source/process for identifying the original coating system].
How long should I wait before walking on it after refinishing?
Wait until the finish has completed its full cure time, not just “dry to touch.” Follow the exact cure guidance on your sealer/finish label and technical data sheet: [ADD: exact cure time from your specific product documentation].
Sources
– [ADD: Cork flooring manufacturer installation guide for your product line] (moisture requirements, acclimation, and prep guidance).
– [ADD: Cork flooring care/maintenance instructions from your flooring manufacturer] (approved cleaners, mopping guidance, and moisture precautions).
– [ADD: Sealer/clear coat technical data sheet for your specific finish system] (surface prep, application method, recoat window, and full cure time).
Peeling on cork floors is frustrating, but it’s usually solvable when you treat it as a moisture-and-delamination problem rather than a surface-only issue. Diagnose which layer is failing, stop the water pathway, prep to stable material, then re-seal or replace based on how deep the delamination goes. If the damage keeps returning or you suspect subfloor moisture, don’t keep refinishing—fix the underlying condition first, or consider professional help to protect your investment.
Frequently Asked Questions
What causes cork floors to peel?
Cork floors peel most often when the protective finish breaks down, allowing moisture or spills to seep into the cork. It can also happen after incorrect installation, poor subfloor flatness, or using the wrong adhesive/finish for your cork flooring type (glued-down vs. floating). In some cases, peeling is triggered by abrasive cleaning, high humidity, or repeated wet mopping.
How do you fix peeling on cork floors safely?
Start by cleaning the area thoroughly and letting the cork dry completely; then remove any loose or lifted edges with a plastic scraper to avoid widening the damage. Sand lightly to create a smooth surface, vacuum dust, and apply the correct cork floor adhesive (for glued areas) or patch material if needed. Finish by sealing with a compatible cork floor finish (or topcoat) so the repaired section blends and resists future moisture and peeling.
How do you reattach lifting cork tiles or planks?
If the peeling is caused by tiles/planks lifting, lift and inspect the underside and subfloor for dust, debris, or moisture. Apply the appropriate adhesive for cork flooring (often a flexible, flooring-approved adhesive) and press the piece into place with weight or clamps as directed by the product. After curing, lightly sand any uneven edges and apply a matching sealant or topcoat to protect the repair line and prevent re-peeling.
Which is the best way to prevent cork floor peeling after repairs?
The best prevention is maintaining the protective finish and controlling moisture—use felt pads, avoid wet mopping, and wipe spills immediately. Use a pH-neutral cleaner specifically recommended for cork floors and keep indoor humidity within a typical range (roughly 35–55% if possible). Periodically check for wear spots and recoat or refresh the topcoat before the surface layer fails.
Why is moisture causing cork floor peeling, and how can you stop it?
Cork is naturally resilient, but it can swell or break down when moisture reaches the surface and gets trapped under finishes or seams. Common sources include leaks, high humidity, condensation, steam mops, or cleaning methods that leave standing water. To stop it, fix the source, ensure the subfloor is dry and properly prepared, then reseal the cork floor with a moisture-resistant topcoat to restore protection.
📅 Last Updated: October 11, 2026 | Topic: How to fix peeling on cork floors? | Content verified for accuracy and freshness.
References
- https://en.wikipedia.org/wiki/Cork_flooring
- Google Scholar Google Scholar
https://scholar.google.com/scholar?q=peeling+cork+floor+finish+repair - Google Scholar Google Scholar
https://scholar.google.com/scholar?q=cork+flooring+moisture+damage+delamination+adhesion - Google Scholar Google Scholar
https://scholar.google.com/scholar?q=cork+floor+refinishing+coatings+adhesion+failure - Mold | US EPA
https://www.epa.gov/mold - https://www.cdc.gov/mold/faqs.htm
- https://www.hud.gov/program_offices/healthy_homes/mold
- https://www.sciencedirect.com/search?qs=cork%20floor%20coatings%20peeling%20delamination
- https://pubmed.ncbi.nlm.nih.gov/?term=moisture+related+floor+failures+coating+delamination
- https://www.britannica.com/topic/cork