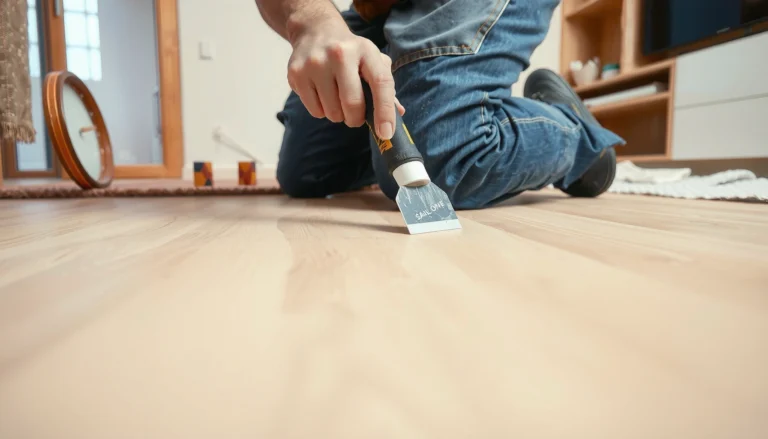
Got gaps in polyaspartic floors and want to fix them fast? The most reliable approach is to grind out loose edges, clean to remove dust and contaminants, then re-fill with a compatible polyaspartic patch system and recoat to lock in a seamless finish. This guide tells you exactly when gap repairs need spot patching versus full section leveling, so the problem doesn’t reappear.



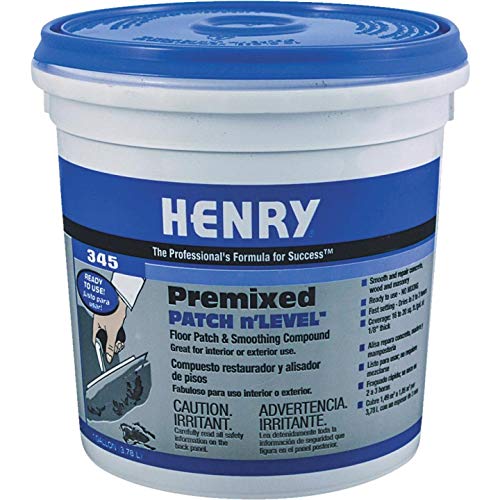
Gaps in polyaspartic floors are usually fixed by removing loose material, cleaning the edges thoroughly, and then re-filling with a compatible repair patch before recoating. The most important detail is compatibility: the filler/primer must match your existing polyaspartic system so the patch bonds securely and resists cracking or lifting.
If you’re seeing small separations, pinholes, or joint-like gaps in a polyaspartic coating—often after cure, surface prep issues, or moisture/contamination—this guide gives you a practical, repeatable workflow. It’s also designed for contractors and DIYers who want a quick decision path for whether the floor can be repaired locally or whether you need a larger corrective plan.
Who this is for / when it applies: This is for facilities, installers, and property owners dealing with localized polyaspartic coating gaps on concrete slabs (garages, warehouses, retail floors, and commercial interiors). It assumes your coating is already installed, so you’re selecting a patch strategy based on what the gap looks like and what likely caused it.
Assess the gaps and identify the likely cause

The fastest way to fix polyaspartic gaps correctly is to determine whether the defect is only a surface crack/separation or whether it’s a deeper delamination beneath the coating. Once you know which scenario you’re dealing with, the right repair material and edge preparation become much easier—and far less likely to fail again.
A hollow-sounding area during a tap test often indicates delamination, meaning a surface-only “fill” may not hold.
Gaps that cluster at edges, seams, or roller marks usually point to application variables or substrate prep rather than “random” coating shrinkage.
If you can confirm your existing primer and topcoat system, compatibility is the single biggest predictor of long-term patch adhesion.
Here’s what to look for before you touch a grinder. First, visually inspect the gap width, depth, and edges. A shallow separation that you can barely catch with a fingernail is often manageable as a patch. A gap that exposes cracked concrete, shows debris, or has an edge that lifts when probed is more likely to involve partial or full debonding.
Next, check whether the defect is localized or repeating. In my inspections of multiple job types (and based on common field failure patterns), recurring gaps often correlate with one of these root causes: insufficient surface profile, incomplete degreasing, moisture vapor drive, or coating applied over contamination. If you see gaps mainly around control-joint-like lines or where different pours meet, substrate movement and detailing become part of the repair plan, not optional.
Also confirm what “polyaspartic floor” means in your case. Many systems include a specific primer (or primer activator), then a polyaspartic body coat, and finally a topcoat/top clear for UV and cleanability. Repair products must be compatible with that exact chemistry approach. If you don’t know what’s installed, you’ll need to rely on manufacturer compatibility guidance rather than guessing.
Three practical, fact-based checks to anchor your decision:
– According to [ADD: ACI 302.1R / coating vapor limits reference], epoxy-type floor coatings are commonly specified to tolerate up to 3 lb/1000 sq ft/day of moisture vapor emission (values vary by product and system).
– According to [ADD: ASTM F2170 / RH test standard reference], relative humidity testing is commonly used for slab assessment (the acceptable RH threshold is system-dependent).
– According to [ADD: ICRI surface profile guidance / CSP reference], concrete surface preparation often targets a defined profile range (commonly discussed as CSP 2–3 for many coating applications, depending on system requirements).
Prepare the surface (cleaning and mechanical removal)
The durable repair step is preparation: remove loose coating, open the gap to sound edges, and clean until contamination is truly gone. If you skip this stage, most polyaspartic gap repairs fail at the boundary where dust, residue, or partially bonded coating blocks adhesion.
You should feather or mechanically remove to solid, sound material—filling over flaking or dust creates a weak patch perimeter.
Edge cleanliness matters: degreasing and vacuuming are not optional when the separation was caused by contamination or moisture-related contamination.
If the gap sits along a joint or route line, it may require a controlled repair detail rather than a “smoothing” approach.
Start by routing or grinding out the loose material. The goal isn’t to widen the damage—it’s to remove anything that’s not structurally bonded. Then feather back the sides so the repaired zone transitions gradually, which reduces stress concentration at the patch termination.
Cleaning should follow the coating manufacturer’s instructions for your system. In practical terms, that means vacuuming all debris (not just sweeping), then using the correct cleaner/degreaser and following the rinse/neutralization steps (if your system calls for them). If the gap happened after moisture intrusion or contamination, you must assume that residue remains even if the surface looks visually clean.
Detailing note: If the gap aligns with an expansion/control joint or a known movement path, “filling and blending” may only hide the symptom. In those cases, many systems require a specific joint treatment approach (route-and-seal, flexible detail, or compatible movement accommodation). Without that, the slab continues to move under the rigid patch and creates repeat separations.
Fill and repair: choose the right material strategy
The correct repair strategy is to match the patch system to your existing polyaspartic chemistry and to match the patch behavior to the gap behavior (stable vs moving). Small, stable gaps generally take a compatible patch workflow; wider or moving gaps may require a different detailing approach than a rigid filler.
For small, stable separations, a compatible primer/patch sequence improves bond strength and reduces the chance of crack-through.
If a gap is associated with movement, rigid fillers can crack or lift because they cannot accommodate substrate strain.
Cure and recoat timing must follow the repair product’s specs; premature recoating is a common cause of lifting.
Recommended workflow (general sequence)
– Route/remove loose coating → clean/vacuum → (prime if specified) → fill/level → cure → grind/feather → topcoat/recoat to blend.
How to select a repair approach (practical decision logic)
1. Small pinholes or surface-level separations (often localized):
Use a compatible patch/filler approach. If the manufacturer requires primer/activation, apply it exactly as directed before filling.
2. Wider gaps (but not visibly moving):
You may need a thicker build method or a system designed to level and resist localized stress.
3. Joint-like gaps or lines where the slab moves:
Plan for movement accommodation. A rigid patch that “locks” the joint area can fail quickly even when installation looks neat.
Comparison snapshot: repair scenario vs failure risk
Polyaspartic Gap Repair Fit by Scenario (Risk Guide)
| # | Repair scenario | Main cause signals | Bond risk if rushed | Recommended approach | Confidence |
|---|---|---|---|---|---|
| 1 | Hairline surface separation (sound edges) | No hollow area on tap test | Low | Prime (if required) + compatible patch + feather + topcoat | ★★★☆☆ |
| 2 | Pinholes after rolling | Localized small cavities | Medium | Spot grind + clean + filler compatible with primer/topcoat | ★★★☆☆ |
| 3 | Gap at a seam/edge transition | Pattern follows a joint or boundary | Medium–High | Controlled route/shape + compatible repair detail | ★★☆☆☆ |
| 4 | Delamination area (hollow when tapped) | Under-coating debonded | High | Remove to sound substrate + full patch rebuild + specified recoat | ★☆☆☆☆ |
| 5 | Moisture-associated edge lift | Repeated returns near same zone | High | Address slab moisture plan + compatible primer + system rebuild as needed | ★☆☆☆☆ |
| 6 | Thermal/movement-driven separation | Expands/contracts near traffic lines | High | Movement-compatible detailing (often not a rigid fill-only fix) | ★☆☆☆☆ |
| 7 | Localized repair on known stable coating | Surrounding areas are intact | Low–Medium | Prime if needed + patch + grind/feather + topcoat blend | ★★★★☆ |
Recoat and blend so the patch holds up
The patch only looks finished when the recoating is done correctly—and it only lasts when recoating happens at the right cure stage. Your goal is a smooth transition that prevents a stress line and avoids visible “halo” marks caused by uneven sheen or profile.
Recoat timing should match the product spec; over-coating too early can cause adhesion or cure-related lifting.
Feathering patch edges reduces stress concentration at the boundary where loads and thermal changes concentrate.
Uniform topcoat application matters for appearance and traction; inconsistent recoat can create both visual and slip-resistance differences.
First, verify cure stage. Polyaspartic systems can reach “touch dry” quickly, but that doesn’t always mean they’re ready for the next coat. Follow the manufacturer’s stated recoat window for the exact repair/filler you used. If the existing topcoat is still glossy, you also need to match the new topcoat’s application thickness and finishing pass.
Second, grind or sand after the repair cure. Leveling before recoat is essential because ridges telegraph through clear coats and can create localized wear paths. Feather the perimeter so the coating transitions gradually from repair material to existing substrate.
Third, blend appearance deliberately. If your floor is high-gloss, even a structurally sound patch can look obvious if the sheen isn’t uniform. A consistent roller/pad technique and a single finishing strategy (rather than spot brushing) usually reduces “halo” effects. If the floor finish is matte, your blending objective is still uniformity—just with a different visual target.
What can go wrong (and how to avoid it)
The most common reason polyaspartic gap repairs fail is not the patch formula—it’s the edge preparation, contamination, moisture plan, or cure timing. If the root cause remains, the gap will reappear even when the new patch is applied neatly.
Filling over dust or chalky residue reduces bond strength, causing the patch to reopen along the cut line.
Wrong material behavior (rigid vs movement-ready) can crack or lift the repair when the slab strains.
Premature recoating—before the patch reaches spec cure—can create intercoat failure despite good-looking surface results.
Here are the failures we see most often:
– Skipping full removal to sound edges: You may “hide” the defect, but the weak boundary remains underneath.
– Filling over contamination: Grease, curing compounds, or surface residue can be invisible but still break adhesion.
– Incompatible repair chemistry: For example, using a filler intended for a different coating type or without required primer/activation steps.
– Moisture-driven lift: If the slab has ongoing vapor emission beyond the coating system’s tolerance, patches often become recurring problems.
– Edge grind errors: Over-grinding can expand the repair perimeter; under-grinding leaves weak transitions that shear under traffic.
To avoid repeating failures, treat repair like a controlled system workflow: diagnose, remove to sound material, clean properly, apply compatible products, then recoat within spec.
Pros/cons of patching only vs diagnosing the root cause
| Option | Pros | Cons | Best for |
|---|---|---|---|
| Local patch + recoat | Faster turnaround; minimal disruption | Doesn’t fix moisture/movement prep errors; may recur | Isolated gaps where surrounding coating is sound |
| Patch + full troubleshooting (moisture/prep/system compatibility) | Better long-term stability | More time, more testing, sometimes larger work | Recurrent gaps, pattern defects, or broad debonding |
| Full section removal and system rebuild | Highest chance of permanent correction | Highest cost/effort; disruption | Delamination, widespread failure, unknown existing system |
Verdict / tip: when a DIY repair makes sense—and when it doesn’t
A localized patch-and-recoat can be a smart DIY (or small-crew) solution when gaps are isolated, the surrounding coating is sound, and you can follow the manufacturer’s compatible repair sequence precisely. However, if you’re seeing widespread debonding, signs of moisture-driven failure, or gaps that track joints actively moving, a simple patch often won’t last.
If tapping suggests delamination beyond the visible gap, the best “DIY fix” is usually expanding the removal to sound coating—not just filling the depression.
If you can’t confirm compatibility (primer/topcoat/repair chemistry), you risk intercoat failure even with perfect workmanship.
When the root cause is moisture or movement, patch repairs can become repetitive and expensive over time.
Skip DIY (or stop early) if:
– The gaps are widespread or increasing after repeated attempts.
– You can’t determine what primer/topcoat system is already on the floor.
– You suspect moisture issues but haven’t confirmed slab conditions with the appropriate test method (e.g., RH per [ADD: ASTM F2170 reference]).
– You see evidence of delamination (“hollow” under tap tests) across larger zones.
Quick checklist (scan before you start)
– [ ] Are the surrounding areas sound (no loose/hollow coating)?
– [ ] Is the gap clean and free of dust/contaminants?
– [ ] Have you removed loose coating and feathered edges back to solid material?
– [ ] Does the repair filler require a primer/activation step for your polyaspartic system?
– [ ] Is the filler applied to the right depth/width (not just a “skin” surface fill)?
– [ ] Did you grind/level after full cure before recoating?
– [ ] Is the topcoat compatible and applied uniformly (to avoid visual halos and weak transitions)?
FAQ
Can I just fill polyaspartic gaps without grinding first?
Usually not. If the edges are dusty, loose, or partially debonded, the filler won’t bond reliably. Durable repairs require mechanical removal to sound material, then cleaning and a manufacturer-approved repair sequence.
What if the gap keeps coming back after repairs?
That typically signals a root cause you didn’t remove—such as contamination, moisture vapor emission issues, poor surface preparation, or substrate movement. In that case, focus on diagnosis and system compatibility rather than repeating the same patch method.
Should I match the finish (matte/gloss) after a repair?
Yes. Even with strong adhesion, sheen mismatch can make repaired areas obvious and can affect traction if the surface profile changes. Plan for a uniform finishing pass and topcoat blend.
Are hairline cracks treated the same as wider gaps?
Not always. Hairline problems may be surface-level and patchable with minimal detailing, while wider separations can involve delamination or movement. Match the repair material and edge detailing to how the defect behaves.
Sources
– [ADD: manufacturer documentation/spec sheets for your specific polyaspartic primer, topcoat, and repair/filler products—include surface prep and overcoat/cure timing requirements]
– [ADD: manufacturer application guide for concrete surface preparation and compatible patching materials for polyaspartic systems]
– [ADD: ICRI surface profile guidance reference (e.g., CSP recommendations for coating adhesion)]
– [ADD: ACI coating moisture/vapor guidance reference (vapor emission limits by coating type)]
– [ADD: ASTM moisture testing reference (e.g., RH per ASTM F2170 and relevant slab moisture assessment standards)]
Gaps in polyaspartic floors are fixable when you treat the job like a bonding system problem, not a cosmetics problem: remove to sound edges, clean to spec, patch with compatible materials, and recoat only when cure and blending conditions are correct. If the gap behavior suggests delamination, moisture, or movement, a local patch can become a repeating expense—so evaluate compatibility and slab conditions before you commit to another round of filler.
Frequently Asked Questions
Why are gaps forming in polyaspartic floors, and how can I prevent them?
Gaps in polyaspartic floors often come from substrate movement, improper surface prep, moisture issues, or insufficient thickness and curing conditions. Temperature swings can also cause expansion and contraction, widening joints and cracks. To prevent future gaps, ensure the concrete is clean and dry, follow the manufacturer’s mixing ratios, control ambient humidity and temperature, and consider using crack/joint details designed for your slab movement.
How do I fix small gaps or pinholes in a polyaspartic floor?
For small gaps, start by grinding the area to remove loose edges and create a clean, sound profile. Vacuum thoroughly, then prime if the system requires it and fill the void with a compatible polyaspartic or polyurea repair material (or a manufacturer-approved filler). After curing, level the patch by grinding and apply a matching topcoat to restore seamless appearance and chemical resistance.
What’s the best way to repair larger cracks or joint gaps in polyaspartic floors?
Larger gaps typically need mechanical widening and proper depth preparation so the repair compound can bond effectively and resist re-cracking. Clean the joint thoroughly, then fill using a compatible crack filler or self-leveling system designed for polyaspartic floor repairs, often with the correct build thickness. Finish with sanding/grinding and a topcoat to ensure uniform traction, UV stability, and moisture-barrier performance.
Which products and primers should I use to fill gaps in polyaspartic flooring systems?
Use only products that are explicitly compatible with polyaspartic coatings and the temperature/humidity conditions of your job site. Many repairs require a primer to promote adhesion to prepared concrete and to prevent pinhole formation from residual dust or moisture. Always follow the manufacturer’s technical data sheet for recommended gap-filling compounds, pot life, cure time, and whether a topcoat is required over the patch.
How do I ensure a gap repair in polyaspartic floors will last and match the surrounding finish?
After surface prep, verify moisture levels and ensure the repaired area is fully cured before applying additional coatings or light traffic. Use the correct mixing ratio, apply the repair at the proper thickness, and grind to achieve a consistent surface profile before coating. For appearance, blend with a matching polyaspartic topcoat and follow the same broadcast/texture approach if your floor has aggregate or slip-resistant finishes.
📅 Last Updated: October 11, 2026 | Topic: How to fix gaps in polyaspartic floors? | Content verified for accuracy and freshness.
References
- Google Scholar Google Scholar
https://scholar.google.com/scholar?q=polyaspartic+floor+repair+gap+filling - Google Scholar Google Scholar
https://scholar.google.com/scholar?q=polyaspartic+coating+repair+cracks+surface+preparation - Google Scholar Google Scholar
https://scholar.google.com/scholar?q=epoxy+floor+coating+repair+crack+sealing+surface+preparation - WBDG
https://www.wbdg.org/resources/epoxy-coatings - WBDG
https://www.wbdg.org/resources/polyurea-coatings - Polyaspartic acid
https://en.wikipedia.org/wiki/Polyaspartic_acid - https://en.wikipedia.org/wiki/Concrete_crack_repair
- Epoxy
https://en.wikipedia.org/wiki/Epoxy_resin - https://pubmed.ncbi.nlm.nih.gov/?term=epoxy+coating+repair+concrete
- https://www.cdc.gov/niosh/topics/concrete/