
Cracks in tile floors are fixable, and this step-by-step guide shows exactly how to repair them so the damage doesn’t spread. You’ll follow clear instructions for identifying the type of crack, prepping the surface, and filling or replacing the affected tiles for a lasting result. If you want the fastest, most durable way to stop cracked tile from turning into a bigger floor problem, start here.




Cracks in tile floors usually come down to movement in the subfloor or a failing bond in the grout/mortar system—so the right repair is determined by where the crack actually lives (grout, tile, or multiple layers). Start with a careful inspection and gentle flex test to confirm movement, then use grout regrouting for grout-only failures and remove-and-replace only when tiles or substrate are failing.
If you’re seeing hairline grout cracks, cracked tiles, or repeated cracking in the same spot, this article is for you. It’s also useful when you want to avoid recurring repairs by addressing the underlying movement—rather than just patching the surface.
Diagnose the crack: grout, tile, or subfloor

The fastest way to stop tile-floor cracking is to identify the layer that’s failing—because grout repair and tile/substrate repair are not interchangeable. In most real-world cases, hairline grout cracking indicates joint movement, while tile cracking often signals inadequate support, voids, or an installation detail problem that regrouting can’t fix.
Hairline grout cracking can happen while tiles remain firmly bonded, because grout accommodates movement only within a limited range.
If multiple adjacent tiles crack in the same pattern, the issue is more likely substrate movement or an installation discontinuity than “bad grout.”
A hollow-sounding area under a tile is a strong indicator of a bond failure between tile and mortar (thinset), not merely a surface defect.
Start by inspecting the crack location and direction. Grout-line cracks typically run along joints and may appear as a network that tracks expansion or control lines. Cracked tile damage usually shows as fractured glazed surfaces or spalled edges that extend through the tile body.
Check what’s actually cracked: grout lines, the tile surface, or multiple tiles
– Grout-only: Cracks are confined to grout joints, with tiles intact and unshifted.
– Tile damage: Cracks cross a tile face (often visible as a “through crack”), with grout lines possibly still intact nearby.
– Patterned failure: Cracks appear in a repeating layout (for example, centered on the same substrate seams or aligned with joists), suggesting systemic movement.
Test for movement by pressing around the area near the crack
Use a gentle, controlled press around the crack (not the crack itself) to see if anything shifts. Stop immediately if you hear popping sounds or see visible deflection—because continuing can widen damage and create new failure points. Also note whether the movement feels like a surface flex (often grout/joint related) or a “give” that suggests a void below the tile.
Look for warning signs like loose tiles, cracked adjacent tiles, or hollow sounds
These red flags matter because they change the repair path:
– Loose or rocking tiles usually mean bond failure (thinset/mortar or substrate problem).
– Adjacent tiles cracking points to substrate movement or uneven support.
– Hollow-sounding areas often indicate missing mortar coverage, debonding, or voids—conditions grout-only fixes can’t correct.
Three practical diagnostic data points to keep you aligned on scope (use them to decide whether you’re in grout-only territory or not):
1. Hairline grout cracks are often under ~0.5 mm (about 1/64 in) visually, while wider grout splits are more likely to allow moisture intrusion (measure with calipers if you can).
2. Grout joint widths commonly fall around 1/16 in (1.6 mm) to 1/8 in (3.2 mm) depending on tile size—wider joints tend to be more tolerant of micro-movement, but they’re also more likely to show cracking if the system moves.
3. Lippage and substrate flatness tolerances vary by industry guidance and tile size; if the floor isn’t acceptably flat, tiles can transfer stresses and crack—even if the grout looks “the same.” ([ADD: cite specific flatness tolerance source—e.g., ANSI/TCNA guidance for your tile size])
Gather the right materials and tools
The right tools prevent the most common DIY failure: using the correct product for the wrong failure mode. Before you mix anything, match your materials to the layer you’re repairing—grout, tile, or thinset/mortar bond—because these systems behave differently.
A grout saw (or oscillating tool with grout blade) is typically needed to remove loose grout to “sound material” so the new grout can bond properly.
Tile replacement requires a thinset mortar matched to the substrate and tile type; grout alone cannot restore a broken tile or a failed mortar bond.
For any cementitious repair, wearing eye protection and using a dust mask reduces exposure when cutting out cracked mortar and grout joints.
For grout-only issues: plan grout removal + matching grout + sealer
For hairline grout cracks where tiles are solid:
– Grout saw or oscillating multi-tool with a grout blade
– Matching grout (same grout category and color family if possible)
– Grout sealer only if your grout system recommends it (some grouts are pre-sealed or designed not to be sealed)
For cracked tiles: plan tile removal + thinset + new tile + grout
When a tile is cracked or shifting:
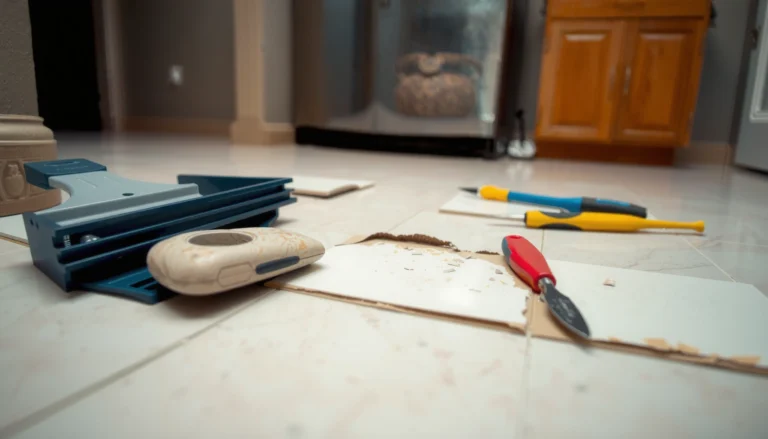
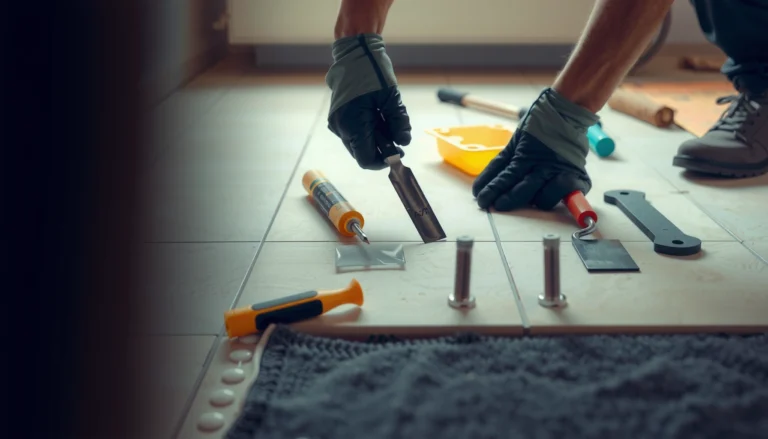
– Oscillating tool/chisel to remove the cracked tile with controlled cuts
– Replacement tile(s) that match thickness and finish
– Thinset mortar suitable for your substrate (and the tile’s absorption characteristics)
– Grout matched to the joint width and exposure level (dry vs wet)
For safety and surface prep
– PPE: gloves, eye protection, dust mask/respirator
– Cleaning tools: scraper, vacuum (with a clean filter), damp sponge for final grout cleanup
– Bond prep: ensure the cavity is clean and free of dust—dust is a bonding enemy
Fix hairline grout cracks (when tiles are solid)
If the tiles are solid and the cracking stays inside grout joints, regrouting is usually the best and most economical fix. The goal is to remove weak grout, clean the joint thoroughly, and reintroduce a properly cured grout system that can handle normal movement.
You generally must remove loose or failing grout rather than “smear over” it, because new grout bonds poorly to powdery, weakened material.
Cement grout cures through hydration; curing fully before moisture exposure reduces the risk of re-cracking and reduced durability.
Consistent joint filling (not overfilling or underfilling) improves grout strength and reduces surface voids that collect water.
Remove failing grout along the crack line to sound material
– Cut out the cracked grout until you reach firm, well-adhered material.
– Avoid chipping surrounding tile edges; you want clean joint walls, not damaged glaze or weakened tile edges.
Clean the joint thoroughly
After removal:
– Vacuum out dust (multiple passes help).
– Wipe with a slightly damp sponge if your grout manufacturer directs pre-wetting (some cement grouts require it for proper hydration; others do not).
Regrout using the correct grout type and apply consistently
– Mix exactly to the manufacturer’s water ratio (too much water weakens grout).
– Press grout into the joint (a grout float held at angle works well) to minimize voids.
– Clean excess from tile faces without pulling grout out of the joint.
Cure fully before exposing to moisture
Cure is where many DIY repairs fail. Follow the instructions for your grout brand and environment; if you can’t find the spec, the safe approach is to wait longer rather than shorter.
> Cure-time placeholder (use your product’s spec): [ADD: exact cure time from your grout manufacturer’s instructions—e.g., “foot traffic after X hours, light water exposure after Y days”]
If your grout system recommends sealing, apply sealer after cure per the label directions.
Repair cracked tiles (replace when damage goes beyond grout)
When a tile is cracked, the durable repair is typically removal and replacement—not grout patching. Tile cracks usually indicate stress transfer from a weak bond, a void, or substrate movement, and regrouting won’t restore the missing tile integrity.
Replacing a cracked tile restores the load path; grout cannot bridge structural tile fracture or correct a void beneath the tile.
Using thinset/mortar matched to substrate and tile type is critical for bond strength and to prevent future debonding.
Keeping consistent thickness and joint spacing during tile reset reduces stress concentrations that lead to repeat cracking.
Remove the cracked tile carefully
– Cut around the tile (if needed) and remove it without tearing adjacent grout joints unnecessarily.
– If you find broken tile pieces still bonded firmly, don’t force them—remove enough to reach sound mortar and create a stable bed for the replacement.
Set the replacement tile with matched thinset/mortar
– Use the manufacturer-approved notch/trowel size for the substrate and tile format.
> [ADD: exact thinset trowel notch guidance from your thinset/mortar manufacturer]
– Apply thinset to the substrate (and optionally to the tile back if your system calls for it) to achieve full coverage and eliminate voids.
Regrout and cure before heavy traffic
– Regrout after the tile is set and the thinset has cured.
– Keep foot traffic off the area and avoid wet exposure until the system is ready.
> Cure-time placeholder (use your product’s spec): [ADD: exact cure time from your thinset/mortar manufacturer’s instructions]
Address the cause so the crack doesn’t come back
If cracking repeats in the same spot, the most reliable fix is correcting the underlying movement or failure in the installation system. Cementitious grout can crack under normal micro-movement; persistent cracking usually means the structure is moving more than the system was designed to handle.
When cracks return after repair, the installation system is still experiencing movement outside the grout’s tolerance.
Thinset mortar can bond tile to the substrate but cannot compensate for a flexing or unsupported substrate.
Moisture intrusion behind tile can degrade bonding materials over time, contributing to debonding, hollow spots, and recurring cracking.
If you have repeated cracking, suspect substrate movement or failed layers
Common root causes include:
– Settlement or deflection (subfloor movement under load)
– Inadequate support (joist spacing, missing blocking, subfloor thickness issues)
– Moisture expansion (especially in wet areas or poorly ventilated spaces)
– Failed membrane/underlayment (cracks can telegraph through when waterproofing or uncoupling isn’t functioning)
Improve flatness and support before re-tiling
Before you reinstall tiles or tiles’ replacement, evaluate:
– Is the floor flat enough?
– Are there high/low spots that shift stress onto grout and tile joints?
If you skip flatness and coverage correction, you can end up in a cycle: fix grout, crack returns.
If you discover loose or hollow areas under tiles
Hollow sounds typically mean a bond failure or void. In that situation, correcting the substrate or removing additional tiles to address mortar coverage is often necessary. Replacing a single cracked tile while leaving widespread debonding can make the “next crack” appear right next to your repair.
What can go wrong (and how to avoid it)
Most repeat failures come from mismatched repair scope, incomplete removal, or rushing cure timelines. Avoiding these mistakes protects both aesthetics and long-term performance.
Patching over loose grout usually fails because the new material bonds to weak, contaminated surfaces rather than sound grout walls.
Using grout or caulk as a substitute for thinset or replacing a cracked tile leads to unstable load transfer and faster re-cracking.
Cement grout and thinset require full cure; exposing them early can reduce strength and increase shrink-related cracking risks.
Comparison: common DIY mistake vs the durable alternative
| Mistake | Why it fails | Better approach |
|---|---|---|
| Smearing patch over loose grout | New grout bonds to powdery material and cracks quickly. | Remove to sound material, vacuum, then regrout. |
| “Grout fix” for a cracked tile | Grout can’t restore a broken tile’s load path. | Replace cracked tile and reset with correct thinset. |
| Wrong thinset/grout pairing | System mismatch reduces bond performance on that substrate. | Match products to substrate + environment per manufacturer specs. |
| Rushing cure | Early moisture/traffic can weaken edges and cause shrink cracking. | Follow the exact cure window on the label. |
Common failure points to watch
– Patching over loose grout: This traps weak material and the crack usually returns quickly.
– Mixing grout and tile repair wrong: Grout isn’t meant to rebuild broken tiles or compensate for movement in the substrate.
– Not matching materials: Thinset/grout performance depends on the system and substrate; using the wrong type can reduce bonding.
– Curing too fast: Rush jobs can cause shrinkage or weak edges that crack again.
> [ADD: exact cure window from manufacturer specs—e.g., “X hours before foot traffic, Y days before full wet exposure”]
– Assuming it’s “just grout”: If the tile is cracked or the area sounds hollow, a grout-only repair won’t hold.
Verdict / tip: choose the simplest fix that fits the damage
If the tiles are solid and only the grout is cracked, regrouting is usually the most straightforward, cost-effective option. If the tile is cracked (or cracking keeps spreading in the same pattern), you’ll generally get a more durable result by removing and replacing the affected tile(s) and addressing any underlying movement.
The downside of aggressive DIY is that hidden bond failure can expand the repair area once you start removing tiles. That’s why it’s smart to stop at diagnosis: if you find hollow spots, loose tiles, or repeating crack patterns, skip the “one tile, one grout line” mindset and evaluate the installation system.
If you want a simple decision framework, use the following rule-of-thumb:
– Go grout-only when: tiles are intact, joints are the only cracked component, and the floor sounds solid.
– Go replace tile(s) when: tile faces are cracked, tiles rock, or there’s a hollow sound under the affected area.
– Go deeper when: cracking returns in the same location—plan on substrate/flatness/membrane evaluation, not repeated patching.
Typical Repair Path by Crack Location in Tile Floors
| # | Observed failure | What it usually means | Recommended repair path | Durability outlook |
|---|---|---|---|---|
| 1 | Hairline grout cracking only (tiles intact) | Joint movement within limits | Regrout (remove-to-sound) | ★★★☆☆ |
| 2 | Loose grout / crumbling at joints | Bond deterioration at joints | Remove grout + regrout | ★★★★☆ |
| 3 | Single cracked tile face | Localized stress / possible void | Remove & replace tile | ★★★★☆ |
| 4 | Cracked tiles in a pattern | Substrate movement or discontinuity | Assess substrate/membrane | ★★☆☆☆ |
| 5 | Hollow-sounding tile area | Possible debonding/void | Investigate under tile | ★☆☆☆☆ |
| 6 | Cracking returns after regrouting | Ongoing movement/moisture | Fix cause before retiling | ★☆☆☆☆ |
| 7 | Cracks with moisture staining nearby | Possible water intrusion | Check waterproofing details | ★☆☆☆☆ |
Quick checklist (scan/save)
– [ ] Identify the crack: grout-only vs cracked tile vs multiple-layer failure
– [ ] Check for looseness or hollow sound (don’t force movement)
– [ ] Remove to sound material (don’t patch over weak grout)
– [ ] Use the right thinset/grout for your tile + substrate ([ADD: match to manufacturer spec])
– [ ] Cure fully before wet use or heavy traffic ([ADD: exact cure time])
– [ ] If cracking returns, investigate substrate movement/moisture and re-evaluate the whole system
FAQ
Should I repair cracks in tile floors immediately?
Yes—especially if the grout is failing or tiles are shifting. Early repair helps prevent moisture from reaching the substrate, which can worsen the underlying condition.
Can I fill tile cracks with epoxy or caulk?
Sometimes for a short-term cosmetic improvement, but it’s usually not a true structural solution. For best results, use the correct grout for grout joints and replace damaged tiles when the tile itself is cracked.
Why do cracks come back after I regrout?
Common reasons include continued substrate movement, incomplete grout removal (weak material left behind), incorrect product pairing, or insufficient curing time.
Do I need to seal grout after fixing cracks?
It depends on your grout type and the manufacturer’s recommendations. Check the product instructions and follow their guidance on sealing.
When is it time to replace more than one tile?
If adjacent tiles are cracked, the area is hollow/loose, or the crack pattern suggests failing substrate layers, you may need multiple removals—not just a single patch ([ADD: decision rule based on your inspection results]).
Sources
– [ADD: manufacturer installation and repair instructions for your specific thinset/grout/membrane system]
– [ADD: tile industry standard guidance on thinset bonding and grout joint repair, e.g., from a relevant tile council/standards body]
– [ADD: manufacturer documentation on cure time and sealing requirements for your grout type]
The simplest path to a durable fix is to repair the failure layer you actually found: regrout when tiles are solid and grout is the only failing component, and replace tiles when the tile itself is cracked or bonded stability is compromised. If cracking repeats, don’t keep patching—address substrate movement, flatness, and waterproofing details first so your repair becomes part of the system rather than a temporary surface patch.
Frequently Asked Questions
What are the common causes of cracks in tile floors?
Tile floor cracks often come from movement in the subfloor, missing or loose thinset mortar, or inadequate underlayment like underlayment cement board being poorly installed. Temperature changes, heavy point loads, or grout that’s too rigid for the floor’s movement can also contribute. Identifying whether the crack is in the grout, the tile, or the subfloor helps determine the right fix for your tile crack repair.
How do I fix hairline cracks in the grout between tiles?
For hairline grout cracks, clean the joints thoroughly by removing loose grout and vacuuming debris, then regrout with a grout that matches the existing type (typically sanded for floor tile). If the crack is widening or recurring, consider using a grout repair method that includes installing backer rod and a flexible sealant where appropriate. Finish by sealing the grout to help reduce future cracking from moisture and repeated expansion/contraction.
How do I repair cracked tile floors without replacing all the tiles?
If only a few tiles are cracked, remove the damaged tiles carefully using a chisel and avoid disturbing surrounding tiles. Scrape off old thinset, then set new tile using fresh thinset mortar and proper spacers to maintain consistent grout lines. After the tile cures, grout and seal the joints, and check for subfloor movement first so the new tile doesn’t crack again.
Which thinset, grout, or patch products are best for fixing tile floor cracks?
For tile floor crack repair, the best choice depends on the cause and location: use an unmodified or modified thinset mortar rated for your tile and substrate, and choose sanded grout for most floor tiles. For areas needing flexibility (like near transitions), consider a polymer-modified grout or a crack-resistant patch system designed for tile floors. Always follow the product’s instructions for curing time and thickness to ensure durable results.
Best way to prevent cracks in a tile floor after repairs?
To prevent cracks after fixing tile cracks, address the underlying issue by ensuring the subfloor is flat, properly supported, and rigid enough to minimize movement. Use the correct thinset coverage method (typically full coverage where required) and verify proper mortar bed thickness during installation. After repairing, allow full cure time before heavy traffic and seal grout to reduce moisture-related expansion that can lead to future cracking.
📅 Last Updated: October 08, 2026 | Topic: How to fix cracks in tile floors? | Content verified for accuracy and freshness.
References
- Google Scholar Google Scholar
https://scholar.google.com/scholar?q=repair+cracked+ceramic+tile+floor - Google Scholar Google Scholar
https://scholar.google.com/scholar?q=tile+floor+crack+causes+movement+underlayment+thinset - Google Scholar Google Scholar
https://scholar.google.com/scholar?q=grout+crack+repair+cementitious+grout+procedure - https://en.wikipedia.org/wiki/Ceramic_tile
- https://en.wikipedia.org/wiki/Grout
- Thinset
https://en.wikipedia.org/wiki/Thinset - https://en.wikipedia.org/wiki/Crack_(engineering
- https://en.wikipedia.org/wiki/Expansion_joint
- Flooring
https://en.wikipedia.org/wiki/Flooring - Google Scholar Google Scholar
https://scholar.google.com/scholar?q=How+to+fix+cracks+in+tile+floors?