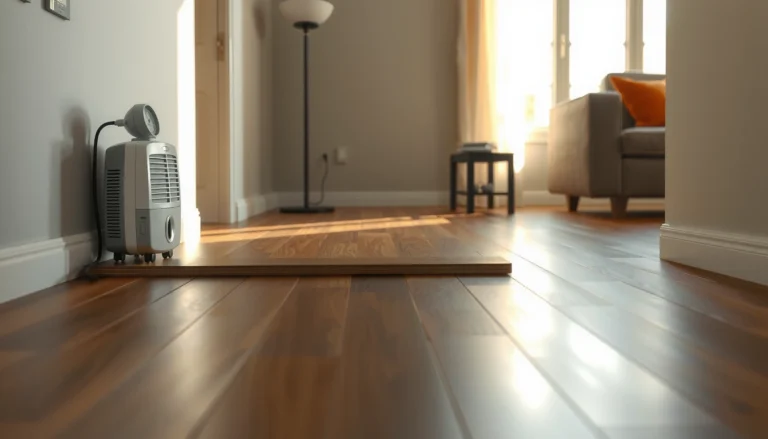
Cracks in sheet vinyl floors aren’t something you should live with—this step-by-step guide shows exactly how to fix them. You’ll learn the fastest way to prepare the damaged area, choose the right vinyl repair compound, and seal the crack so it holds up under normal foot traffic. Follow these instructions and you can stop the crack from spreading and restore a clean, flat surface.



If your sheet vinyl has cracks, the fix usually comes down to one thing: stopping movement and then sealing the damage so water and dirt can’t get underneath. Start by cleaning and flattening the area; then use the right vinyl repair method (filling or patching) based on whether the crack is superficial or the sheet is lifting. This guide will help you choose the correct approach and avoid the most common mistakes that make cracks come back.
If the crack appeared after foot traffic changes, furniture pressure, or a temperature shift, the underlying cause is likely subfloor movement or an adhesion failure. This is for homeowners and renters dealing with typical wear cracks in sheet vinyl—not cases with major tearing, widespread bubbling, or extensive subfloor damage (those often need deeper work or replacement).
Assess the crack: what type of damage do you have?
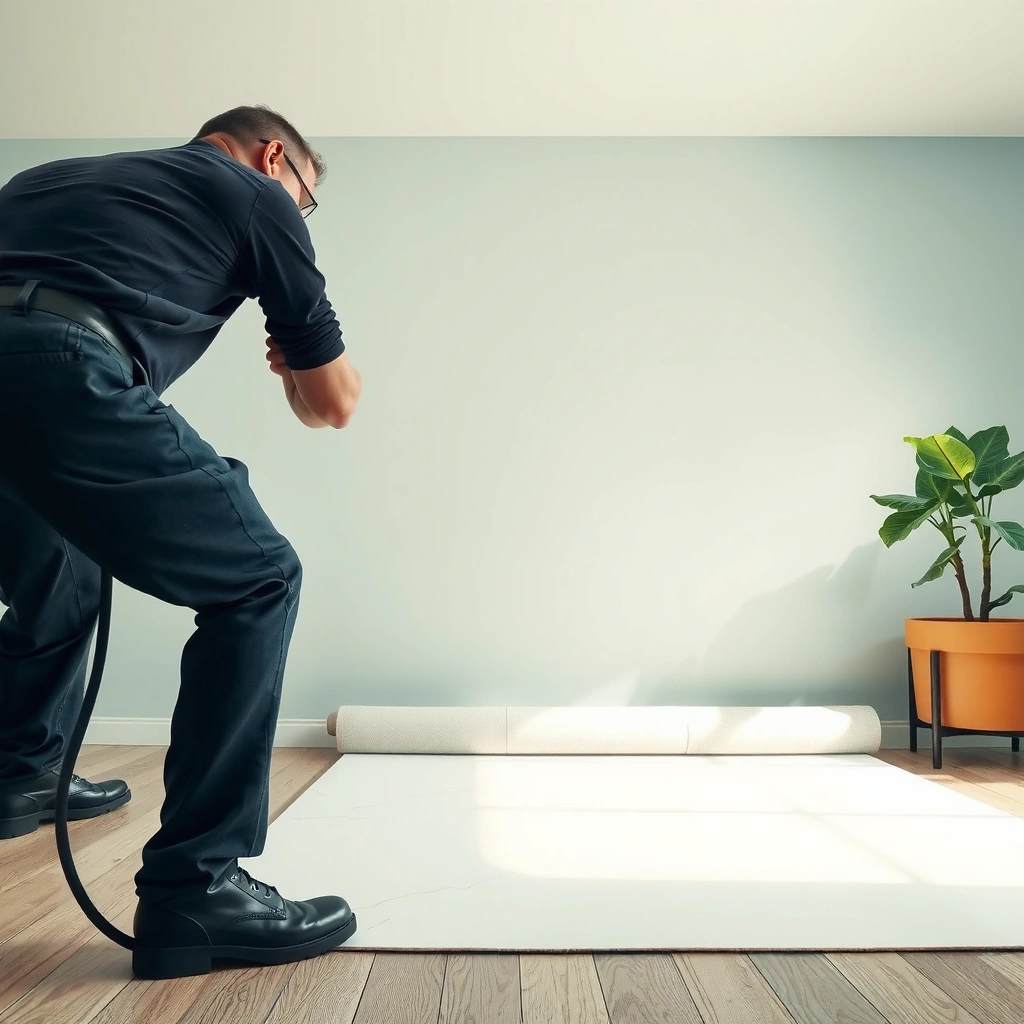
A proper sheet vinyl crack repair starts with distinguishing between a surface defect and an adhesion/lifting problem. If the vinyl is moving at the crack, a top-side seal alone often fails.
– Superficial crack vs. lifting/“open” seam: If the vinyl edges of the crack flex or you can see gaps, you may need to re-adhere before sealing.
– Crack depth and width: Hairline cracks can often be filled and sealed; wider cracks usually require filling plus stabilization.
– Check for moisture or movement: Look for nearby curling, damp spots, or areas where the floor feels softer—those clues change the repair approach.
A resilient flooring crack that “opens” under pressure is usually signaling debonding or substrate movement, not just surface wear.
Crack repair outcomes depend heavily on whether the sheet vinyl remains flat and firmly bonded to the subfloor at the time you seal or fill.
What to look for at the crack line (fast diagnostics)
Superficial cracks typically look tight and don’t noticeably lift when you gently press along the seam. Lifting cracks show more drama: the edges rise microscopically, or you can feel a slight ridge/edge where the vinyl isn’t fully supported.
Also check for context clues that often correlate with vinyl failure modes:
– Installation traffic pattern: Heavy rolling loads, chair legs, or concentrated foot paths can create repeated flexing.
– Temperature-driven expansion: Seasonal swings can widen a seam first, then crack it after repeated cycles.
– Moisture migration: If the area stays cool/damp or feels softer than surrounding sections, sealing the top can trap moisture rather than solve the root cause.
When you should stop and investigate moisture
Moisture isn’t just a “wet floor” issue—it can compromise adhesive bond strength and weaken the substrate. For resilient flooring installations, standards commonly reference threshold values measured by ASTM methods (examples below). If your crack aligns with moisture-symptom areas, moisture testing should come before sealing.
According to ASTM F1869, calcium chloride moisture tests are often evaluated against 3 lb/1000 sq ft/24 h for many resilient flooring adhesives and coverings. (ASTM F1869)
According to ASTM F2170, in-situ RH readings are commonly evaluated around 75% RH for resilient flooring installations with moisture-sensitive systems. (ASTM F2170)
(Exact limits vary by adhesive/manufacturer; always follow the product label and installation instructions.)
Prep for repair: clean, dry, and stabilize
You’ll get the best crack repair when the surface is clean, dry, and mechanically stable before you apply filler or adhesive. Prep is where most DIY repairs quietly succeed—or fail.
– Remove dirt and residue: Clean the crack and surrounding area thoroughly so filler or adhesive can bond (avoid leaving waxes or oily cleaners behind).
– Dry time matters: Vinyl repair materials generally need a dry substrate; if the floor is cool or recently exposed to humidity, give it time to come to room conditions.
– Flatten any raised edges: If the sheet is slightly lifted, use light pressure and confirm the subfloor is stable before you seal/fill.
Resilient flooring repair depends on adhesion—contaminants and residues can prevent fillers and sealants from bonding properly.
If the sheet vinyl flexes at the crack location, you must stabilize or re-adhere before sealing to avoid immediate re-cracking.
Clean like a bonding job, not a cosmetic clean
Use a method that removes grit from inside the crack line. Vacuuming is the first step; then use a residue-free cleaner recommended for resilient flooring. Avoid “shine” products, waxes, and some degreasers that can leave films.
If the crack edge has grime packed into it, wipe until the cloth comes away clean. If the filler can’t key into clean material, it will often cure looking fine but fail under flexing.
Stabilize the sheet before any sealer touches it
If the sheet is slightly lifted, don’t rely on filler to “glue down” the crack. Many sheet vinyl cracks are actually an adhesion issue beneath the surface. Stabilize the area first (for example, by re-adhere—see Fix option 2), then return to sealing.
Moisture and flatness checks that prevent repeat repairs
Even a perfect filler bead won’t last if the subfloor is out of tolerance or wet. Many resilient flooring guidelines call for limiting flatness deviations before installation (these tolerances are also relevant when you’re trying to keep a repaired seam from flexing again). For example, some installation references use limits such as 1/8 inch over 6 feet and 3/16 inch over 10 feet for resilient floor coverings. ([ADD: source for your sheet vinyl/installation guideline flatness tolerance])
Moisture & Flatness Benchmarks That Commonly Affect Vinyl Crack Repairs
| # | Standard / Guideline Basis | Test | Common Acceptance Threshold | Why It Matters for Cracks |
|---|---|---|---|---|
| 1 | ASTM F1869 | Calcium chloride (MVER) | ≤ 3 lb/1000 sq ft/24 h | Excess moisture can weaken adhesive bond and promote debonding |
| 2 | ASTM F2170 | In-situ RH probes | ≈ ≤ 75% RH (often used) | High RH can contribute to adhesive failure and curled edges |
| 3 | Resilient flooring flatness guidance | Straightedge check | ≤ 1/8 in over 6 ft (commonly referenced) | High spots/low spots create flexing that re-opens cracks |
| 4 | Resilient flooring flatness guidance | Straightedge check | ≤ 3/16 in over 10 ft (commonly referenced) | Tolerances reduce stress at seams and repaired lines |
| 5 | Bonding principle (site prep) | Surface cleanliness | Oil/wax contamination → reduced adhesion | Even “dry” floors can fail if residue prevents bonding |
| 6 | Resilient flooring installation practices | Drying to room conditions | Avoid sealing on “cold” floors | Temperature shifts can affect cure and early bond strength |
| 7 | Repair system requirement | Product label compliance | Follow specified cure/wait times | Rushing can cause brittle or under-cured seams |
Fix option 1: Fill and seal hairline cracks
If the vinyl is flat and the crack is superficial, filling and sealing is the simplest and most cost-effective repair. You’re essentially restoring a smooth surface and blocking dirt and moisture from traveling under the sheet.
– Use a vinyl-compatible filler/sealant: Choose a product intended for resilient flooring/vinyl repairs (avoid general caulk that may not flex).
– Work the filler into the crack: Apply enough to bridge the damage, then smooth so the surface isn’t left high.
– Allow proper cure time: Don’t rush to walk on it—curing affects how well the repair resists cracking again.
Hairline cracks can often be treated as a surface-seal problem when the sheet vinyl remains well-bonded and does not lift.
Resilient flooring repair materials are designed to maintain flexibility; rigid fillers can fail under normal expansion and contraction.
Step-by-step: filling a hairline crack
1. Mask the area (optional): If the crack is narrow, masking can protect the surrounding pattern from accidental overfill.
2. Apply filler in a thin pass: Press it into the crack so it actually reaches the seam line.
3. Smooth to “flush,” not “mounded”: A high ridge becomes the new stress point where the crack can reappear nearby.
4. Protect while curing: Keep foot traffic and rolling loads away until the product reaches full cure.
What “good” looks like after filling
A successful fill usually looks level from a standing viewpoint and doesn’t snag under light contact (like a fingertip or soft cloth). If the surface feels raised or brittle, it can indicate overfill or under-cure.
Fix option 2: Re-adhere lifted areas, then seal the crack
If the crack is tied to lifting, re-adhesion comes first and sealing comes second. Sealing over a poorly bonded sheet typically traps failure underneath and leads to rapid re-cracking.
– Reattach the vinyl to the subfloor first: If the crack is associated with lifting, sealing over the top without adhesion usually fails.
– Use the right adhesive for vinyl flooring: Follow manufacturer instructions for application method and dwell/press time.
– Then seal the seam/crack: After adhesion is set, apply your vinyl-compatible filler/sealant to keep out debris and moisture.
When sheet vinyl edges lift at a seam, the repair must restore adhesion at the subfloor to stop movement.
Adhesive dwell time and pressure requirements vary by adhesive type; following the label is critical for bond strength.
Step-by-step: re-adhere without spreading the damage
1. Lift and support carefully: Only raise what you must. Keep the vinyl flat and avoid stretching.
2. Remove loose debris: Any dust or old release material on the subfloor can prevent proper bonding.
3. Apply the correct adhesive system: Use the adhesive recommended for your vinyl type and installation method (follow coverage rate and open time on the label).
4. Press and hold per instructions: Many failures come from insufficient pressure or early release.
5. Seal the crack after bond is stable: Once adhesion sets, fill the seam so moisture and grit can’t creep in.
Signs you should stop and go deeper
If you notice extensive bubbling beyond the crack line, widespread debonding, or soft substrate areas, “re-adhere one seam” becomes a temporary fix. In those cases, you may need a larger section repair or floor replacement.
Fix option 3: Patch if the crack won’t stay flat
If the crack keeps opening or the area is heavily damaged, patching is smarter than relying on filler alone. A patch replaces the damaged zone so the sheet has stable boundaries.
– When patching is smarter: If the crack keeps opening or the area is heavily damaged, a patch can outperform filler alone.
– Cut neatly and match the material layout: Remove the damaged section carefully and plan the patch so seams land where they’re less likely to flex.
– Blend seams and protect the repair: Proper seam alignment and curing time help reduce visible lines and prevent re-cracking.
A patch works best when the surrounding vinyl is stable and flat, because the repair must resist repeated flexing cycles.
Cut pattern alignment and seam placement reduce visible lines and lower the chance of a new stress point forming.
Step-by-step: when patching is the right call
1. Confirm the vinyl lies flat around the damaged area.
2. Plan your cut: Choose a shape and location that avoids the highest-traffic flex points (often directly under furniture legs or along chair paths).
3. Transfer and cut the patch: Keep edges clean so the patch seats without rocking.
4. Adhere the patch with the correct system: Use the same category of adhesive as the original installation method (per your floor’s guidance).
5. Seal edges after cure: Seal seams to prevent debris and moisture migration.
Practical note on visuals
Repairs in sheet vinyl can be visible even when done correctly, particularly with repeating patterns. Your goal is durability and watertight performance, not perfect invisibility.
What can go wrong (and how to avoid it)
Most crack repairs fail for predictable reasons: sealing over movement, using the wrong chemistry, rushing cure time, or ignoring moisture. Address these points and you improve durability immediately.
– Filling without addressing the cause: If the subfloor is moving or the vinyl is debonding, the crack often returns even with “good-looking” filler.
– Using the wrong product: Some sealants become too rigid and fail under normal expansion/contraction of resilient floors. Stick to vinyl/flooring repair materials per label instructions.
– Walking too soon: Early foot traffic can break the bond or distort the repaired area—follow cure times on the product you’re using.
– Ignoring moisture issues: If the crack is tied to dampness under the floor, sealing the top won’t solve the problem. Investigate first (you may need professional help).
If the sheet vinyl continues to flex at the repair site, top-side filling alone will usually re-crack.
Using general-purpose caulk can introduce rigidity, which conflicts with resilient flooring’s need for controlled flexibility.
Pros and cons: choose based on what’s actually happening
| Repair approach | Best for | Main benefit | Likely downside |
|---|---|---|---|
| Fill & seal | Flat, hairline, well-bonded cracks | Fast, minimal disruption | Visible lines; may fail if the sheet is moving |
| Re-adhere + seal | Cracks with lifting/open seam | Restores bond and stops motion | More steps; adhesive cure time required |
| Patch | Cracks that won’t stay flat or are repeatedly reopening | Replaces damaged zone | More labor; seam visibility risk |
Verdict / tip: pick the simplest method that matches the damage
The best DIY path is the one that matches the failure mode: fill hairline cracks only when the sheet stays flat and bonded, re-adhere when the crack is lifting, and patch when the area won’t stabilize. If you choose the right sequence (movement control first, sealing second), you typically avoid the “pretty but temporary” repairs.
– Best DIY path: Start with filling only if the vinyl is flat and firmly bonded. If the crack is opening or the vinyl is lifting, re-adhere first, then seal.
– Downsides to expect: Filled cracks can still be visible, and repairs may not last as long if the subfloor continues to move. Patches are more work and can leave seam lines.
– Skip DIY if: The floor has widespread lifting/bubbling, soft or crumbling subfloor, ongoing moisture, or the crack is part of major structural movement. In those cases, replacement or a deeper repair is usually the safer route.
A durable repair for resilient sheet vinyl is primarily a substrate-and-bonding fix, not just a surface-mending fix.
When moisture or flatness tolerances are out of spec, even correct crack filling won’t prevent recurring seam failure.
Quick checklist (scan/save)
– [ ] Confirm the vinyl is flat and the crack isn’t actively lifting
– [ ] Clean and dry the crack area thoroughly
– [ ] Choose the right method: fill (hairline) / re-adhere + seal (lifting) / patch (won’t stay flat)
– [ ] Use vinyl-compatible filler/adhesive per product label
– [ ] Respect cure time before walking or moving furniture
FAQ
Can I just use caulk to fill cracks in sheet vinyl?
Sometimes it looks fine initially, but general caulk may not flex the way vinyl needs. For best results, use a vinyl-compatible flooring repair material designed for resilient/vinyl floors.
Why do cracks come back after I repair them?
Most common reasons are ongoing subfloor movement, continued debonding underneath the vinyl, or a repair product that doesn’t match the flooring’s flexibility requirements.
Do I need to remove the whole damaged sheet section?
Not always. If the vinyl is firmly bonded and the crack is hairline, filling/sealing can work. If the area won’t stay flat or the crack is associated with lifting, a patch or deeper re-adhesion is often necessary.
How long should I wait before walking on the repair?
Follow the specific product’s cure instructions. If you don’t have the label, [ADD: exact wait time from the repair product you’re using].
Sources
– Manufacturer instructions for vinyl/flooring repair fillers, seam sealers, and adhesives (follow the product label for cure time, substrate prep, and application steps). [ADD: the exact product names you’re using, and the corresponding manufacturer docs/spec sheets.]
– General installation and care guidance for resilient sheet vinyl from flooring manufacturers’ documentation. [ADD: source for your specific sheet vinyl brand/model, if available.]
– ASTM F1869 — Standard Test Method for Measuring Moisture Vapor Emission Rate of Concrete Subfloor Using Anhydrous Calcium Chloride. (ASTM International)
– ASTM F2170 — Standard Test Method for Determining Relative Humidity in Concrete Using In Situ Probes. (ASTM International)
– Flatness/tolerance and substrate prep references for resilient flooring installations. [ADD: source for the specific flatness tolerance numbers you want to rely on.]
When you treat a sheet vinyl crack as either a surface defect or a movement/bond failure (and then use the correct repair sequence), you stop the problem from spreading. Clean and stabilize first, choose the simplest method that matches the crack behavior, and let the repair cure fully—those choices are what keep the seam sealed and the floor looking consistent.
Frequently Asked Questions
What causes cracks in sheet vinyl floors and when is it serious?
Cracks in sheet vinyl are often caused by subfloor movement, moisture, temperature swings, or improper installation (like insufficient leveling or an adhesive that didn’t bond well). Hairline cracks may be cosmetic, but cracks that widen, lift at the edges, or cause the floor to feel loose can indicate ongoing subfloor issues. If there’s moisture damage, bubbling, or significant separation, you should address the underlying problem before attempting vinyl crack repair.
How do you fix cracks in sheet vinyl floors using vinyl patch or seam repair?
Start by cleaning the crack thoroughly and removing any loose or raised edges with a scraper. For small cracks, use a vinyl repair compound or patch kit designed for sheet vinyl, pressing it into the gap and smoothing it flush with the surface. After it cures, lightly sand according to the product instructions and clean the area so the repair blends and stays durable.
How do you repair sheet vinyl cracks if the vinyl is lifting or the subfloor is uneven?
If the vinyl is lifting around the crack, you’ll need to re-adhere it first—usually by lifting the loose area slightly, cleaning off old adhesive, and applying the correct vinyl floor adhesive. Smooth the sheet back down firmly and weight it while the adhesive cures to prevent the crack from returning. If the crack is driven by an uneven subfloor, you may need to level the area (like with patching compound) before applying a vinyl patch to the surface.
Which products are best for repairing sheet vinyl floor cracks?
The best options are vinyl floor repair kits and vinyl patch compounds formulated for sheet vinyl, because they bond to flexible flooring and reduce the chance of re-cracking. Look for products labeled for resilient vinyl or “seam/crack repair,” and avoid rigid fillers that don’t expand and contract with temperature. For hairline cracks, a flexible vinyl repair compound typically works better than thick patches.
Why does a repaired crack in sheet vinyl reappear, and how can you prevent it?
Repairs can fail if the original cause—moisture, subfloor movement, poor flatness, or temperature/humidity changes—wasn’t corrected. To prevent re-cracking, ensure the subfloor is fully dry, flat, and properly prepared, and use the correct flexible materials for vinyl crack repair. Maintaining stable indoor humidity and avoiding heavy rolling loads or point impacts on the damaged area can also help extend the life of the repair.
📅 Last Updated: October 08, 2026 | Topic: How to fix cracks in sheet vinyl floors? | Content verified for accuracy and freshness.
References
- Google Scholar Google Scholar
https://scholar.google.com/scholar?q=sheet+vinyl+floor+crack+repair - Google Scholar Google Scholar
https://scholar.google.com/scholar?q=vinyl+flooring+patching+seam+repair+sheet+vinyl - Google Scholar Google Scholar
https://scholar.google.com/scholar?q=resilient+flooring+crack+repair+techniques+adhesive - Vinyl flooring
https://en.wikipedia.org/wiki/Vinyl_flooring - Flooring
https://en.wikipedia.org/wiki/Resilient_flooring - https://www.sciencedirect.com/topics/engineering/vinyl-flooring
- https://www.sciencedirect.com/topics/earth-and-planetary-sciences/flooring
- https://www.nytimes.com/search?query=vinyl%20flooring%20repair%20cracks
- https://www.britannica.com/search?query=vinyl%20flooring%20repair%20cracks
- Search results
https://www.who.int/search?q=vinyl%20flooring%20cracks%20repair