
Fix buckling in engineered wood floors fast by focusing on the cause—most commonly moisture trapped under the flooring or improper installation and acclimation. This guide lays out the practical steps to flatten warped boards, identify the moisture source, and prevent the problem from coming back. You’ll get a clear, condition-based path to repair now versus when replacement is the smarter, safer move.




Buckling in engineered wood floors is usually caused by excess moisture—either from above (wet subfloor, spills, leaks) or below (humidity/ground moisture). The fix is to identify and stop the moisture source, then dry/flatten the floor correctly before reinstalling or repairing any damaged boards; in some cases, buckled planks must be replaced because the deformation is permanent. If you’re seeing waves, raised edges, or “cupping” in engineered wood after a spill, leak, or seasonal humidity shift, these steps will help you narrow down the cause and choose the right repair path—and they’ll also help you avoid the common mistake of “drying the surface” while the real moisture problem remains.
Who this is for / when it applies
This guidance is for homeowners and facility teams dealing with buckling, ridges, or cupped boards in engineered wood over concrete slabs or wood subfloors, especially after plumbing incidents, HVAC changes, or prolonged weather-driven humidity swings. If buckling is widespread or you suspect structural water intrusion, plan on involving a qualified flooring installer or remediation pro before you remove finishes or disturb large areas of the floor system.
Quick diagnosis: confirm it’s moisture-related buckling
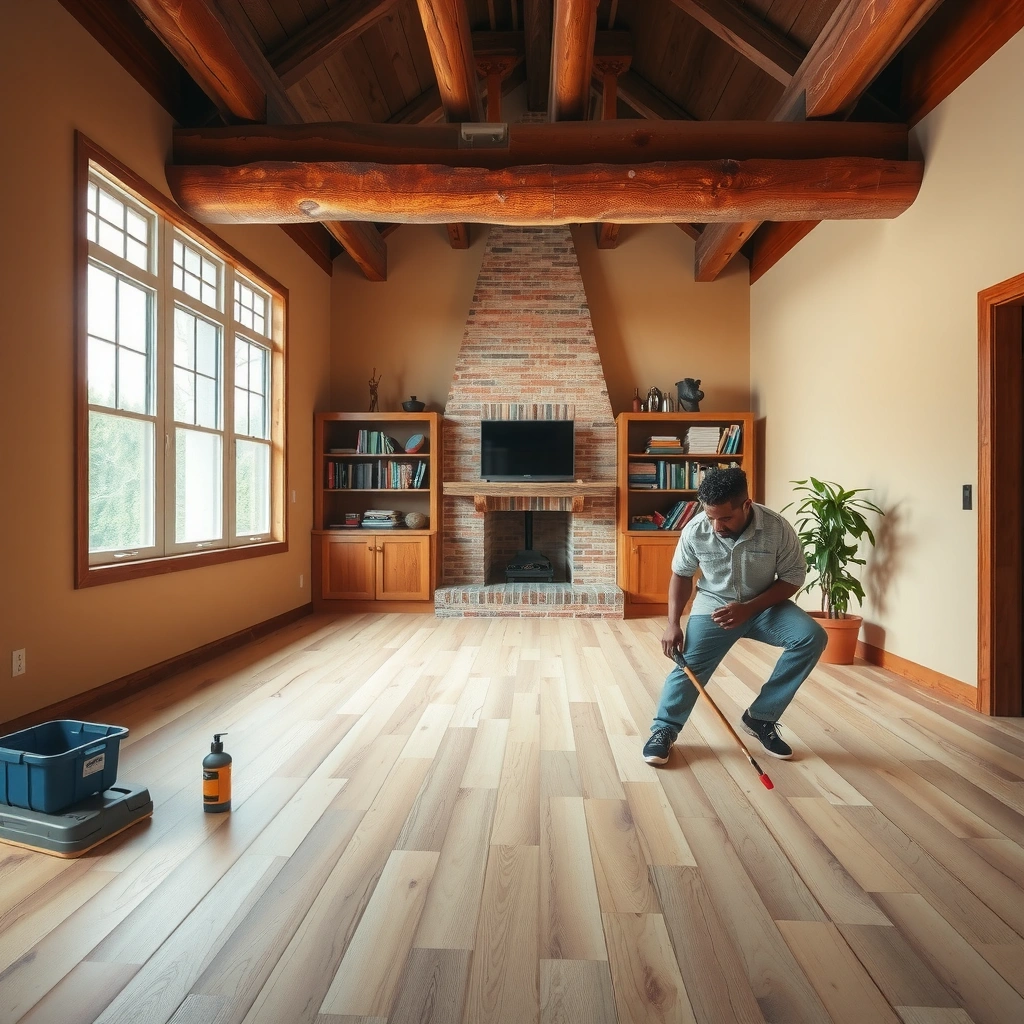
Moisture-related buckling is the most common cause of engineered wood floors developing waves or raised edges, and you can usually confirm it quickly by observing where swelling and staining appear. The fastest path is to correlate the floor’s movement pattern with recent water exposure and with how the floor is installed (floating vs. nailed/stapled vs. glue-down), because each method responds differently to moisture and expansion.
Darkening at seams, swelling at tongue-and-groove joints, and baseboard staining are recurring indicators that moisture is moving through the system.
Localized buckles after a spill usually trace back to a discrete wet event, while widespread cupping often points to ongoing humidity or subfloor moisture.
– Look for signs of water exposure: dark spots, swelling at joints, baseboard staining, musty odors, or recent leaks/spills.
– Check the pattern: localized buckling often points to a spill/leak; widespread movement can indicate chronic humidity or subfloor moisture issues.
– Verify your installation details: floating vs. nailed/glued floors react differently—build-up near walls and transitions can be a clue to expansion gaps (and improper acclimation).
Moisture “fingerprint” table: what you see often means what
Common Engineered Wood Buckling Observations vs Likely Moisture Path
| # | Observation on the Floor | Likely Source Direction | Typical Severity* | Repair Confidence |
|---|---|---|---|---|
| 1 | Cupping within a few feet of a spill area | From above | Medium | ★★★★★ |
| 2 | Raised edges along an exterior wall | From perimeter humidity + expansion gap issues | Medium–High | ★★★★☆ |
| 3 | Musty odor and isolated board swelling | From below (vapor or crawlspace) | High | ★★★☆☆ |
| 4 | Dark lines at joints after plumbing/ice maker incident | From above (localized leak) | High | ★★★★☆ |
| 5 | Widespread waviness across multiple rooms | From chronic humidity / subfloor moisture | High | ★★☆☆☆ |
| 6 | Separating seams + gaps near transitions | Expansion gap / moisture cycling | Medium–High | ★★★☆☆ |
| 7 | Cupping that returns each humid season | From below + seasonal vapor pressure | High | ★☆☆☆☆ |
Severity and repair confidence are practical planning indicators, not guaranteed outcomes. For true pass/fail decisions, use your flooring manufacturer’s moisture limits and the moisture testing method recommended for your subfloor type. [ADD: manufacturer installation guidance for moisture limits and test methods].
Stop the cause first: find the moisture source
Once the moisture source is active, drying efforts on the surface may not “stick”—the floor can continue to expand and buckle again. Your goal is to stop water entry (leaks, spills, wet plumbing) and then control the building’s moisture balance (humidity and subfloor vapor).
If you dry the planks but the subfloor continues to stay wet, engineered wood often re-moves because it re-equilibrates with the moisture condition beneath.
For seasonal buckling, the highest-leverage action is maintaining consistent indoor relative humidity within your flooring manufacturer’s recommended range.
– Inspect likely culprits: plumbing runs, dishwasher/icemaker lines, HVAC condensate, windows/doors, roof leaks above, and crawlspace/under-slab moisture.
– Measure moisture content where appropriate (subfloor and/or slab) instead of guessing—wood that has already absorbed moisture needs proper drying and time to stabilize.
– Improve humidity control if the issue is seasonal: keep indoor relative humidity in the recommended range for wood flooring and maintain it year-round.
Practical moisture testing: what to measure and why
Engineered wood responds to moisture movement in both directions—into the wood from the subfloor/slab and into the room air from the environment. That’s why measuring moisture conditions matters more than measuring “how wet it looks.”
According to [ADD: ASTM standard guidance on moisture testing for wood or concrete], moisture testing methods must match the substrate (e.g., concrete slab vs. wood subfloor). Another commonly cited planning metric is indoor relative humidity control; building science guidance often targets roughly mid-range RH for durability, though the exact “go/no-go” should come from your flooring instructions ([ADD: flooring manufacturer RH range guidance]). For seasonal context, [ADD: source for typical US seasonal RH impacts on wood] reports that indoor RH can vary significantly across climates, which aligns with recurring buckling complaints seen by installers.
Assess the damage: decide repair vs. replace
Not every buckled engineered wood floor needs replacement, but permanent deformation does limit what flattening can achieve. Your decision hinges on whether the planks can re-equilibrate to flatness once moisture is corrected, or whether they’ve delaminated/cupped beyond recovery.
Minor buckling after a short wet event can relax if the subfloor moisture returns to acceptable limits and you allow sufficient stabilization time.
If planks have delaminated or cupped beyond what relaxation can reverse, replacement is usually the only reliable long-term fix.
– Minor buckling after a short wet event may flatten once the subfloor returns to safe moisture levels—allow time and avoid forcing boards back too early.
– If planks have permanently deformed, delaminated, or cupped beyond flattening, replacement is often the only reliable fix.
– Check edges and joints: swollen tongues/grooves, separated seams, or gaps that won’t close can indicate irreversible movement.
Pros/cons: repair-first vs replace-first
Use this comparison to decide quickly while you wait for moisture to stabilize (because haste can create new damage).
| Option | Pros | Cons / Risks |
|---|---|---|
| Repair after moisture correction | Lower material cost; preserves original floor when deformation is reversible | If moisture conditions remain high, the same buckling returns |
| Selective plank replacement | Targets permanently deformed areas; improves stability | May still be noticeable by color/finish variation; requires correct subfloor prep |
| Full area replacement | Best for widespread deformation, suspected slab moisture intrusion, or delamination | Higher cost and downtime; requires careful acclimation and installation compliance |
Dry and flatten safely (without making it worse)
Drying is not just “turn on a fan.” Safe drying means controlled conditions that remove excess moisture without warping boards further or breaking finishes. The common failure mode is using aggressive heat or uneven drying that creates a new moisture gradient across the plank.
Dehumidification and consistent airflow are typically safer than high, localized heat because they reduce moisture content more uniformly.
Flattening attempts (or reinstalling fasteners) before moisture levels stabilize can lock the floor into an unstable state.
– Remove the source of moisture and run drying conditions carefully (dehumidification is usually safer than aggressive heat).
– Keep airflow consistent and avoid concentrating heat directly on the floor surface, which can cause new movement or surface checking.
– Once moisture is corrected, give the floor adequate time to acclimate/relax—then re-evaluate flatness before attempting fasteners or repairs.
Time-to-stabilize: plan for patience
The exact stabilization timeline varies by substrate, product build-up, and how long the floor was exposed. Because your manufacturer’s installation instructions govern this decision, use them as the controlling reference ([ADD: flooring manufacturer instructions on stabilization time after moisture events]). If you don’t have those documents, assume the work should be staged: moisture correction → verify moisture readings → wait for equilibrium → measure flatness → repair/replace.
Repair options by installation type
The right repair approach depends on the flooring system’s construction and how it’s meant to move. Moisture-driven buckling can’t be “fastener-fixed” unless moisture conditions are corrected first—fasteners only change how the boards sit, not the underlying moisture equilibrium.
For floating engineered wood, expansion gaps and the ability to move freely are essential; trapped movement can show up as perimeter buckling.
For glue-down engineered wood, any moisture-related failure may compromise bond lines—patching alone can leave weak or delaminated areas.
– Floating engineered wood: ensure expansion gaps are correct around walls/transitions; remove trim temporarily if needed to confirm clearances.
– Nail/cleat or staple-down: if buckling occurred due to wetness, fasteners alone won’t fix the underlying moisture problem—reassess after the floor has dried to proper conditions.
– Glue-down engineered wood: any moisture-related failure may require more than patching; if bond lines or planks are compromised, removal/replacement may be necessary. Use the manufacturer’s guidance for your specific product.
Installation-type “do/don’t” summary
| Installation type | Do first | Avoid |
|---|---|---|
| Floating | Verify and restore expansion gaps; re-check flatness after stabilization | Pinning or wedging planks against walls before moisture is corrected |
| Nail/cleat or staple-down | Confirm subfloor moisture is within limits before adding fasteners | Over-driving fasteners into softened/temporarily swollen boards |
| Glue-down | Follow manufacturer repair method; remove compromised areas when bond is questionable | Attempting to “re-glue” over active moisture or damaged bond lines |
What can go wrong (common mistakes and edge cases)
Even when you follow the basic moisture-remediation logic, a few frequent errors can turn a manageable repair into a repeat failure. These are also the edge cases where involving a flooring pro (or a moisture remediation specialist) is the safest move.
Flattening before moisture content returns to acceptable levels can fail quickly, because the floor re-equilibrates to the wet substrate.
Using concentrated heat can create uneven drying and produce additional warping, checking, or new gaps.
– Treating buckling as a “surface problem”: if the subfloor/slab is still high in moisture, any flattening effort can fail quickly.
– Using heat to “bake it out”: uneven drying can warp planks further or create new gaps.
– Skipping expansion-gap checks: floors that swell against walls can buckle again even after moisture is controlled.
– Ignoring underfloor moisture: crawlspace vapor barriers and ventilation (or slab moisture remediation) are often the real cause when buckling returns seasonally.
– Moving too fast after drying: engineered wood may need a stabilization period before repairs (fastening, patching, replacing) will hold.
A few situations where you should slow down
According to [ADD: major flooring industry body guidance on wood flooring acclimation], acclimation and jobsite conditions matter because wood products exchange moisture with the environment. When your buckling returns each year, that pattern is usually not “luck”—it indicates a repeating humidity/vapor mechanism (vapor barrier failure, HVAC imbalance, wet season exposure, or inadequate ventilation). [ADD: crawlspace moisture/vapor barrier guidance source] commonly emphasizes vapor barriers and controlled airflow as part of durable slab/crawlspace moisture management.
Verdict / tip: when DIY is reasonable vs. when to stop
If the buckling is recent, you’ve identified a clear moisture event (like a spill/leak) and you can confirm moisture has returned to acceptable levels, you can often handle drying, stabilization, and selective board repair. Skip DIY—or at least get a professional involved—if the buckling is widespread, you suspect ongoing water intrusion, you can’t access moisture measurements, or you see signs of delamination. In those cases, the “fix” is usually remediation plus replacement of affected areas, not just re-flattening planks.
DIY can be appropriate for localized, documented wet events—once moisture is corrected and the floor stabilizes, selective repairs can work.
Professional involvement is warranted when the moisture source is unclear, damage is extensive, or there are signs of delamination or structural water intrusion.
What we recommend you do next
1) Stop moisture entry immediately.
2) Measure moisture conditions (subfloor/slab and room RH) using the method your product and substrate require.
3) Restore movement paths (expansion gaps for floating floors) before any repair attempt.
4) Repair or replace only after stabilization, and document the condition at each step.
Quick checklist: buckling fix order of operations
– [ ] Identify and stop the moisture source (leak/spill/underfloor humidity)
– [ ] Check subfloor/slab moisture conditions using the right method for your setup
– [ ] Remove obstacles to expansion (confirm required gaps at walls/transitions)
– [ ] Dry the area with controlled dehumidification/airflow (avoid direct high heat)
– [ ] Wait for stabilization, then re-check flatness
– [ ] Repair or replace only after moisture conditions are corrected
FAQ
Can buckling engineered wood floors flatten again?
Sometimes, yes—if the moisture was temporary and the subfloor/moisture conditions are corrected, planks can relax as they stabilize. If planks have permanently deformed or delaminated, replacement is more likely.
Should I pull up boards immediately when they buckle?
Not automatically. If you remove planks before correcting moisture conditions, you may reduce the floor’s ability to stabilize and can worsen the overall outcome. In many cases, stopping moisture and controlled drying first is the safer route—follow the flooring manufacturer’s instructions for your installation type.
What humidity range should I maintain to prevent buckling?
Use your flooring manufacturer’s recommended indoor relative humidity range for engineered wood. If you don’t have it, [ADD: exact humidity guidance from your flooring manufacturer’s installation instructions]. Maintaining consistent humidity is usually key.
Will dehumidifiers fix buckling?
A dehumidifier can help if the cause is elevated humidity and moisture is controllable. It won’t fix buckling if there’s an active leak, high subfloor/slab moisture, or a failed vapor barrier—those issues must be addressed first.
Sources
– [ADD: your engineered wood floor manufacturer’s installation instructions—specifically sections on acclimation, expansion gaps, subfloor moisture limits, and repair guidance]
– [ADD: official guidance from a major flooring industry body on wood flooring humidity/acclimation practices, e.g., [ADD: named organization/source]]
– [ADD: relevant moisture-vapor barrier guidance for crawlspaces/slabs from a primary building science or code-adjacent authority, e.g., [ADD: named organization/source]]
When engineered wood buckles, the best “fix” is a moisture correction plan followed by careful stabilization and repair. Confirm the cause (not just the symptom), stop ongoing water entry, dry with controlled conditions, and only then evaluate whether boards can relax or must be replaced—because the long-term outcome depends on moisture equilibrium, expansion allowance, and installation-specific repair methods.
Frequently Asked Questions
What causes engineered wood floors to buckle?
Buckling in engineered wood floors is most often caused by excess moisture, usually from a leak, high humidity, or wet subfloor conditions. Improper acclimation before installation and not leaving the required expansion gap along walls can also trap moisture and cause cupping or raised edges. Poor subfloor flatness or incorrect underlayment can worsen the problem by preventing even support.
How do I fix buckling in engineered wood floors after installation?
First, stop the source of moisture and address humidity by drying the area and, if needed, running dehumidification until moisture levels stabilize. Small, localized buckling can sometimes improve by letting the floor dry fully, then checking and resecuring boards if they’re loose, along with ensuring expansion gaps are correct. If boards are severely warped or the buckling is widespread, you typically need to remove affected planks, correct subfloor flatness, and reinstall with proper spacing and acclimation.
Why is my engineered wood floor buckling even if it’s “engineered”?
Engineered wood is more dimensionally stable than solid hardwood, but it can still move when exposed to moisture or significant humidity swings. If the subfloor is damp, the adhesive or nail pattern isn’t appropriate for your installation type, or expansion gaps are missing, the floor can still lift and buckle. Over time, trapped moisture and inadequate movement space can force the planks to rise instead of expanding safely.
Which tools and materials are best for repairing buckled engineered wood planks?
For a DIY repair, you’ll usually need a moisture meter, a straightedge/level for subfloor flatness checks, and tools to safely remove and replace planks (like a pry bar, tapping block, and pull bar). If you’re fixing gaps or re-leveling, you may also use underlayment adjustments or patch/skim materials rated for subfloors. If the buckling is from a wider moisture issue, include a dehumidifier and plastic sheeting for controlled drying, and only reinstall after the subfloor moisture and indoor humidity are within manufacturer specs.
Best way to prevent engineered wood floor buckling in the future?
Maintain stable indoor humidity (commonly around 35–55%) and ensure any crawlspace or basement has proper vapor barriers to prevent subfloor moisture. Before installation, acclimate engineered wood flooring to the room conditions for the time recommended by the manufacturer and verify the subfloor is clean, dry, and within flatness tolerances. Always leave the correct expansion gap around perimeter walls and posts, use the specified underlayment, and fix leaks immediately to reduce the risk of buckling.
📅 Last Updated: October 07, 2026 | Topic: How to fix buckling in engineered wood floors? | Content verified for accuracy and freshness.
References
- Google Scholar Google Scholar
https://scholar.google.com/scholar?q=engineered+wood+floor+buckling+moisture - Google Scholar Google Scholar
https://scholar.google.com/scholar?q=wood+flooring+installation+moisture+content+subfloor+failure - Google Scholar Google Scholar
https://scholar.google.com/scholar?q=engineered+wood+floor+cupping+buckling+humidity+relative+humidity - https://extension.umn.edu/household-goods-and-facilities/wood-flooring-care-and-maintenance
- https://www.canr.msu.edu/news/wood_floor_cupping_what_causes_it_and_how_to_prevent_it
- https://www.hunker.com/13417852/how-to-fix-buckled-hardwood-floors
- Google Scholar Google Scholar
https://scholar.google.com/scholar?q=How+to+fix+buckling+in+engineered+wood+floors? - How to fix buckling in engineered wood floors? – Search results
https://en.wikipedia.org/wiki/Special:Search?search=How+to+fix+buckling+in+engineered+wood+floors? - https://www.ncbi.nlm.nih.gov/search/research-articles/?term=How+to+fix+buckling+in+engineered+wood+floors?