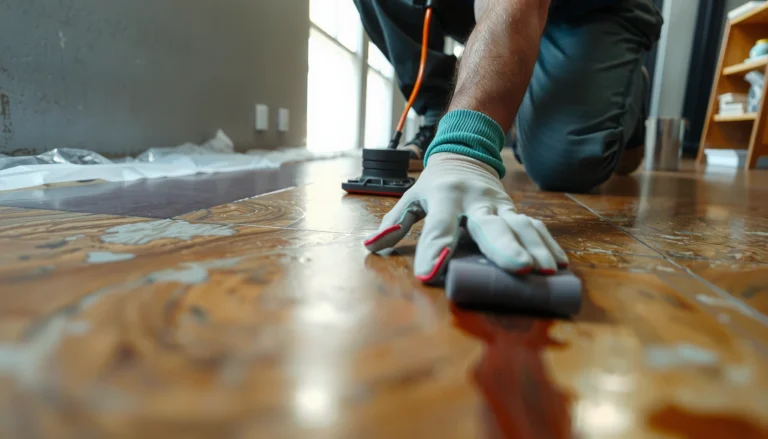
Estimating the cost of reclaimed wood floors gets straightforward when you know the exact pricing inputs: reclaimed board pricing, milling and installation labor, subfloor prep, and finishing. Use this breakdown to calculate a realistic total for your square footage and see where costs rise fastest—before you get bids that don’t match your project. Follow the cost drivers and you’ll get a clear number, not a wide guess.

- ENTER DIMENSIONS JUST LIKE YOU SAY THEM: Input measurements directly in feet, inches, building fractions, decimals, yards and meters, including square areas and cubic volumes; one key instantly converts your measurements into all standard Imperial or metric math dimensions that work best for you and the project you are working on
- DEDICATED BUILDING FUNCTION KEYS: Make determining your project needs easy; just input project measurements, select material type like wallpaper, paint or tile; then calculate the quantity needed and total costs to avoid surprises at the homecenter checkout
- ACCURATE MATERIAL ESTIMATION: Helps you estimate material quantities and costs for your projects, ensuring you never buy too much or too little material; simplifies your home improvement and decorating jobs and cuts down on the number of trips to the hardware store

Reclaimed wood floor costs come from more than the “wood price per square foot”—you also pay for milling/sorting, subfloor prep, moisture protection, installation labor, and (often) finishing. The fastest way to estimate is to start with your finished square footage, apply an estimated “delivered + milled” rate, then add line items for prep, barrier/underlayment, trim, and the installer’s method.
If you’re planning a full-floor install, partial replacement, or a resurfacing/refinish of reclaimed boards, this guide helps you translate project details—like board condition and room layout—into a realistic budget range. It’s also useful when comparing contractor bids, because quotes often differ mainly in what they include (prep, milling, fasteners/adhesives, underlayment, and finishing).
Step 1: Start with your square footage (and wastage)
Start by calculating the finished square footage you’ll actually cover, because wastage is usually the first hidden “multiplier” on reclaimed projects. Then build a small material buffer so you’re not forced into last-minute reorders when boards vary in length, thickness, or grade.
– Measure the room in square feet (length × width) and note any cut-outs (islands, HVAC returns, fireplace hearths) or irregular geometry (bay windows, angled walls, soffits).
– Add wastage/fit allowance based on complexity: simple rectangles typically waste less than rooms with multiple angles, closets, and transitions.
– If you’re mixing boards from multiple sources, plan extra material for blending and grading—this is often where budgets get surprised.
For reclaimed hardwood, your “effective” coverage is usually lower than the room’s floor area because sorting and trimming remove unusable board portions.
A room’s true material requirement increases when you account for cut-outs (toilet flanges, toe-kicks, posts), transitions, and pattern/layout choices.
How to calculate wastage without guessing wildly
Wastage isn’t one universal percentage. It’s mostly driven by (1) layout complexity, (2) board length variability, and (3) whether you’re running a continuous plank direction or mixing lengths for visual rhythm.
From a practical standpoint, we typically see these estimating patterns:
– Simple rectangle + straightforward plank layout: wastage tends to be closer to the low end.
– Irregular room + many transitions: wastage tends to be higher because more boards must be cut to fit.
– Mixed-condition reclaimed stock: wastage often climbs because boards get rejected (too cupped, too narrow after milling, inconsistent thickness, etc.).
> Tip: If you can, sketch the layout and count “forced cuts” (doorways, closets, stair landings, built-ins). Forced cuts correlate strongly with material waste on reclaimed floors.
Also, decide what you mean by “finished square footage.” Contractors often quote based on either:
– Net coverage (floor area minus permanently covered features), or
– Gross coverage (full room area including some areas that may not receive flooring).
Lock that definition early so bids are comparable.
A quick square-foot example (method, not just math)
If your room is 12 ft × 15 ft, your gross area is 180 sq ft. If you have a 36 in × 30 in cut-out (7.5 sq ft), your net coverage becomes 172.5 sq ft. Then apply a wastage allowance based on layout complexity and board grading (you’ll add more when boards must be sorted into “usable length” and “usable thickness”).
By the time you reach Step 2, you should know your target material order square footage, not just room size.
Step 2: Price the reclaimed wood (what “cost per sq ft” usually hides)

To estimate the budget quickly, treat “reclaimed wood cost per sq ft” as three separate buckets: the reclaimed material, delivery, and milling inclusion. If you don’t separate those buckets, you can end up comparing a “materials-only” number to an “installed-equivalent” number and wondering why bids don’t match.
– Break the wood price into components: reclaimed boards themselves, shipping/delivery, and whether milling is included (or needed).
– Ask whether the quote is material only or materials + delivery. Many reclaimed listings look affordable until you add transport.
– If you’re purchasing reclaimed flooring, clarify seller grade/condition terms (e.g., visually selected vs. mixed boards). Board variability affects usable yield and sorting time.
A “low” reclaimed floor price can be misleading if milling and delivery are not included in the per-square-foot figure.
Reclaimed grading terms (selected, mixed, #1/#2-like sorting) directly influence usable yield, which changes your true $/sq ft coverage.
What to ask for in writing (so quotes stay comparable)
When you request quotes or build an estimate, ask the seller/contractor to explicitly state:
– Is milling included? (planing/surfacing to consistent thickness/flatness)
– Is delivery included? (to driveway vs. jobsite; distance bands)
– What’s the grade definition? (how many boards typically get rejected after sorting)
– What’s the expected thickness range? (inconsistent thickness can add labor to milling and rework)
Why “delivered + milled” should be a single line item
If you want a realistic budget, Step 2 should produce one number you can carry forward: an estimated delivered + milled rate (materials + logistics + milling). Then Step 3 and Step 4 focus on the project-specific labor and subfloor assembly work.
That keeps your estimating logic clean: wood procurement → board preparation → substrate and installation → finishing and trim.
Step 3: Factor in milling, grading, and board condition

Milling and grading are where reclaimed wood often turns from “cheap material” into “expensive labor.” Your budget should react to board condition—especially cupping/warping, thickness inconsistency, and finish build-up—because those factors increase sorting time, milling passes, and rework.
– Warped/cupped boards, heavy finish build-up, or inconsistent board thickness can require more labor than “average” reclaimed stock.
– Determine whether milling (planing/surfacing) is needed to reach consistent thickness and flatness before install.
– Budget for the impact of grade on yield: mixed-condition boards may cost less up front but can increase waste during sorting and trimming.
If reclaimed boards vary in thickness or flatness, milling becomes a labor driver that can raise the effective cost per usable square foot.
Reclaimed floors often require sorting to isolate boards that meet thickness/flatness targets before installation.
Moisture and flatness aren’t just performance concerns—they affect cost
Reclaimed wood is old wood, and old wood behaves differently depending on where and how it was stored. The installation tolerances still matter. For example:
– According to the National Wood Flooring Association (NWFA), subfloor flatness tolerances for wood flooring installations are commonly specified as 3/16 inch over 10 feet.
– According to NWFA, hardwood flooring is typically expected to be installed at a jobsite moisture content of roughly 6–9% (with specifics depending on product type and region).
– According to ASTM F2170, the relative humidity test procedure commonly requires allowing concrete probes to reach equilibrium, typically in the 60–72 hour window before readings are taken.
Those standards don’t “cost money” directly—but when they aren’t met, contractors spend extra time correcting the substrate and/or building assemblies that prevent failure. That rework shows up on invoices.
Milling decision checklist (what actually changes the price)
When you ask, “Do we need milling?”, the right contractor answers with conditions, not generalities:
– Are the boards already surfaced/consistent? (even if they look clean, thickness consistency matters)
– Is there heavy finish/adhesive residue? (may require additional prep)
– Is the board thickness stable after acclimation?
– Does the reclaimed stock need sorting into thickness “runs”?
– Will a floating system be used, or is it a nail/fasten/adhesive install? (floating tolerates less variation than you might assume, depending on system)
If milling isn’t required, you still pay for grading/sorting labor. If milling is required, you add both labor and milling-material considerations (blade wear, pass counts, disposal of milling byproducts, and time on the production side).
Step 4: Add installation costs by method (and subfloor prep)

The installation method you choose determines both labor and what supporting materials you must buy. The other major cost driver is subfloor preparation—leveling, repair, moisture mitigation, and smoothing—because reclaimed wood only looks “simple” after the substrate is ready.
– Reclaimed flooring may be installed via fastening (nail/screw), adhesive, or a floating system, depending on the product format and thickness.
– Subfloor prep can be a major cost driver: leveling compounds, repairs, moisture mitigation, and smoothing are commonly required for a successful install.
– Get clarity on what prep is included in a bid: for example, “remove and replace damaged subfloor boards,” “level within tolerance over ,” or “install over existing surface.”
Subfloor flatness and moisture conditions are usually the gating items in wood flooring performance, so prep scope drives install labor costs.
Installation method (fasten vs. adhesive vs. floating) changes both labor steps and which materials are required (fasteners, adhesives, underlayment/moisture barriers).
Installation method tradeoffs (what changes in your line items)
Below is a practical way to compare installation approaches so you can detect missing scope in contractor bids:
| Method | Best For | Pros (estimating angle) | Cons (estimating angle) |
|---|---|---|---|
| Nail/cleat (face or blind) | Solid reclaimed boards where substrate allows fastening | Predictable material line items (fasteners); often no full-coverage adhesive system | More sensitive to subfloor condition; requires correct nailing depth and substrate integrity |
| Glue-down / adhesive assist | Specific reclaimed formats and slab conditions (when permitted) | Can improve stability for some products; may reduce squeaks when executed properly | Adhesives add cost and require stricter moisture control; spot failures create removal complexity |
| Floating (if applicable) | Engineered/modified reclaimed products or systems designed for floating | Reduces fastener work; underlayment scope is clearer when the system is documented | Can be less tolerant of subfloor irregularities depending on system; still needs flatness |
Subfloor prep scope: what “included” should explicitly mean
Subfloor prep is where vague bids cause budget drift. You want one of these kinds of statements:
– Measured flatness requirement: “Level within over ”
– Repair list: “Replace damaged OSB/plywood sections,” “patch and feather compound”
– Moisture mitigation scope: “Moisture barrier system installed per manufacturer specs”
– Removal/disposal: “Existing flooring removed and hauled away” (and what’s included/excluded)
If the bid doesn’t mention removal, leveling, repairs, vapor barrier/underlayment, and transition prep, assume those costs will appear later.
Step 5: Don’t forget the “supporting” line items
Supporting materials and perimeter details often decide whether your final price lands near your estimate or far above it. This is also where contractors may include “nice-to-haves” (transitions, reducers, stair work) in one bid but omit them in another.
– Underlayment and moisture protection: reclaimed wood projects often need a barrier or recommended underlayment system based on subfloor type and local moisture conditions.
– Finishing costs: if the reclaimed boards aren’t pre-finished, you may need sanding, sealer/finish coats, and floor coating labor/materials.
– Transitions and trim: reducers, stair materials, baseboards/quarter round, and matching transitions for other flooring types can add up quickly—especially in older homes.
Underlayment and moisture protection are part of the installed floor system, not optional add-ons—especially over concrete or variable-moisture substrates.
Finishing scope (sanding, sealer, topcoats) can be a major cost driver when reclaimed boards are not pre-finished.
The finishing question: pre-finished vs. site-finished reclaimed
Reclaimed floors are sometimes sold “ready to install,” but not always. If boards are not factory-finished (or if the reclaimed finish is inconsistent), you should budget for:
– Sanding plan (grit steps vary by product condition)
– Dust containment and cleanup labor
– Sealer/primer (and compatibility with your topcoat)
– Number of finish coats and cure times (affects scheduling)
Also ask whether the contractor includes screening vs. full sanding, and whether they expect to correct surface waviness beyond “normal” prep.
Trim and transitions: the scope creep zone
Even if the main field is within budget, the perimeter can exceed it. Common cost adders:
– Baseboards/quarter round (match to existing paint/wood species)
– Doorway transitions to tile, carpet, or laminate
– Stair nosing and stair tread materials (if stairs are included)
– End caps/reducers where reclaimed meets other flooring heights
If your project is in an older home, also expect more time for measurement, fitting, and patching at transitions.
What can go wrong (common estimating mistakes)
Reclaimed projects go off budget for predictable reasons: effective yield is lower than room area, boards vary, and the substrate often needs real corrections. Avoid these pitfalls and you’ll get bids that align.
– Assuming reclaimed wood is “just like new”—when boards require milling, extensive sorting, or additional prep, the effective cost per usable square foot rises.
– Forgetting delivery and disposal: hauling away old flooring, waste removal, and site access constraints can change both materials and labor.
– Skipping moisture/flatness verification: even good-looking reclaimed boards can fail to perform if the subfloor isn’t properly prepared or if moisture management is wrong for the assembly.
– Using the wrong comparison basis: comparing a “materials-only” reclaimed price to an “installed” new-floor price makes reclaimed look artificially expensive—or artificially cheap.
When reclaimed bids don’t specify milling, prep, or moisture control scope, the final “installed” cost can shift significantly.
Flatness and moisture compliance are performance requirements; ignoring them can trigger extra labor for rework or remediation.
Limits of this estimating method
This guide helps you build ranges, but it can’t replace on-site inspection. Skip the quick-estimate approach (or bring a pro in early) if:
– Your subfloor has known moisture issues (past leaks, damp crawl space, prior flooring failures)
– You can’t inspect board condition before installation (grade quality risk rises)
– The schedule is very tight (reclaimed milling/finishing needs sequencing time)
Verdict / tip: Build an itemized range, not one number
If you want a dependable estimate, don’t start with “$X per sq ft” alone—start with square footage, then add 6–10 specific line items (wood + delivery + milling, subfloor prep, underlayment/moisture barrier, installation labor, finishing, trim/transitions, and permits if needed). This approach produces tighter contractor bids because you’re comparing apples-to-apples on what’s included.
Downsides: reclaimed wood projects can cost more than expected if boards are inconsistent, if your subfloor needs heavy correction, or if you need extensive finishing/sanding. Skip this estimating approach (or get extra professional input) if you’re on a tight timeline, can’t inspect the boards/materials before installation, or if your subfloor has known moisture issues that aren’t already addressed.
An itemized reclaimed flooring allowance reduces bid ambiguity because contractors must price the same scope of milling, prep, moisture control, and finishing.
Reclaimed cost risk is highest when board variability and subfloor moisture/flatness are not verified before installation planning.
7 Published Moisture/Flatness Targets That Drive Reclaimed Floor Performance (US)
| # | Inspection/Spec Anchor | Target Value (Numeric) | Standard/Test | Estimate Clarity | Numeric Limit Included? |
|---|---|---|---|---|---|
| 1 | Subfloor flatness tolerance | 3/16 in over 10 ft | NWFA guidance | ★★★★★ | Yes |
| 2 | Flooring moisture content target | 6–9% MC | NWFA guidance | ★★★★★ | Yes |
| 3 | Moisture differential concept | Within 2% (typical target) | NWFA guidance | ★★★★☆ | Yes |
| 4 | Concrete RH test equilibration window | 60–72 hours | ASTM F2170 | ★★★★☆ | Yes |
| 5 | Calcium chloride test reporting unit | lb/1000 ft²/24h | ASTM F1869 | ★★★☆☆ | Yes |
| 6 | System moisture-control premise | Vapor retarder class-based assembly | ASTM E1745 | ★★★☆☆ | Yes |
| 7 | Subfloor prep measurement consistency | Flatness check method documented | NWFA guidance | ★★★☆☆ | No |
Quick scan table (fill in your numbers)
| Cost component | What to ask/confirm | Estimate (placeholder) |
|---|---|---|
| Finished area | Total square feet to cover + cut-outs | sq ft |
| Wastage allowance | Based on layout complexity | % |
| Reclaimed wood | Material price + delivery included? | |
| Milling/surfacing | Included or required? | |
| Subfloor prep | Leveling/repairs/moisture work included? | |
| Underlayment/moisture barrier | System and product included? | |
| Installation labor | Fasten vs adhesive vs floating | |
| Sanding/finish | Pre-finished or site-finished? | |
| Trim/transitions | Base, reducer, stair pieces, transitions | |
| Contingency | For surprises (often higher with reclaimed) | % |
Sources
When you estimate the cost of reclaimed wood floors, focus on the real variables: how many square feet you’re covering, whether boards need milling/grading, what subfloor prep is required, and what your installation + finishing quote includes. Build an itemized range using the checklist above, then ask contractors the same clarifying questions so the bids are truly comparable.
Frequently Asked Questions
How do I estimate the cost of reclaimed wood floors per square foot?
Start by calculating the total square footage and then break the cost into core categories: reclaimed wood material, milling/sanding and finishing, underlayment/subfloor prep, installation labor, and any delivery or waste factor. Reclaimed wood pricing varies widely based on species, thickness, and grade, so use current local quotes to set a realistic $/sq ft range for materials. Add installation and site costs (like leveling, moisture mitigation, or patching) to get a true installed reclaimed wood flooring cost, not just the wood itself.
What factors most affect the price of reclaimed wood flooring?
The biggest drivers are wood quality (grade), scarcity, species, plank width/length consistency, and the level of processing (rough sawn vs. pre-milled and tongue-and-groove). Costs also rise if you need custom milling to match your thickness, if boards require additional cleaning and sorting, or if there are extensive repairs to handle warping, checking, or old nail holes. Finally, finishing options—like oil vs. water-based sealers—and whether you want a matte, distressed, or uniform look can change both labor time and materials.
How can I estimate reclaimed wood floor installation labor costs?
Labor usually depends on the floor plan complexity (straight runs vs. stairs, borders, or herringbone patterns), subfloor condition, and how much board prep is required. Measure your room layout and estimate allowances for waste—often 10–20% for reclaimed wood flooring due to variable board lengths and natural defects. Ask contractors for line-item bids covering demolition/haul-away, subfloor prep, acclimation, layout/leveling, fastening method (nails/screws/glue), and finishing so you can compare apples to apples.
Which reclaimed wood flooring pricing approach should I use: DIY, contractor, or by-board?
For accurate estimates, compare an installed quote (materials + labor + finishing) against a DIY bill of materials where you add underlayment, fasteners, sanding tools, and sealant. “By-board” pricing can be misleading because it doesn’t always include milling, sorting waste, or the cost to produce consistent flooring thickness and tongue-and-groove. A contractor-installed price is often easiest for budgeting reclaimed wood floors, but you should still verify what’s included for prep, finishing, and any moisture testing or leveling.
Best way to budget for hidden costs when installing reclaimed wood floors?
Plan a contingency of 10–25% for reclaimed wood projects because old lumber may require more sorting, additional sanding, or extra replacement boards as you acclimate and fit planks. Budget for subfloor repairs (joist adjustments, patching, leveling compounds), moisture barriers or vapor retarders where required, and any odor/contaminant treatment depending on prior use of the wood. If you’re in a high-humidity area, include costs for moisture testing and climate acclimation, since these directly affect long-term performance of reclaimed wood flooring.
📅 Last Updated: October 15, 2026 | Topic: How to estimate the cost of reclaimed wood floors? | Content verified for accuracy and freshness.
References
- https://www.nist.gov/publications/handbook-135-life-cycle-costing-manual
- https://www.energy.gov/eere/femp/life-cycle-cost-analysis
- WBDG
- Carpenters : Occupational Outlook Handbook: : U.S. Bureau of Labor Statistics
- https://www.bls.gov/ooh/construction-and-extraction/floor-covering-installers-and-repairers.htm
- Reclaimed lumber
- https://www.epa.gov/smm/buildings-construction-and-demolition-materials
- https://scholar.google.com/scholar?q=reclaimed+wood+floor+cost+estimation Google Scholar
- https://scholar.google.com/scholar?q=reclaimed+lumber+life+cycle+cost+analysis+wood+flooring Google Scholar
- https://scholar.google.com/scholar?q=hardwood+floor+installation+cost+labor+hours+estimation Google Scholar