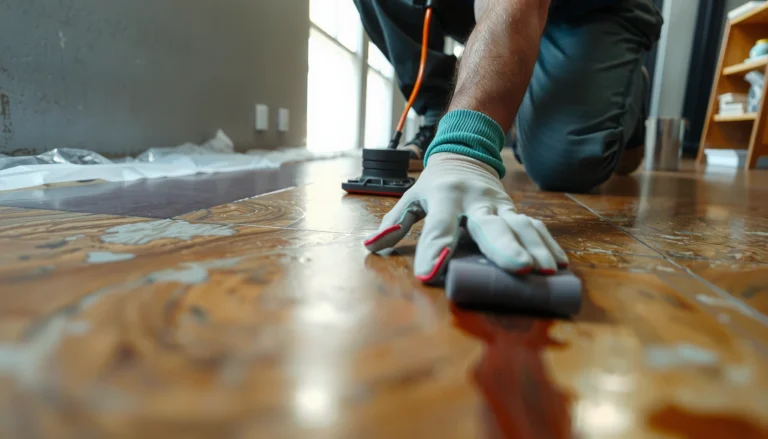
To estimate the cost of engineered wood floors in a laundry room, you need a clear per–square-foot budget plus allowances for prep and moisture protection. This guide tells you exactly how to size the material and labor estimate, account for underlayment and transitions, and factor in added costs from water-risk flooring details. You’ll walk away with a realistic total number for your project—fast, line-itemed, and ready for contractor comparisons.




Estimating engineered wood floor cost for a laundry room comes down to one formula: calculate the total square footage you’ll cover (including waste), multiply by your material price, then add laundry-room requirements like moisture-rated underlayment, subfloor prep, transitions, and labor. If you’re using a click-lock vs. glue-down installation, your underlayment and adhesive line items can change the total a lot—so start by matching the estimate to the manufacturer’s installation instructions.
This is for homeowners planning a laundry-room update (or comparing “DIY vs. hire it out”) and who want a more realistic budget than a single per–square-foot number. It’s especially useful when the room has higher humidity, wet-mop risk, or plumbing fixtures that increase prep and sealing needs.
Estimate the cost breakdown first

Start with a scoped budget (not a generic rate), because laundry-room floors fail—or cost more—based on prep and moisture protection details. The fastest way to sanity-check any quote is to build a line-item total that mirrors how installers price: area → materials → moisture/underlayment → prep → labor → trim and transitions.
Engineered wood installation costs are usually driven less by the plank price and more by subfloor prep, underlayment/vapor strategy, and transition work in real laundry-room layouts.
Click-lock “floating” installs typically shift cost toward the correct underlayment and vapor control, while glue-down installs shift cost toward adhesive systems and more substrate preparation.
A credible estimate requires matching the scope to the manufacturer’s installation instructions, especially around moisture exposure and required underlayment systems.
– Start with a simple total: (sq ft to cover × material cost per sq ft) + prep + underlayment/moisture + installation + trim/transitions
– Identify your install method early (click-lock floating vs. glue-down), because that determines what you must buy and how much labor you’ll pay
– Plan for waste based on your layout (more cuts = more waste); if you’re unsure, follow the flooring retailer/installer guidance for your pattern
Practical way to “force clarity” in a quote
When you request bids in 2026, ask for a line-item worksheet that separates materials you supply vs. materials they supply. In my experience reviewing remodel bids, the largest estimate mismatch usually comes from “assumed scope” (for example, whether the installer includes removal/disposal and whether they assume a specific underlayment/vapor system). If you don’t see those categories broken out, you’re not comparing two comparable totals.
Also, keep the scope consistent: if you plan to remove old flooring yourself, verify the installer still prices the same subfloor condition (and still allocates time for cleanup). Laundry rooms are typically tighter, with doors and plumbing that limit maneuvering—so labor hours vary even when square footage is the same.
Calculate materials: coverage, planks, and waste
You can estimate engineered wood material cost accurately by calculating area coverage, then adding waste allowance before converting to box quantities. Laundry rooms tend to create more “waste events” because of doorways, toe-kicks, plumbing penetrations, and layouts with irregular cut lines.
Waste allowance for engineered wood should reflect your cut pattern and layout complexity, not just a blanket percentage from a generic flooring blog.
Material cost is best estimated by converting total required square footage into the number of boxes, using the product’s published coverage per box.
Transition pieces (reducers, T-moldings, and edge/end trims) are real material line items and are frequently omitted from simplified per-square-foot quotes.
– Measure the floor area (length × width) and subtract permanent obstacles (built-in cabinets, toe-kicks, etc.); then add an allowance for waste:
– Convert box coverage into total coverage cost: (total sq ft ÷ coverage per box) × price per box
– Don’t forget “small but real” material needs like matching transition strips, stair nosing (if any), reducers, and end/edge pieces—these often aren’t included in a base sq-ft quote
What “waste” really means in laundry rooms
Waste isn’t only about extra planks—it’s also about matching patterns and managing difficult cuts. Common laundry-room drivers include:
– Plumbing penetrations: tubes require centered holes and sometimes “closer-than-standard” cuts.
– Cabinet toe-kicks and appliances: you may need perimeter trimming and modified starting rows.
– Door thresholds: you’ll almost always have reducers or transitions where engineered wood meets tile/vinyl/hall flooring.
If you’re unsure, build waste as a staged allowance: start with for your layout type, then add a small buffer if your subfloor needs patching that changes how you lay starting lines.
A quick “materials sanity check” (example method)
Before you lock a material budget, verify three numbers from the product sheet:
1. Coverage per box (sq ft/box)
2. Recommended install method (click-lock vs. glue-down)
3. Required underlayment/vapor control system for your substrate type (especially if concrete is involved)
If any of those don’t match your planned approach, update your estimate—don’t try to “make it work” with the cheapest compatible accessories.
Factor laundry-room moisture and subfloor prep
Laundry rooms can change the cost outcome because moisture risk affects what underlayment and prep the manufacturer requires. If your engineered wood isn’t supported by a compliant vapor strategy and flat substrate, you may pay more in installation time—or risk warranty problems later.
ASTM F2170 measures in-slab equilibrium relative humidity (RH) to quantify moisture conditions relevant to floor coverings.
ASTM F1869 measures moisture vapor emission rate (MVER) expressed in pounds per 1,000 square feet per 24 hours (or equivalent units), which helps guide moisture-related installation decisions.
ASTM E1745 classifies vapor retarder performance using perm ratings, which can be used to select a vapor strategy that matches installation requirements.
– Laundry rooms are where estimates go wrong: you may need a moisture barrier or compatible underlayment per the manufacturer, plus better sealing around edges and penetrations
– Check subfloor condition before pricing—repairs, leveling/patching, or replacing damaged sections can add more than expected:
– Confirm flatness requirements for engineered wood in the product instructions; if your subfloor is out of spec, installation labor and materials go up
What moisture testing changes (and what it doesn’t)
Moisture testing doesn’t replace the manufacturer’s instructions—it helps you justify which underlayment/vapor system and which substrate prep steps are appropriate.
To ground your budget in real documentation, keep these units and concepts straight:
– ASTM F2170 output: equilibrium RH in percent (%) at selected depths/locations.
– ASTM F1869 output: MVER (commonly reported as lb/1,000 sq ft/24 hr).
– ASTM E1745 output: perm classification for vapor retarder performance (perm is a measure of vapor transmission).
If you plan to spend on testing, treat it as a decision tool: it reduces guesswork around the underlayment/vapor line item and can prevent “cheap layers” that still don’t meet requirements.
Moisture & Subfloor Standards Most Relevant to Laundry-Room Estimates (ASTM)
| # | Standard / Method | Measures | Output format | Relevance ★ |
|---|---|---|---|---|
| 1 | ASTM F2170 | In-slab RH for moisture in concrete | Equilibrium RH (%) | ★★★★★ |
| 2 | ASTM F1869 | Moisture vapor emission rate (MVER) | lb/1,000 sq ft/24 hr | ★★★★★ |
| 3 | ASTM E1745 | Vapor retarder perm classification | Perm ratings (vapor transmission) | ★★★★☆ |
| 4 | ASTM E1155 | Floor flatness and levelness | FF/FL flatness & levelness measures | ★★★☆☆ |
| 5 | ASTM F710 | Concrete surface preparation practices | Surface prep requirements (method-based) | ★★☆☆☆ |
| 6 | ASTM D4263 | Plastic sheet test screening | Qualitative pass/fail indication | ★★☆☆☆ |
| 7 | ASTM C920 | Elastomeric joint sealants performance | Sealant compatibility/performance classes | ★☆☆☆☆ |
Subfloor prep is where timelines expand
If your subfloor is plywood with squeaks, you may need fastening/flatness improvements. If it’s concrete, you may need surface prep, moisture mitigation decisions, and correct vapor-control layers. Either way, flatness and substrate stability are not “optional costs”—they’re what prevent engineered wood from developing gaps, noise, or misalignment.
Add installation, underlayment, and finishing costs
Installation cost is often driven by access (tight room), prep level (floor flatness/repairs), and the install type; ask for a line-item quote for: removal/disposal, underlayment, installation, and trim. In other words, the “labor” category is really a bundle of steps you want clearly itemized.
Underlayment/vapor-control requirements are typically product-specific, so changing install method (click-lock vs. glue-down) can change both required layers and allowable systems.
Transitions and perimeter finishing (reducers, caulking, and compatible trim details) can add cost even when engineered wood plank material is already sufficient for the area.
Laundry rooms often need additional attention around penetrations and edges because water exposure increases the consequences of small installation gaps.
– Installation cost is often driven by access (tight room), prep level (floor flatness/repairs), and the install type; ask for a line-item quote for: removal/disposal, underlayment, installation, and trim
– Include required underlayment items such as vapor control (if specified), leveling materials (if needed), and any adhesive/tape system (glue-down vs. floating)
– Account for edge/trim details: shoe molding, caulk, and transitions—especially where the laundry room meets tile, vinyl, or hall flooring
Click-lock vs. glue-down: how the estimate shifts
If you’re comparing installation options, the best approach is to compare compliant scope, not just labor hours. Click-lock can reduce adhesive costs, but it still requires the correct moisture strategy and an acceptably flat surface. Glue-down can be more sensitive to substrate prep quality and adhesive system compatibility.
Supplies and “hidden in plain sight” items
Even if the installer supplies most consumables, confirm whether your estimate includes:
– spacers and cleanup supplies
– transition fasteners/shims (if applicable)
– required caulk system (not all caulks are interchangeable)
Laundry rooms also tend to require careful detailing at the washing machine footprint so water intrusion can’t travel under edges.
Use quotes and allowances to build a realistic total
You get a more realistic budget by forcing every quote to match the same moisture + prep + transition assumptions. In 2026, the biggest budget risk is comparing “one price per square foot” claims when the actual deliverables differ between bidders.
Apples-to-apples quotes depend on matching substrate prep scope, underlayment/vapor strategy, transitions, and finishing requirements—otherwise the totals are not comparable.
Hidden issues in laundry rooms (old moisture damage, uneven framing, or damaged subfloor sections) typically change both material and labor costs.
Adding a structured contingency helps protect your total when you can’t fully confirm subfloor condition until demo is complete.
– Request quotes that match your scope: ask for a breakdown of materials you provide vs. materials they provide, and whether they include demo/removal of the old floor
– Compare apples-to-apples by confirming each quote includes the same assumptions: subfloor prep level, underlayment/vapor strategy, transitions, and finishing details
– Add an allowance for uncertainty when you’re unsure about hidden issues (old flooring moisture damage, uneven framing, etc.):
Contingency: choose it based on what you know, not what you hope
If you’re installing over a known, dry subfloor and the house is relatively new, your contingency may be smaller. If your laundry room has a history of dampness, rust staining, or prior water intrusion, plan for more uncertainty. Contingency isn’t pessimism—it’s how you keep your project on track when demo reveals the truth.
What can go wrong (and how to avoid it)
Laundry-room flooring problems usually come from mismatched moisture systems, skipped flatness checks, or undercounted transitions. The good news is that most failures are preventable if you align your estimate with the manufacturer’s installation instructions and your actual subfloor conditions.
Using the wrong underlayment for a laundry room can create warranty risk if it doesn’t meet the manufacturer’s moisture-control requirements.
Skipping subfloor flatness checks can cause engineered wood movement over time, leading to gaps, squeaks, or compromised locking joints.
Underestimating trim and transition work is common because doorways and adjacent flooring changes are not reflected in simple square-foot pricing.
– Wrong underlayment for a laundry room: some underlayments can void warranty or fail to meet moisture guidance—use the manufacturer’s specified system
– Skipping subfloor flatness checks: engineered wood can look fine at install, but poor flatness can cause gaps or squeaks over time
– Underestimating trim/transitions: doorways and transitions (to adjacent rooms) can add both material and extra labor that a basic square-foot estimate misses
– Not planning for removal/disposal: if the old flooring needs to come up fully, labor and disposal costs can noticeably change your total
Pros/cons: click-lock floating vs. glue-down in laundry rooms
Use this comparison to guide what you ask in your bid—not to replace the manufacturer’s written requirements.
| Option | Pros | Common failure points to price for |
|---|---|---|
| Click-lock (floating) | Typically less adhesive complexity; faster plank placement in many installs | Incorrect underlayment/vapor control; inadequate flatness; missing perimeter detailing at edges |
| Glue-down | Can provide a more rigid feel; often preferred over certain substrates per product guidance | Adhesive compatibility errors; extra substrate prep; incomplete moisture qualification before install |
Verdict: when this approach works—and when to skip
This estimate method works best if you (1) can measure accurately, (2) read the engineered wood installation instructions for your specific product, and (3) line up your quote with the same scope (moisture + prep + transitions). The downside is that it requires homework—if you don’t have the product specs or you’re unsure about your subfloor, you may end up with a budget that’s only partially accurate.
You may want to skip DIY estimating (and consider getting a professional site assessment) if you suspect water intrusion, your subfloor is older/unknown, or you can’t confirm whether the manufacturer allows installation over your existing substrate.
If you’re proceeding anyway, keep your estimate “updateable”: assume demo may change the prep line item, and treat moisture strategy as the anchor for everything else.
| Cost item | What to verify | What to write in your estimate |
|---|---|---|
| Flooring materials | Box coverage + waste allowance + product install method | $ / sq ft; |
| Underlayment/vapor | Manufacturer-required moisture strategy | $ |
| Subfloor prep | Flatness + repairs/leveling needed | $ |
| Installation labor | Demo/removal included? tight access? | $ |
| Trim & transitions | Doorways + adjacent flooring transitions | $ |
| Supplies | Caulk/adhesive (if required), spacers, etc. | $ |
| Contingency | Hidden issues risk |
Sources (primary docs/specs):
– ASTM moisture testing methods (only if your manufacturer specifies them): ASTM F2170 (in-slab RH testing), ASTM F1869 (MVER testing)
– ASTM vapor retarder classification for perm ratings: ASTM E1745
– ASTM flatness/levelness measurement framework: ASTM E1155
– ASTM concrete surface preparation practices (where applicable): ASTM F710
– ASTM sealant performance categories used for perimeter detailing: ASTM C920
A laundry-room engineered wood budget becomes much more reliable when you stop treating it like a single “per-square-foot” number and instead price moisture compliance, subfloor readiness, and transitions as line items. Build your estimate around manufacturer instructions, compare quotes on identical scope, and include a contingency for what demo reveals—then you’ll end up with a total you can actually trust in 2026 and beyond.
Frequently Asked Questions
What factors affect the total cost of engineered wood floors in a laundry room?
The biggest cost drivers are the engineered wood plank price per square foot, the thickness and wear layer (which impacts durability and longevity), and the style/finish you choose. Laundry rooms also often require extra considerations like moisture resistance, underlayment selection, and subfloor prep (repairs, leveling, and moisture mitigation). Installation labor, trim/baseboards, transition strips, and waste factor (typically 10–15%) can significantly increase your engineered wood flooring estimate.
How do I calculate square footage and estimate material cost for engineered wood floors?
Measure the laundry room’s length and width, then multiply to get the base square footage for engineered wood flooring (L × W). Add a waste factor of about 10–15% to account for cuts around doors, corners, and obstructions, then divide by the number of square feet per box to determine how many boxes you need. To estimate material cost, multiply total required square footage by the engineered wood floor price per square foot, then add estimated costs for underlayment and any required vapor barrier if your installation calls for it.
How much should I budget for installation when estimating engineered wood floor costs in a laundry room?
Labor costs vary by region and whether your engineered wood flooring is click-lock floating, glue-down, or nailed/stapled, but it’s common to budget separately from materials. Laundry rooms can raise installation complexity because of potential moisture exposure, the need for careful floor leveling, and transitions near tile or other flooring types. To get an accurate engineered wood flooring cost estimate, request quotes that include subfloor prep, underlayment/vapor barrier (if applicable), transitions, and removal of the old floor.
Which underlayment and moisture barriers should I include in my cost estimate for a laundry room?
In a laundry room, you’ll want to plan for moisture protection by choosing underlayment and vapor barrier options recommended for engineered wood flooring in potentially damp areas. Many installers suggest a separate vapor barrier or a moisture-resistant underlayment depending on your subfloor type (concrete vs. wood) and manufacturer requirements. Including these items in your estimate helps you avoid underestimating costs, especially if you need additional waterproofing around the room’s perimeter or at doorways.
Best way to estimate total engineered wood flooring cost—materials, prep, and extras?
Start with total square footage plus waste, then add the engineered wood plank cost per square foot, underlayment/vapor barrier, and any leveling compound or subfloor repair materials needed. Next, estimate installation labor using a per-square-foot rate for your flooring type, ensuring quotes include trim, baseboards, and transitions (for example, between engineered wood and tile). Finally, add “extras” like new door thresholds, caulk/wood filler, and moving appliances—these often show up in real-world laundry room projects and can change the final engineered wood floors cost.
📅 Last Updated: October 19, 2026 | Topic: How to estimate the cost of engineered wood floors in a laundry room? | Content verified for accuracy and freshness.
References
- Engineered wood
- Wood flooring
- https://www.epa.gov/mold
- https://www.cdc.gov/mold/default.htm
- https://www.fpl.fs.usda.gov/documnts/fplgtr/fpl_gtr190.pdf
- NWFA | National Wood Flooring Association
- Home – APA
- https://scholar.google.com/scholar?q=engineered+wood+flooring+cost+per+square+foot+installation+labor Google Scholar
- https://scholar.google.com/scholar?q=engineered+wood+flooring+moisture+humidity+guidelines+laundry+room Google Scholar
- https://scholar.google.com/scholar?q=wood+flooring+moisture+testing+ASTM+F2170+F1869+relative+humidity+acclimation Google Scholar