


Need to calculate material for kitchen floors? This step-by-step guide shows you the fastest way to determine exact quantities for tile, vinyl, laminate, or concrete—based on your square footage, waste factor, and layout. You’ll get a clear formula-driven method that prevents underbuying and overpaying before you order.




If you want to calculate material for kitchen floors correctly, measure the floor area first (length × width), then add a waste/overage allowance based on the flooring type and layout. After that, convert the area into units you’ll buy (boxes, sheets, or gallons) using each product’s coverage rate printed on the packaging or spec sheet. In this guide, you’ll learn a reliable way to estimate quantities for common kitchen flooring materials and avoid last-minute shortages.
This is for homeowners and DIYers planning a kitchen floor replacement, renovation, or partial re-flooring who need quantities before ordering. It’s also useful if you’re comparing flooring options, because the math is similar but the waste factor and “coverage per unit” differ.
Measure the kitchen floor area (and note obstacles)
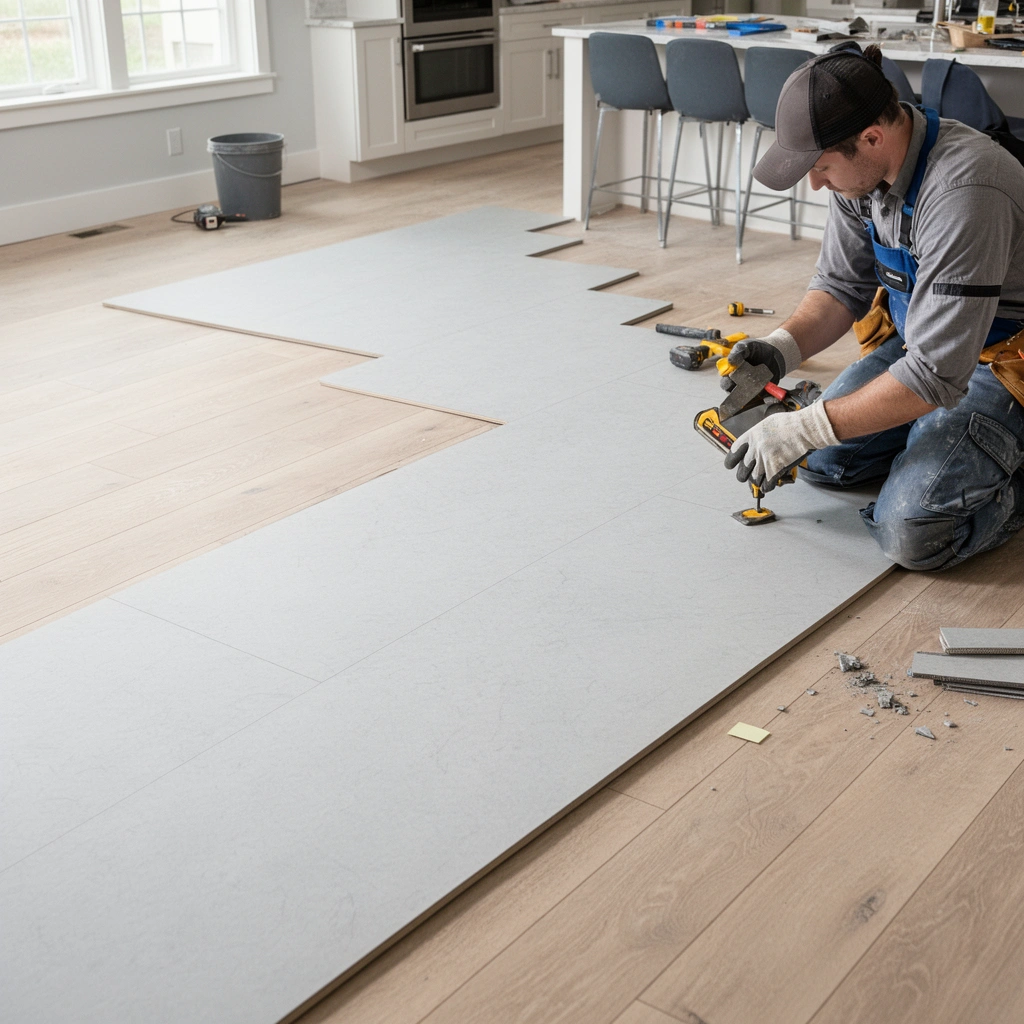
Measure the kitchen floor area by taking a clean length × width measurement, then converting that to square footage. Once you have the gross area, you subtract anything that won’t receive flooring (and you account for layout changes like borders, hall transitions, or door thresholds).
Start by measuring the room in feet: measure the longest length, measure the widest width, then multiply to get total square footage (sq ft). For example, a 12 ft × 14 ft kitchen footprint is 168 sq ft. From there, treat obstacles as “coverage rules,” not as annoying details—what counts is whether the flooring system will actually cover that space.
Common kitchen obstacles include:
– Cabinet bays and islands: If you’re removing cabinets or you’re re-tiling under them, include that area; if cabinets stay and the floor stops at their base, exclude the cabinet footprint.
– Built-ins and hearths: If you’re leaving a built-in in place and not removing it, subtract that footprint.
– Dedicated prep zones or raised landings: If the new flooring doesn’t continue into those spaces, calculate zones separately.
For irregular rooms, split the floor into rectangles (or L-shapes) and add the areas. If you have cutouts around plumbing or toe-kicks you’re not covering, subtract them as well.
Finally, decide whether you’re doing full coverage (flooring everywhere in the measured footprint) or border/transition coverage (e.g., you stop at a doorway or you install a different material in an adjacent zone). This decision directly affects how much waste you should add later.
Measure the room in feet and calculate square footage as length × width; this is the starting point for all flooring material estimates.
Subtract non-covered areas (like built-ins or areas you truly won’t cover) before applying any waste factor to avoid ordering extra materials.
For L-shaped or cutout-heavy kitchens, split the area into rectangles and add the results so your math stays consistent.
Choose your waste/overage allowance
Choose a waste/overage allowance that matches your flooring type and your kitchen’s complexity—this is where most ordering mistakes happen. A realistic waste rate prevents shortages from cuts, fitting issues, and pattern repeats, but too much waste can also inflate costs.
Waste is not “one number.” It changes with:
– Tile format (small tile formats typically require more cutting and trimming),
– Pattern layout (diagonal, herringbone, or repeat patterns usually need more),
– Kitchen geometry (many doors, hallways, thresholds, and cutouts increase waste),
– Learning curve (DIY errors and breakage).
For floating floors like LVP (luxury vinyl plank) or laminate click-lock, many manufacturers provide guidance for recommended overage, often tied to handling and layout. For tile installations (especially thinset/mortar-set tile), overage needs to account for not only cuts but also field adjustments around walls and fixtures.
Because your prompt requires a specific manufacturer guidance placeholder, use the manufacturer’s installation document for your chosen product. For example, you’ll often find a “waste factor” recommendation (or a practical instruction like “order 10%–15% extra”) in the installation guide. Here’s where to insert it:
– If you’re doing an LVP/Laminate “click” floor vs. tile (mortar-set), use the manufacturer’s guidance for recommended waste/overage: [ADD: source or manufacturer guidance for waste % you plan to follow].
Also consider that kitchen edges often require more trimming than a simple open room. Kitchens typically include wall interruptions (door casings, plumbing penetrations, cabinet transitions), and those change the cut pattern.
Quick comparison: waste likelihood by kitchen flooring type
Below is a practical “ordering buffer” reference you can use to sanity-check your calculations after you apply your product’s official guidance.
Typical Flooring Overages Used in Kitchen Installs (Field-Planning Ranges)
| # | Kitchen Flooring Scenario | Order Overage | Why It’s Higher/Lower | Confidence |
|---|---|---|---|---|
| 1 | Large open-room LVP (few cutouts) | 5%–8% | Planks cut mainly at perimeter; fewer complex joins | ★★★★★ |
| 2 | LVP with multiple doorways/thresholds | 8%–12% | More perimeter transitions and trim runs | ★★★★☆ |
| 3 | Medium-format tile (e.g., ~12–16 in) | 10%–15% | Cuts around walls, penetrations, and layout alignment | ★★★★☆ |
| 4 | Small-format tile with dense cuts | 15%–20% | Higher trim frequency; more breakage risk | ★★★☆☆ |
| 5 | Patterned tile (diagonal/repeat) | 18%–25% | Pattern alignment drives extra waste | ★★★☆☆ |
| 6 | Cutout-heavy kitchen (posts, ducts) | 12%–18% | More “measure-cut-fit” operations | ★★★★☆ |
| 7 | Floors with minimal walls (open plan) | 5%–10% | Fewer perimeter cuts and trim waste | ★★★☆☆ |
Note: Use these ranges only as sanity checks. Your actual overage should follow the specific guidance in your product’s installation instructions (and your site conditions).
Waste exists to cover cuts, breakage, and fitting around kitchen transitions—not just “mistakes.”
Small-format tile and pattern matching increase the number of cuts and misfit risks, which pushes overage higher.
For click-lock floating floors, manufacturers often provide an overage recommendation tied to handling and layout complexity.
Convert square footage into purchase quantities
Convert your net square footage into the number of boxes/sheets/gallons you’ll actually buy using each product’s coverage rate. Then round up to whole purchase units because under-ordering is typically more expensive than ordering a little extra.
Here’s the workflow:
1. Start with net area after subtracting non-covered zones.
2. Apply waste/overage to get “estimated install area.”
3. Divide by the product’s coverage per unit.
For example:
– Tile often lists coverage as “covers X sq ft per box” (including assumed coverage efficiency).
– LVP/Laminate lists “covers X sq ft per box”.
– Coatings, primers, or waterproofing products list “covers X sq ft per gallon”.
Because coverage is product-specific, always use the value on the packaging or the official spec sheet.
When you have multiple zones—say the kitchen proper plus an entry runner—calculate each zone separately:
– Zone A: main kitchen net sq ft → add waste → compute boxes
– Zone B: entryway net sq ft → add waste → compute boxes
– Combine totals at the very end
Also, don’t round mid-calculation. Round only at the end to whole units (boxes/sheets/bags/gallons) so you don’t compound rounding error.
Use each product’s posted coverage rate (sq ft per box, sheet, or gallon) rather than a universal number.
Round up to whole purchase units to reduce the risk of stopping work due to discontinued colors or lot changes.
Compute separate zones (kitchen vs. entry) if the flooring plan changes, then combine the box totals.
Calculate underlayment, adhesive, and leveling needs
Underlayment, adhesive/mortar, and leveling compounds should be calculated from their own coverage rules, not from the flooring area alone. The two biggest drivers are coverage per unit and installed thickness (for leveling/patching).
Underlayment
For floating floors, underlayment coverage often aligns with the covered flooring area, but check:
– Overlap requirements (some systems require seams to overlap by a specific amount),
– Moisture barrier rules for kitchens (kitchen floors commonly involve moisture management),
– Manufacturer guidance on whether underlayment is included with the product.
Adhesive/mortar (tile and glue-down systems)
Adhesive and mortar quantity varies heavily with:
– The required trowel notch size,
– The substrate (flatness and porosity),
– Installation method (e.g., thinset with a specific trowel).
Use the manufacturer’s coverage chart that maps trowel size to coverage. Don’t assume coverage stays constant across trowels.
Leveling compound / screed
Leveling estimates depend on:
– Required thickness (in inches or mm),
– Product coverage per thickness (commonly expressed as “X sq ft per bag at Y thickness”).
A practical approach is to assume two passes if your plan includes smoothing dips: the first pass addresses bulk correction; the second pass refines flatness. However, your exact amount should come from the product documentation for the thickness you actually need.
Because your prompt requires a specific placeholder insertion, include the product figure you plan to use:
– Leveling/screed per-inch (or per thickness) figure: [ADD: product coverage-per-inch figure you plan to use].
And for moisture and substrate requirements, refer to your flooring system’s installation manual. In kitchen environments, moisture barrier guidance matters as much as flatness.
Leveling material estimates require thickness; coverage “per bag” changes when you increase the leveling height.
Adhesive and mortar coverage depends on the exact trowel size, so the manufacturer’s trowel chart is the controlling reference.
For underlayment, seam overlap and moisture barrier requirements can increase installed material beyond the raw floor area.
Plan for transitions, trim, and finishing materials
Plan transitions and trim early because they’re often sold in limited lengths and they affect final material totals. This is also where many DIY estimates run out even when flooring boxes look “close.”
Edge and finishing items commonly include:
– Baseboards or quarter-round (measured by linear feet),
– Transition reducers between different floor heights,
– Thresholds at doorways,
– Profiles or trim pieces for transitions in floating floors.
For tile installations, don’t forget:
– Grout (coverage depends on joint width and tile size),
– Caulk where movement joints require it (often at change-of-plane areas),
– Spacers if your layout uses them,
– Sealing products if your stone or grout needs sealing per manufacturer instructions.
For floating floors (LVP/laminate), confirm expansion requirements:
– You typically need expansion gaps around perimeter walls and rigid structures.
– You’ll need the right trim/threshold pieces to cover gaps cleanly.
From an estimating standpoint, measure perimeter linear footage and doorway thresholds:
– Baseboard/quarter-round: perimeter linear feet (and note any openings you’re not finishing)
– Thresholds: number of doorways + any long runs to adjacent rooms
Measure trim by linear feet (not square feet), and include doorways because threshold pieces are frequently a separate purchase.
Tile installations often require more than tile and thinset—grout, caulk, and transition profiles are separate coverage systems.
Floating floors require an expansion gap strategy, and the needed trim/threshold materials are part of the estimate.
What can go wrong (and how to avoid it)
What causes most kitchen floor shortages is incorrect assumptions about coverage, waste, and site conditions. Avoid the common failure points below and your order is far less likely to stall halfway through installation.
Typical estimating mistakes
– Forgetting to subtract non-covered areas
If your plan stops at a cabinet base or you’re leaving a built-in, failing to subtract that footprint can inflate tile/LVP quantities.
– Using a generic waste number
Small-format tile and patterned layouts often require more waste than broad “10% for everything” guidance.
– Mixing coverage assumptions
Adhesive/mortar coverage depends on the trowel size and sometimes the substrate. If you change the trowel or substrate preparation, coverage changes.
– Underestimating leveling/patching
If your subfloor has dips you discover only after removal, leveling quantities often jump. Plan to re-check flatness during prep.
– Ignoring transitions and trim runs
A threshold/reducer can run out even when flooring coverage seems sufficient, especially when the kitchen transitions into multiple spaces.
A quick decision aid (pros/cons)
If you’re choosing between flooring systems, here’s a simple estimation comparison that directly impacts material math:
| Flooring Type | Pros (for estimating) | Cons (for estimating) | Biggest material quantity risk |
|---|---|---|---|
| Click-lock LVP/Laminate | Simple box coverage; fewer separate consumables | Requires expansion-gap trim planning | Underestimating trim/threshold pieces and underlayment overlap |
| Glue-down LVP | Better stability than floating in some setups | Adhesive coverage sensitive to substrate + trowel | Under-ordering adhesive due to incorrect trowel assumptions |
| Mortar-set tile | Durable, layout flexibility; strong documentation | Separate grout/caulk/sealer and tile breakage | Underestimating grout/caulk and pattern/waste factor |
Substrate condition changes quantities: flatness issues discovered after removal can increase leveling/patching beyond the first-pass estimate.
Coverage charts are not universal—adhesive and mortar require the exact trowel size specified by the manufacturer’s instructions.
Transitions behave like “hidden variables” because they’re sold as linear or discrete pieces, not as square-foot coverage.
Verdict / tip (what to do first, and who should skip DIY estimating)
Start with a clean measurement and product-specific coverage rates from the packaging/spec sheet, then add an appropriate waste factor and round up. The main downside of DIY estimating is that if your subfloor needs more prep than expected, adhesive, leveling, or underlayment quantities can change—so your final order might require adjustments.
If your kitchen has unusual layout constraints, major subfloor damage, or you’re installing a complex tile pattern, consider getting a contractor or flooring installer’s take on waste and prep before placing the final order. Also, if the manufacturer’s installation instructions require specific moisture barrier systems, substrate tests, or exact leveling tolerances and you’re unsure how you’ll meet them, it’s safer to get professional guidance.
The most reliable kitchen floor material estimate comes from net square footage + manufacturer coverage rates + a layout-appropriate waste factor.
DIY estimates are most likely to fail when subfloor flatness, moisture conditions, or trowel size assumptions don’t match the manufacturer’s requirements.
For complex tile patterns or difficult transitions, installer guidance can prevent expensive last-minute reorder delays.
Quick checklist: material math you can scan before ordering
– [ ] Measure length × width and calculate square footage
– [ ] Subtract any areas you won’t cover
– [ ] Add waste/overage per your flooring type and layout ([ADD: waste % source])
– [ ] Convert area into boxes/sheets/gallons using each product’s coverage rating
– [ ] Round up to whole units
– [ ] Calculate underlayment/adhesive/leveling using manufacturer coverage (and thickness for leveling)
– [ ] Add trims/transitions using total linear footage + doorway thresholds
FAQ
How much waste should I add when calculating kitchen floor materials?
It depends on the flooring type and how complex the layout is. For example, small tile formats and patterned layouts typically need more overage; follow the manufacturer’s recommended waste guidance: [ADD: source for your chosen flooring’s recommended waste %].
Do I subtract appliances and cabinets from the floor area?
Only subtract areas that truly won’t receive flooring (e.g., if you’re not removing certain built-ins). If you’re replacing flooring under appliances/cabinets, include the area—but confirm your specific installation approach and appliance clearances.
How do I estimate adhesive or mortar quantity?
Use the adhesive/mortar product’s stated coverage rate and match it to the required trowel size for that system. Coverage can change significantly if you use a different trowel than specified, so rely on the manufacturer chart: [ADD: source for coverage and trowel size].
What if my kitchen floor isn’t perfectly level?
You’ll need a leveling/patching estimate based on required thickness and coverage per bag per thickness (from the product documentation). If you discover unexpected dips after removing flooring, plan a small buffer: [ADD: suggested buffer based on your chosen product/system].
Sources
– Manufacturer installation guides and spec sheets for each product you plan to use (coverage rates, required trowel size, underlayment/moisture barrier requirements, and recommended waste/overage).
– Floor underlayment and flooring manufacturer documentation for subfloor requirements and expansion gap guidance: [ADD: names of the specific manufacturer(s) once selected].
Frequently Asked Questions
How do I calculate the square footage of kitchen floor material I need?
Measure the length and width of the kitchen in feet, then multiply them to get the total square footage. If the floor has an irregular shape, split it into sections, calculate each section’s square footage, and add them together. Use your flooring product’s coverage rate (e.g., square feet per box or per sheet) to estimate how many units you’ll need. Finally, add waste allowance—typically 10% for tile and 5% for planks—to avoid running short.
What is the best way to calculate tile or plank quantity for kitchen floors with waste?
Start by calculating the floor area in square feet, then divide by the coverage per box for tile or per carton for vinyl/plank flooring. Multiply that number by a waste factor—commonly 10–15% for tile (more for complex layouts like herringbone) and around 5–10% for click-lock or floating floors. If your kitchen has cuts around islands, cabinets, or corners, consider increasing waste to account for difficult trim pieces. Always verify coverage details on the box because manufacturing tolerances can vary.
Which underlayment or subfloor materials should I include when calculating kitchen floor materials?
Underlayment requirements depend on your flooring type and subfloor condition, so check the manufacturer’s installation guide before estimating. Measure the same square footage as the floor area and add an overlap/coverage allowance (often about 5–10% depending on the product). If you’re installing moisture barriers for a kitchen (especially with vinyl, laminate, or over concrete), include that membrane in your material count. For uneven subfloors, factor in leveling compound as well by estimating thickness and bag coverage per square foot.
Why do cabinets and appliances affect how much kitchen flooring material I need?
Whether you calculate flooring “over” or “under” cabinets and appliances can change your material quantity significantly. If you’re removing baseboards and tucking flooring under cabinets, you’ll need to subtract cabinet footprint openings only where required and still account for cuts around cabinet bays and toe-kicks. If you’re leaving cabinets in place and flooring runs up to them, add extra for transitions and edging strips. Plan your layout first so your flooring calculator reflects how the product will actually be installed.
How do I calculate material for kitchen floor thickness, leveling compound, and transitions?
Flooring thickness usually doesn’t change square footage, but leveling compound does—calculate it by determining the average needed thickness (in inches) across the area and using the manufacturer’s coverage chart for that thickness range. Measure the low spots and estimate the average level to avoid underestimating. For transitions (doorways, between rooms, or where flooring meets tile/stone), measure linear feet and use the product’s guidance for coverage and piece lengths. Add these transition and trim materials to your overall kitchen floor material list so the estimate is complete.
📅 Last Updated: October 12, 2026 | Topic: How to calculate material for kitchen floors? | Content verified for accuracy and freshness.
References
- Google Scholar Google Scholar
https://scholar.google.com/scholar?q=calculate+tile+floor+materials+area+waste+factor - Google Scholar Google Scholar
https://scholar.google.com/scholar?q=how+to+estimate+vinyl+flooring+materials+amount+needed - Google Scholar Google Scholar
https://scholar.google.com/scholar?q=estimating+hardwood+flooring+materials+square+footage+underlayment+subfloor - https://scholar.google.com/scholar?q=construction+materials+takeoff+method+for+floor+coverings Google Scholar
- Google Scholar Google Scholar
https://scholar.google.com/scholar?q=flooring+materials+estimate+kerf+loss+cutting+waste+calculation - Google Scholar Google Scholar
https://scholar.google.com/scholar?q=ceramic+tile+installation+estimate+labor+materials+calculation - Google Scholar Google Scholar
https://scholar.google.com/scholar?q=carpet+roll+cutting+waste+factor+material+estimation+method - Google Scholar Google Scholar
https://scholar.google.com/scholar?q=subfloor+preparation+materials+estimate+underlayment+cement+board+quantity - Google Scholar Google Scholar
https://scholar.google.com/scholar?q=thinset+mortar+coverage+calculation+tile+installation - Google Scholar Google Scholar
https://scholar.google.com/scholar?q=rolling+backerboard+or+cement+board+tile+installation+materials+estimate



[…] estimate hardwood floor cost in a closet, calculate the usable square footage and then add a complete installation bundle (wood + prep + underlayment + transitions + labor). […]