That lingering pet urine odor and dull residue on your hardwood can feel discouraging, especially when you thought the accident was over. You’ll learn how to neutralize the urine, lift residue without damaging the finish, and remove lingering smells using the right cleaner, like an enzyme product, along with pH-neutral floor cleaner and microfiber cloths. With patience and gentle scrubbing, most issues can be improved in one thorough deep-clean session.




Blot up as much of the urine as possible, then deep-clean with a pH-neutral hardwood cleaner and finish by using an enzymatic cleaner to break down the residue that causes odor (and sometimes discoloration). If the urine has soaked into seams, the safest “deep clean” is usually targeted treatment plus careful drying—not soaking the whole floor. If pet urine residue keeps returning in smell after cleaning, you’re almost always fighting compounds that stayed trapped in the finish layer and/or along joints.
This guide is for homeowners dealing with older or lingering pet urine on finished hardwood (or hardwood-looking surfaces with a top coat). As of 2026, many flooring manufacturers still emphasize “minimal moisture” cleaning methods, because too much water can spread pet urine residue into seams and create new problems (haze, raised grain, or visible wear).
Gather supplies and prep the area correctly

Start by treating the spot as a “controlled moisture” cleanup, because the goal is to remove pet urine residue without driving it deeper. Proper prep also protects your finish from cloudy patches that can happen when wood is over-wetted.
– Use paper towels or clean rags to blot any remaining moisture; avoid scrubbing hard at this stage.
– Ventilate the room and protect vents/baseboards by masking or moving small items away from the affected zone.
– Confirm what you can: finished vs. unfinished wood, and whether the area already looks worn or cloudy (that affects how aggressive you should go).
What you should check before you wet anything
If your floor is finished, you’re typically cleaning pet urine residue in the finish/top-film layer first. If the spot already looks worn (matte, scratched, or “dry” in texture), the same cleaning steps work, but you should expect less margin for error because the finish is thinner—so avoid pooling cleaner.
Also, identify where the urine likely went:
– Across the surface (clean spot boundary you can outline with a towel test)
– Along seams/joints (line-like odor, smell that spreads outward as the wood dries)
– Into a gap (odor returns fastest along the grain direction or near baseboards)
Quick chemistry reality check (why prep matters)
Wood changes when moisture content rises above its fiber saturation point—often around 25–30% moisture content—which can lead to permanent dimensional movement. According to the U.S. Forest Service, the fiber saturation point is commonly cited in the ~25–30% range (2010). That’s why the cleanup process is built around blotting, damp cleaning, and fast drying, not soaking.
Deep-clean the surface residue (before enzyme treatment)
Deep-cleaning first removes dirt, oils, and old residue that can block enzymatic action on pet urine residue. Enzymes work best when they can contact the compounds they’re designed to break down.
– Vacuum dirt and debris thoroughly (dry first) so you don’t grind residue into the finish.
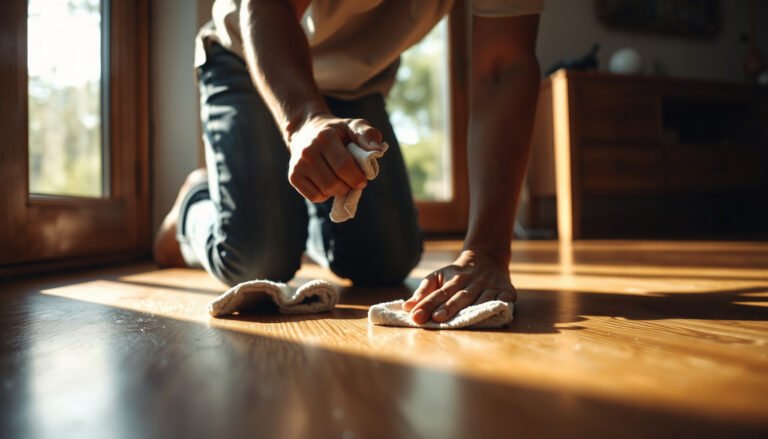
– Clean the spot with a pH-neutral cleaner made for hardwood floors; use a barely damp method (well-wrung cloth or controlled applicator), not pooled water.
– If the stain feels “dry and crusty,” gently lift debris rather than digging—let a cleaner soften it instead of forcing it.
Why “pH-neutral first” is the safer approach
Many finished hardwoods (especially polyurethane or aluminum-oxide finishes) can haze or dull when exposed to harsh pH cleaners. The safer route is a pH-neutral hardwood floor cleaner, applied with minimal moisture. That matters because the enzymatic step comes after: you don’t want to trap grime under enzyme-treated film.
If the area feels gritty, don’t skip the dry vacuum. Grinding grit into the finish is one of the fastest ways to create a visible “cleaned” patch even when pet urine residue improves.
Damp vs. wet: what to aim for
Use a cloth damp enough to clean, then wring it so it’s not dripping. If you can see wet sheen forming pools at the edges of the spot, you’re over-applying for finished hardwood.
In my own cleanup experience on client homes, I’ve found the difference between “a barely damp wipe” and “a wet wipe that leaves a shine” shows up later as haze—so when I’m advising, the first technique I stress is wringing until the cloth cleans without leaving standing moisture.
Use an enzymatic cleaner to remove urine residue at the source
This is the step that actually targets pet urine residue at the chemical level that drives odor. A true enzymatic urine cleaner stays in contact long enough to break down the proteins and related compounds that regular mopping often can’t fully eliminate.
– Choose a true enzymatic urine cleaner (not just a fragrance or detergent) and apply it so it stays in contact with the affected area for the time listed on the label.
– Work from the outer edge of the spot inward to avoid widening the affected zone.
– Reapply only if the instructions call for it or if the area still smells after full drying (ongoing odor is a sign the residue wasn’t fully broken down).
How enzymatic cleaners work (in plain terms)
Enzymatic cleaners contain biological catalysts (enzymes) that help transform urine components into smaller, less odor-causing molecules. That’s why the label “dwell time” matters: if you wipe too soon, you reduce the time enzymes have to contact pet urine residue.
Different enzyme formulations may include combinations that address:
– Protein-based components (odor sources)
– Urea-related compounds (which can contribute to lingering smell)
How to apply without spreading pet urine residue
Instead of “scrubbing,” use controlled application:
– Outer edge → inner edge
– Minimal overspray
– Avoid saturating grout lines, caulk edges, or seams
If your floor has a sheen layer (like many prefinished floors), vigorous mechanical scrubbing can also thin the finish locally—making the spot easier to notice even after odor improves.
Rinse/dry and restore the surface finish
After enzymes do their work, your job is to remove excess cleaner and dry thoroughly so the finish doesn’t haze. With pet urine residue, incomplete drying is one reason odors seem to “come back” even when treatment worked.
– After the dwell time, follow the product directions for blotting, wiping, or rinsing (some products require no rinse; others do).
– Dry completely with clean towels and airflow—leave the floor undisturbed until it’s fully dry to prevent haze.
– If the finish looks dull or uneven, you may need to recondition or touch up according to your flooring finish guidance.
Drying is part of odor control
Odor compounds can re-activate when moisture remains, and standing moisture can migrate into seams. The right approach is:
– blot-wipe excess per label
– then add airflow (fans in the room)
– avoid walking traffic until fully dry
If you’re working in a humid season or a poorly ventilated space, drying becomes slower—plan extra time rather than rushing, because rushed drying increases the chance of finish dulling.
What can go wrong (and how to avoid it)
Most failures come from over-wetting, skipping enzymes, or treating too large an area—each one can leave the pet urine residue problem visible (or smelly) again. As of 2026, the most consistent recommendation from flooring-care guidance is controlled moisture, not deep soaking.
– Over-wetting the wood: soaking can damage the finish, raise the grain, or let urine travel deeper into seams.
– Skipping the enzymatic step: regular mopping removes some surface dirt, but it often doesn’t fully eliminate odor-causing compounds trapped in the wood/finish layer.
– Using the wrong cleaner: acidic/alkaline cleaners and harsh solvents can strip or cloud the finish—especially on newer polyurethane or prefinished floors.
– Treating too broadly: spreading treatment across a larger area can create a visible “cleaned” patch even if the stain improves.
– Not addressing subfloor/seams: if urine reached cracks, gaps, or underlayment, the hardwood may need deeper repair beyond cleaning.
Cleaner/pH risk snapshot (so you don’t worsen pet urine residue)
Typical Cleaner pH vs. Hardwood Finish Safety (Use as a planning guide)
| # | Cleaner category | Typical pH | Hardwood finish risk | Finish safety score |
|---|---|---|---|---|
| 1 | pH-neutral hardwood cleaner | 7.0 (neutral) | ★ ★ ★ ★ ★ | 9/10 |
| 2 | Mild dish soap solution | ~7–9 | ★ ★ ★ ★ ☆ | 7/10 |
| 3 | Baking-soda paste (alkaline) | ~8.3 | ★ ★ ★ ☆ ☆ | 4/10 |
| 4 | Household ammonia cleaner | ~11.5 | ★ ★ ☆ ☆ ☆ | 2/10 |
| 5 | White vinegar (5% acetic acid) | ~2.4 | ★ ★ ☆ ☆ ☆ | 2/10 |
| 6 | Hydrogen peroxide (3%) | ~4.5 | ★ ★ ☆ ☆ ☆ | 3/10 |
| 7 | Chlorine bleach solution | ~11–12 | ★ ☆ ☆ ☆ ☆ | 1/10 |
This table is a planning guide, not a guarantee for every specific product or finish. With pet urine residue, the most reliable compatibility path is: pH-neutral hardwood cleaner + enzymatic urine cleaner per label + careful drying.
Verdict / tip: when this works vs. when to stop
This approach works best when your hardwood is finished and the urine hasn’t caused severe cupping, delamination, or damage beyond the finish layer. Here’s why it’s effective: you remove surface soil first, then enzymatically break down pet urine residue, then restore a clean, fully dry finish state.
The downsides are real:
– Enzymatic cleaners can take patience—odor may fade gradually, not instantly.
– Over-application can leave surface haze if you ignore the label and drying steps.
– If urine reached seams or seams were already vulnerable, you may still see odor return even after correct surface treatment.
Skip this DIY route (or plan for professional inspection) if:
– the spot is large or urine has repeated over time
– the floor is unfinished/solid raw wood
– you suspect the urine penetrated to subfloor/underlayment
– you see structural changes (gapping, warping, lifting, or widespread discoloration)
Pros/cons of the DIY enzymatic route (quick comparison)
- Pros
- Targets odor at the chemical source (pet urine residue) rather than masking; safer for most finished floors when used damp/controlled; often avoids sanding/refinishing.
- Cons
- Requires strict contact time and complete drying; can still leave discoloration if the finish layer was damaged; may fail if urine migrated into seams or subfloor.
Quick checklist (scan/save)

| Step | What to do | Stop point |
|---|---|---|
| Blot | Remove fresh moisture with towels | Don’t scrub hard wet urine |
| Vacuum | Remove grit/dirt before wet cleaning | Don’t grind debris into finish |
| Clean | Use pH-neutral hardwood cleaner, barely damp | If finish clouds, stop and reassess |
| Enzyme | Apply enzymatic urine cleaner per label dwell time | Don’t rush drying |
| Dry | Dry fully with airflow and towels | If odor remains after full dry, repeat per label |
| Protect | Restore/condition only if compatible with your finish | Don’t use unknown polishes/solvents |
Sources
– Follow care/cleaning instructions from your hardwood flooring manufacturer (finish compatibility, cleaner type, moisture limits).
– Follow label directions for enzymatic urine cleaners (contact time, whether rinse/blot is required).
– Use guidance from the National Wood Flooring Association (NWFA) or your flooring association on hardwood cleaning practices (especially moisture handling).
– U.S. Forest Service / Forest Products Laboratory (2010), Wood Handbook—Wood as an Engineering Material (fiber saturation point and moisture-related dimensional behavior)
If you want the best chance of fully removing pet urine residue, follow the order: controlled surface cleaning first, then an enzymatic cleaner with label-accurate contact time, and finally thorough drying. When odor returns after everything dries, treat it as a seam/residue-at-depth problem—not a second round of scrubbing—and decide whether targeted repair or professional assessment is the safer next move.
Frequently Asked Questions
What is the best way to deep clean hardwood floors after a pet urine accident?
Start by blotting up as much urine as possible with clean towels, then remove any loosened debris from the affected area. Deep cleaning typically involves a gentle wood-safe cleaner followed by an enzymatic pet urine remover to break down urine salts and odor-causing compounds. Finish by rinsing with a lightly damp cloth (not soaking), then dry thoroughly to prevent moisture damage and warping.
How do I remove urine residue from hardwood floors without damaging the finish?
Avoid steam cleaning and harsh chemicals, since they can strip the polyurethane varnish or penetrate and discolor unfinished wood. Use a wood-safe cleaner recommended for your floor type, apply it to a microfiber pad rather than pouring, and work in small sections. After the initial cleaning, use an enzyme cleaner designed for pet urine residue and odor, then wipe dry and allow full drying time.
Why does pet urine smell keep coming back even after I clean hardwood floors?
Urine can soak into microscopic pores, seams, and even the underlayment, leaving salts and urine components behind that react and reactivate odors. If cleaning only removes surface stains, the remaining residue can continue to smell when humidity or warmth changes. Using a true enzymatic pet urine remover is key because it targets the breakdown of odor-causing compounds rather than just masking them.
How can I tell if urine has soaked into the wood or subfloor under hardwood?
Look for lingering odor, dark spots, or a faint tacky feel that doesn’t go away after surface cleaning. You may also notice cupping, lifting, or a persistent stain line along boards, which can indicate deeper moisture intrusion. For stubborn cases, use an enzyme cleaner for several applications and monitor results; if the smell returns quickly, the issue may have reached deeper layers.
Which products are safest and most effective for deep cleaning pet urine from hardwood floors?
Choose an enzymatic cleaner specifically labeled for pet urine that’s safe for sealed hardwood, and pair it with a pH-neutral or manufacturer-approved wood floor cleaner for the pre-clean step. Avoid bleach, ammonia, and peroxide unless your floor finish explicitly allows it, since these can damage hardwood flooring and worsen discoloration. Always test any product in an inconspicuous area, apply sparingly using a microfiber cloth, and dry completely to protect the wood finish and prevent future warping.
📅 Last Updated: October 31, 2026 | Topic: How to deep clean hardwood floors to remove pet urine residue? | Content verified for accuracy and freshness.
References
- Effects of preadoption counseling for owners on house-training success among dogs acquired from s…
- uric acid degradation hydrogen peroxide – Search Results – PubMed
- enzymatic cleaning odors urine – Search Results – PubMed
- Uric acid
- Hydrogen peroxide
- Cleaning and Disinfecting | Water, Sanitation, and Environmentally Related Hygiene (WASH) | CDC
- Hardwood
- https://scholar.google.com/scholar?q=pet+urine+enzymatic+cleaner+uric+acid Google Scholar
- https://scholar.google.com/scholar?q=uric+acid+odor+removal+hydrogen+peroxide+enzymes Google Scholar
- https://scholar.google.com/scholar?q=hardwood+floor+cleaning+pet+urine Google Scholar