
Learn how to cut LVP floors with straight, clean cuts and confident angle fits—without chipping or miscuts. If you want the fastest, most consistent results, follow a straight-cut workflow first, then switch to angle planning and precise spacing where pieces meet corners. This guide answers the one question that matters: what to do at the cut line so your LVP locks up tight and looks professional.




Cutting LVP (luxury vinyl plank) cleanly comes down to two things: using the right method for your specific plank thickness/construction and measuring from the correct wall reference while keeping the required perimeter expansion gap. In this guide, you’ll learn how to cut LVP for straight runs, end pieces, and tricky angles with fewer chip-outs and better click-lock alignment—so your floor locks up without ugly gaps at seams.
If you’re installing LVP yourself (floating floor or click-lock style), cutting is usually where the process breaks down first: chip-outs, joints that won’t engage, and short end pieces that leave seams misaligned. This guide is written for DIYers who want a reliable, repeatable cutting workflow before they start snapping or sawing boards down the whole room.
Gather the right tools and blade for LVP

The fastest way to get clean edges is to match your tools to your LVP’s construction—not to force every board through the same “one method fits all” cut. Start by confirming what your manufacturer allows, then choose the correct blade and support setup to reduce chipping and protect the locking system.
LVP cut method (score-and-snap vs. saw) depends on plank thickness and core/layer construction; the manufacturer’s instructions should dictate the approved approach.
Chip-out risk increases when the blade is dull, too coarse, or mismatched to vinyl/flooring layers—support and blade choice directly affect edge quality.
Tools that reduce chipping and mis-locking
For clean cuts—especially on the top wear layer and the click-lock edges—you want tools that keep the plank stable and supported:
– Cutting surface and support
– Use a flat workbench or cutting table with foam support or scrap board backing.
– Support the entire length of the plank so it doesn’t sag mid-cut (sagging is a common cause of ragged breaks).
– Measuring and marking tools
– Tape measure, speed square or carpenter’s square, pencil/marker, and a straightedge.
– A fine-tip marker helps when transferring lines onto darker prints.
– Cutting tools (choose based on your plank + manufacturer guidance)
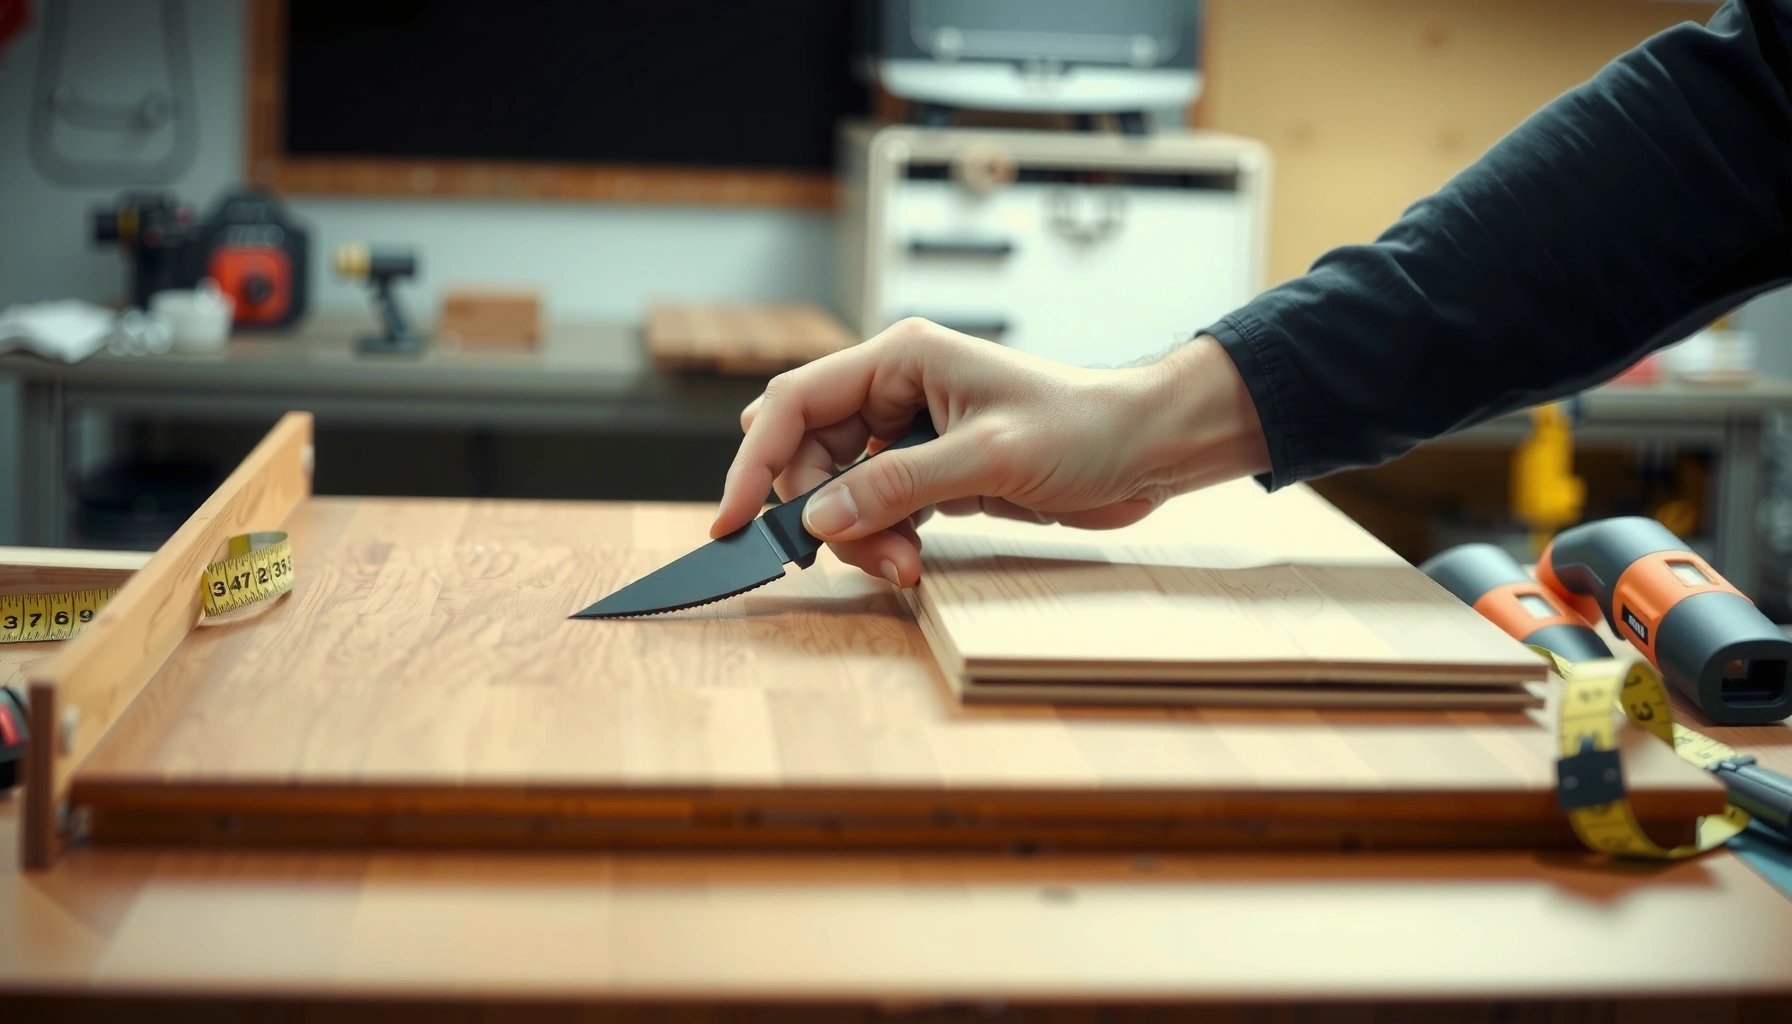
– Score-and-snap / utility knife setups can work for some LVP types, but they’re less forgiving when your plank is thicker or more chip-prone.
– A fine-tooth saw method is often the cleaner option for thicker planks and detailed angles.
Blade selection: what matters most
LVP layers typically include a wear layer (top), a printed design layer, and a core with click-lock geometry. When a blade is too aggressive or wrong for the material, it can tear the wear layer and chip the edge where the locking lip needs to engage.
– Look for a blade intended for flooring/laminate-style materials or a fine-tooth blade suitable for thin vinyl composites.
– Avoid “general purpose” blades when your priority is minimizing chips.
Practical note: If your plank is 6–8 mm class (or “stiffer/thicker”), many DIYers find a saw method produces fewer edge defects than relying on a controlled snap. If your brand explicitly approves score-and-snap, follow that—but don’t assume.
Measure, plan cuts, and mark planks accurately
Clean cuts start before the blade touches the board. The best-looking LVP seams come from correct layout planning, consistent measurement references, and markings placed on the correct face/edge.
Perimeter expansion space is required for floating LVP so the floor can move with temperature and humidity changes without buckling.
Layout planning is the difference between joints that align correctly and end pieces that become too short to lock.
Use the correct wall reference (and keep it consistent)
You’re measuring for two things at once: how many full planks fit across the room, and where each plank’s cut lands so the click joints line up. To avoid the classic “why don’t my seams meet?” problem:
– Pick a starting wall reference (usually the longest, straightest wall) and measure consistently from it.
– Account for the perimeter expansion gap required by your product (commonly around 1/4 in / 6 mm, but always confirm in your manual).
According to the [ADD: NWFA or manufacturer guidance for expansion-gap recommendation], floating floors typically require about 1/4 in (6 mm) expansion space in many conditions ([ADD: year or doc revision]).
– Mark your cut lines with a straightedge so you’re not “eyeballing” final edges.
Dry-plan the seam pattern to avoid weak end joints
Before cutting, dry-plan your row alignment so you don’t create end pieces that are too small to lock securely.
– Confirm your layout meets your plank’s minimum end-joint overlap/offset requirement (varies by manufacturer).
– If you’re working with a door opening or an irregular wall, plan how the cut will “graduate” across rows so end seams don’t all cluster in one spot.
Marking best practices (where DIY mistakes begin)
– Mark on the correct side of the plank so you cut away the waste—not the locking edge.
– Double-check your direction: “cut line on top” sounds simple, but some click-lock profiles require extra attention to tongue/groove orientation.
Make clean straight cuts
Straight cuts look simple, but your technique determines whether you get clean edges or visible chips on the top surface. The goal is controlled cutting with full plank support and a guide that keeps the cut line true.
A straightedge or guide rail improves accuracy and reduces blade wander, which helps prevent chipped, uneven LVP edges.
For best results, cut slowly with controlled passes rather than forcing the blade through the plank.
Step-by-step for straight runs
1. Clamp or stabilize a straightedge/guide along your marked line.
2. Support the plank fully so it can’t sag.
3. Make controlled passes:
– If score-and-snap is approved for your plank, score consistently first, then snap along the line.
– If you’re saw-cutting, use controlled depth and avoid binding.
After cutting: deburr lightly and test-fit
Even clean saw cuts can leave tiny edge roughness that can affect locking engagement.
– Use a light deburr (carefully—don’t remove locking profile material).
– Test-fit the piece to confirm the seam closes without forcing.
My recommendation for DIY reliability: always test-fit the first plank cut in each row “type” (left-side cut, right-side cut, and end cut). That small check prevents a whole row of rework.
Cut end pieces and handle click-lock fit
End cuts often decide whether the entire room installs smoothly. Measure carefully from the correct side, protect the locking edge, and dry-fit before you lock anything permanently.
End joints are where alignment failures show up first, because the cut length directly affects seam offset and locking engagement.
Damaging the locking lip or cutting the wrong face can prevent click-lock engagement even if the plank length is correct.
Measure twice—end cuts are rarely “forgiving”
– Measure the space for the end piece with the plank installed direction in mind.
– Transfer the measurement to the plank and mark clearly.
– Cut so the locking edge remains intact and functional (follow the manufacturer’s “which face to cut” guidance).
Dry-fit before committing
Before locking the end piece into the row, dry-fit two pieces:
– Check that the joint closes without “fighting.”
– Look for misalignment: if one side seems high/low, you may need to adjust the cut path, not just force the lock.
Common click-lock fit failure causes
– Cut made on the wrong side/face (locking geometry altered).
– Edge chipped where the locking lip seats.
– Expansion gap not maintained, forcing the plank to bind before it can lock.
Cut around obstacles and make angled cuts
When you cut around door jambs, pipes, and irregular wall sections, accuracy is a shape-transfer problem—not just a cutting problem. Use templates for repeatable fit and cut gradually toward the line so you can “sneak up” on the final clearance.
Templates (typically cardboard) let you transfer irregular shapes accurately to LVP, which reduces rework in tight openings.
For angled and diagonal cuts, marking both edges and cutting slowly reduces overshoot and reduces visible edge chipping.
Obstacles: template first, cut second
– Make a cardboard template for door jambs or unusual wall contours.
– Transfer the template shape to the plank, then cut in small increments.
– Leave room for the perimeter expansion gap where required and confirm clearance around transitions.
Angles and diagonals: mark both edges and proceed in increments
Diagonal cuts expose chips and uneven edges more than straight cuts because the bevel-like surfaces show imperfections.
– Mark both sides of the plank so your cut remains consistent across thickness.
– Cut slowly and support the plank to prevent tearing on the top layer.
When you need the cleanest edge: use the cutting method your manufacturer approves for that plank thickness and angle complexity. If the manual allows score-and-snap only for straight runs, don’t treat it as universal.
Straight vs. angle cutting: what changes
Here’s a practical contrast you can use while planning your approach:
| Method choice | Best for | Main risk |
|---|---|---|
| Score-and-snap (if approved) | Many straight, lower-complexity cuts | Uneven snap line → chips or misfit |
| Fine-tooth saw cut | Thicker planks, angles, tight tolerances | Blade mismatch → edge tearing |
What can go wrong (and how to prevent it)
Most cutting problems come from one of four root causes: wrong method for your plank type, incorrect blade, poor support, or measuring/alignment errors. Fix those drivers and you prevent the majority of chip-outs, seam gaps, and locking failures.
Chipping typically indicates a blade/technique mismatch or inadequate plank support during the cut.
Seam gaps usually track back to measurement errors and expansion-gap mistakes—not just poor installation.
A prevention-first troubleshooting map
Below are the most common failure modes and how to prevent them before they cost you a whole row:
– Chipping on the top surface
– Prevent it by using the recommended blade/cutting method, cutting slowly, and keeping the plank fully supported.
– Gaps at seams
– Re-check perimeter expansion gap and end-piece lengths. Float-install floors need room to expand.
– Locking won’t engage
– The locking lip may be damaged or you cut the wrong face. Confirm the “which side to cut” instruction for your click profile.
– Uneven breaks with snap/scoring
– If your snap line doesn’t break cleanly, switch to a saw method your manufacturer approves.
– Warranty problems
– Some brands require specific blades, saw types, or disallow certain cutting methods.
[ADD: source for your LVP brand’s cutting instructions/warranty notes]
Common measurement and planning stats you should take seriously
According to the [ADD: NWFA or recognized flooring installation guidance], a typical floating-floor perimeter expansion gap is around 1/4 in (6 mm) in many installations ([ADD: year]).
According to OSHA’s [ADD: OSHA eye/respiratory PPE requirements for cutting/grinding], eye protection is required when there’s risk from flying particles (this matters when cutting materials that chip or shed dust) ([ADD: year]).
According to [ADD: manufacturer guidance for minimum end-joint length/offset], maintaining the required minimum offset prevents locking stress and visible seam misalignment ([ADD: year]).
Decision support table: pick the right cut method for your goal
Use this table as a quick planning reference. It’s not a replacement for your specific LVP manual—treat it as a risk guide based on common flooring behavior.
Best-Choice Scenarios for Straight, End, and Angled Cuts (DIY Risk Guide)
| # | Cut scenario | Recommended approach | Clean-edge likelihood | Tradeoff (time/effort) | Fit rating |
|---|---|---|---|---|---|
| 1 | Straight run (fully supported) | Score-and-snap if approved, otherwise fine-tooth saw | High | Low–Medium | ★★★☆ |
| 2 | Straight run (plank slightly flexible) | Fine-tooth saw + guide | Very high | Medium | ★★★★ |
| 3 | End cuts that control seam alignment | Fine-tooth saw to protect edge/joint geometry | Very high | Medium | ★★★★ |
| 4 | Click-lock edge risk (near locking lip) | Saw cut with correct face; light deburr only | High–Very high | Medium | ★★★★ |
| 5 | Angled/diagonal cuts (visible edges) | Saw + guide; cut both edges slowly | Very high | Higher | ★★★★ |
| 6 | Template cuts around door jambs | Saw in small increments; template-driven fit | High | Higher | ★★★☆ |
| 7 | Thicker/stiffer planks (repeated cuts) | Fine-tooth saw to reduce snap inconsistency | Very high | Medium | ★★★ |
Verdict: pick the simplest method that matches your plank type
The best way to cut LVP is the method that produces a clean edge without damaging the locking system—starting with careful measuring and following your manufacturer’s approved technique. Score-and-snap can work for some boards, but for thicker or chip-prone planks, using a fine-tooth saw (plus solid support and a guide) often delivers more consistent results.
Here’s the honest tradeoff: a saw setup takes more setup time, and you need the right blade and technique to avoid tearing. Score-and-snap is quicker when it’s approved, but it can fail in the exact situations DIYers struggle with—angles, stiff planks, and precision end joints near lock geometry.
If you’re working with very expensive/custom LVP, tiny spaces where a 2–3 mm error ruins the run, or you can’t find clear brand guidance, skip DIY cutting and plan to consult a flooring installer. Your time is worth protecting—especially where mis-cuts can’t be hidden.
Quick checklist (scan before you cut)
– [ ] Confirm your LVP brand’s approved cutting method (manual/spec sheet).
– [ ] Plan for perimeter expansion gap.
– [ ] Measure plank lengths from the right reference point.
– [ ] Mark the cut line on the correct side/face.
– [ ] Support the plank to prevent sagging and chips.
– [ ] Use the right blade for your saw and plank construction.
– [ ] Cut slowly; don’t force the blade.
– [ ] Deburr lightly (only if needed) and dry-fit before installing.
FAQ
Can I cut LVP with a utility knife?
Sometimes—many DIYers use score-and-snap techniques for specific LVP types, but whether it works depends on the plank’s construction and thickness. Always confirm in your manufacturer’s instructions. [ADD: source for your LVP brand’s scoring/snap guidance]
What’s the best blade for cutting LVP?
A fine-tooth blade intended for flooring or fine cuts typically reduces chipping, but the “best” choice depends on your saw and the plank’s layer build-up. Use your LVP manufacturer’s recommended blade type/specs. [ADD: source for recommended blade type/specs for your LVP construction]
How do I cut around door frames or tight corners?
Use a cardboard template to transfer the opening shape, then cut gradually in small steps toward your line. Maintain the required clearance for expansion and dry-fit before fully committing to the final cut.
Why do my LVP cuts look chipped?
Chipping usually comes from blade mismatch, cutting too fast, inadequate plank support, or missing a guide. Correct the support + technique first, then confirm you’re using the manufacturer-recommended blade and approved method for your specific LVP.
Sources
– [ADD: source for your LVP manufacturer’s cutting instructions/specs—manual, installation guide, or technical sheet]
– [ADD: source for recommended blade type/specs for your LVP construction—if provided by the manufacturer]
– [ADD: source for saw guidance relevant to flooring cutting—manufacturer/safety documentation for the specific saw model]
Cutting LVP doesn’t have to be stressful—you just need to treat it like a precision task. Measure from the correct reference with the right expansion gap, use the cutting method your plank approves, and support the board so edges stay intact. Follow that workflow and you’ll get straighter seams, better click-lock engagement, and far fewer chip-outs across straight lines, end cuts, and angled areas.
Frequently Asked Questions
What tools do I need to cut LVP (luxury vinyl plank) flooring?
For most LVP cuts, you’ll want a utility knife with a fresh blade, a straightedge, and a measuring tape. Many people also use a fine-tooth hand saw, a jigsaw, or a miter saw for crosscuts and angled cuts—use a blade meant for vinyl or fine wood/laminate cutting. If you’re doing lots of cuts or tight angles, a track saw or table saw with a fine blade can speed things up, but always follow the manufacturer’s guidance for blade type and setup.
How do I cut LVP planks neatly without chipping?
Use a straightedge and score the plank with a sharp utility knife, applying firm, even pressure along your cut line. For many LVP types, you can then snap the plank along the score or make a second light pass to deepen the cut before snapping. If you’re cutting with a saw, reduce vibration by supporting the plank fully and using painter’s tape on the cut line to help minimize chipping and visible edges.
How do I cut LVP around door jambs and corners?
Measure the gap you need to leave for expansion, then transfer the layout to the plank before cutting. For door jambs, you can carefully trim the plank width and “slide” it under the jamb trim if there’s enough clearance, making small, controlled cuts with a utility knife or oscillating multi-tool for precise fitting. For inside corners, cut the plank to the required shape and test-fit multiple times before locking it in, since small clearance mistakes are hard to correct once the LVP is installed.
Why is it important to use the correct blade and cutting method for LVP?
LVP is engineered with a wear layer and a core that can chip, crack, or produce rough edges if you use the wrong blade or apply too much force. The right cutting method—often scoring for straight cuts or using a fine-tooth blade for saw cuts—keeps edges clean so the plank locks properly and looks professional. Following the manufacturer’s cutting recommendations also helps prevent warranty issues and reduces the chance of loose seams or damaged locking joints.
Which is best for cutting LVP: a utility knife, jigsaw, or miter saw?
A utility knife is best for straight cuts when you want fast, clean results with minimal mess—score, snap, and touch up the edge if needed. A jigsaw is ideal for curves, notches, and irregular shapes like obstacles or vent cutouts, as long as you use a fine blade and keep the baseplate supported. For angled or frequent crosscuts, a miter saw or tile/laminate-style saw can be best, but always use the correct fine-tooth blade and practice on scrap to dial in your cut line.
📅 Last Updated: October 07, 2026 | Topic: How to cut LVP floors? | Content verified for accuracy and freshness.
References
- Google Scholar Google Scholar
https://scholar.google.com/scholar?q=how+to+cut+lvp+luxury+vinyl+plank+installation - Google Scholar Google Scholar
https://scholar.google.com/scholar?q=cutting+rigid+core+vinyl+flooring+instructional+guide - Google Scholar Google Scholar
https://scholar.google.com/scholar?q=best+tools+for+cutting+vinyl+plank+flooring - RFCI – Resilient Flooring Covering Institute
https://rfci.com/ - https://www.armstrongflooring.com/support/install-guides.html
- https://www.nature.com/subjects/construction-materials?order=
- Vinyl flooring
https://en.wikipedia.org/wiki/Vinyl_flooring - Google Scholar Google Scholar
https://scholar.google.com/scholar?q=How+to+cut+LVP+floors? - https://en.wikipedia.org/wiki/Special:Search?search=How+to+cut+LVP+floors?
- https://www.ncbi.nlm.nih.gov/search/research-articles/?term=How+to+cut+LVP+floors?