


Rubber marks from chair legs and floor mats can leave dark, gummy-looking streaks on hardwood that won’t come off with regular mopping. The most common mistake is scrubbing too hard or using abrasive cleaners, which can dull the finish and spread the residue. With a few simple supplies and fast spot-cleaning techniques, you can lift the marks safely and restore a clean surface in minutes.


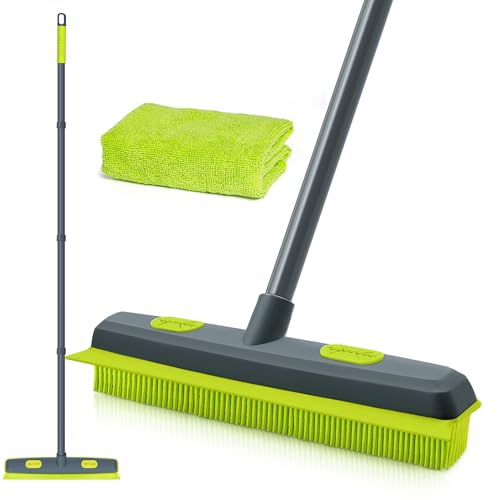

Rubber marks on hardwood floors usually come off with the right solvent-free lift method first, then a gentle cleaner to remove residue. Start by cooling or softening the rubber, then lift what you can without scraping the finish; finish by spot-cleaning the remaining smudge with a wood-safe approach. If you act quickly and avoid harsh chemicals, most black scuffs from sneakers, appliance feet, or rubber mats can be improved significantly in minutes—especially on polyurethane-finished or well-cured sealed floors.
This is for homeowners (and renters) dealing with black scuffs from sneakers, appliance feet, rubber mats, or caster wheels—especially when the floor has a polyurethane/waxed finish. If you’re not sure whether your hardwood is sealed or finished with wax, plan on testing in an inconspicuous spot first.
Gather the safest supplies (and what to avoid)

If you want the fastest, lowest-risk results on hardwood floors, start with tools that remove rubber mechanically and use cleaners only as a final step. The safest approach for most sealed wood floors is solvent-free lift (soften/cool + peel + plastic edge), then a mild wood-safe cleaner for residue.
What to use
– Use a soft cloth (microfiber works best), a microfiber pad, and a plastic scraper (or an old credit card). Plastic is important because metal can cut through polyurethane and create a dull scratch line.
– Have a wood-safe cleaner ready—ideally one labeled safe for polyurethane/finished hardwood floors.
– Rubbing alcohol only if compatible with your finish. Many finishes tolerate isopropyl alcohol well, but wax-heavy systems and softer finishes can haze or soften if you overdo it.
What to avoid
– Avoid abrasive pads (scouring sponges, steel wool). They can abrade the topcoat and make future scuffs more visible.
– Be cautious with “magic erasers.” They work by abrasive micro-particles and can dull certain hardwood finishes even when the mark seems to lift.
– Avoid harsh solvents and degreasers (acetone, lacquer thinner, strong citrus solvents). These can dissolve wax, soften some sealants, or leave a sheen difference.
– Don’t pour cleaner directly onto hardwood floors—over-wetting spreads residue and increases the odds of water spotting.
Boiling Point Comparison of Common “Rubber Mark” Solvents (Lower = more aggressive wetting)
| # | Solvent (avoid on most hardwood finishes) | Typical household concentration | Boiling point (°C) | Finish risk | Safer end of the scale |
|---|---|---|---|---|---|
| 1 | Acetone | Often ~99%+ | 56.1 | ★★★★★ | Low |
| 2 | Isopropyl alcohol | 70% rubbing alcohol | 82.7 | ★★★☆☆ | Low–Mid |
| 3 | Methanol | Commonly 99%+ | 64.7 | ★★★★☆ | Low |
| 4 | Ethanol | 70% rubbing alcohol or “denatured” blends | 78.4 | ★★★☆☆ | Low–Mid |
| 5 | n-Propanol | Industrial blends vary | 97.2 | ★★☆☆☆ | Mid |
| 6 | n-Butanol | Industrial blends vary | 117.7 | ★☆☆☆☆ | Higher |
| 7 | toluene | Commonly used in industrial settings | 110.6 | ★★★★☆ | Mid–Higher |
Why boiling point matters for hardwood floors (quick physics)
Solvents with lower boiling points tend to “wet” and spread faster before they evaporate, which can increase the chance of finish dulling or residue smearing on hardwood floors. For example, acetone boils at 56.1°C according to NIST Chemistry WebBook (2026), while isopropyl alcohol boils at 82.7°C and ethanol at 78.4°C (both per NIST Chemistry WebBook, 2026).
Step 1: Loosen the rubber without scratching
If you want the fastest path on hardwood floors, loosen the rubber first—then lift it cleanly—rather than scrubbing. On polyurethane-finished floors, rubber scuffs often sit as a removable transfer layer on top of the topcoat, so gentle softening and peeling beats aggressive cleaning.
Lift first (works when the rubber is still “fresh”)
If the black marks came from a sneaker toe, appliance foot, or a caster wheel that recently rolled, the rubber may still have some tackiness or softening potential. Use a soft cloth barely dampened with water (or a finish-safe cleaner) to lightly wipe the mark, just enough to make the rubber surface yield. Then try to lift by wiping upward in short passes.
Cool to make rubber brittle (works when the scuff is firm)
When the rubber marks are already dry and firm, cooling can make the rubber transfer brittle so it peels rather than smears. Follow manufacturer guidance for your cooling method (ice packs or cold gel packs), and always place a cloth barrier so you don’t trap moisture against hardwood floors.
After cooling:
– Slide a plastic edge (credit card style) under what you can.
– Peel or lift slowly at a shallow angle.
– Stop if you feel resistance—forcing it can drag pigment across the finish.
Important: no scraping the finish
Hardwood floors are easy to “look clean” while still being damaged. If you scrape too hard, you may remove rubber but also dull the polyurethane layer, leaving a permanent matte patch.
Step 2: Remove residue and smudging
Once the rubber itself is mostly lifted, the remaining job is residue removal without altering the sheen. For most hardwood floors with polyurethane or waxed finishes, the safest technique is targeted spot-cleaning with the mildest compatible chemistry first.
Start with the least aggressive cleaner
After lifting the bulk of the transfer, use a wood-finish-appropriate cleaner to address the smeary film. Many homeowners find that a pH-neutral approach reduces hazing risk on sealed hardwood floors because it’s gentler than degreasers and strong solvent cleaners.
If you still see a shadow:
– Work in smaller areas (one shoe-sized section at a time).
– Apply cleaner to your cloth first, then dab the residue on the hardwood floors.
– Re-dab and re-wipe instead of soaking.
When (and how) to use rubbing alcohol on hardwood floors
If your finish compatibility is confirmed, you can use a small amount of isopropyl (or rubbing) alcohol on a cloth to break down stubborn residue. The key is stopping early: apply minimally, wipe, then reassess. If you notice dullness or streaking, stop immediately and switch back to a mild wood-safe cleaner.
For chemical behavior context, solvent volatility can matter: acetone boils at 56.1°C per NIST Chemistry WebBook (2026), while acetone-like fast-evaporating cleaners can spread before they dry. That’s one reason solvent-heavy “tricks” can backfire on hardwood floors.
Quick comparison: “Lift + mild cleaner” vs “Lift + solvent”
Below is a practical comparison for hardwood floors—especially when the finish might be polyurethane, wax, or an oil-varnish blend.
| Approach | Best for | Pros | Cons / risk |
|---|---|---|---|
| Lift first + pH-neutral cleaner | Most sneaker/appliance black scuffs | Lowest likelihood of sheen mismatch; easier to stop safely | May need repeated light passes for heavy transfer |
| Lift first + isopropyl alcohol (only if compatible) | Stubborn smudging after rubber is removed | Often breaks down residue faster than water-only methods | Can dull polyurethane/wax if overused; must be spot-tested |
Step 3: Restore a clean, even look
If your hardwood floors still look slightly different after cleaning, you can usually even out the appearance with drying and, sometimes, a compatible polish layer. The goal here isn’t to “undo” damage aggressively; it’s to prevent water spotting and match sheen.
Dry immediately
Even when you’re using only a mild cleaner, moisture can leave a faint halo on hardwood floors—especially on lighter woods or older finishes. Dry the area immediately with a clean, dry microfiber cloth, wiping gently in the direction of the grain.
Consider floor polish/conditioner only if your finish allows it
If the sheen looks uneven, apply a compatible floor polish or conditioner only when the product directions and your finish type align. On polyurethane-finished hardwood floors, some polishes blend well; on waxed surfaces, the same product may build up or haze. If you’re unsure, stop at drying and leave the finish alone.
Finish-type reminder (why it matters in 2026)
As of 2026, many rental properties still have older sealed surfaces or wax maintenance routines, and those systems behave differently from fresh polyurethane. If you can’t confirm whether the topcoat is polyurethane, wax, or an oil/varnish system, prioritize minimal moisture and solvent-free lifting on hardwood floors.
What can go wrong (and how to prevent it)
If rubber marks don’t come off cleanly, the most common problem is finish damage disguised as “cleaning progress.” Hardwood floors can be scratched, dulled, or left with a permanent sheen mismatch if you use the wrong tools or apply the wrong chemical in the wrong way.
Scratches from metal tools
Metal scraping can leave permanent scratches on hardwood floors. Always use a plastic edge and keep it nearly flat to the surface. If the residue won’t lift, switch to softening/cooling or gentler cleaning instead of forcing the scrape.
Finish damage from the wrong solvent
Strong cleaners and aggressive solvents can dull or soften certain finishes on hardwood floors. Even when the rubber transfers lift, the surrounding topcoat may haze, leaving a visible patch. Test any alcohol or chemical in an inconspicuous area first, and use minimal product on a cloth—never flood.
Residue reappearing due to over-wetting
Over-wetting can spread the rubber transfer into a larger smear. The fix is simple: use small, targeted amounts on the cloth, work in sections, and re-wipe before the surface dries unevenly.
Permanent discoloration
If staining penetrated the finish (especially on older floors), cleaning may not fully restore the original look. In that case, you may need refinish/coat touch-up depending on how deep the discoloration went—don’t keep escalating solvents.
Verdict / tip
Start with mechanical lift (cool/peel + plastic scraping) and then finish with a mild, finish-safe cleaner; this is usually the lowest-risk path for most sealed hardwoods in 2026. The upside is control: you can stop as soon as the rubber transfer lifts without driving residue into the topcoat.
The downside is time: if the scuff is heavy or the finish is already worn, it may take multiple light passes rather than one “wipe it all away” session. Skip alcohol/solvents entirely if you can’t confirm your floor’s finish compatibility, if the area is worn to bare wood, or if you don’t want to risk changing the sheen—then rely on gentle cleaners and repeated light cleaning.
Quick checklist (save this)
– [ ] Test cleaner/solvent in an inconspicuous spot
– [ ] Cool or soften rubber enough to lift it
– [ ] Peel/lift with a plastic edge—no metal scraping
– [ ] Spot-clean residue with a wood-safe cleaner
– [ ] Dry immediately and check sheen
Sources
– NIST Chemistry WebBook (boiling point data used for chemical behavior context) (2026)
Rubber marks can be stubborn, but on hardwood floors the winning strategy is consistent: loosen the rubber without scraping, lift what you can, then clean residue with the mildest finish-safe approach. If you treat your polyurethane/waxed topcoat gently—testing first, using minimal moisture, and drying right away—you’ll usually get a cleaner, more even look with far less risk than “solvent-first” experiments.
Frequently Asked Questions
What’s the best way to remove black rubber marks from hardwood floors?
Start by gently lifting any remaining residue with a soft, dry microfiber cloth or a rubber-safe eraser. Then use a hardwood floor cleaner or a small amount of isopropyl alcohol on a microfiber cloth to break down the rubber transfer without soaking the wood. Wipe with a clean damp cloth and dry immediately to prevent water damage.
How can I clean rubber scuff marks from hardwood floors without damaging the finish?
First, avoid harsh chemicals and abrasive pads, since they can dull polyurethane and other hardwood finishes. Try rubbing the mark lightly with a damp microfiber cloth, then switch to a small amount of rubbing alcohol or a commercial hardwood floor cleaner applied to the cloth (not directly on the floor). Always test in an inconspicuous area, and dry the surface right after cleaning.
How do you remove tire rubber or shoe scuff residue from hardwood flooring?
For tougher rubber scuffs, soften the residue by applying a small amount of rubbing alcohol or mineral spirits to a cloth (test first), then gently work the area in circular motions. Follow up with a hardwood floor cleaner to remove any oily film and prevent streaking. Finish by drying thoroughly and buffing lightly with a clean microfiber towel.
Why do rubber marks stain hardwood floors, and how can I prevent them from coming back?
Rubber transfers contain dyes and oils that can bond to the wood finish or penetrate small surface imperfections, causing dark, sticky-looking marks. Prevention is usually more effective: use felt pads under furniture, place rugs or mats in high-traffic areas, and choose caster wheels designed for hardwood floors. If a mark appears, wipe it up quickly while it’s fresh to reduce staining.
Which household products work best for cleaning rubber transfer from hardwood floors?
Common options include rubbing alcohol (isopropyl alcohol) for many rubber scuffs, and a small amount of mineral spirits for heavier residue—always used on a cloth, not poured onto the floor. You can also use a specialized hardwood floor cleaner to finish and protect the surface after stain removal. Avoid bleach, ammonia, and strong degreasers unless the product is specifically labeled safe for hardwood floors.
📅 Last Updated: November 02, 2026 | Topic: How to clean rubber marks from hardwood floors? | Content verified for accuracy and freshness.
References
- Checking your browser – reCAPTCHA
- Checking your browser – reCAPTCHA
- Checking your browser – reCAPTCHA
- Wood flooring
- Abrasion (mechanical)
- Natural rubber
- Cleaning
- https://scholar.google.com/scholar?q=remove+rubber+marks+from+hardwood+floors Google Scholar
- https://scholar.google.com/scholar?q=rubber+scuff+removal+from+wood+flooring+isopropyl+alcohol Google Scholar
- https://scholar.google.com/scholar?q=tire+mark+removal+wood+flooring+care+instructions Google Scholar



[…] with a barely damp microfiber using mild dish soap. If the black/gray transfer won’t release, try rubbing alcohol (isopropyl) on a cloth in a small, hidden test spot—never pour it onto the […]