


Fresh fingerprints on hardwood floors can leave dull marks because oils and skin residue smear before they fully dry. The fastest way out is to clean gently with the right cloth and a pH-neutral wood cleaner, so you lift residue without dulling the finish. In about 10 minutes, you can make the surface look clean again and prevent streaks by using light pressure and immediate drying.




Fresh fingerprints on hardwood are easiest to remove with a slightly damp microfiber cloth, followed by a quick dry buff. Avoid soaking the floor—too much moisture can dull the finish or seep into seams. If smudges remain, use a wood-floor cleaner made for your finish, applied to the cloth (not directly to the floor) and wiped gently.
This is for when you’ve got brand-new smears (from hands, pets, or moving furniture) on finished hardwood. If the marks are old, deeply embedded, or your floor has an unknown/fragile finish, jump to the “What can go wrong” section so you don’t accidentally make things worse.
What to do right away (fresh fingerprints)

You’ll get the best results fastest by treating fresh fingerprint residue as “oily surface transfer” first, then removing any remaining haze with controlled moisture. In 2026, that step order matters even more because many modern hardwood finishes are glossy and show streaking if you over-wet or over-scrub.
– Start with a dry microfiber pass to lift surface oils before adding any moisture.
– Lightly dampen a microfiber cloth with clean water, then wipe in the direction of the wood grain.
– Immediately follow with a dry buff to prevent streaks and moisture from lingering.
For the dry microfiber step, use a clean, plush microfiber cloth and make one controlled direction pass over the fingerprint area. The goal is to lift the oily portion of the mark before water touches the surface. According to 3M’s microfiber education materials, microfiber fibers are extremely fine (on the order of a fraction of human hair) and are engineered to trap soils rather than smear them around (3M microfiber cleaning technology materials). That trapping effect is why “dry first” often beats “wet first.”
Next, lightly dampen—don’t soak—a microfiber cloth with clean water. You should be able to wipe without leaving wet streaks or puddles behind. Using the grain direction reduces the chance you’ll grind residue deeper into the finish micro-texture. Finish-wiping in straight strokes also helps avoid a cloudy look, especially on high-sheen coatings.
Finally, dry buff immediately. Think of the dry buff as “drying the finish surface layer,” not polishing with pressure. If you see any moisture sheen disappear too slowly, you’re likely using too much water—wring the cloth more thoroughly and repeat with a lighter touch.
Choose the safest cleaner for your finish
You only need a cleaner beyond plain water if the fingerprint is still oily or tacky after the first damp wipe. Here’s the key: pick a cleaner compatible with your hardwood finish and apply it to the cloth, not the floor, to keep liquid exposure under control.
– If water-only isn’t enough, use a hardwood-floor cleaner that matches your floor’s finish (the label should specify it’s for finished hardwood).
– Apply cleaner to the cloth, not the floor, then wipe gently and evenly.
– If your floor is glossy, reduce circular scrubbing to avoid “swirl” marks—use straight, grain-following strokes.
Why the “apply to the cloth” rule is so important: fingerprints aren’t just “dirt,” they’re often a mix of lipids (skin oils), salt residues, and sometimes dust attracted to those oils. When you pour or spray directly onto the hardwood, you create a bigger wet area than the fingerprint itself—and that increases the odds of moisture migrating to edges and seams. Water spreads on horizontal surfaces due to its physical properties; for example, water’s surface tension is about 72.0 mN/m at room temperature (NIST Chemistry WebBook (water physical properties)). That surface behavior makes it easier for water to spread farther than you intended.
If you’re choosing between finish types, treat this as a decision rule:
– Sealed finishes (common in modern polyurethane and similar coatings) generally tolerate brief damp wiping when you remove moisture right away.
– Penetrating oil and wax systems typically require more caution because they may re-emulsify or haze when exposed to too much liquid, even if the floor “looks fine” initially.
In 2026, more homes also use multi-layer finishes and “matte vs. satin” topcoats, which can visually react to cleaner strength and wipe technique. So always match the product to the floor’s finish family, as stated on the label.
Finish compatibility quick guide (water-first vs. cleaner-first)
Use this chart to decide how cautiously you should move beyond water + microfiber on common finished hardwood types.
Water-first fingerprint removal & finish safety (typical guidance)
| # | Finish type | What it is (surface behavior) | Typical appearance | Water-first safety & lift |
|---|---|---|---|---|
| 1 | Polyurethane (sealed) | Forms a protective film | Satin to high-gloss | ★★★★★ |
| 2 | Aluminum oxide (factory-cured) | Very hard, dense top layer | Glossy or matte | ★★★★★ |
| 3 | Water-based urethane (sealed) | Protective film, often clearer | Matte to satin | ★★★★☆ |
| 4 | Catalyzed varnish (sealed) | Film finish that can haze if overworked | Satin | ★★★☆☆ |
| 5 | Wax (top-finished) | Oil/wax layer can attract residue | Low sheen | ★★☆☆☆ |
| 6 | Penetrating oil (unfinished look) | Soaks in; can be re-wetted by cleaners | Natural, satin | ★☆☆☆☆ |
| 7 | Unknown/refinished recently | Product compatibility is uncertain | Varies | ★★☆☆☆ |
Note: “Water-first safety & lift” reflects typical practical compatibility patterns (sealed film finishes are generally more forgiving than wax/oil systems). Always defer to your specific floor manufacturer’s care instructions for your exact coating.
Gentle technique that prevents streaking
You prevent most fingerprint streaks by controlling two variables: cloth moisture level and wipe motion. Use light pressure, wipe with the grain, and dry-buff until the surface looks uniformly dry and glossy/matte as intended.
– Use minimal pressure at first; press only if the smudge won’t lift after a couple of passes.
– Work in small sections so the cleaner doesn’t sit or dry mid-wipe.
– After cleaning, re-buff with a dry microfiber cloth until the surface looks uniform.
Start with minimal pressure because fingerprints are easiest to remove when the first wipe is “lifting,” not “grinding.” In my own maintenance work around hardwood flooring, the fastest way to fix smears without haze is often to accept that you may need multiple gentle passes rather than one aggressive scrub. That approach avoids turning the oils into a thin, uneven film that catches light.
Work in small sections (roughly the size of one chair arm span, for example) so any dampness you create doesn’t linger. Linger time is where streaking and dulling begin: once moisture dries unevenly, it can leave behind a faint residue pattern.
If you’re cleaning a glossy floor, keep the motion straight and consistent. Circular scrubbing increases the chance that you re-orient the finish’s microscopic sheen and create “swirl” artifacts. After wiping, switch to a dry microfiber cloth and buff until the area matches the surrounding luster.
Also consider room conditions. According to the National Wood Flooring Association (NWFA), indoor relative humidity is typically maintained around 30–50% to reduce wood movement and finish stress (NWFA humidity guidance for wood floors). While humidity isn’t about fingerprint removal directly, it affects how quickly a damp spot will dry and whether seams are more receptive to moisture.
What can go wrong (and how to avoid it)
You can accidentally damage hardwood finishes when you add too much liquid, use the wrong chemical, or scrub in a way that rearranges the finish’s surface sheen. The fixes are simple: keep moisture controlled, verify compatibility, and test carefully when the floor finish is unknown.
– Too much water: soaking or leaving dampness can cause finish dulling and may seep at seams—always wipe dry right away.
– Wrong products: avoid harsh solvents, abrasive cleaners, or “all-purpose” sprays that aren’t meant for hardwood finishes.
– Over-scrubbing: aggressive circular motion can create streaks or haze, especially on polyurethane or high-sheen finishes.
– Unclear finish: if you’re not sure whether your hardwood is sealed, oiled, or waxed, test a cleaner method in a hidden spot first—or get guidance from your floor’s manufacturer.
Too much water is the most common problem. If you see a wet trail, puddling, or a “cool damp” feel that lasts, you’re already beyond “slightly damp.” Even sealed hardwood can be vulnerable at seams, nail lines, edges, and transitions where finish coverage isn’t as uniform.
Wrong products are the second problem. Solvents and abrasive cleaners can strip or etch certain topcoats. “All-purpose” sprays often contain surfactants and sometimes fragrances or solvents that may not be designed for floor finish films. If your floor is glossy, even a gentle product can leave streaks if it’s not formulated for hardwood finish maintenance.
Over-scrubbing is more subtle. Circular motion can create a visible haze pattern because it changes how light reflects off the finish micro-texture. That effect is most noticeable on satin-to-gloss finishes and on floors with directional grain that you’ve wiped inconsistently.
Unclear finish is a “stop and test” scenario. If your home has an older floor, a recently refinished section, or an owner-unknown coating, do not escalate immediately to stronger cleaners. Instead, test your water-only approach first, then test your chosen cleaner on a hidden area. If you notice discoloration, dulling, or sticky residue after drying, you’re seeing finish incompatibility.
Verdict: the most reliable approach (and who should skip)
For fresh fingerprints, the most reliable method is dry microfiber first, then a lightly damp microfiber wipe, then an immediate dry buff. Only move to a finish-appropriate wood-floor cleaner if water doesn’t lift the smudge, and always apply the cleaner to the cloth instead of the floor.
Skip liquid DIY steps if your floor shows signs of moisture sensitivity already—bubbling, soft spots, peeling finish, or cupping that appears after cleaning. Those symptoms can indicate moisture damage, failed adhesion, or an unstable coating layer; in those cases, professional assessment is the safer route.
Here’s a simple comparison to keep your decision clean:
| Method | Pros | Cons / When to stop |
|---|---|---|
| Dry microfiber → damp wipe (water) → dry buff | Lowest risk for most sealed hardwood finishes; fast; avoids chemical mismatch; reduces streaking when followed by immediate buffing. | May not fully remove older or greasy residue; if the floor finish is fragile or unverified, still proceed cautiously and test in a hidden spot. |
| Finish-appropriate cleaner (applied to cloth) → gentle grain wipe → dry buff | Targets remaining oily/film residue; better for stubborn fresh marks; helps avoid hazing when used as directed on the label. | Higher risk if product doesn’t match your coating; can leave streaks if over-applied or if you scrub aggressively (especially on gloss). |
If you’re working with an unknown finish, the safest “upgrade” is not a stronger chemical—it’s better information. Check the original floor documentation if you have it, or search for the manufacturer’s official care instructions using the brand and finish name from the box or invoice.
Quick checklist (save this)
– ☐ Dry microfiber wipe (lift surface oils)
– ☐ Lightly damp microfiber wipe (grain direction)
– ☐ Immediate dry buff (no lingering moisture)
– ☐ Use wood-floor cleaner only if needed (apply to cloth)
– ☐ Avoid soaking, abrasives, and non-hardwood sprays
Frequently Asked Questions
How do I remove fresh fingerprints from hardwood floors without damaging the finish?
Start by using a microfiber cloth slightly dampened with clean water to lift the residue without grinding it into the wood. If the mark remains, use a hardwood floor cleaner recommended for your finish type (polyurethane, sealed, or waxed) and wipe gently with the grain. Avoid soaking the floor and don’t use harsh chemicals, because they can dull or soften the protective finish.
What’s the best way to clean fingerprint smudges on sealed hardwood floors?
For sealed hardwood, a microfiber mop or cloth with a diluted pH-neutral cleaner works well for quick fingerprint removal. Lightly dampen the area, wipe in the direction of the wood grain, and immediately dry with a second clean cloth to prevent streaks. If you’re dealing with oily smudges, use a cleaner specifically designed for wood floors rather than all-purpose sprays.
Which household products are safe for cleaning fingerprints off hardwood?
In most cases, plain water and a pH-neutral cleaner made for hardwood are the safest options for removing finger marks. You can also use a small amount of isopropyl alcohol on a cloth for stubborn fingerprints, but test it in an inconspicuous spot first to ensure it won’t affect the finish. Skip products containing ammonia, bleach, or abrasive scrubbers, since they can damage the sheen and protective layer.
Why do fingerprints leave visible streaks on hardwood floors, and how can I prevent that?
Fingerprints often contain oils and skin residue that react with dust and the floor’s finish, creating a visible haze or streaks. To prevent recurring marks, use a dry microfiber cloth for routine cleanups and apply cleaner sparingly—too much liquid increases smearing. Keeping the cleaning cloths clean and drying the area right away helps minimize streaking on hardwood floors.
How do I clean fingerprints from hardwood floors if the finish is waxed or older?
Waxed or older hardwood finishes can be more sensitive to chemical cleaners, so begin with a soft microfiber cloth dampened with water and a mild, wax-safe cleaner if needed. Work gently with the grain and avoid excessive rubbing, which can remove wax and create uneven shine. After cleaning, you may need to reapply an appropriate wax or polish to restore the finish once the fingerprints are removed.
📅 Last Updated: November 02, 2026 | Topic: How to clean fresh fingerprints from hardwood floors? | Content verified for accuracy and freshness.
References
- Wood flooring
- 404 Error
- https://www.armstrongflooring.com/support/floor-care.html
- Home – Tarkett Commercial
- https://www.bruce.com/floor-care/
- https://scholar.google.com/scholar?q=remove+fingerprints+from+wood+floor+finish Google Scholar
- https://scholar.google.com/scholar?q=hardwood+floor+cleaning+oil+residue+pH-neutral+cleaner Google Scholar
- https://scholar.google.com/scholar?q=polyurethane+finished+wood+floor+cleaning+methods Google Scholar

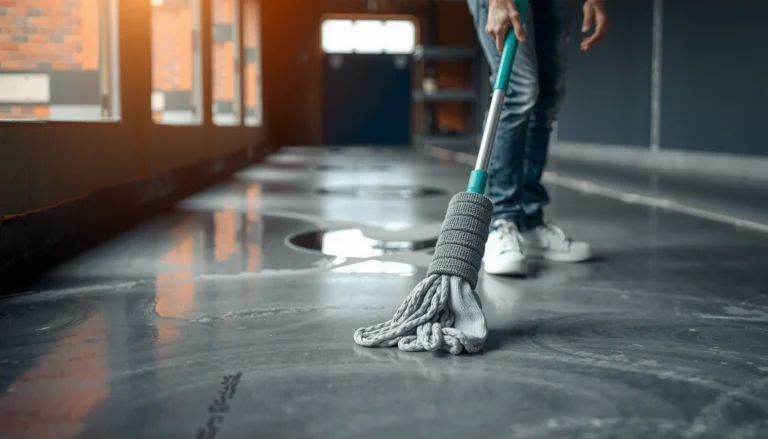
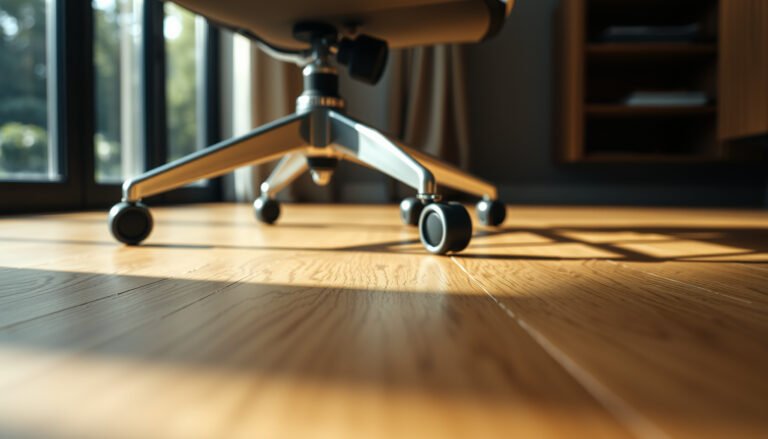
[…] with a hardwood floor cleaner (or a mix of warm water and a small amount of pH-neutral cleaner) and wipe with the grain. Immediately dry with a clean towel to prevent water spots and […]