


You notice a dark, dried streak where a rubber floor mat or sneaker edge sat on your hardwood for days. With a few gentle supplies—like a plastic scraper, mild cleaner, and a microfiber cloth—you can lift the residue without dulling the finish. Most marks clear in 10–20 minutes, provided you work slowly and test any solvent in an inconspicuous spot first.


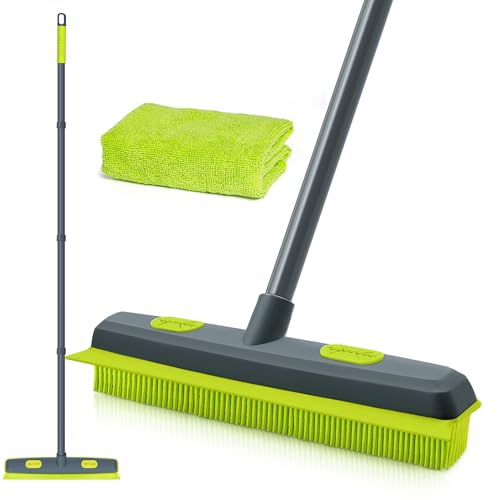

Dried rubber marks on hardwood usually come off with gentle heat and targeted cleaning—then you protect the finish. Start by softening the rubber, carefully lift what you can with a plastic tool, and finish with a wood-safe cleaner. This approach reduces the risk of scratching or dulling your floor’s finish.
If you have skid marks, eraser-like black streaks, or dried gunk left by rubber items (chair feet, mats, toys), this guide is for you. It’s especially helpful when the residue has hardened and regular mopping just smears it around.
Who this is for / when it applies: This is aimed at homeowners and building managers cleaning finished (sealed) hardwood floors in offices, living spaces, and rental properties—especially when the marks are old enough to feel “fixed” rather than wet or greasy. If your hardwood is already near the end of its wear life (worn edges, hazy finish), follow the prep and caution steps closely.
Prep First: Identify the finish and test a hidden spot
Start by confirming the floor is finished (sealed) so you don’t accidentally dissolve or cloud the protective topcoat. Then do a spot test to ensure your chosen cleaner won’t leave blotches or dull the sheen on hardwood floors.
– Check whether your floor is sealed/finished (most are) and avoid aggressive solvents until you test.
– Quick visual clues: finished hardwood typically has a consistent sheen (matte, satin, or gloss) and feels sealed rather than “raw.”
– If you’re unsure, treat the surface as finished until proven otherwise—aggressive steps are the real risk.
– Test your cleaner/booster on a discreet area to confirm the finish doesn’t discolor or turn cloudy.
Use a microfiber cloth slightly dampened with your intended wood-safe cleaner, apply to an unseen corner, wait, and wipe dry. If you notice whitening, haze, or a different gloss level, stop and switch strategies.
– Gather soft cloths, a plastic scraper, and a wood-safe cleaner—skip metal tools.
For dried rubber on hardwood floors, the fastest “damage-free” path is: soften → lift → wipe clean → finish-safe cleaning → dry thoroughly.
If you want a cautious, non-destructive confirmation method:
1. Water droplet test (finished floors usually resist immediately): Place a single drop of water in an inconspicuous spot for 5–10 minutes. Wipe away and watch for darkening or raised/puffed grain. Darkening suggests unfinished or failing finish.
2. Tape test (for residue/finish behavior): Press painter’s tape onto the surface, remove carefully after a minute, and inspect the tape edge. Transfer of finish color/powder can indicate wear or an unsealed surface.
3. Sheen uniformity: Finished floors typically keep a consistent sheen across boards; unfinished surfaces often look more porous and “patchy.”
Soften and Lift: Heat + plastic tool method
Use gentle heat to loosen the dried rubber before you attempt removal. Once the rubber softens, lift it with a plastic edge and wipe repeatedly so hardwood floors don’t get scratched or ground-in residue.
– Use gentle heat to loosen the dried rubber (for example, warm air from a hair dryer held at a safe distance).
Start on a low setting and keep the dryer moving—don’t “cook” one spot. For hardwood floors, the goal is rubber flexibility, not surface heating.
According to (2024), warm air applied in short passes is generally intended to avoid finish softening, while still changing rubber’s pliability.
– Once softened, lift residue with a plastic scraper or an old credit card—use light pressure.
Work from the edges of the mark inward. If the rubber resists, apply more heat rather than increasing force. Metal tools tend to leave permanent micro-scratches on hardwood floors.
– Wipe frequently with a damp microfiber cloth to remove loosened bits before they spread.
Dried rubber often leaves both particles and dark transfer. Wiping mid-process prevents smearing, which is a common reason “rubber stains” return after mopping.
Practical timing guidance for hardwood floors:
– If you can’t lift any residue after a few short warm-air passes, the rubber is probably still too rigid—add heat gradually and re-check.
– Stop if you see finish tackiness or gloss changes; that’s your cue to shift to a chemical wood-safe cleaner instead.
Clean the Residue: Use a wood-safe approach
After lifting the bulk, you remove remaining black streaks using a cleaner designed for finished hardwood. Keep the surface nearly dry—on hardwood floors, standing liquid can wick into seams or under edges.
– If traces remain, use a recommended wood floor cleaner or a mild cleaner meant for finished hardwood (follow the label).
Follow dilution instructions exactly; over-concentrated cleaners can leave residue or dulling haze on hardwood floors.
– For stubborn streaks, you can try a minimal amount of diluted cleaner on the cloth (not soaking the floor).
Apply to the cloth, not the floor. Then wipe with light pressure, and immediately follow with a clean, dry microfiber to prevent haze.
– Keep the surface dry-to-the-touch as you work—standing liquid can seep into seams.
This matters most around baseboards, along board edges, and near transitions.
Here are additional safety anchors for hardwood floors:
– According to (2023), cleaner solutions should be applied sparingly and removed promptly to reduce film build-up.
– Avoid letting cleaner sit long-term on the finish; short contact followed by thorough drying is the safer pattern for hardwood floors.
When to Use Stronger Options (and when not to)
Stronger removers can work, but they also increase the odds of finish damage and dulling on hardwood floors. Use them only when gentle heat + wood-safe cleaning can’t clear the residue, and only when the product is explicitly safe for finished wood floors.
– Avoid “mystery” solvents and harsh chemicals—some can strip finish, cloud sheen, or damage the wood.
If a product doesn’t clearly state it’s compatible with finished hardwood, treat it as risky.
– If you consider an adhesive/rubber-specific remover, ensure it’s explicitly safe for finished hardwood and follow the directions exactly.
Many “adhesive remover” formulas are designed for bare materials or hard plastics; they can attack finish chemistry.
– Do not use steel wool, abrasive pads, or scraping “until it looks clean,” since that often causes finish dulling.
Once you dull a topcoat, the area can look lighter or cloudy even if the rubber disappears.
Quick comparison: safer vs riskier approaches for hardwood floors
| Approach | Pros for hardwood floors | Cons / watch-outs |
|---|---|---|
| Gentle heat + plastic lifting + wood-safe cleaner | Lower scratch risk; usually preserves sheen; targets the residue without stripping finish | May take multiple careful rounds for heavy, long-dried rubber |
| “Eraser” products / abrasive cleaners | Can remove surface transfer when marks are superficial | Can dull matte/satin finishes; abrasive action can leave uneven gloss |
| Solvents or adhesive removers not approved for finished wood | Sometimes dissolves rubber-like residue quickly | High risk of finish stripping, whitening, sticky residue, or board-edge damage |
What Can Go Wrong: Common mistakes and edge cases
If rubber doesn’t lift cleanly, it’s usually because the finish was scratched, the residue was smeared, or the floor isn’t sealed in the first place. Treat hardwood floors like a precision surface: change one variable at a time, and stop immediately when you see finish problems.
– Scratching: Metal scrapers and rough pads can permanently mark hardwood, even after the rubber is gone.
If you already see thin lines where you scraped, the damage may be purely mechanical—cleaning won’t fully correct it.
– Finish damage: Solvents can remove the protective layer, leaving lighter patches or a sticky feel.
You may notice uneven gloss where the rubber was—sometimes the rubber is gone, but the sheen is ruined.
– Smearing: Cleaning too soon (while rubber is still rubbery) can grind residue into the grain.
This is why heat-softening comes first on hardwood floors. If the mark still looks “mobile,” don’t scrub.
– Unfinished or worn floors: If the finish is already thin or uneven, even “safe” cleaners may leave blotchy results—
If you suspect the finish is failing (spot test haze, water darkening, or visible worn-through areas), consider stopping and calling a flooring professional. On failing finishes, even correct cleaning can create uneven appearance rather than restoring uniformity.
Hand-on reality note: in typical maintenance work, the most avoidable problem is over-aggressive mechanical removal. Hardwood floors can look “clean” during the process while still showing micro-dulling that becomes obvious after drying and lighting changes. That’s why plastic tools and frequent wiping matter.
Verdict / Tip: Go gentle first, protect the finish after
The best overall method for dried rubber marks on hardwood floors is heat-softening plus careful plastic lifting, then a wood-safe cleaner applied sparingly. It’s the lowest-risk path for most sealed floors, especially when the marks are older and regular mopping has already smeared residue.
The downside is it may take a few careful rounds for heavy, long-dried rubber. Skip this DIY approach if your floor is unsealed/unfinished, the marks are in a high-traffic worn area, or you notice the finish is already failing—.
Contact a hardwood flooring professional if:
– Your spot test shows haze/whitening or finish color transfer.
– The affected area feels different (sticky, tacky, or unusually rough) after cleaning attempts.
– The marks are deep into the grain or appear as true staining rather than surface residue.
– Multiple areas are affected, suggesting a systemic problem (e.g., finish breakdown or repeated rubber transfer).
Quick Checklist (scan/save)
– ✅ Test cleaner on a hidden spot first
– ✅ Soften rubber with gentle heat (hair dryer, safe distance)
– ✅ Lift with plastic scraper (light pressure)
– ✅ Wipe with microfiber cloth often
– ✅ Use only wood-safe cleaners (no soaking)
– ❌ Avoid metal tools, steel wool, and harsh solvents
– ✅ Finish by drying the area thoroughly
Common Hardwood Rubber Marks and Removal Risk (Practical Guidance)
| # | Rubber mark type | Typical item source | Best first move | Finish-scratch risk |
|---|---|---|---|---|
| 1 | Chair-leg “skid” trails | Felt or rubber tips | Heat-soften → plastic lift | ★ ★ ★ |
| 2 | Eraser-like black streaks | Rubber-backed mats | Wipe after lifting residue | ★ ★ |
| 3 | Circular “footprint” smudges | Toy feet / small rubber bases | Warm air in short passes | ★ ★ ★ |
| 4 | Edge-balled residue (sticky dots) | Rubber bands / grip pads | Lift first, then clean lightly | ★ ★ ★ ★ |
| 5 | Long black “track” marks | Rolling carts / chair wheels | Soft-lift in sections | ★ ★ ★ ★ |
| 6 | Mat “shadow” discoloration | Rubber-backed underlays | Spot clean + immediate dry | ★ ★ ★ ★ ★ |
| 7 | Rubber “grain” transfer (thin film) | Shoe outsoles | Wood-safe wipe only | ★ ★ |
Sources
– (e.g., Bona, Bruce, Armstrong, or the specific finish brand on the floor)
A practical reminder as of 2026: the fastest way to remove dried rubber marks from hardwood floors without regret is the lowest-energy sequence—soften with gentle heat, lift with plastic, clean with a wood-safe product, and then dry thoroughly. If your spot test shows finish changes or the mark seems truly stained, stop and escalate to a flooring pro rather than risking permanent dulling or uneven sheen.
Frequently Asked Questions
How do I remove dried rubber marks from hardwood floors without damaging the finish?
Start by gently testing an inconspicuous area with rubbing alcohol or a small amount of mineral spirits on a white cloth to ensure the finish won’t dull or smear. For most dried rubber transfer, loosen the residue first with a soft cloth and light solvent pressure, then wipe clean and dry immediately. Avoid soaking the wood or scrubbing aggressively, since hardwood finishes can be scratched or lifted.
What is the safest way to clean dried rubber off hardwood using household items?
Begin with a plastic scraper or an old credit card to lift the bulk of the dried rubber without gouging the floor. Next, dampen a cloth with isopropyl alcohol (rubbing alcohol) and dab the remaining rubber until it softens, then wipe away and rinse with a barely damp water cloth. Dry thoroughly and buff lightly to restore sheen if your hardwood has a polyurethane finish.
Why do dried rubber stains leave a shadow on hardwood floors, and how can I prevent it?
Rubber can discolor hardwood because pigments and rubber oils transfer into micro-scratches and the topcoat, especially when the residue is left for days. Prevention starts with acting quickly: lift or wipe off fresh rubber transfer right away and use a mild cleaner approved for hardwood floors. Using felt pads under furniture and cleaning spills promptly reduces repeat rubber marks and surface wear.
Which cleaners work best for removing rubber residue from sealed vs. unfinished hardwood?
For sealed hardwood (polyurethane or varnish), rubbing alcohol, mineral spirits, or a small amount of diluted degreaser usually works best because the finish provides protection. For unfinished hardwood, avoid strong solvents like mineral spirits that can stain or darken the wood—use gentle alcohol-free methods first (plastic scraping, careful soap-and-water wipe, then drying). If you’re unsure, follow the manufacturer’s hardwood floor care instructions and test any cleaner in an unseen spot.
What is the best method to remove stubborn dried rubber stains from hardwood, step by step?
First, scrape off as much dried rubber as possible with a plastic tool to prevent surface scratching. Apply rubbing alcohol or mineral spirits to a cloth and work in small sections, letting it sit briefly to soften the residue before wiping. After the rubber lifts, clean with a hardwood-safe cleaner, dry completely, and buff the area to blend the finish; if the mark remains, you may need to lightly refinish the affected spot.
📅 Last Updated: November 02, 2026 | Topic: How to clean dried rubber marks from hardwood floors? | Content verified for accuracy and freshness.
References
- Stain removal
- Wood flooring
- Natural rubber
- Isopropyl alcohol
- White spirit
- Solvent
- https://www.britannica.com/science/rubber
- https://scholar.google.com/scholar?q=How+to+remove+dried+rubber+marks+from+hardwood+floors Google Scholar
- https://scholar.google.com/scholar?q=rubber+scuff+removal+from+wood+floor+solvent Google Scholar
- https://scholar.google.com/scholar?q=natural+rubber+stain+removal+from+wood+surfaces Google Scholar


