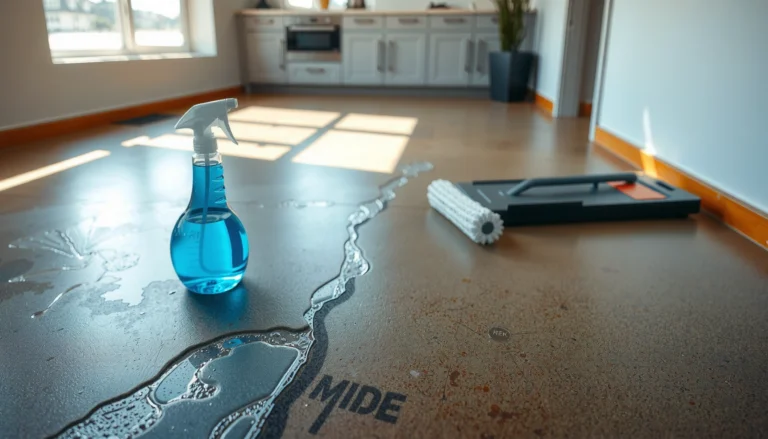
After you remove dried road salt safely, your hardwood will look clean again and stay protected against dulling and water damage. This article walks you through the exact steps to dissolve and lift salt residue without harming the finish, typically in under an hour. You will need a gentle cleaner, a microfiber mop or soft cloth, and a few basic tools so you can work methodically and finish with a dry, residue-free surface.




Remove dried road salt from hardwood by dry-lifting the crystals first (scrape + vacuum), then cleaning with a barely-damp pH-neutral, wood-safe solution and drying immediately. Dried salt isn’t just “stuck dirt”—when it rehydrates, it can form a salty brine that pulls moisture under the finish, leaving haze, grit, and sometimes swelling.
If you’ve tracked salt in during winter, moved through a wet doorway, or found white crust along edges, this guide is for you. These steps work best for finished hardwood (sealed surfaces like polyurethane, urethane, aluminum-oxide, or varnish). If your floor is unfinished, severely damaged, or the salt has been sitting for a long time in deep seams, you’ll need to be more cautious—or stop and call a professional.
Get supplies before you start

You’ll get the safest results by assembling tools that remove crystals dry and clean with minimal moisture. This prevents you from grinding salt into the finish or overwetting the wood, which is the most common cause of dulling and swelling during “winter cleanup.”
– Plastic scraper or old plastic card (metal scrapers can scratch the finish)
– Microfiber cloths (multiple, so you’re not smearing brine around) and a bucket
– pH-neutral hardwood floor cleaner or a very mild cleaner approved for wood floors
– Vacuum with a soft brush attachment
Typical pH of winter cleaners vs. sealed hardwood finish safety (25°C)
| # | Agent | Typical pH | Road-salt crust response | Finish safety rating |
|---|---|---|---|---|
| 1 | pH-neutral hardwood floor cleaner | 6–8 | Cleans without attacking finish | ★★★★★ |
| 2 | Mild dish soap (well-diluted) | 7.5–9 | Helps lift greasy dirt; uses minimal water | ★★★★☆ |
| 3 | Distilled water (barely-damp) | ~7.0 | Dissolves salt; risk if overused | ★★★☆☆ |
| 4 | Baking soda solution | ~8.1–8.5 | May neutralize odors, but can leave residue | ★★☆☆☆ |
| 5 | White vinegar (5% acetic acid) | ~2.2–2.9 | Acid dissolves minerals; can dull finish | ★☆☆☆☆ |
| 6 | Lemon juice | ~2.0–2.6 | Similar acidity to vinegar; higher risk to finish | ★☆☆☆☆ |
| 7 | Household ammonia (diluted) | ~11–12 | Alkaline cleaner; can damage sheen/sealants | ★☆☆☆☆ |
The key takeaway for road salt and hardwood is chemistry + water control. Salt residue (commonly sodium chloride, but sometimes calcium or magnesium chlorides) dissolves readily when wetted—so your method must remove crystals first, then clean with minimal dampness. For example, according to NIST Chemistry WebBook, sodium chloride solubility is about 359 g/L at 25°C, which explains why “just a little” moisture can turn crust into mobile brine fast ([accessed 2026]). If you leave that brine behind, it can reappear as grit and white haze the next time the doorway gets damp.
Remove dried salt without damaging the finish
You should remove dried salt with a dry-lift approach first: gently scrape loose crust, then vacuum the grit. This prevents abrasive crystals from acting like sandpaper when you wipe, and it reduces the amount of salt you would otherwise dissolve and spread.
– Dry-lift first: gently scrape loose crust, then vacuum the grit so you’re not rubbing crystals into the finish.
– Work slowly along edges and seams where salt collects; those areas often look “clean” until you wipe.
– If crystals won’t budge, don’t soak—repeat dry scraping/vacuuming and only then move to wiping.
Start with a plastic scraper or an old plastic card at a low angle. Road salt crystals often form a crust that’s thicker at corners because the water in winter tracks evaporate, leaving behind concentrated mineral residue. If you press too hard or use a metal blade, you can scuff the topcoat on finished hardwood, turning a temporary salt stain into permanent dullness. After scraping, vacuum thoroughly with a soft brush attachment—hard bristle can also increase micro-scratches that show up when light hits at a diagonal.
For edges and seams, use smaller strokes than you think you need. Salt tends to collect along baseboards, door thresholds, and expansion gaps because those are the pathways where brine arrives and then dries. When you think “that looks clean,” stop and look again after a vacuum pass—residue that’s invisible dry often turns visible once your cloth is barely damp. If crystals are stubborn, repeat the dry phase rather than escalating to water. Over-wetting dried salt can drive salty moisture under the finish and into seams, and that’s the setup for warping, cupping, or the dull white haze people associate with “salt damage.”
Wipe with a mild, wood-safe cleaning solution
You should wipe with a barely-damp microfiber method using a pH-neutral hardwood cleaner—not household acids or degreasers. Road salt cleanup is about dissolving and lifting remaining residue without flooding the floorboards.
– Use a cleaner meant for hardwood, not household acids or degreasers (they can haze or strip some finishes).
– Lightly dampen a microfiber cloth (you want damp, not wet), wipe small sections, and change cloths when they pick up salt.
– If you see residue that lifts only after repeated passes, let the cloth do the work rather than increasing water or scrubbing pressure.
Before you wipe, ensure you’ve removed the crystals you can dry-lift. Then, dilute or use your pH-neutral hardwood floor cleaner exactly as directed on the label. If you don’t have a specific cleaner yet, choose one explicitly marketed for sealed hardwood and described as pH-neutral or “safe for wood finishes,” and avoid DIY acids. The issue isn’t that acids “can’t clean”—it’s that many finishes are sensitive to extreme pH, and you may end up trading salt grit for a permanent dull spot.
Wipe small sections—think “one doorway lane at a time,” not entire rooms. A barely-damp microfiber cloth should pick up residue; it should not leave puddles. Swap to a clean cloth when it starts carrying gray grit or briny residue. In winter conditions (especially during the 2024–2026 seasons when tracked salt is common), it’s easy to smear dissolved salt across a wider area, which then dries as a pale film.
If stubborn residue remains, patience beats pressure. Pressing harder with a wet cloth grinds salt into the finish micro-texture. Repeated gentle passes with a properly damp cloth are usually more effective than adding more water. Also, keep your bucket water clean—dirty mop water turns a localized salt problem into a broader one.
Rinse and dry to protect hardwood
You should dry immediately, and you may want a second minimal-damp wipe only to remove cleaner residue. The safest goal with hardwood floors is: remove salt, remove excess cleaner, and prevent moisture from lingering at seams.
– After the salt is removed, wipe again with a fresh cloth that’s only lightly damp (or per your cleaner’s directions) to reduce cleaner buildup.
– Dry immediately with a dry microfiber cloth, especially at doorways and near baseboards where moisture lingers.
– Airflow helps: open nearby windows or run a fan (not a high-heat setting) to speed drying.
Whether you do a “rinse” wipe depends on your cleaner’s instructions. Some pH-neutral hardwood cleaners are designed to leave little to no residue and may not require a follow-up rinse; others recommend a lightly damp wipe afterward. In either case, use a fresh microfiber cloth and keep it lightly damp. The purpose is to prevent cleaner buildup from interacting with future moisture and creating haze.
Drying is not optional. Even with a sealed topcoat, moisture can sit along edges and in the micro-gaps where brine initially pooled. This is why door thresholds and baseboard lines often look worse after cleaning: liquid concentrates there first, then evaporates more slowly. Use a dry microfiber cloth to “chase” moisture out of those areas. Then improve airflow with a fan or open window. Avoid high heat because it can exaggerate finish shrinkage or surface drying patterns that look like streaking.
Also remember that salt damage sometimes reveals itself after the cleanup. If you still see whitening or grit after everything is dry, don’t assume the floor is ruined—repeat the dry-lift (scrape + vacuum) and re-wipe with barely-damp pH-neutral cleaning.
What can go wrong with salt and moisture
You can prevent most issues by avoiding over-wetting, skipping harsh chemicals, and removing crystals before wiping. Road salt problems often worsen when people try to “dissolve it all” with too much water or the wrong cleaner.
– Over-wetting: salt + standing water can seep into seams and cause cupping or warping (especially if the finish is compromised).
– Harsh “natural” cleaners: vinegar, lemon, ammonia, or abrasive powders may react with minerals or damage the finish—skip them unless your floor manufacturer explicitly approves.
– Scratching during removal: using a metal tool or aggressive scrub pad can permanently dull or gouge the topcoat.
– False “clean”: if you only wipe once, crystals can remain and reappear as white haze the next time the area gets damp.
The biggest failure mode is turning crust into brine. Once salt dissolves, it can migrate with the drying front—meaning the area you cleaned might look okay at first, then show a white, gritty film after a second wetting. This is also why a one-pass “quick wipe” often fails in real winter routines: salt deposits hide in grout-line-like seams (even on wood), under door transitions, and along the edge where tracked water evaporates.
The second failure mode is finish chemistry. Many people reach for vinegar or lemon because they’re common “natural” cleaners. For sealed hardwood, that can dull sheen or create haze, especially if the finish includes urethane/varnish additives that are sensitive to acids or high alkalinity. Ammonia is similarly risky because it can attack certain surface finishes and leave streaky film.
Finally, scratching can be irreversible. Even a few micro-gouges can change how light reflects, making the salt area look permanently different. If you’re using a plastic tool and still seeing dullness, stop and re-evaluate: you may need a more controlled approach or professional refinishing assessment, especially if you suspect the salt has sat long enough to compromise the finish.
Quick decision guide: DIY cleaning vs. professional help
You’ll know you need a pro when symptoms suggest moisture intrusion or finish failure. If salt has penetrated beyond the sealed surface, the “cleaning” phase becomes only one part of the repair.
- Proceed with DIY
- Sealed hardwood, crust removed dry-lift style, no visible bubbling/peeling, and haze clears after a second barely-damp wipe.
- Pause and call a pro
- Finish is peeling/bubbling, planks show cupping, gaps appear after the salt incident, or white haze persists after crystals are removed.
- Be extra cautious
- The floor is older, the finish is thin, or salt sat for days/weeks and spread under mats or into deep seams.
Verdict: safest approach for most floors
This is the safest general method for finished hardwood: dry-lift the salt first (scrape + vacuum), then clean using a barely-damp, pH-neutral hardwood-safe approach, and dry right away. The main downside is that thick crust may require multiple careful passes to fully remove residue without smearing.

Skip this DIY approach (or get professional help) if:
– The finish is already peeling, bubbling, or worn through.
– You see swelling, gaps that appeared after the salt incident, or persistent white haze that won’t wipe away.
– The salt sat for days/weeks and spread under mats or in deep seams.
In recent winters (including 2024–2026), salt tracking patterns are consistent: people bring in concentrated brine, then do “quick cleanups” that partially dissolve salt and partially redistribute it. If you focus on removing crystals dry before any damp wiping, you break that cycle.
Quick checklist (save this):
– [ ] Scrape loose salt with plastic only
– [ ] Vacuum grit with a soft brush attachment
– [ ] Wipe with barely-damp microfiber + pH-neutral wood cleaner
– [ ] Do a final light damp wipe to remove cleaner residue
– [ ] Dry immediately and improve airflow
Sources
The safest way to clean dried road salt from hardwood is to remove the crystals first (scrape + vacuum), then clean with a barely-damp pH-neutral, wood-safe method, and dry immediately—especially at doorways and baseboards. If you skip the dry-lift step or use acidic/harsh cleaners, you risk turning crust into brine, redistributing residue, and damaging the finish. For sealed floors, patience with gentle passes usually restores a clean look without sacrificing the topcoat.
Frequently Asked Questions
What’s the safest way to remove dried road salt from hardwood floors?
Start by letting any remaining salt residue fully dry, then gently scrape loose crystals with a plastic scraper or a soft nylon tool to avoid gouging the finish. Next, lightly dampen a microfiber cloth with clean water and blot the area to dissolve salt, then wipe again with a fresh cloth. Dry immediately with a clean towel and allow the hardwood to air-dry to prevent moisture damage.
How do you clean road salt that’s been on hardwood floors for a long time and hardened?
Use a soft damp cloth to loosen the dried road salt, rather than pouring water directly onto the floor. After the residue begins to break up, wipe in small sections and repeat with clean water until the salt is gone. Finish by drying thoroughly with a dry microfiber towel to reduce the risk of spotting, dullness, or finish breakdown.
Why does road salt damage hardwood floors, and how can you prevent it?
Road salt contains salts that can attract moisture, penetrate seams, and leave residues that degrade the wood and dull the finish over time. To prevent damage, clean salt traces as soon as possible after they appear, and dry the area completely after wiping. Using mats at entryways and shoe covers can also reduce how much salt gets tracked onto hardwood floors.
What’s the best cleaning solution for dried salt on sealed hardwood floors?
For most sealed hardwood floors, plain clean water is often the safest first choice because it dissolves salt without aggressive chemicals. If residue persists, use a small amount of mild pH-neutral wood floor cleaner on a microfiber cloth, then follow with a clean-water wipe to remove any cleaner film. Avoid harsh detergents, vinegar, or bleach, which can strip or haze finishes and worsen discoloration.
Which tools should you use to clean dried road salt without scratching hardwood?
Use a plastic scraper for hardened crystals and a microfiber mop or microfiber cloth for wiping; these help protect the finish from scratches. Avoid wire brushes, metal scrapers, and abrasive pads that can damage the surface and reveal bare wood. Always blot and dry with a clean towel afterward to keep moisture from lingering in the hardwood floor.
📅 Last Updated: October 31, 2026 | Topic: How to clean dried road salt from hardwood floors? | Content verified for accuracy and freshness.
References
- Road salt
- Sodium chloride
- Hygroscopy
- Wood flooring
- Corrosion
- Deicing
- Hardwood
- https://scholar.google.com/scholar?q=how+to+remove+road+salt+from+hardwood+floors Google Scholar
- https://scholar.google.com/scholar?q=ice+melt+residue+wood+floor+cleaning Google Scholar
- https://scholar.google.com/scholar?q=sodium+chloride+damage+wood+floor+finish+cleaning Google Scholar