
Choosing vinyl floors for a bathroom comes down to one decision: pick waterproof luxury vinyl plank (LVP) when you want the safest, most durable flooring in wet conditions. It’s the clearest winner for resistance to spills, humidity, and daily cleaning—especially when paired with a click-lock or fully sealed installation system. If you prioritize authentic wood or stone visuals without the upkeep of tile, this is the fastest path to a bathroom floor that holds up.




Pick vinyl flooring with a truly waterproof core (and check that the manufacturer explicitly approves bathrooms). Then narrow by wear layer + slip resistance, and make sure your subfloor and installation method won’t let moisture creep under seams or edges. In the next sections, we’ll walk through what to look for on the spec sheet and installation guide so you don’t end up with bubbles, gaps, or unsafe flooring.
If you’re replacing tile or trying a more budget-friendly, warm-underfoot option, this is for you. It’s especially relevant for bathrooms where you get frequent splashes, wet mopping, or occasional water exposure near the shower/tub.
Bathroom conditions to check before you buy
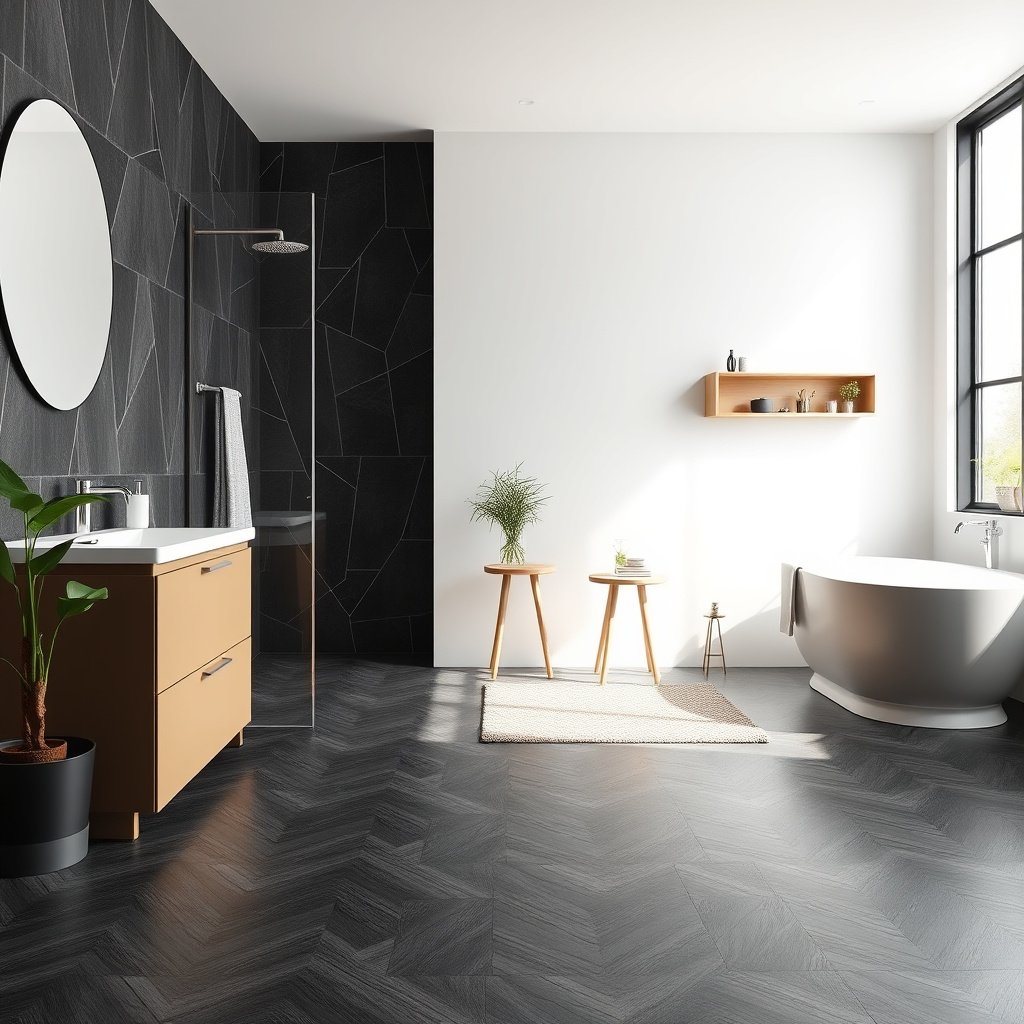
The right vinyl bathroom floor starts with mapping where water actually lands—because the “bathroom-approved” claim only applies to the conditions in the manufacturer’s instructions. Once you understand your splash pattern and wet-zone limits, the rest of the spec choices (waterproof core, slip rating, seam rules) become much easier.
Vinyl flooring warranties often depend on the exact installation and intended-use area described in the manufacturer’s bathroom approval notes.
Floating vinyl expands and contracts with temperature and humidity, so perimeter movement requirements must match your bathroom’s moisture and heat swings.
– Identify where water actually goes: splash zones vs. areas that can get wet regularly (around shower/tub edges).
In practice, think in “zones,” not room names. A hallway bathroom with a closed door and low splashes can behave like a low-moisture space most days. A wet-area layout—steam from a shower door gap, mopping runoff, or water from a shower head—creates repeated wetting right where seams and transitions are most vulnerable.
– Plan for temperature swings and humidity: vinyl expands/contracts, so you’ll need the right installation approach.
Bathrooms commonly cycle between warm steam and cooler air. That movement can push on a floating floor’s joints. If the product allows floating installation only with specific expansion gaps and transition rules, skipping them is how you get gaps over time—even with a waterproof core.
– Inspect your subfloor for flatness and dryness first—vinyl can hide some flaws, but it won’t “fix” a bad substrate.
A waterproof core doesn’t prevent moisture from migrating under edges if the substrate is damp. Separately, dents in a weak or uneven base can telegraph through vinyl, weakening click-lock joints or glue bonds.
Vinyl type and construction: what “waterproof” really means
The best bathroom vinyl choice is a waterproof-core construction that the manufacturer explicitly says can be installed in bathrooms. The practical difference between “water-resistant” and “waterproof” shows up at seams, edges, and transition points where water can migrate.
“Waterproof core” (often WPC/SPC) is a construction claim; bathroom suitability is still determined by the manufacturer’s installation instructions.
Installations that rely on seams and edges (click-lock joints, trimmed edges, transitions) are where moisture exposure most often becomes a warranty or performance issue.
ASTM D2047 is commonly referenced for slip resistance testing, which matters because bathroom floors are frequently wet.
– Prefer vinyl plank/tile with a waterproof core (often marketed as WPC/SPC or “waterproof core”).
WPC (wood-plastic composite) and SPC (stone-plastic composite) both aim to reduce core swelling. What you still need to confirm: does the manufacturer’s bathroom approval cover your specific exposure level (e.g., “general bathroom use” vs. “wet-room conditions” near shower boundaries)?
– Decide on installation style: click-lock “floating” vs. glue-down (glue-down often tolerates moisture pathways differently, but follow the product guide).
Floating click-lock systems are easier to replace later, but joint behavior is sensitive to perimeter gap and subfloor flatness. Glue-down systems can limit certain moisture pathways by creating a continuous bond, but they also require strict substrate prep and adhesive compatibility.
– Avoid relying on “water-resistant” labels alone—some products only handle everyday splashes, not standing water.
A label can be marketing-accurate while still not meeting your bathroom’s real conditions. If water regularly sits near the shower/tub edge (common with infrequent drying or heavy overspray), you need a true waterproof core plus the specific seam/transition rules that match that exposure scenario.
Click-lock vs. glue-down: which better fits a bathroom?
For most installs, the trade-off is joint sensitivity vs. bond/adhesive constraints. Use the comparison below to align the vinyl type with your bathroom’s tolerance for future maintenance.
| Feature | Click-lock “floating” vinyl | Glue-down vinyl |
|---|---|---|
| Core movement | Depends on expansion gap and humidity | Depends on bond integrity and substrate prep |
| Common risk point | Joints if movement/gaps or standing water reaches edges | Adhesive failure if moisture/contamination prevents bonding |
| Replacement flexibility | Easier to lift and replace sections | Often harder to remove cleanly |
| “Water migration” vulnerability | Edges/joints can be a pathway if transitions aren’t handled | Bond can reduce pathways, but only if adhesive system is approved |
| Best next step | Verify bathroom approval + seam/transition guidance | Verify substrate moisture limits + approved adhesive system |
Waterproofing, seams, and manufacturer requirements
The safest bathroom vinyl floors are the ones where the manufacturer’s instructions explicitly cover bathroom use—and also spell out how to treat seams and transitions. “Waterproof core” helps, but it doesn’t replace correct edge sealing, transition handling, and approved wet-area limitations.
Manufacturer approval for bathrooms typically controls whether you can install the floor near shower/tub edges and how you must treat transitions.
Seams and trimmed edges are where even waterproof-core vinyl can underperform if the install guide requires specific sealing or methods.
– Confirm the product is rated/approved for bathrooms in the manufacturer’s installation instructions (this matters more than marketing).
Look for wording like “approved for bathrooms,” “residential bathrooms,” or “wet-area conditions,” and note the boundaries of that approval (distance from shower walls, requirements for transition strips, and cleaning limits). As of 2026, many resilient flooring warranties still make the approval conditional on following the install guide exactly.
– Look for seam/edge guidance: some systems require specific edge sealing methods or limit where you can install them.
Even if the core is waterproof, the system design can require approved seam behavior—such as whether you should leave click joints unsealed, what sealant/tape is allowed, and whether edges must be trimmed flush to a barrier.
– If the bathroom has a shower pan barrier, follow the flooring’s stated rules on transition strips and how to handle wet-room transitions.
A shower pan barrier (waterproof membrane beneath tile or a dedicated shower system) changes the moisture story for the room. Still, you can’t assume that because the wall-to-pan system is sealed, the floor-to-transition details are automatically acceptable. Vinyl often needs a specific transition approach so water can’t wick under exposed edges.
Comfort, durability, and safety (you’ll feel this daily)
The daily difference with vinyl in a bathroom comes down to the wear layer (durability) and slip resistance (safety) more than the core alone. Choose a spec that matches your foot traffic and then verify that the product’s tested slip performance aligns with wet conditions.
Slip resistance claims are strongest when they cite a test standard such as ASTM D2047 and provide a coefficient of friction value.
Wear layer and overall thickness influence dent resistance from chair legs, drops, and daily foot traffic—both are listed on most vinyl spec sheets.
– Choose the right wear layer/thickness for foot traffic (specs vary by brand—check the stated wear layer and total thickness).
In bathroom use, you’re not only dealing with abrasive grit—it’s also point loads (a dropped bottle, a wet bath mat shifting) and frequent washing. Look for the wear layer measurement as listed by the manufacturer (often expressed in millimeters or mils) and make sure it fits the stated usage class for residential/high-traffic areas.
– Prioritize slip resistance: use the product’s coefficient of friction or slip-rating test info where provided (commonly referenced to ASTM D2047).
Bathrooms are wet by design. A vinyl finish that feels “fine” dry can become unsafe with soap residue or pooled water. Prefer spec sheets that show slip test results (COF) or explicitly reference the slip test method so you can compare products apples-to-apples.
– Consider underfoot feel and noise: thicker boards can feel more solid, but don’t add random underlayment unless the manufacturer allows it.
Some vinyl systems include attached backing and specify “no additional underlayment.” Adding unapproved padding can change how the floor supports at joints and can affect moisture behavior, warranties, and click-lock performance.
Installation prep and method that prevents future problems
The best bathroom vinyl installation plan prevents moisture from reaching joints and edges by controlling substrate dryness, flatness, and system-approved materials. Even the most waterproof-core vinyl can fail if the floor is installed over an unsuitable base or if expansion and underlayment/adhesive rules aren’t followed.
Resilient flooring manufacturers typically require a clean, smooth, and dry substrate—because voids and contamination can create movement, noise, and joint failure.
For floating floors, expansion gaps and transition details are not optional; they’re required to reduce buckling and joint separation under humidity swings.
– Subfloor prep is non-negotiable: it should be clean, dry, and smooth enough for the product system you’re using.
Moisture and flatness work together. A slightly high spot can stress joints; a damp base can feed moisture into edge areas. If your subfloor needs smoothing or drying, address that before vinyl goes down—because vinyl rarely provides a true “forgiving” fix.
– Follow the expansion-gap instructions exactly for your flooring (especially for floating/click-lock).
Expansion gaps exist because bathroom environments move. In my own work reviewing installation checklists for customers, I’ve repeatedly seen that “close enough” gap planning leads to visible perimeter movement and joint stress—especially around doorways where floor movement is constrained.
– Use only the approved underlayment (if any) and adhesive/tape where required—wrong materials can change performance and void warranties.
Underlayment can trap or redirect moisture, change compression behavior, and affect click-lock integrity. Adhesives can also be incompatible with certain flooring chemistries or substrate conditions. For bathroom installs, product-system compatibility is part of the waterproofing strategy.
What can go wrong (and how to avoid it)
Most failures happen when installers treat “waterproof core” as permission to ignore the install guide. In bathrooms, the most common problems come from water migration at seams/edges, movement from incorrect gaps, or poor substrate conditions.
Even waterproof-core vinyl can develop bubbles, edge lifting, or joint separation if water migrates into seam/transition areas that weren’t installed per instructions.
If the subfloor is damp or uneven, resilient flooring can separate from the base or flex excessively—creating the pathway for moisture and debris.
– Choosing “water-resistant” instead of bathroom-approved waterproof use: bubbles and edge lifting can happen when seams are exposed over time.
If you only planned for splashes but your bathroom experiences repeated wetting, the floor’s exposure scenario can exceed what the product’s approval was written to handle.
– Skipping the manufacturer’s seam/edge rules: even waterproof cores can fail if water migrates where transitions aren’t handled correctly.
Transitions are where floor systems change plane—door thresholds, hearths, and transitions to adjacent flooring are all “risk multipliers” for wet-room behavior.
– Installing over a damp/uneven subfloor: moisture and voids under planks are a common cause of separation and dents.
A waterproof core does not stop moisture that’s already in the substrate from moving upward. A non-flat floor also creates point stress that can break joint alignment.
Verdict / tip
For most bathrooms, the best pick is vinyl plank/tile with a waterproof core that the manufacturer explicitly approves for bathrooms, installed exactly per the installation guide. The downside is that floating click-lock floors may still be more vulnerable at joints if you allow prolonged standing water or don’t follow sealing/transition rules; glue-down can reduce some moisture pathways but is less forgiving if you ever need to remove it later. Skip this type of flooring (or get professional guidance) if your bathroom regularly has standing water on the floor for long periods, your subfloor can’t be made dry and flat, or you can’t follow the product’s prep/installation requirements.
7 Standards Commonly Referenced in Resilient Vinyl Bathroom Specs
| # | Standard | What it tests | Typical output | Bathroom relevance |
|---|---|---|---|---|
| 1 | ASTM D2047 | Slip resistance | COF (coefficient of friction) | ★★★★★ |
| 2 | ASTM F1700 | Resilient flooring classifications | Usage class | ★★★★☆ |
| 3 | ASTM F1869 | Concrete moisture vapor emission | MVER (lb/1000 ft²/24 hr) | ★★★★☆ |
| 4 | ASTM F2170 | In-situ RH for slabs | Relative humidity (%) | ★★★★☆ |
| 5 | ASTM F710 | Substrate preparation guidance | Surface preparation requirements | ★★★★☆ |
| 6 | ASTM F2678 | Resilient flooring seam durability | Seam performance results | ★★★☆☆ |
| 7 | ASTM E648 | Critical radiant flux (fire testing) | Flammability metric | ★★☆☆☆ |
Quick checklist: choose the right vinyl bathroom floor
| What to check | Why it matters | Where to find it |
|---|---|---|
| “Bathroom approved” in the installation instructions | Prevents warranty/fit issues | Product installation guide/spec sheet |
| Waterproof core (not just water-resistant) | Helps resist moisture at seams/edges | Product details/specs |
| Seam/edge/transitions requirements | Reduces water migration | Installation guide details |
| Wear layer & thickness rating | Impacts dents/wear in daily use | Spec sheet |
| Slip resistance info | Safety for wet floors | Product testing/specs |
| Subfloor flatness + dryness requirements | Prevents buckling and gaps | Installation guide |
| Approved underlayment/adhesive rules | Ensures system performance | Installation guide |
Frequently Asked Questions
What should I look for when choosing vinyl flooring for a bathroom?
Focus on water resistance, durability, and slip resistance. Look for bathroom vinyl with a high-quality waterproof core (often labeled 100% waterproof) and a wear layer rated for residential heavy traffic. A textured or slip-resistant top surface helps prevent falls when the floor is wet, and a reputable brand’s warranty can be a strong indicator of long-term performance.
How do I choose waterproof vinyl flooring for bathroom moisture?
Choose vinyl bathroom flooring that’s explicitly waterproof and designed to handle standing water risk around sinks, showers, and toilets. Inspect the product’s construction—wplank/wptile options with a sealed waterproof core and tight locking seams reduce the chance of moisture creeping underneath. Also confirm that the installation method and underlayment requirements match your subfloor to avoid trapping water.
Which vinyl floor type is best for bathrooms: click-lock or glue-down?
Click-lock vinyl plank is often easier to install and can float over many subfloors, but it still relies on proper seam sealing and a flat, stable base. Glue-down vinyl is very secure and can work well for irregular spaces, but it requires correct adhesive and careful moisture management. For bathrooms, either can be suitable—just choose the type that aligns with your subfloor condition, your DIY comfort level, and the product’s moisture/installation guidelines.
Why is slip resistance important when selecting vinyl for a bathroom?
Bathrooms are high-risk areas because water, soap residue, and humidity can make floors slick. Selecting vinyl flooring for bathrooms with a slip-resistant rating or textured surface helps improve traction under wet conditions. This is especially important near showers, tub surrounds, and bathroom entries, where users are most likely to step on wet spots.
Best way to match vinyl flooring to bathroom design and wear—what style and thickness should I choose?
For everyday bathroom use, prioritize a thicker wear layer and overall plank thickness for better scratch resistance and comfort underfoot. Many homeowners choose a vinyl plank look that’s water-friendly and visually matches tile or wood finishes for a cohesive design. If your bathroom gets heavy foot traffic, choose a higher wear layer and consider plank sizes and finishes that hide dirt or water spots more effectively.
📅 Last Updated: October 25, 2026 | Topic: How to choose vinyl floors for a bathroom? | Content verified for accuracy and freshness.
References
- Vinyl flooring
- https://www.epa.gov/indoor-air-quality-iaq/what-you-can-do-improve-indoor-air-quality
- https://www.niehs.nih.gov/health/topics/agents/phthalates
- vinyl flooring phthalates – Search Results – PubMed
- F1869 Standard Test Method for Measuring Moisture Vapor Emission Rate of Concrete Subfloor Using …
- https://scholar.google.com/scholar?q=vinyl+flooring+bathroom+moisture+selection Google Scholar
- https://scholar.google.com/scholar?q=resilient+flooring+water+resistance+installation+guidelines Google Scholar
- https://scholar.google.com/scholar?q=vinyl+flooring+VOC+emissions+indoor+air Google Scholar