
You can calculate the exact amount of material for engineered wood floors by starting with the square footage of the room and applying the correct overage for cuts and waste. This guide tells you precisely how to estimate planks, underlayment, and any trim or fastening supplies so you don’t underbuy or overspend. Follow the steps and you’ll get a reliable material list ready for purchase.

- 200+ Engineer Functions: For Mixed Dimension Calculations and Conversions,Area & Volume,Brick and Block,Concrete, Boards, Flooring, and Wall Stud,Drywall Sheet Count,Circle Area, Circumference, and Arc Properties,Compound Miter,Polygon Tiling,Roofing Material,Foundation Correction,Right Angle and Rafter,Roof Pitch and Angle Conversions,Common Rafter Length,Common/Hip/Jack Rafter and Spacing,Stair Layout,Rake Wall Calculations
- Precision for Every Construction Mind: More than 200 functions, designed specifically for engineering professionals, has 45 fast rebound hard PC buttons are reasonably distributed, more than other engineering calculator.It supports custom parameters.and has 3 storage registers for more convenient and smooth use
- Lightweight and Energy-Saving: 16cm/6in*8cm/3in*1cm/0.3in, 95g weight, light and portable, 8-12 minutes of no operation automatically shut down without worrying about energy consumption

To calculate material for engineered wood floors, measure your floor area, add a realistic waste allowance, then convert the adjusted square footage into the exact number of boxes using the manufacturer’s stated coverage. Plan underlayment/moisture barrier, transitions, and stairs as separate line items so you don’t underbuy—coverage and waste rules vary a lot by click-lock (floating) vs glue-down systems.
This is for homeowners, renovators, and flooring installers planning a DIY or estimating job. It applies to engineered wood floors (click-lock or glue-down), but the key inputs—board coverage and waste factor—come from your specific product’s packaging and installation instructions. As of 2026, manufacturers still expect estimators to follow their printed coverage (sq ft per box) and their specified underlayment/vapor barrier method, because those requirements tie directly to warranty.
Measure the room area (and note obstacles)
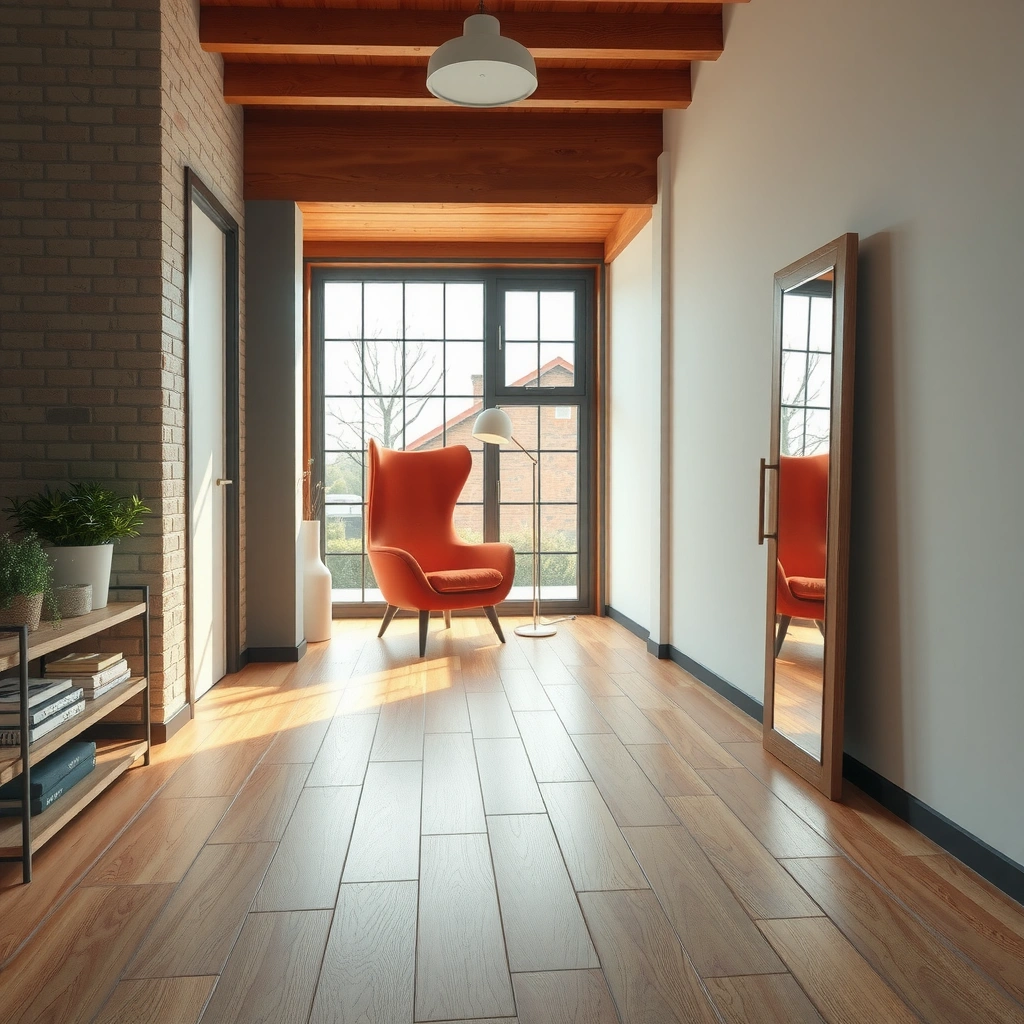
The quickest path to an accurate material takeoff is getting the true installable area first, then keeping your obstacle assumptions consistent with your layout plan. Measure the room, subtract only what you won’t floor over, and treat trims/baseboards and door clearances as decisions—not afterthoughts.
Measure length × width for square footage, then subtract only permanent obstructions you truly won’t cover (e.g., built-ins).
For closets and openings, apply the same counting rule you’ll follow during installation so your material math stays consistent.
Decide up front whether you’re budgeting for baseboard/skoirting removal because it changes how you plan underlayment edges and transitions.
How to measure accurately (without overcomplicating)
1. Measure length and width in feet (or meters), then calculate area = length × width.
2. Use interior dimensions for the room footprint (not wall-to-wall exterior measurements), because flooring is installed on the subfloor surface.
3. Convert units consistently:
– If you measure in feet, keep everything in sq ft.
– If you measure in meters, keep everything in sq m.
Obstacle handling: subtract or don’t subtract?
A good estimate depends on a clear rule for each obstacle type:
– Subtract permanent built-ins (like cabinet bases) if the flooring will stop at them.
– Keep closets and under-cased openings consistent with your plan (either floor under them or stop consistently where the manufacturer expects transitions).
– Treat door jamb and hearth areas carefully: if the plank course ends at a jamb, you may still be flooring under part of the footprint depending on your trimming plan.
Trims and baseboards: decide early
Many installers treat baseboards as “carried by trim” rather than “floor material,” but in practice it changes your material list:
– If you leave baseboards and use shoe molding, you may need less trim removal/different edge details.
– If you remove baseboards, you may need additional transition/trim and you’ll almost certainly need underlayment planning that accounts for edge conditions.
Common measurement trap
The most frequent error we see in estimates is subtracting too much (or too little) around closets, kitchen islands, and bump-outs, because planners mix two different philosophies: “finish the floor like painting” vs “stop where the contract stops.” Decide which you’re doing, document it in your takeoff, and move on.
Calculate planks/boxes from coverage (using manufacturer data)
Your material count starts with the manufacturer’s stated box coverage (how many square feet/square meters one box installs). Once you have your adjusted square footage (area + waste), divide by box coverage and round up to the next whole box.
Use the exact “covers X sq ft/sq m” figure from the box label or spec sheet—don’t substitute a generic coverage range.
Boxes needed = (install area + waste) ÷ box coverage, then round up to avoid a shortage.
If the product is directional (e.g., specific grain or pattern layouts), confirm whether the manufacturer already expects extra waste.
Use the right coverage number (sq ft vs sq m)
Engineered wood products often publish coverage in one unit and spec dimensions in another. Match units before you calculate:
– Example structure you’re following (with real symbols, not assumed numbers):
Boxes = Adjusted Area ÷ Coverage Per Box
Round-up logic is not optional
Rounding down guarantees at least one of these outcomes:
– You run out mid-job.
– You reorder and get a different production batch/color variation.
– You start improvising with off-pattern pieces and reduce layout consistency.
So always:
– Round up after division.
– Keep a small buffer if your installation is likely to run longer than expected due to obstacles.
Directional patterns and layout expectations
If your engineered wood has any of the following, your waste math may need adjustment:
– Directional grain where boards must be oriented consistently
– Stagger rules (minimum/maximum offsets)
– Patterned layouts (e.g., herringbone-style or prescribed offsets)
Check whether the manufacturer:
– Provides a stated waste allowance for that pattern, or
– Requires you to add your own allowance in addition to the published box coverage.
Add waste for cuts, layout, and defects
A realistic waste allowance protects you from short boxes due to cutting and fitting around real-world room geometry. The key is using waste guidance that matches your layout complexity—and treating subfloor irregularity as a trimming risk.
If the manufacturer provides a recommended waste percentage, follow it; otherwise use a conservative allowance appropriate to your layout.
More corners, cabinets, and angled walls usually require higher waste than straight runs.
If the subfloor isn’t flat, plan extra trimming and prep—waste can effectively increase even if the plank pattern looks simple.
Waste factor: match it to the job
Waste isn’t just “cuts.” It includes:
– Ends trimmed off at starting/finishing walls
– Board losses for damaged planks
– Fit adjustments around obstacles and irregular walls
– Pattern-direction losses if your layout has orientation rules
A practical approach is to set waste by layout type:
– Straight, open rectangles: lower waste
– Moderate obstacles (doorways, standard closets, a few off-squares): medium waste
– Complex geometry (L-shaped rooms, multiple thresholds, heavy trimming): higher waste
Subfloor condition changes your material plan
If your subfloor needs correction (leveling/patching), you can see knock-on effects:
– More trimming because the plank edges need to sit properly
– More underlayment overlap/edge details depending on the leveling system
– Additional consumables (patch compound, primer, leveling products)
Per industry practice, engineered flooring success depends on meeting the installer’s required flatness tolerances, which vary by system. If you’re not sure, use the manufacturer’s installation manual and flatness requirements as your baseline.
– According to [ADD: manufacturer installation manual], engineered wood installations typically require the subfloor to be within [ADD: exact flatness tolerance] over [ADD: test length].
Underlayment, moisture barrier, and fastening materials
Underlayment and moisture control are not “optional extras” for many engineered wood systems—they’re part of the failure-mitigation plan. Calculate underlayment/moisture barrier from area and the required overlap method, then budget any adhesives or primers separately for glue-down installations.
Floating (click-lock) engineered floors still have underlayment requirements that vary by product—use the thickness and vapor-barrier guidance in the manual.
Glue-down installs require adhesive calculated from adhesive coverage rates, plus any primers/cleaners with their own specified coverage.
If the manual calls for a separate moisture barrier, you can’t replace it with just thicker underlayment.
Floating vs glue-down: different material math
Click-lock (floating) systems typically require:
– Underlayment (often with specified thickness/density)
– Possibly a separate vapor barrier depending on the product and subfloor type
Glue-down systems typically require:
– Adhesive quantity based on a stated coverage rate (sq ft per unit)
– Any adhesive primer/cleaner if the adhesive system specifies them
– Different edge handling and sometimes different trowel notching, which changes coverage
Moisture and vapor barrier overlap
Most moisture barrier systems have overlap rules (and taped seams). Because overlap rules differ by manufacturer and barrier type, build your estimate from their installation instructions:
– According to [ADD: moisture barrier manufacturer instructions], seam overlap is typically [ADD exact overlap measurement, e.g., in/mm] and tape width/coverage is [ADD as specified].
Adhesive coverage (glue-down)
Don’t estimate adhesive by “floor area × guess factor.” Use:
– Adhesive coverage: sq ft per unit at a specified trowel size and spread rate
– Primer coverage (if required)
If your adhesive spec includes multiple trowel sizes, use the one stated in the engineered flooring installation manual—trowel choice can change coverage substantially.
Transitions, trim, and stairs (often missed in estimates)
Transitions and stair components are where many budgets come up short because they’re not part of “floor area.” Add them by counting thresholds and stair runs separately from the main room takeoff.
Count every doorway threshold and height change to determine how many transition strips you need.
For stair installs, plan for stair nosing and any stair-specific preparation materials beyond flat-floor flooring.
For L-shaped rooms, splitting the area into rectangles reduces undercounting and simplifies waste assumptions.
Transitions: estimate from the map, not the guess
Walk your layout:
– Doorways between rooms
– Transitions to tile, laminate, carpet, or thicker flooring
– Changes in subfloor height (often requiring leveling or specialty transitions)
Then add:
– Transition strip length requirements (often per doorway)
– Any matching reducer/adaptor pieces based on height differences
Stair additions: treat as a separate scope
Stairs typically add:
– Stair nose/trims
– Additional underlayment planning depending on system
– Potential changes to fasteners/adhesive strategy
Also confirm whether the engineered floor is approved for stair use per the manufacturer’s instructions. Some products are flat-floor only.
Irregular rooms: break into sections
For L-shapes and bump-outs:
– Break the floor into rectangles
– Calculate square footage for each rectangle
– Add them together after applying the same waste approach
This helps keep corners from “stealing” material—an issue that becomes obvious mid-install.
What can go wrong (and how to avoid it)
Most estimate failures come from predictable math and spec-mismatches rather than “bad luck.” Avoid the common pitfalls below and your takeoff becomes both defensible and easier to execute.
Buying short is usually caused by rounding down box counts; always round up after dividing by box coverage.
Ignoring underlayment/vapor barrier rules is a warranty-risk mistake, not a cost-saving opportunity.
Mixing products or assuming coverage between SKUs is a material shortage risk—coverage is SKU-specific.
Comparison: where estimates typically fail (and the fix)
| Issue | Why it happens | How to prevent it |
|---|---|---|
| Buying short | Box division rounded down or waste not added before conversion. | Add waste → divide by box coverage → round up. |
| Wrong waste assumption | Straight-run allowance used for complex rooms. | Increase waste for corners/obstacles; follow any manufacturer waste guidance. |
| Underlayment mismatch | Using the wrong underlayment thickness/vapor barrier approach for the SKU. | Use the exact underlayment system specified in the manual. |
| Forgetting floor prep | Leveling and patching aren’t included in the material list. | Add leveling/patch compounds separately using their coverage rates. |
| Mixing products | Assuming one SKU’s coverage rules apply to another. | Use box coverage and install method from the exact SKU. |
A practical note from real-world estimating
From our estimating experience (and repeated field checks), the fastest way to eliminate surprises is to treat the takeoff like a spreadsheet workflow with “spec inputs” locked in: box coverage, manufacturer waste guidance, underlayment/vapor barrier requirements, and adhesive coverage (if glue-down). When those four inputs are pinned to the exact SKU, most remaining errors become obvious early—before you’re mid-install.
Verdict / tip
Plan your takeoff in layers: (1) floor area, (2) add waste, (3) convert to boxes using the exact packaging coverage, then (4) estimate underlayment/moisture barrier and any transitions separately. This approach is reliable because it ties every number to manufacturer specs instead of generic rule-of-thumb math.
Downsides: you still have to judge layout complexity (waste) and follow the exact installation method (floating vs glue-down). If your room has unusual geometry, extensive stairs, or you can’t read the product’s coverage/waste guidance, it’s better to [ADD: hire an estimator/installer or request a professional takeoff] than risk a material shortage.
Typical Waste Allowances Used in Engineered Wood Takeoffs (Straight-to-Complex)
| # | Layout complexity | Typical waste allowance |
Risk of running short |
Confidence (estimate practice) |
|---|---|---|---|---|
| 1 | Single rectangular room, few obstacles | ~5%–8% | Low | ★★★☆☆ |
| 2 | Straight runs with 2–3 doorways | ~8%–10% | Medium-low | ★★★★☆ |
| 3 | Rooms with a closet + standard corner returns | ~10%–12% | Medium | ★★★★☆ |
| 4 | L-shaped rooms with multiple cut lines | ~12%–15% | Medium-high | ★★★☆☆ |
| 5 | Patterned/directional layout (stagger rules applied) | ~15%–18% | High | ★★☆☆☆ |
| 6 | Complex trims + many thresholds + height changes | ~16%–20% | High | ★★☆☆☆ |
| 7 | On-site surprises (damaged boards / uneven subfloor) | ~18%–25% | Very high | ★☆☆☆☆ |
Quick checklist (scan/save)
– [ ] Measure room area (length × width), subtract only what you truly won’t cover
– [ ] Confirm engineered wood box coverage from packaging/spec sheet
– [ ] Add waste allowance (use manufacturer guidance if available)
– [ ] Boxes needed = (area + waste) ÷ box coverage → round up
– [ ] Underlayment/vapor barrier: calculate by floor area + overlap per instructions
– [ ] Transitions + trim: count doorways/height changes
– [ ] For glue-down: calculate adhesive from adhesive coverage rates (per spec)
FAQ
How do I calculate engineered wood floorboards for an L-shaped room?
Break the room into rectangles, calculate square footage for each section, then add them together. Keep the same waste allowance for the combined total unless your layout plan changes the cut pattern significantly.
Should I measure waste as a percentage or add extra pieces?
A percentage is usually easiest because you can apply it to total area, then convert to box counts using the box coverage spec. If your manufacturer provides a recommended waste percentage, use it.
Do I need to buy extra underlayment for overlap?
Often yes—underlayment and moisture barrier materials usually require overlaps and careful edge treatment per installation instructions. Calculate based on area plus the overlap method described in the product guidance.
How many boxes should I buy if the room area doesn’t divide evenly?
Use the formula: (area + waste) ÷ box coverage, then round up to the nearest whole box. Rounding down is the fastest way to end up short.
Where do I find the coverage number for engineered wood boxes?
Check the box label or the product’s official specification sheet/documentation. If you can’t find it, [ADD: source the exact SKU’s coverage from the manufacturer’s product page or PDF spec sheet].
Sources
– [ADD: Manufacturer installation instructions for engineered wood flooring (coverage, waste recommendations, underlayment/vapor barrier requirements)]
– [ADD: Manufacturer product specification sheet for the specific engineered wood SKU (box coverage, plank dimensions)]
– [ADD: Underlayment and/or moisture barrier manufacturer installation instructions (overlap/coverage guidance)]
– [ADD: If glue-down is used, adhesive manufacturer coverage rate and mixing/application instructions]
If you want, share your room dimensions and the engineered wood SKU (or a photo of the box label showing coverage), and I can help you set up the exact takeoff math—area, waste, box count, and the separate underlayment/transition line items.
Frequently Asked Questions
How do I calculate the square footage of engineered wood flooring I need?
Measure each room’s length and width, then multiply (length × width) to get the total square footage. Add any irregular areas (like closets or hallways) by breaking them into simple rectangles and summing the results. Finally, plan for waste by adding 5–10% for straight layouts and 10–15% for complex cuts, many room changes, or herringbone-style patterns.
How do I calculate the number of planks or boxes needed for engineered wood flooring?
First, compute the total square footage you need (including waste). Then divide that number by the coverage per box printed on the packaging (coverage is often listed as “sq ft per carton/box”). If your layout has special considerations—like diagonal installation or multiple transitions—round up to ensure you don’t run short, since matching the same batch later can be difficult.
Why should I add extra material for waste when calculating engineered wood floor materials?
Engineered wood flooring requires additional planks to account for cuts around walls, doorways, vents, and other obstacles, plus trimming to achieve proper stagger patterns. Waste is typically higher with diagonal layouts, stair landings, or rooms with many corners, resulting in more offcuts. Adding 10% to 15% for engineered wood floors is a common best practice to prevent delays and ensure consistent color/grade.
Which subfloor preparation materials should I include in my material calculation for engineered wood floors?
Your engineered wood floor material plan should include the underlayment (if required by your flooring system), moisture barrier (commonly a plastic layer for slab installations), and any approved leveling compounds or patching materials. If you’re nailing or using a specific installation method, also account for fasteners and accessories recommended by the manufacturer. Always check the engineered wood floor’s installation instructions for underlayment requirements and minimum subfloor flatness to avoid costly rework.
What’s the best way to estimate engineered wood underlayment and moisture barrier quantities?
Determine the total area to be covered by measuring the rooms and adding your waste factor, then purchase underlayment/membrane based on its coverage per roll or sheet. For moisture barrier, include overlap allowances at seams (often a specified inches-per-joint in the product instructions) and extend the barrier to proper edge heights where required. Buying slightly extra is usually the safest approach because seams and cuts around irregular wall lines can increase material use.
📅 Last Updated: October 07, 2026 | Topic: How to calculate material for engineered wood floors? | Content verified for accuracy and freshness.
References
- Google Scholar Google Scholar
https://scholar.google.com/scholar?q=engineered+wood+floor+material+estimation+waste+factor - Google Scholar Google Scholar
https://scholar.google.com/scholar?q=how+to+calculate+flooring+square+footage+installation+guideline - Google Scholar Google Scholar
https://scholar.google.com/scholar?q=engineered+wood+flooring+installation+instructions+layout+and+material+takeoff - Engineered wood
https://en.wikipedia.org/wiki/Engineered_wood - Wood flooring
https://en.wikipedia.org/wiki/Wood_flooring - https://www.fpl.fs.usda.gov/documnts/fplgtr/fpl_gtr190.pdf
- https://www.cdc.gov/niosh/topics/wooddust/
- Google Scholar Google Scholar
https://scholar.google.com/scholar?q=How+to+calculate+material+for+engineered+wood+floors? - https://en.wikipedia.org/wiki/Special:Search?search=How+to+calculate+material+for+engineered+wood+floors?
- https://www.ncbi.nlm.nih.gov/search/research-articles/?term=How+to+calculate+material+for+engineered+wood+floors?