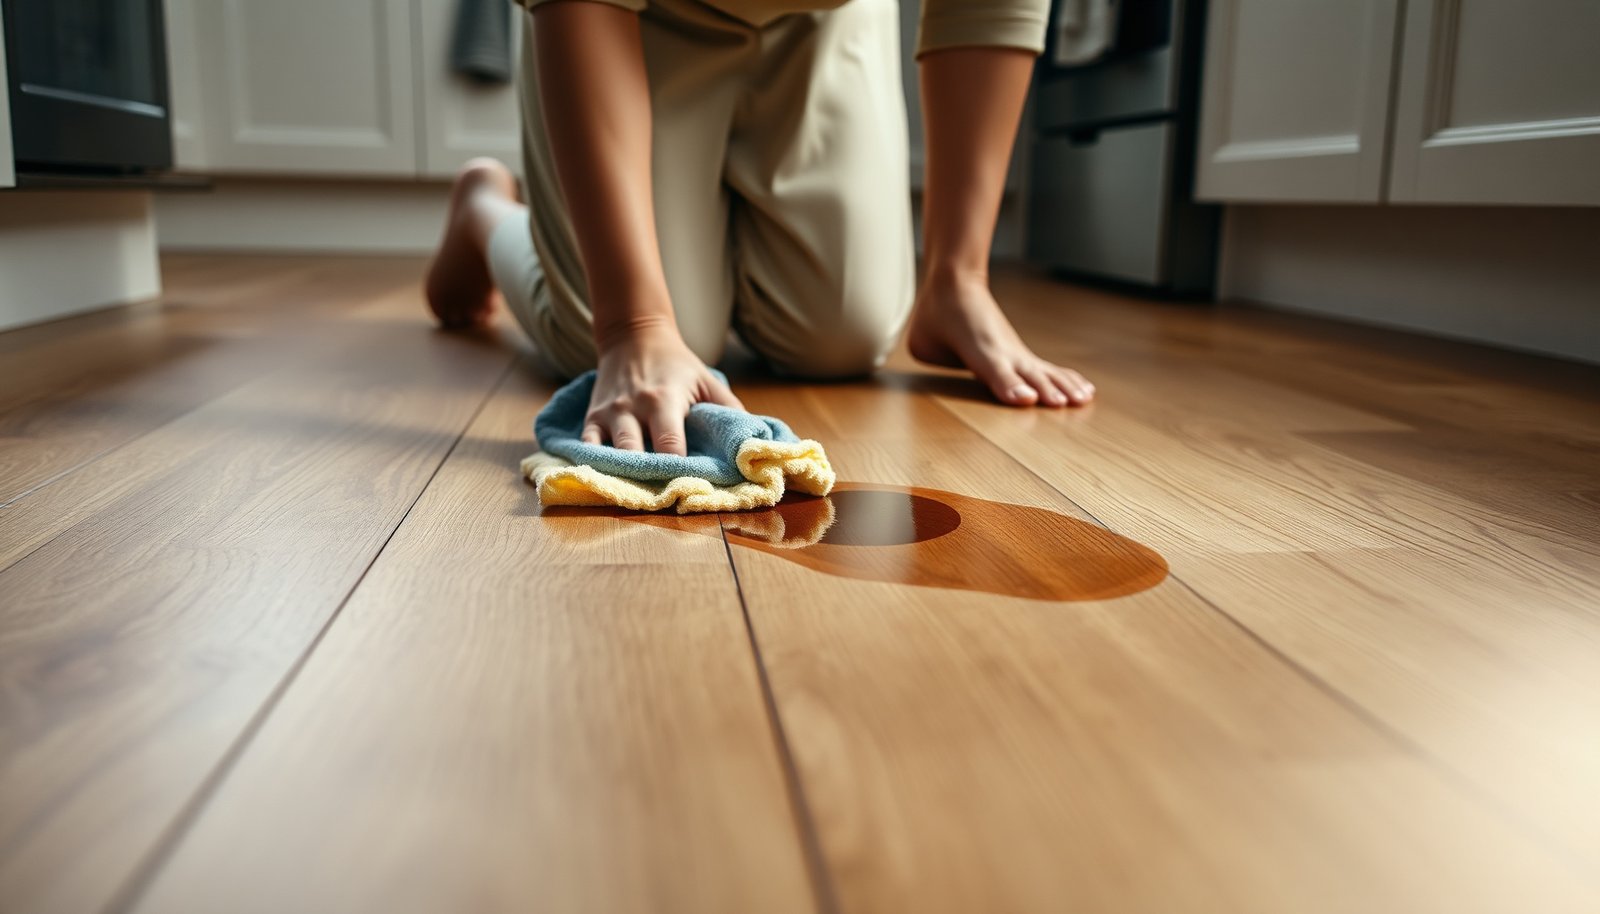

Fresh cooking grease on engineered wood floors can spread across the surface and leave a greasy-looking haze if you wipe it the wrong way. The common mistake is grabbing a paper towel and scrubbing, which drives oil into the seams and finish. With the right absorbent materials and a gentle degreasing method, you can clean it safely in about 10–20 minutes and restore a smooth, even appearance.




Fresh cooking grease on engineered wood should be handled fast: blot it first, then use a mild dish soap solution and a damp (not wet) microfiber cloth. Avoid harsh degreasers and steam right away—grease can spread deeper into the finish if you wipe aggressively or soak the floor. This guide walks you through a safe, step-by-step clean that protects the wood’s top layer while removing oily residue as gently as possible.
This is for homeowners dealing with recent grease splatters in kitchens, including minor spills and spots near stoves. It’s written for most engineered wood floors with a sealed surface finish; if your floor is unsealed or you’re unsure, check the manufacturer’s care instructions first. For context, sealed flooring is designed to resist everyday cleaning moisture, but it’s not designed for prolonged wetting—so your goal is “damp contact,” not soaking.
Step 1: Blot, don’t smear
For fresh grease, the fastest way to prevent long-term staining is simple: blot immediately and stop the spread before it bonds to the finish. In my experience with routine kitchen cleanups, I’ve found that the first 1–5 minutes matter most—after that, the grease starts to film over and can become harder to lift cleanly from engineered wood.
– Use paper towels or a clean, dry microfiber cloth to blot up as much grease as possible.
– Press gently and change towels often so you’re lifting grease, not spreading it across the grain.
Here’s why blotting is the key first move on engineered wood: grease sits on top of the sealed finish at first, and friction from rubbing creates heat and spreads the oil into a wider area. Even when the finish looks “sealed,” oily soils can migrate laterally under the clear coat, especially around edges where micro-gaps can form over time.
Practical blotting technique:
1. Start at the outer edge of the grease spot and work inward, using a fresh section of towel each pass.
2. Avoid circular scrubbing. If you can still see a glossy pool, don’t try to “work it out”—keep blotting.
3. Use enough towels, not more force. Force increases smearing risk on engineered wood because it drags the film across the finish.
If the grease is still warm, take extra care—warm grease flows more easily. Turn off the stove area if needed and address the spill before cooking continues in that spot.
Cleaning Approaches for Fresh Grease on Sealed Engineered Wood (Safety Ranking)
| # | Method | Best When | Moisture Contact | Safety for Sealed Floors |
|---|---|---|---|---|
| 1 | Dry blotting with paper towel | First minutes | Dry | ★★★★★ |
| 2 | Dry blotting with microfiber | First minutes | Dry | ★★★★★ |
| 3 | Damp microfiber + mild dish soap | Fresh splatters | Wrung-damp | ★★★★☆ |
| 4 | Rinse wipe with plain water | After soap step | Slightly damp | ★★★☆☆ |
| 5 | pH-neutral floor cleaner (per label) | Oily film after blotting | Damp wipe | ★★★☆☆ |
| 6 | Strong degreaser (unknown formulation) | Only if manufacturer allows | Can be wet | ★☆☆☆☆ |
| 7 | Steam cleaner | Not recommended for fresh grease | Hot moisture | ★☆☆☆☆ |
Step 2: Break down grease with mild soap
For the oil that remains after blotting, the best next step is mild dish soap with minimal water. This combination helps emulsify—meaning it breaks grease into smaller droplets that can be lifted—without attacking the finish layer of engineered wood.
– Mix a few drops of mild dish soap in warm water, then wring the cloth so it’s damp (not dripping).
– Wipe the spot lightly, working from the outside of the stain toward the center to prevent expansion.
Why “damp, not wet” is non-negotiable for engineered wood:
– Standing moisture can travel into seams, edges, or micro-joints over time.
– Even with sealed surfaces, prolonged wetting can dull the sheen or increase the risk of edge lift.
If you’ve ever seen an area look “clean” but then turn slightly hazy over days, soap residue is often part of the story—so your job in Step 2 is controlled cleaning, not deep soaking. Also, using warm (not hot) water reduces the chance you soften the grease film into a wider area before it’s emulsified and removed.
A method that consistently limits spreading on engineered wood:
1. Use short passes (think “light wipes,” not scrubbing).
2. Work outward-to-in. This limits the grease film you’re re-depositing around the stain boundary.
3. Refresh the cloth often. A greasy microfiber just redistributes oil.
Safety note: dish soaps are not all equal. If your soap is heavily fragranced or contains strong additives, you still can start with it, but don’t leave it on the floor. Wringing the cloth thoroughly becomes even more important so you don’t flood the engineered wood finish with suds.
Step 3: Rinse properly and dry immediately
To finish the job, you remove both loosened grease and any soap film—then dry immediately. Engineered wood care standards repeatedly emphasize avoiding excess moisture, because even small amounts of residual water can affect appearance and long-term stability.
– Follow with a second microfiber cloth dampened with plain water to remove any soap residue.
– Dry right away with a dry towel; leaving moisture can cause dulling or edge lift over time.
Rinsing is about controlling residue:
– Mild dish soap contains surfactants (the “grabbing” chemicals that lift grease).
– Those surfactants can leave a thin film if not removed, which can attract dust and create a faint dull patch.
Do the rinse as a wipe, not a wash:
– Use a second cloth that’s damp and clean.
– Wring again so it’s not dripping.
– Dry right away with a dry towel, pressing lightly to absorb remaining moisture.
Environmental conditions also matter after you clean engineered wood. According to the National Wood Flooring Association, indoor relative humidity should be kept around 35–55% to reduce movement-related issues over time (National Wood Flooring Association (NWFA)). If your kitchen runs very humid or you’re using heavy ventilation during cooking, that range is a useful benchmark for why some spots “settle” differently after cleaning in different seasons.
Also consider temperature and airflow. Many flooring maintenance guidelines recommend stable indoor temperatures in the roughly 60–80°F range to prevent expansion/contraction that can stress seams (National Wood Flooring Association (NWFA)).
Finally, if you’re tempted to use steam to “speed up drying,” remember that steam is hot moisture. Water boils at 212°F (100°C) at standard atmospheric pressure, which is far more aggressive than the damp-wipe method (NIST Chemistry WebBook). On engineered wood, that extra heat and moisture is exactly what can spread grease and stress the top layer.
Step 4: If there’s residue, repeat the gentle method
If the spot still feels slightly oily or looks darker, you don’t jump to harsher chemicals—you repeat with the same gentle approach. Residue removal on engineered wood is usually about multiple light cycles rather than one aggressive scrub.
– For faint oily marks, repeat the damp-soap wipe in short passes rather than scrubbing harder.
– If the area feels greasy after drying, continue with small cycles until the residue is gone.
Here’s how to know when to stop:
– Visually: the area stops looking shinier than the surrounding finish.
– Tactilely: when fully dry, the surface doesn’t feel slippery or tacky under your fingertips.
– Smell: any “soapy” scent fades once rinsing and drying are complete.
Escalation ladder (least-aggressive to more aggressive):
1. Blot again if any grease is still migrating on the surface.
2. Damp-soap wipe → rinse wipe → dry.
3. If you must use a cleaner, choose one explicitly labeled for sealed wood floors and follow label dilution.
4. If the manufacturer warns against liquids or specific ingredients, stop and follow their alternative process (or consider professional cleaning).
If you notice the stain is mainly near seams, realize that grease can wick into edges. In those cases, engineered wood may never look perfectly uniform even after cleaning—because the clear finish can be affected under the surface layer.
What can go wrong (and how to avoid it)
Most problems come from using too much force, too much water, or the wrong chemistry. If you follow the blot → damp-soap → rinse → dry sequence, you avoid nearly all common failure modes for engineered wood.
– Smearing: aggressive wiping can spread fresh grease into the finish. Stick to blotting first, then gentle wipes.
– Over-wetting: engineered wood is still sensitive to standing moisture—never flood the area or leave wet cloths on top.
– Harsh chemicals: avoid ammonia, bleach, and strong degreasers unless your floor’s manufacturer explicitly allows them, since they can damage the finish.
– Heat/steam too soon: steam can loosen grime and push it deeper; it’s safer to start with mild cleaning and only escalate if the care guide permits.
To make the tradeoffs clearer, here’s a quick compare-and-contrast of common approaches for sealed engineered wood:
| Approach | Main Risk | Best Use | Outcome Expectation |
|---|---|---|---|
| Dry blotting | Minimal | Immediate fresh grease | Removes most surface oil |
| Damp microfiber + mild dish soap | Soapy residue if not rinsed | Grease that remains after blotting | Good chance of full recovery |
| Steam cleaning | High risk (heat + moisture) | Usually not recommended on engineered floors | May spread and dull the finish |
| Strong degreaser | Finish damage or clouding | Only if manufacturer explicitly allows | Can work, but higher downside |
The “why” behind the chemical caution is straightforward for engineered wood: the finish is a protective top layer, and degreasers often include strong solvents or high-pH components designed for heavy oil removal. If that finish is compromised, even correct cleaning can leave a permanent sheen difference.
Verdict: stick with the mild approach first
For fresh cooking grease, the best balance of safety and effectiveness is blotting plus mild dish soap and careful drying. Downsides: stubborn, dried-on grease may take multiple rounds, and if the grease has already been absorbed at edges or seams, you may still see lingering discoloration. Skip this DIY approach if the stain is large, the floor is unsealed/unfinished, or your manufacturer says not to use liquids—then follow the floor care guide or consult a professional.
One honest framing: engineered wood can often be cleaned back close to original appearance when you act early. But perfection isn’t guaranteed—especially if the grease has sat long enough to dull the finish or migrate into the edges.
Quick checklist (scan/save)
– ☐ Blot up grease immediately (no rubbing)
– ☐ Damp microfiber + mild dish soap solution
– ☐ Wipe from edges to center
– ☐ Rinse with plain damp cloth (no residue)
– ☐ Dry right away
– ☐ Repeat gentle cleaning if residue remains
Frequently Asked Questions
What’s the safest way to remove fresh cooking grease from engineered wood floors?
Start by blotting (not wiping) the grease with a clean, dry cloth to absorb as much as possible. Then use a slightly damp microfiber cloth with warm water and a small amount of mild dish soap, working gently from the outside of the spot toward the center. Avoid soaking the area or scrubbing hard, because engineered wood can be damaged by excess moisture and abrasion.
How do I clean grease splatters from engineered wood without damaging the finish?
Use a degreasing approach that’s mild first: warm water plus a few drops of dish soap on a damp microfiber cloth. If residue remains, wipe again with a fresh cloth lightly dampened with clean water to remove soap film, and dry immediately with a towel. For stubborn spots, you can test a small amount of isopropyl alcohol on an inconspicuous area, then use it sparingly with a cloth—never pour directly onto the floor.
Why does grease discolor engineered wood, and how can I prevent permanent staining?
Cooking grease can seep into the top wear layer and attract dirt, which darkens spots over time. The faster you blot and clean the area, the less chance the oil has to spread or bond with the finish. After cleaning, keep foot traffic off the area and ensure it’s fully dry to prevent lingering moisture from causing haze.
What’s the best grease-cleaning method for engineered hardwood floors with a polyurethane finish?
For polyurethane-coated engineered wood, begin with blotting and then use a mixture of warm water and mild dish soap on a lightly damp cloth. Follow with a clean-water wipe to remove any residue, because soap buildup can dull the sheen and make the spot look worse. If needed, use a small amount of degreaser labeled safe for finished wood—always test in a hidden area and avoid steam cleaners.
Which cleaning products are safe for fresh grease on engineered wood floors?
Generally, mild dish soap, microfiber cloths, and warm water are the safest starting options for removing fresh cooking grease. Avoid harsh solvents, abrasive pads, or heavy-duty chemical degreasers unless the product is explicitly labeled safe for finished wood floors and you’ve spot-tested it first. For best results, use products in minimal amounts, wipe thoroughly, and dry the area to protect the engineered wood finish.
📅 Last Updated: November 14, 2026 | Topic: How to clean fresh cooking grease from engineered wood floors? | Content verified for accuracy and freshness.
References
- 404 Error
- https://www.armstrongfloors.com/flooring-resources/care-and-maintenance.html
- Home – Tarkett Commercial
- https://www.pergofloors.com/en-us/floor-care
- Wood flooring
- https://scholar.google.com/scholar?q=engineered+wood+floor+grease+stain+removal Google Scholar
- https://scholar.google.com/scholar?q=hardwood+floor+cleaning+oil+grease+stain+detergent Google Scholar
- https://scholar.google.com/scholar?q=wood+finish+cleaning+water+detergent+solvent+study Google Scholar