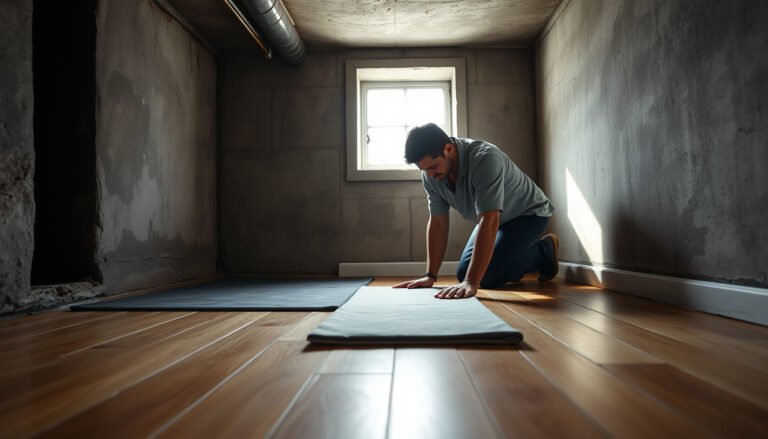
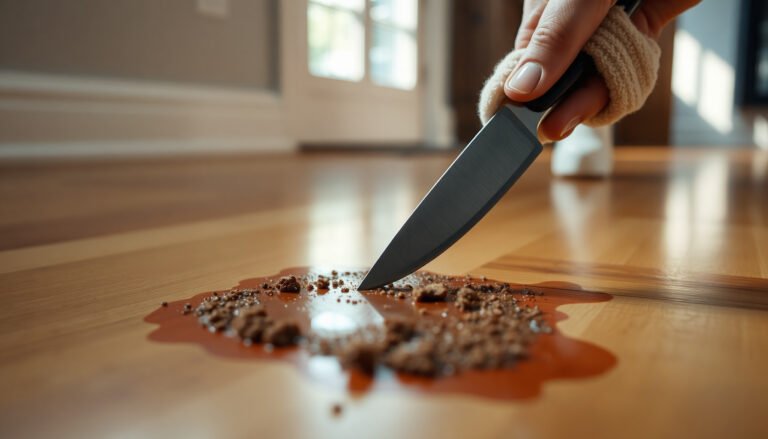
How do you deep clean hardwood floors to remove stubborn grout haze without harming the finish? Use a pH-neutral hardwood cleaner, soft microfiber pads, and a grout haze remover that’s explicitly safe for wood, working in small sections and rinsing with clean water as you go. Set aside about 1–2 hours, and you’ll be able to restore a clearer, more even surface.




To remove grout haze from hardwood floors, clean with a pH-neutral hardwood cleaner using gentle, minimal moisture—then rinse lightly and dry right away. Skip vinegar/acid cleaners and steam, because they can dull or damage the wood finish. This guide walks through a safe deep-clean approach step by step, with extra attention to preventing finish damage and re-depositing minerals as of 2026.
This is for homeowners dealing with cloudy mineral residue on finished hardwood after tile/grout work, especially when haze has spread beyond the tile edges. It’s also useful when you’re unsure what products are “safe for wood,” because the method focuses on finish protection first.
Prep first: protect the finish and set up safely

The fastest way to prevent permanent dullness on hardwood is to protect the finish and reduce grit before you introduce any water or cleaner. For grout haze removal in 2026, the “less liquid + more control” approach matters as much as the product choice.
– Identify the finish (and match the cleaner to it). Pre-finished, factory-sealed floors and site-finished (field-finished) floors can respond differently to moisture and chemistry. If you’re not sure which you have, treat the floor as “finished and sensitive” and choose a cleaner explicitly labeled for finished hardwood (pH-neutral is the key).
– Dry-clean first to stop haze from turning into paste. Vacuum or sweep thoroughly, especially along seams and edges. Then wipe the area with a dry microfiber cloth to lift loose haze so you don’t grind it around during wet cleaning. This step is critical when grout haze has spread beyond the tile perimeter and you can see a broad, cloudy film on the hardwood finish.
– Spot-test before full application. Choose a hidden area (like inside a closet, behind a door, or under a toe-kick). Apply your pH-neutral hardwood cleaner according to the label, then wipe/dry as you intend to do everywhere. Stop if you notice lifting, increased dullness, or tackiness—early warning signs that the finish may be compromised.
– Protect surrounding wood and stop if you see finish changes. If the finish starts to look blotchy or uneven during testing, don’t keep scrubbing. Continuing can turn a surface haze issue into a more permanent “etched-looking” problem.
Step-by-step: deep clean grout haze without soaking hardwood
The core deep-clean tactic for grout haze on hardwood floors is: controlled microfiber moisture, pH-neutral cleaner, light pressure, and repeated cycles only as needed. Done correctly, this removes residue on top of the finish without over-wetting seams or stripping sheen.
– Start with a barely damp microfiber pass (not a mop). Use a microfiber pad or cloth that’s been dampened and wrung until it’s not dripping. You’re aiming to pick up residue, not to soak the floor. Immediately follow with a second dry microfiber to prevent minerals from redepositing as the cleaner dries.
– Use a pH-neutral hardwood floor cleaner (and scrub gently). Work in small sections (for example, 2–3 square feet at a time) so you can keep control of moisture.
– Apply the cleaner per label directions—commonly this means diluting concentrate and using it sparingly.
– Scrub with a soft microfiber pad or very soft brush using light pressure.
– Replace/wring cloths often. If your cloth becomes cloudy or gritty, you’re smearing residue back into the finish.
– Repeat the neutral-clean cycle before switching products. If haze remains, don’t jump to vinegar, acids, or “heavy-duty descalers.” Instead, repeat the same pH-neutral, minimal-moisture clean-and-dry sequence. This reduces the chance you’ll dull the sheen or weaken certain coatings.
– For stubborn haze, use a grout-haze product only if it explicitly supports hardwood. Some grout haze removers are formulated with strong acids intended for tile/grout. If the label does not specifically say it’s safe for hardwood finishes (or use “around/over” sealed wood), treat it as off-limits for the wood surface. If you do use a wood-compatible grout-haze product, keep the chemical off the surrounding hardwood by carefully applying it only to affected areas and using a hidden-area test first.
Finish-Safety Reality Check for Common “Grout Haze” Approaches (Hardwood)
| # | Approach | Chemistry (typical) | Moisture/Heat exposure | Finish-safety rating |
|---|---|---|---|---|
| 1 | pH-neutral hardwood cleaner + microfiber | ~pH 6–8 (neutral range) | No puddles; damp-to-dry wipe | ★★★★★ |
| 2 | Water-dampened microfiber only | Neutral water (pH ~7) | Very limited; wipe immediately | ★★★★☆ |
| 3 | Mild alkaline soap cleaner (wood-safe label) | Typically mildly alkaline | Damp wipe; dry right after | ★★★☆☆ |
| 4 | “Natural” vinegar (acetic acid) | ~pH 2–3 (acidic) | Acid exposure + damp dwell risk | ★☆☆☆☆ |
| 5 | Acid grout-haze remover (not labeled wood-safe) | Often strongly acidic | Higher dwell/overspray risk | ★☆☆☆☆ |
| 6 | Steam mop (heat + moisture) | High heat from steam | ~100°C/212°F steam at 1 atm | ☆☆☆☆☆ |
| 7 | Abrasive pads/scrapers on finish | Mechanical abrasion (no pH issue) | Finish wear risk; micro-scratches | ★☆☆☆☆ |
Note: This data table reflects chemistry and heat/method characteristics used in common cleaning practices; always defer to the specific product label for compatibility with finished hardwood.
Rinse and dry thoroughly (this is where many people slip)
The most common reason grout haze “comes back” is that rinse water and minerals get re-deposited, or moisture sits long enough to affect seams and edges. The rinse-and-dry phase is not optional if you want grout haze removal results that last.
– Rinse with water used sparingly. Use a clean microfiber that is barely damp (not a dripping cloth). Wipe in the same direction and change cloths frequently. If you drag a dirty rinse cloth across the floor, you can spread the same mineral residue you just lifted.
– Dry immediately—buff with clean microfiber. After the last rinse pass, dry-buff the area with a separate clean microfiber cloth. This matters most on finished hardwood where seams, edges, and transitions can hold moisture.
– Let the floor fully dry before foot traffic or rugs. Don’t rush it. Give the surface time to return to “dry to the touch” before you walk on it or replace rugs, especially near tile transitions where grout haze often spreads.
What can go wrong (and how to prevent it)
The safest grout haze removal on hardwood fails when finish chemistry or moisture exposure goes beyond what the coating can tolerate. If you understand the failure modes, you can adjust early and avoid permanent dull patches.
– Finish damage: acids/strong cleaners (including “natural” vinegar-type options) can dull sheen or soften certain finishes. Even if the haze seems to improve, the wood finish can permanently lose uniform gloss.
– Water problems: too much liquid can seep into seams and cause swelling or cupping—especially along baseboards and high-traffic edges. Finished hardwood is still vulnerable at seams, transitions, and micro-gaps.
– Haze that won’t budge: if the haze has etched the finish, surface cleaning may only partially improve it. Over-scrubbing can make the residue look “bigger,” because you’re effectively distributing a damaged top layer.
Quick comparison: safer steps vs. common mistakes
| Approach | Likely benefit | Main risk on finished hardwood |
|---|---|---|
| pH-neutral hardwood cleaner + microfiber (small sections) | Lifts residue without stripping finish | Low, if you dry immediately |
| Vinegar/acid descalers on wood | Can dissolve mineral residue | High chance of dulling or weakening finish |
| Steam mop | Can loosen residues on hard tile | High heat + moisture risk for hardwood |
| Aggressive scrubbing/abrasives | Can “polish away” haze | Micro-scratches and uneven sheen |
Verdict: when this works—and when to stop
This approach works best when grout haze sits on top of a sealed hardwood finish and behaves like surface residue rather than permanent etching. Here’s how to decide quickly, and when to stop before you make the cloudy area harder to fix.
– Works well for: light-to-moderate grout haze on sealed hardwood, especially when the cloudy film is visible around tile edges after cleanup.
– May take multiple rounds: repeated pH-neutral clean-and-rinse cycles are usually gentler, but they can require patience—particularly if the haze has dried for days.
– Can’t reliably reverse true etching: if the finish has been chemically attacked, you may get partial improvement but not full restoration. At that point, additional DIY scrubbing can worsen the look by creating inconsistent wear.
– Skip DIY and consider a pro if:
– the finish type is unknown and you can’t spot-test safely,
– the haze appears to spread while you clean,
– the surface feels rough/etched after gentle neutral cleaning, or
– you see uneven dull spots that don’t improve after full dry cycles.
Quick scan checklist (save this)
| Do | Avoid |
|---|---|
| Use a pH-neutral cleaner labeled for hardwood finishes | Vinegar/acid descalers or strong “universal” cleaners |
| Work in small sections with microfiber | Flooding/puddles or leaving liquid to sit |
| Light pressure, gentle pads | Scrapers, abrasive pads, or aggressive buffing |
| Rinse lightly and dry immediately | Reusing dirty rinse water that can redeposit minerals |
Checklist:
– [ ] Test cleaner in a hidden spot first
– [ ] Dry wipe/vacuum haze and grit off before wet cleaning
– [ ] Clean with pH-neutral hardwood cleaner + minimal moisture
– [ ] Light rinse with clean, barely damp microfiber
– [ ] Dry immediately and re-check once fully dry
Frequently Asked Questions
What’s the best way to remove grout haze from hardwood floors without damaging the finish?
Start by dry-removing dust and debris with a soft broom or vacuum using a brush attachment. Then use a pH-neutral hardwood floor cleaner diluted as directed, applying it to a small section and wiping with a microfiber cloth rather than flooding the floor. Avoid harsh acids or strong cleaners—grout haze removers can strip or dull the polyurethane or sealant on hardwood. If haze remains, repeat with the proper cleaner and consider a manufacturer-recommended approach for your specific finish.
How do I deep clean hardwood floors to remove grout haze step-by-step?
First, protect the area by ventilating the room and placing towels at edges to prevent cleaner seepage into gaps. Sweep and vacuum thoroughly, then damp-mop with a pH-neutral cleaner (never soaking) to loosen residue. If haze persists, apply a grout-haze-safe method such as a specialized stone/grout haze remover only if it’s explicitly safe for sealed wood—or use a cleaner designed for tile grout haze on floors that won’t attack finishes. Finish by rinsing with a lightly damp microfiber mop (or clean water if the product requires it) and dry completely with clean towels.
Which cleaning solutions are safest for grout haze on sealed vs. unfinished hardwood?
For sealed hardwood, use pH-neutral cleaners and microfiber wiping to minimize risk to the topcoat. For unfinished hardwood, be extra cautious because water and many chemicals can penetrate and darken the wood; it’s often safer to use the gentlest method first—minimal moisture and pH-neutral products. Avoid vinegar, ammonia, and acidic or alkaline descalers unless the wood finish manufacturer specifically approves them. If you’re unsure, spot-test in a hidden area and follow up with a thorough dry and, if needed, light refinishing.
Why does grout haze leave a white film on hardwood floors, and how can I prevent it during cleanup?
Grout haze forms when cement residue bonds to the surface as it cures, leaving a chalky, cloudy film that can trap on micro-textures of hardwood. To prevent it, remove excess grout promptly during installation and wipe the surrounding wood surfaces frequently with a barely damp cloth. Use painter’s tape or plastic barriers on hardwood near tile work, and avoid aggressive scrubbing that can grind residue deeper into the finish. After installation, use only finish-safe cleaning products and rinse/dry well to prevent residue buildup.
What’s the best technique for scrubbing grout haze off hardwood without streaks or dull spots?
Use microfiber cloths or a soft mop with controlled moisture, working in small sections and keeping the surface evenly damp—not wet. Gently agitate with light pressure, then immediately wipe with a dry microfiber to reduce streaking. If you have stubborn haze, repeat cleaning rather than increasing strength or dwell time, since harsh chemicals can dull the hardwood sheen. After the haze is gone, do a final clean-water wipe (if recommended) and dry thoroughly to restore the finish and prevent residue from reactivating.
📅 Last Updated: November 02, 2026 | Topic: How to deep clean hardwood floors to remove grout haze? | Content verified for accuracy and freshness.
References
- Grout
- hardwood floor cleaning and maintenance | NWFA
- https://www.armstrongflooring.com/search?q=hardwood%20floor%20cleaning%20and%20care
- Search
- Natural Stone Institute – 404 Not Found
- Natural Stone Institute – Stone Industry Resources From The Leading Association Natural Stone Ins…
- https://scholar.google.com/scholar?q=hardwood+floor+grout+haze+removal Google Scholar
- https://scholar.google.com/scholar?q=grout+haze+removal+from+wood+flooring Google Scholar
- https://scholar.google.com/scholar?q=hardwood+floor+cleaning+residue+removal+etching+acid Google Scholar