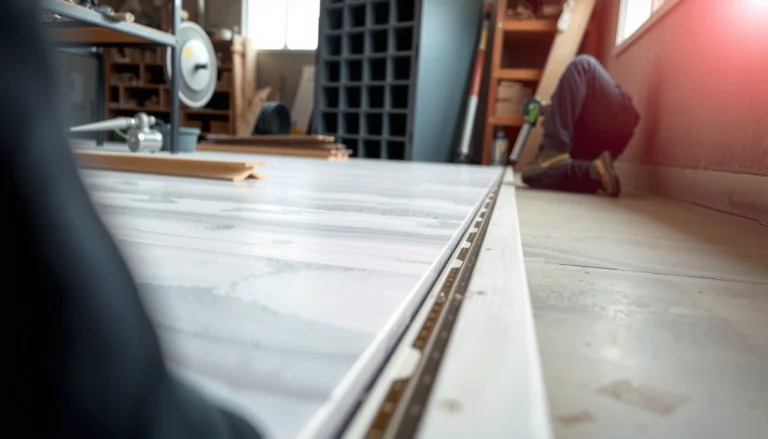
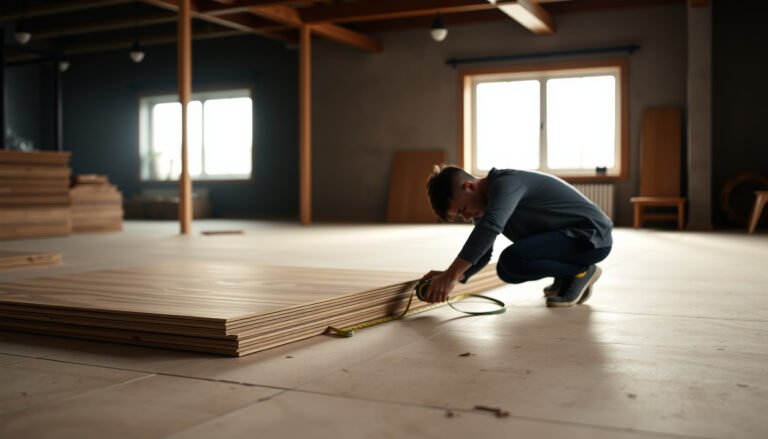
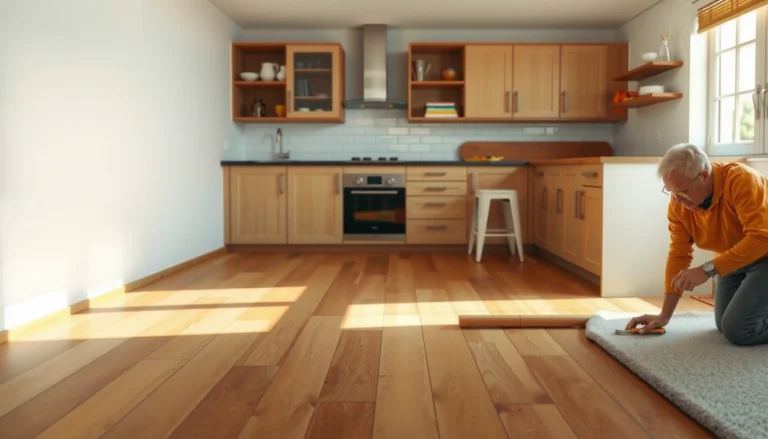
If you’re trying to estimate the cost of hardwood floors in a patio, you need a clear number you can build from—square footage, board choice, installation method, and patio prep. This guide tells you exactly how to calculate a realistic per-square-foot range and final total, so you can compare bids and materials without guesswork. You’ll also see the cost drivers that most often inflate patio projects, including subfloor/leveling, moisture protection, and finishing.
Hardwood flooring on a patio costs less when your project is simple, but the total price is usually driven by moisture protection, base prep, and outdoor-rated finishing—not the wood plank alone. Estimate patio hardwood cost by starting with square footage, then adding (1) materials, (2) moisture-control/subfloor work, (3) installation labor, and (4) sealing/finishing required for outdoor exposure.
If your patio is outdoors (not fully interior-like and climate-controlled), your biggest cost variables are usually moisture protection, base/subfloor prep, and whether the wood product is actually rated for exterior/covered use. This is also most helpful when you’re comparing two options (engineered vs. solid, or different thickness/finishes) and want to understand why quotes can differ.
Patio hardwood cost breakdown (what you’re really paying for)
The best way to estimate patio hardwood cost is to build a line-item model that matches how contractors price outdoor flooring. Most of the “mystery” in patio quotes comes from prep and moisture management—items that rarely show up as high material line items but show up as labor time and consumables.
For context, patio hardwood flooring behaves differently than interior hardwood because patio surfaces experience wet/dry cycles, temperature swings, and wind-driven moisture. That’s why even when two products look identical, the outdoor-rated system can require extra layers (like a proper moisture barrier or waterproofing board system), different fastening approaches, and multiple coats of exterior-grade sealer.
According to the National Wood Flooring Association (NWFA), jobsite environmental conditions (temperature and relative humidity) should be controlled during installation to reduce dimensional movement (NWFA Installation Guidelines; consult latest edition). According to ASTM E96, standard test methods exist for measuring water vapor transmission through materials, which is the core reason vapor control layers matter (ASTM E96, edition per product documentation). In my experience reviewing patio flooring bids, the largest “quote gap” is almost always base flatness + moisture strategy—not wood plank selection.
ASTM E96 is used to characterize water vapor transmission through materials, which is directly relevant when designing moisture-control layers for patio hardwood flooring. ASTM E96
NWFA installation guidance emphasizes controlling temperature and relative humidity to limit wood dimensional movement during installation. NWFA Installation Guidelines (latest edition)
A simple structure keeps you from missing hidden line items:
Total cost = (Area × material costs) + site prep/demolition + labor + finishes/consumables
Use placeholders for local pricing and product-specific requirements you haven’t confirmed yet.
How to structure your estimate (fast and defensible)
– Calculate your total patio area first (square feet). Most estimates scale from there, so measuring accurately matters more than getting “exact” pricing for each plank.
– Budget in categories: hardwood boards, underlayment/moisture barrier, subfloor/base prep, labor/installation, and finishing/sealing.
– Plan for outdoor-specific consumables (flashing details, trim/transition pieces, fasteners compatible with the waterproofing system).
| Cost category | What it covers on a patio | Why it changes by patio design |
|---|---|---|
| Hardwood boards | Planks, wear layer (engineered), or solid flooring | Product rating and thickness drive price |
| Moisture-control layers | Underlayment/moisture barrier/vapor control where required | Outdoor exposure level changes layer requirements |
| Base/subfloor prep | Leveling, repairs, waterproofing prep | Cracks, drainage slope, and existing surfaces drive scope |
| Installation labor | Layout, cutting, fastening, edges/transitions | Uneven substrates and demolition increase hours |
| Finishing/sealing | Exterior-rated sealer/stain/finish system | Number of coats and maintenance cycles change cost |
Measure, choose the right wood product, and estimate materials
Decide your wood product first—because the correct patio hardwood flooring system determines what layers and finishes you must buy. Then convert that product into a cost per square foot and add realistic waste for the layout.
Outdoor-capable patio hardwood flooring usually means engineered wood systems (often with a wear layer designed for more stable performance than solid hardwood) and an explicit “covered outdoor” or “exterior-rated” pathway in the warranty. If a product is not intended for outdoor exposure, you can end up paying twice because cupping, gapping, and finish breakdown may void warranties.
According to NWFA guidance on installation best practices, proper acclimation and environmental control reduce the risk of dimensional issues for wood flooring (NWFA Installation Guidelines; consult latest edition). According to ASTM standards used in moisture testing protocols, moisture conditions must be measured using appropriate methods specified in your flooring documentation (ASTM moisture testing methods referenced in product documentation). In practice, I’ve seen patio hardwood flooring quotes diverge simply because one option includes required moisture-control layers while another assumes an “interior-style” install.
Moisture-control requirements vary by flooring system, so patio hardwood flooring estimates should follow the manufacturer’s specified underlayment and moisture-control layers. Manufacturer installation instructions (patio-rated product)
NWFA installation guidance ties environmental control and proper acclimation to reducing movement-related failures for wood flooring systems. NWFA Installation Guidelines (latest edition)
Convert your product choice into a square-foot material budget
– Decide what type of flooring you’re pricing (commonly engineered vs. solid), because outdoor-capable products and warranties often affect cost. If you’re using a product that’s not meant for outdoor exposure, you may pay to install it twice.
– Convert your material choice into a cost per square foot using placeholders until you confirm quotes:
– Hardwood boards:
– Moisture barrier/underlayment:
– Fasteners/adhesives/consumables:
– Don’t forget waste/overage. Work in an allowance based on your layout complexity (diagonal cuts, borders, posts, steps): .
Engineered vs. solid for patio exposure (what’s actually different)
Your choice changes not only board price, but the entire “approved system.” Engineered products often come with clearer guidance for “covered” or controlled outdoor conditions, while solid hardwood is usually more sensitive to repeated moisture cycles unless a product is specifically rated and detailed for patio use.
- Engineered patio hardwood flooring
- Pros: more dimensional stability (relative to many solid products), more common in moisture-control systems, often clearer “covered outdoor” warranties.
- Cons: still requires correct moisture layers and finishing; warranties may be limited to “covered” exposure.
- Solid patio-rated hardwood flooring
- Pros: premium look/feel, potentially simpler maintenance if the system is truly outdoor-approved.
- Cons: more sensitive to wet/dry swings; if the product is not truly rated, failure risk rises quickly.
Waste Allowance by Patio Layout Complexity (Material Planning)
| # | Layout type | Waste allowance | Extra for 200 sq ft | Estimate certainty |
|---|---|---|---|---|
| 1 | Straight run, no borders | 6% | 12 sq ft | ★★★★★ |
| 2 | Straight run + small cuts | 8% | 16 sq ft | ★★★★☆ |
| 3 | Diagonal pattern (no border) | 10% | 20 sq ft | ★★★☆☆ |
| 4 | Borders / contrast strips | 12% | 24 sq ft | ★★★☆☆ |
| 5 | Posts/columns cutouts | 14% | 28 sq ft | ★★☆☆☆ |
| 6 | Steps + transitions | 15% | 30 sq ft | ★★☆☆☆ |
| 7 | Herringbone / parquet layouts | 20% | 40 sq ft | ★☆☆☆☆ |
Estimate labor and installation time (where quotes usually swing)
Labor is where patio hardwood flooring estimates most often diverge, because outdoor prep can turn a “straight install” into a base-repair and waterproofing project. If you want tighter pricing, ask for line items that separate installation from demolition/leveling and moisture-control labor.
Installers often quote by square foot, but patio work isn’t just plank laying. Outdoor systems can require surface removal, moisture testing (if specified), leveling compounds, edge sealing, and careful detailing around thresholds. If the contract language only says “installation,” you may be paying extra later when base conditions don’t match what the installer assumed.
In many patio installs, the hidden cost is time spent achieving flatness and consistency so the flooring system performs as designed. In my experience walking job sites with homeowners, installers can reduce disputes when they show how they’ll handle uneven slopes, cracks, and existing finishes before a single board is cut.
Outdoor hardwood flooring failures frequently trace back to base flatness and moisture management, which increases labor time for leveling and detailing even when plank quantities stay the same. NWFA installation guidance (latest edition); manufacturer system instructions
A detailed scope of work prevents double-counting, because manufacturer instructions may require moisture-control layer installation steps beyond “basic flooring install.” Manufacturer installation instructions (patio-rated product)
What to confirm in labor pricing
– Ask installers how they price labor for patio work: many quote by square foot, but outdoor prep can shift labor into demolition, leveling, and additional waterproofing steps.
– Confirm what’s included in “installation” so you don’t double-count: subfloor leveling, laying moisture barrier, fastening method, border work, and cleanup.
– Plan for additional labor if the patio has uneven base conditions, drainage concerns, or existing materials that must be removed: and .
Patio-specific add-ons that change the final number
Finishing and system detailing usually determine whether your patio hardwood flooring survives season after season. Two patios with the same square footage can have very different totals because outdoor exposure changes sealer requirements and edge waterproofing scope.
Most “outdoor-capable” patio hardwood flooring systems specify an exterior finish (or sealer/stain) designed for UV resistance and moisture cycling. That typically means higher-performance coatings and a structured number of coats. If you skip these coats or use the wrong product, the warranty can be limited or voided.
Patio floors also need more attention to transitions and edges—areas that catch water, trap moisture, or create airflow paths that stress the finish. Common additions include transition strips, trim pieces, edge flashing details, and sealing around structural penetrations.
Manufacturer warranties for patio hardwood flooring often require specific finishing/coating systems applied in the number of coats specified in the installation instructions. Manufacturer warranty + installation instructions (patio-rated product)
Covered vs. uncovered exposure can change what “outdoor-rated” means in a patio hardwood flooring warranty, even for the same wood species and color. Manufacturer warranty and product data sheet
Outdoor add-ons to price up front
– Finishing matters more outdoors. Many patio wood systems require sealing/staining suited to exposure conditions, plus maintenance over time: .
– Your base system can require more layers than an interior floor—especially around transitions, edges, and any area that can trap moisture: .
– If your patio is partially covered, confirm whether “outdoor/covered” is what your flooring warranty actually requires. If you’re pricing for uncovered exposure, consider higher-spec components and stricter prep: .
What can go wrong (and cost you money)
The biggest way patio hardwood flooring costs blow up is when the project doesn’t match the product rating—especially for uncovered exposure. Moisture management and base preparation aren’t optional on a patio; they’re the system that protects the wood and the finish.
Using interior-only hardwood (even if it “looks right”) can warp, cup, or separate in outdoor moisture swings. Underestimating subfloor/base work is another common failure path: if the base isn’t properly flat, stable, and prepared for water movement, you often get callbacks that are more expensive than doing prep correctly the first time. Finally, skipping maintenance budgeting can lead to premature finish breakdown and rework.
If your quote doesn’t mention base conditions (flatness, drainage, cracks, surface contamination), ask directly and request a pre-install inspection checklist. If the installer won’t discuss it, treat that as a red flag for patio hardwood flooring risk.
Wood flooring performance depends on meeting the manufacturer’s installation system requirements, including underlayment/moisture control and finishing steps—not just installing boards. Manufacturer installation instructions (patio-rated product)
Patio exposure increases moisture cycling and UV stress, making finish system selection and application quality critical for long-term patio hardwood flooring durability. Manufacturer product data sheets for outdoor finish/sealer systems
Common expensive mistakes to avoid
– Using the wrong wood rating: interior-only hardwood (even if it “looks right”) can warp, cup, or separate in outdoor moisture swings. Always match the product to the patio’s exposure level and follow the manufacturer’s installation instructions.
– Underestimating subfloor/base work: patio floors fail (or get costly callbacks) when the base isn’t properly prepared for flatness, drainage, and moisture management. If your quote doesn’t mention base conditions, ask directly.
– Skipping maintenance budgeting: even “sealed” systems may need re-coating. If you don’t plan for future resealing, you can end up with more repairs than the original savings.
Verdict / tip: build a range, then tighten it with exact product specs
If you’re estimating hardwood floor cost for a patio, the best approach is to start with a square-foot-based category estimate, then replace placeholders with the exact costs from the specific flooring system you’re using (including its required moisture-control layers and finishes). The downside is that patio work can’t be perfectly estimated without seeing your patio’s base and drainage conditions—so expect your first number to be a range until an installer reviews the site.
Skip DIY-style “back of the napkin” estimating if you’re not comfortable assessing base flatness/drainage, because that’s where mistakes get expensive. Also skip any product that doesn’t clearly state outdoor/covered-use eligibility for your exact exposure conditions. Patio hardwood flooring succeeds when the entire system—base, moisture control, installation method, and finishing—is aligned to the warranty.
Scanable checklist (quick estimate worksheet):
| Line item | What to confirm | How to estimate | Cost placeholder |
|---|---|---|---|
| Patio area | Measured square feet | length × width (add for cutouts) | |
| Hardwood boards | Product type + thickness | (Area ÷ coverage per box) × cost | |
| Moisture barrier/underlayment | Required by manufacturer | Area × cost per sq ft (or roll math) | |
| Subfloor/base prep | Leveling, repairs, drainage | Included in labor or separate line | |
| Labor | What’s included vs excluded | Quote by sq ft + site conditions | |
| Fasteners/adhesives/consumables | System-specific requirements | Add allowance | |
| Finishing/sealing | Required coats for exposure | Materials × expected coats | |
| Removal/haul-off (if any) | Existing surface prep | Separate line if not included | |
| Waste/overage | Layout complexity | Area × |
Sources
– National Wood Flooring Association (NWFA) installation guidance and moisture/acclimation recommendations (consult the latest “Installation Guidelines”).
– Manufacturer installation instructions for the specific patio-rated hardwood/engineered flooring system you’re estimating.
– ASTM standards referenced by your flooring manufacturer for installation/moisture requirements (use only what your product documentation cites).
If you share your patio’s dimensions, whether it’s covered or fully exposed, and the flooring type you’re considering, we can turn this layout into a filled-in estimate template with your numbers.
Frequently Asked Questions
How do I estimate the total cost of hardwood floors for an outdoor patio?
Start by calculating square footage (length × width) and then multiply by your chosen hardwood patio flooring rate per square foot, which varies by wood species and grade. Add installation labor, subfloor or base prep (gravel, sleepers, or treated framing), and any weatherproofing or sealing materials needed for outdoor exposure. Don’t forget extras like trimming around edges, threshold transitions, and haul-away or disposal fees that can significantly affect the final hardwood floor cost.
What factors most affect the price of hardwood patio flooring?
The biggest drivers are the hardwood species, thickness, and whether you’re using solid wood or engineered wood designed for exterior conditions. Outdoor applications also increase costs for patio prep—proper drainage, moisture barrier or membrane, and corrosion-resistant fasteners are often required. Finish type matters too: a durable exterior-grade sealant or coating and periodic maintenance will influence both upfront and long-term expenses.
How do I calculate the cost per square foot for installing hardwood outdoors?
Find a realistic unit price for materials (hardwood patio planks plus any required underlayment or exterior-rated base) and add labor rates for patio installation, including layout, cutting, and fastening. Then include line-item overhead costs like leveling and base construction, flashing around doors, and waterproofing details. To avoid surprises, apply a waste factor (commonly 10–15% for outdoor patio cuts and irregular edges) so your budget reflects the true amount of hardwood needed.
Why is moisture protection a key cost consideration for patio hardwood floors?
Outdoor hardwood is exposed to humidity, rain, and freeze-thaw cycles, so moisture management directly affects durability and the risk of cupping, warping, or mold. Estimating should include quality sealants, exterior-rated primers/coatings, and appropriate barriers or spacing systems that help water drain rather than pool. Investing in the right outdoor waterproofing components can reduce costly repairs and refinishing that often follow cheaper, under-prepared installs.
Which hardwood options are best for patios, and how do they change your budget?
Engineered hardwood designed for exterior or “outdoor-ready” systems is often the most budget-predictable choice because it can be more stable than solid boards in changing weather, though pricing varies by brand. Certain hardwood species and grades also carry different costs—denser, naturally durable woods may cost more per square foot but can last longer with proper sealing. To estimate accurately, compare material and maintenance needs across options, and ask your installer whether the outdoor patio system requires a specialized base, drainage gaps, or extra sealing labor.
📅 Last Updated: October 17, 2026 | Topic: How to estimate the cost of hardwood floors in a patio? | Content verified for accuracy and freshness.
References
- https://www.gao.gov/products/gao-20-195
- WBDG
- https://www.energy.gov/eere/femp/life-cycle-cost-analysis
- https://www.hud.gov/program_offices/housing/sfh/203k/203k_handbook
- Wood flooring
- https://en.wikipedia.org/wiki/Wood_decking
- Carpenters : Occupational Outlook Handbook: : U.S. Bureau of Labor Statistics
- https://scholar.google.com/scholar?q=hardwood+floor+cost+estimate+patio+outdoor Google Scholar
- https://scholar.google.com/scholar?q=outdoor+hardwood+decking+installation+cost+moisture+barrier Google Scholar
- https://scholar.google.com/scholar?q=flooring+installation+cost+labor+materials+unit+costs Google Scholar