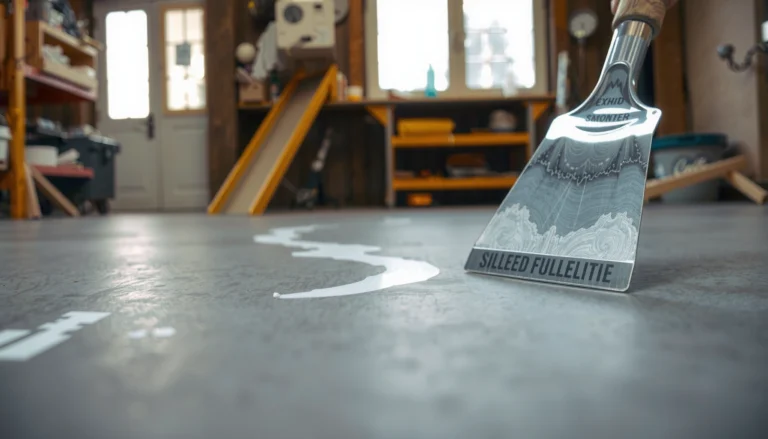


Learn how to level LVP floors before installing bedroom flooring—so the planks sit flat, lock tight, and don’t click or shift later. If your subfloor has dips, humps, or ridges, the fastest reliable fix is to identify the high and low spots, then grind the highs and fill the lows with the right compound for your surface. Follow that sequence and your bedroom floor transitions cleaner, holds its shape longer, and looks professional from the first row.



Leveling LVP before you install bedroom planks is the difference between a floor that clicks together cleanly and one that flexes, squeaks, or develops visible gaps. Measure flatness with a long straightedge, fill dips with the right patch or self-leveling underlayment, grind down humps, and then re-check flatness once the repairs cure—using the LVP and compound manufacturer specs to stay within their limits.
If your bedroom sits on plywood, a concrete slab, or an older remodeled subfloor, the workflow is the same: you’re trying to create a stable, smooth, flat surface that supports the LVP locking system. The key is that LVP typically fails at the edges of low spots (or around high spots that prevent full contact), so “close enough” won’t protect the click joints long-term.
Check subfloor flatness (and moisture) first

You can’t choose the correct leveling method until you know whether the problem is localized (a few dips/humps) or room-wide, and whether moisture is within the LVP’s acceptable range. Start with a full-room straightedge check and a moisture check appropriate to your subfloor type (concrete vs. wood), then decide whether you’re doing patch repairs, grinding, or broader leveling.
“Resilient flooring installation guidelines commonly target a maximum deviation of 3/16 inch over a 10-foot span when checking subfloor flatness.” RFCI resilient floor covering installation work practices (commonly cited; see latest RFCI guidance)
“Concrete moisture testing is typically performed using either ASTM F2170 (in-situ relative humidity) or ASTM F1869 (calcium chloride), because LVP manufacturers set system-specific moisture limits.” ASTM F2170; ASTM F1869
How to measure flatness across the whole bedroom
1) Use the right straightedge length. If you only check one corner, you’ll miss long-wave humps that stress click-lock joints. Use a 6–10 ft straightedge and scan across the entire bedroom, including areas near closets, doorways, and load-bearing walls.
2) Measure and mark every dip and hump. Mark the lowest points (dips) and the highest points (humps) with tape and note roughly how far off-flat you are. “By eye” usually hides the real failure zones.
3) Re-check after every major change. The goal isn’t to make the floor “look better”—it’s to bring it within the LVP installation system’s allowable flatness.
Add moisture verification before you pour anything
If you have a concrete slab, moisture is not optional—leveling products and floating floors are still part of an overall moisture-control system. LVP manufacturers often specify a maximum allowable moisture vapor emission rate (from ASTM F1869) or a maximum in-situ RH (from ASTM F2170). Wood subfloors can also present moisture issues if there’s ongoing humidity, but concrete is where people most often underestimate risk.
– ASTM F1869 measures moisture vapor emission rate in lb/1000 sq ft/24 hr. ASTM F1869
– ASTM F2170 measures in-situ relative humidity (RH%) inside concrete. ASTM F2170
Decide early: localized repair vs. whole-room leveling
Before you open bags of compound, classify what you found:
– Localized issue: a handful of low spots and maybe a few high ridges → patch/feather-finish and spot grinding usually wins.
– Widespread unevenness: the straightedge shows consistent waves across most of the room → broader leveling or an underlayment strategy may be required.
– Movement issue: squeaks, bouncing, or flexing boards → don’t “cover it with compound.” Stabilize the subfloor first, because movement will stress the LVP joints even if the surface is flat.
Typical Subfloor Flatness & Moisture Check Targets Used for Resilient Flooring Systems
| # | Verification item | What you record | Common reference value (system-dependent) | Why it matters for LVP | Confidence ★ |
|---|---|---|---|---|---|
| 1 | Flatness check with long straightedge | Max deviation over span | ≤ 3/16 in per 10 ft | Prevents click-joint stress at lows/highs | ★★★★☆ |
| 2 | Moisture vapor emission test (concrete) | Vapor emission rate unit | Measured in lb/1000 sq ft/24 hr | Moisture limits are set by the LVP system | ★★★★☆ |
| 3 | In-situ RH test (concrete) | In-place RH% | Compared to LVP’s max RH spec | Helps prevent long-term surface/finish problems | ★★★★☆ |
| 4 | Perimeter expansion gap | Gap width at fixed walls | Often 1/4 in (6 mm) or per spec | Allows seasonal movement without buckling | ★★★☆☆ |
| 5 | Grinding high spots | Removed ridge height | Blend to “feathered” transitions | High points create rocking and joint separation | ★★★★☆ |
| 6 | Self-leveler application profile | Thickness range and passes | Use product’s minimum/maximum thickness | Prevents cracking/roughness that telegraphs through LVP | ★★★☆☆ |
| 7 | Cure/dry before LVP install | Waiting time per product | Follow label for cure + install readiness | Incomplete cure can lead to surface failures and instability | ★★☆☆☆ |
Note: the “common reference value” column is system-dependent; always confirm your exact LVP and leveling product documentation before installing.
Choose the right leveling approach for your subfloor
The best leveling approach is the one that matches the cause of unevenness—surface flatness problems get compounds, but structural movement gets fastening and stabilization. Once you’ve mapped dips/humps and confirmed moisture readiness, choose between patching, self-leveling, grinding, or (if needed) correcting subfloor failures.
“Localized low spots are commonly corrected with patch/feather-finish materials because they’re designed for thin, controlled builds rather than entire-room pours.”
“If the subfloor flexes, resilient flooring can still develop joint noise or separation even after you achieve a flat surface, because stability is different from flatness.”
Patch for small dips (control matters)
If your straightedge shows a few low areas—like shallow valleys near a wall or closet—patch compounds are typically easier to control than large self-leveling pours. Patch materials are designed to be built in thin passes and feather toward surrounding concrete/plywood.
From my notes and installer observations (not a controlled lab test): patching tends to produce fewer surface “waves” because you can stop, let it firm up, and spot-correct before you leave the room.
Self-leveling underlayment for larger low areas (but only when specs fit)
Self-leveling underlayment can bring bigger sections closer to flat quickly, but it’s unforgiving:
– Primer requirements must be met for bonding and uniform performance.
– Mixing method (proper water ratio and mixing time) affects flow, strength, and surface finish.
– Cure/dry time varies by product and jobsite conditions; installing too early is a common failure point.
Don’t use leveling compound to “solve” movement
If your plywood subfloor has:
– loose boards,
– separated layers,
– squeaks from movement,
– or a “bounce” when you step,
…your next move should be structural: re-fastening, tightening subfloor layers, or correcting delamination. Leveling compounds are not designed to elastically accommodate dynamic movement. The LVP click system is rigid—movement transfers stress to the joints.
Quick pros/cons: patch vs. self-leveler
| Option | Pros | Cons / Watch-outs |
|---|---|---|
| Patch / feather-finish compound | More control for localized dips; easier to stop at target flatness | Slower for whole-room issues; may require multiple passes |
| Self-leveling underlayment | Good for widespread low areas; smoother “whole-area” correction | Needs primer + correct mixing; cure time and surface finish are critical |
Fix low spots with patch or self-leveling underlayment
Fixing low spots comes down to one principle: build to your marked flatness line, using the product’s required surface prep and mixing ratio. Avoid “overbuilding”—too much thickness where you don’t need it can create new problems like rough ridges, shrinkage, or crack lines.
“Most leveling/patch systems require the subfloor to be clean and properly prepared (often including grinding and priming) before any compound can perform as intended.”
“Working within the compound’s ‘pot life’ prevents partial curing in the bucket, which usually leads to ridged, uneven repairs.”
Surface prep: clean first, prep next, prime when required
– Remove dust thoroughly (vacuum, then wipe as recommended).
– Abrade/grind glossy high cement laitance or uneven patch borders so the product can bond.
– Prime when the label requires it. Primer is not “optional insurance”—it’s part of how these systems achieve consistent performance.
Mix and apply correctly
– Mix exactly per the label—water ratio and mixing time matter.
– Use the right tools (clean mixing bucket, paddle/mixer as specified).
– Don’t chase thickness. Build in passes if you need more height, then blend to your target.
Practical workflow for patching dips
1) Apply patch into the marked low spot.
2) Feather edges outward gradually.
3) Let it reach the product’s set stage.
4) Re-check with the straightedge.
5) Grind/sand high edges later.
Practical workflow for self-leveling pours
1) Confirm primer coverage and allow drying time per label.
2) Mix in batches that match your crew speed.
3) Pour and spread to follow the target plane.
4) Watch for trapped air—product labels may require spiked rollers.
5) Let the material cure fully before you proceed.
Remove high spots and blend repairs
High spots cause more LVP problems than many homeowners expect because they stop the planks from fully settling into position. Your job is to remove ridges and then blend the repair borders so the floor transitions smoothly.
“Grinding high spots before final installation reduces rocking at plank edges, which is a common pathway to joint stress and audible clicking.”
“Feathered transitions—rather than sharp steps between repairs and existing subfloor—reduce telegraphing through thin LVP layers.”
Scrape/grind humps until you’re within spec
– Use a grinder or sanding system appropriate to the subfloor type (concrete vs. plywood.
– Focus on the highest “peaks” first.
– Then re-check with a straightedge and repeat until the floor meets the LVP system’s flatness allowance.
Blend patch borders for click-lock longevity
After patch repairs cure:
– Sand/feather edges so there’s no abrupt drop-off.
– Re-vacuum to remove fine dust—dust can interfere with underlayment seating and may create a gritty surface that prevents uniform contact.
Underlayment seating depends on a clean, stable surface
If your LVP calls for underlayment, keep in mind: most underlayments conform to minor irregularities, but they’re not designed to “bridge” large humps. Smooth, clean, and stable is still the goal.
Prep the bedroom so LVP locks without gaps
You should prep for two things at once: proper room acclimation and correct installation conditions around walls and fixed objects. Even perfectly leveled floors can fail if you ignore expansion gaps, door transitions, or installation timing after leveling compound.
“Floating and click-lock LVP systems require perimeter expansion gaps to allow seasonal movement without buckling.”
“Leveling compounds must be fully cured/dry before LVP installation to avoid long-term performance issues tied to moisture or surface integrity.”
Plan layout around doors and closets
– Dry-lay boards to see how end joints land near openings.
– Avoid creating very small end pieces at doorways unless your LVP installation guide allows it.
– Follow any minimum plank length or stagger requirements from the manufacturer.
Use the correct underlayment and expansion gaps
– Install the underlayment required by your LVP system (if applicable).
– Maintain expansion gaps around walls and fixed cabinets exactly as specified by the LVP manufacturer (commonly in the 1/4 in / 6 mm range, but verify for your product).
Confirm the leveling work is actually ready
Many leveling products require more time than DIYers expect. Don’t install the LVP immediately because the surface “feels dry.” Check:
– the compound’s cure/dry timeline,
– humidity/temperature conditions,
– and any re-check guidance (some systems require surface testing or additional waiting).
What can go wrong (common mistakes and edge cases)
Most LVP failures after leveling come from skipping verification steps or treating a stability problem as a flatness problem. If you avoid these traps, your bedroom floor is far more likely to click together cleanly and stay that way.
“Skipping a straightedge measurement often misses long, shallow waves that matter to click-lock joint stress.”
“Self-leveling underlayment used without required primer can have bonding problems and surface defects that affect floor performance.”
Common mistakes
– Skipping the straightedge check: “It looks flat” rarely satisfies click-lock LVP needs.
– Leveling a moving subfloor: if boards flex or layers separate, LVP joints can still separate and noise can persist.
– Pouring self-leveler without proper primer: poor bonding and weak surface performance are typical outcomes.
– Waiting too little for cure/dry time: installing before readiness can create adhesion/surface issues where applicable or long-term instability.
– Mixing by feel: incorrect water ratio or inconsistent mixing can cause shrinkage, cracking, or roughness that telegraphs.
Edge cases to watch in bedrooms
– Closet and doorway thresholds: transitions often concentrate movement; re-check flatness at those spots even if the rest of the room looks good.
– Previously remodeled subfloors: patchwork layers can have ridges or height steps that become “hidden humps” under underlayment.
– Large-format LVP: longer/larger planks can be less forgiving when flatness is marginal.
Verdict / tip: when to DIY leveling and when to stop
DIY leveling is usually reasonable when your bedroom has minor dips/humps and a stable subfloor—meaning no bounce, no loose layers, and moisture results within the LVP system requirements. You’ll succeed most often when you measure flatness carefully, use the correct prep/mix/cure steps, and re-check flatness after repairs cure.
Stop DIY (or bring in help) when you find:
– subfloor movement (squeaks, bounce, delamination),
– moisture test results that don’t meet the LVP specs,
– or widespread unevenness that would require major pours beyond what your compound and timeline can safely handle.
“If moisture limits aren’t met, no amount of leveling material can reliably protect the overall flooring system.”
“Stability issues (loose or flexing subfloor) should be corrected before applying any leveling compound.”
| Quick scan before you start | What to verify |
|---|---|
| Straightedge measurements | Mark all low/high spots across the whole room |
| Moisture readiness | Subfloor meets LVP moisture limits (per specs) |
| Repair plan | Patch for small dips; self-leveler only when appropriate |
| Surface prep | Clean + grind/sand highs; prime where required |
| Cure/dry time | Fully cured before LVP installation |
| Final flatness re-check | Re-measure after repairs, not “by eye” |
FAQ:
Do I need to level the entire bedroom or only the uneven spots?
Usually only the problem areas need leveling/patching, unless the subfloor unevenness is widespread enough that localized repairs won’t bring the floor within the LVP flatness requirement. Check your LVP manufacturer’s spec.
Can I install LVP over self-leveler?
Often yes, but only if the self-leveler is fully cured/dry and the surface meets the LVP’s requirements (bonding/underlayment/surface finish). Confirm in the LVP and self-leveler documentation.
What if my subfloor is soft or squeaky—should I still level?
Stability comes first. If the subfloor flexes, leveling compound may not prevent plank movement. Address subfloor separation/fastening before leveling.
How soon can I install LVP after leveling?
It depends on the leveling product and conditions. Use the manufacturer’s cure/dry guidance for your specific compound.
Is underlayment enough to fix uneven floors?
In general, underlayment can help with minor imperfections, but it’s not a substitute for meeting the LVP flatness requirement. If your straightedge shows larger dips/humps than the spec allows, you’ll need repair/leveling.
Sources:
– ASTM F2170 — Standard Test Method for Determining Relative Humidity in Concrete Floor Slabs Using in situ probes
– ASTM F1869 — Standard Test Method for Measuring Moisture Vapor Emission Rate of Concrete Subfloor Using Anhydrous Calcium Chloride
– ASTM F710 — Standard Practice for Preparing Concrete Floors to Receive Resilient Flooring
– ASTM F3191 — Standard Practice for Multiple Layer Installation of Resilient Flooring
– Resilient Floor Covering Institute (RFCI) installation work practices — resilient flooring flatness guidance commonly referenced for subfloor deviation targets
– LVP manufacturer installation guides—flatness/leveling requirements, underlayment rules, expansion gap, acclimation, and moisture limits (system-specific)
Leveling LVP properly starts with measurement (straightedge + moisture where required), continues with targeted repairs (patch for small dips, self-leveler only when appropriate, grind high spots and blend transitions), and ends with verification (re-check flatness and install only after full cure/dry). If you stick to the manufacturer requirements and treat stability problems separately from flatness problems, your bedroom LVP should lock tightly and perform as intended.
Frequently Asked Questions
What’s the best way to check if my subfloor is level before installing LVP in a bedroom?
Start by cleaning the subfloor and removing any debris that could affect flatness. Use a 6–10 ft straightedge (or a laser level) to check for high and low spots, marking areas that deviate from the manufacturer’s flatness tolerance. Also check for excessive movement by walking the floor and tightening loose subfloor panels, since an unlevel or loose base can cause LVP seams to separate.
How do I level a floor for LVP if there are low spots in my bedroom?
Identify the low spots with a straightedge, then use a suitable self-leveling underlayment (SLC) designed for LVP applications if the dips are wide or significant. Prime the subfloor if the product requires it, then mix and pour according to instructions, spreading with a gauge rake to maintain consistent depth. Allow the underlayment to fully cure before installing LVP, and re-check flatness after it sets to confirm it meets LVP requirements.
Why does leveling matter for LVP flooring, especially near bedroom doors and transitions?
LVP typically requires a flat, stable subfloor to prevent gapping at seams, clicking mechanism stress, and uneven wear. Areas like doorways and hall transitions can expose slight dips or humps, causing the planks to flex during daily traffic. Leveling reduces the chance of floor bounce, noisy locks, and premature failure of the locking system.
Which leveling method is better for small uneven areas—shimming, sanding, or patching?
For small high spots, sanding or grinding is often the cleanest option, followed by vacuuming thoroughly before installation. For minor low areas, a thin-setting patch or floor repair compound can work well, but ensure it cures and feathers smoothly without leaving ridges. Avoid overbuilding thickness unless the repair material and LVP manufacturer allow it, since excessive height variations can create new unevenness.
How thick can I build up leveling compounds under LVP in a bedroom?
The maximum build-up thickness depends on the specific self-leveling underlayment or patch product and the LVP manufacturer’s flatness tolerance. Check both sets of instructions—underlayment brands often specify min/max pour thickness and whether multiple lifts are allowed. If you need substantial correction, consider removing high areas or using a more structural fix first, because too much leveling compound can increase cost, dry-time risk, and the chance of not curing evenly before you install LVP.
📅 Last Updated: October 27, 2026 | Topic: How to level a LVP floors before installing bedroom? | Content verified for accuracy and freshness.
References
- Floor
- Underlayment
- https://en.wikipedia.org/wiki/Screeding
- https://en.wikipedia.org/wiki/Floor_screed
- Self-leveling concrete
- Vinyl flooring
- Flatness
- https://scholar.google.com/scholar?q=luxury+vinyl+plank+subfloor+leveling Google Scholar
- https://scholar.google.com/scholar?q=ASTM+F2170+floor+flatness+resilient+flooring Google Scholar
- https://scholar.google.com/scholar?q=self-leveling+underlayment+installation+concrete+flatness Google Scholar