You can install vinyl floors in an outdoor walkway successfully and avoid lifting, curling, and premature wear by following the right prep and product choices. The best path is to use exterior-rated vinyl designed for wet, temperature swings, paired with a properly leveled, sealed base and weatherproof edges. This guide answers exactly how to install vinyl floors outdoors so your walkway looks clean and holds up season after season.




Yes—installing vinyl on an outdoor walkway is possible, but only if your specific vinyl product is rated for exterior use and temperature/moisture swings. The biggest success factor is starting with a stable, properly drained, smooth substrate and following the manufacturer’s approved installation method and sealing/expansion-gap instructions. If your product is only “waterproof” for spills (not true exterior installation), the same rain exposure that makes outdoor vinyl appealing can also accelerate edge failure and seam opening.
Who this is for / when it applies:
This guide is for homeowners (or DIY installers) installing vinyl plank (LVP) or vinyl tile (LVT) on a walkway that sees rain/snow and sun exposure. It’s also meant for anyone who already has a concrete slab, pavers, or an outdoor surface and wants to know what to check before committing—especially because many “waterproof” vinyl floors are still not intended for true exterior installation.
Choose vinyl that’s actually approved for outdoor use
You get the best outcomes when you treat “outdoor-rated” as a specific product approval—not a marketing claim. The key is verifying the exact model’s exterior conditions, approved installation method (glue-down vs click-lock), and any edge/seam requirements.
Vinyl should be installed only using the exact method the manufacturer specifies (for example, glue-down vs click-lock), especially under exterior temperature swings.
“Waterproof” usually describes resistance to water on the surface, not the floor’s ability to tolerate freeze-thaw, trapped moisture, or wet edges over time.
What to verify in the installation guide (not just the box)
– Look for your exact product’s installation instructions (and written language) that it’s approved for “exterior,” “outdoor,” or direct weather exposure—don’t assume “waterproof” means “outdoor.”
– Prefer an installation method your manufacturer approves (often full-spread adhesive for exterior conditions); avoid guessing if your product is click-lock or glue-down.
– Confirm seam/edge requirements: some outdoor-rated products allow/require specific seam treatments and strict perimeter gaps or termination profiles.
– If the manual says “interior only,” stop there. Even the toughest wear layer can’t protect joints and termination points if the system wasn’t engineered for exterior movement.
Quick comparison: glue-down vs click-lock (outdoor exposure)
Choose the system that matches the manufacturer’s approved installation details for exterior conditions—because outdoor floors move differently than interior floors.
| Feature (exterior-walkway relevant) | Glue-down LVP/LVT (approved for exterior) | Click-lock LVP (only if explicitly approved for exterior) |
|---|---|---|
| Manufacturer approval for outdoor use | Yes—when specified | Often limited; verify wording |
| Tolerance of edge wetting | Improves when termination is correct | Can be more sensitive at seams if not designed for exterior |
| Thermal expansion management | Depends on correct perimeter gap + termination | Depends on strict gap + locking integrity |
| Seam stability under freeze-thaw | Typically better when base is stable | Can open if movement occurs |
| Moisture path risk | Reduced with proper substrate prep and sealing | Can increase if water reaches the locking profile |
| Flatness sensitivity | High—adhesive system needs full contact | High—unevenness affects locking and edges |
| Installation complexity | More steps (adhesive spread, timing) | Appears simpler but fails fast when gaps/flatness aren’t correct |
| Repair approach | Localized replacements can require adhesive removal | Often easier if the system is designed for it |
| Best practice for outdoor drainage | Still critical—water must not pool | Still critical—standing water undermines edges |
| Failure mode outdoors | Edge/termination and adhesive bond are common weak points | Locking profile separation and seam opening are common weak points |
| Best For | Walkways where you can meet the full exterior termination + moisture requirements | Small areas only when the manual explicitly permits exterior use and you can control base flatness/gaps |
Prepare the base so water can’t pool and vinyl can’t flex
You protect outdoor vinyl the same way you protect any resilient flooring system: a stable, smooth, properly drained substrate with moisture that falls within the flooring system’s limits. If the base flexes or holds water, the floor’s edges and seams become the leak path.
Moisture control is part of resilient flooring design, not an optional “extra step,” because trapped moisture can undermine adhesives and cause edge lifting.
If the substrate is uneven or soft, vinyl won’t stay fully seated—creating micro-gaps where water can work under the surface.
What “good base prep” means for outdoor walkways
– Start with a smooth, stable surface. Vinyl needs solid support; soft spots, rocking areas, thick debris, and patch ridges will show up as gaps and lifting.
– Ensure proper drainage and slope so runoff doesn’t sit on the walkway. If water collects, it will eventually work under edges and seams.
– Address moisture concerns: concrete or slabs must be dry enough for your flooring system. Use moisture testing methods referenced in common resilient flooring practice (don’t rely on “it looks dry”).
Moisture & Substrate Standards Most Often Referenced for Resilient Flooring Prep
| # | Document | Primary Use | Result Type | Outdoor-Relevance Rating |
|---|---|---|---|---|
| 1 | ASTM F1869 | Concrete moisture vapor emissions | Quantitative (MVER) | ★★★★★ |
| 2 | ASTM F2170 | In-situ RH in concrete slabs | Quantitative (RH%) | ★★★★★ |
| 3 | ASTM D4263 | Plastic sheet moisture indication | Qualitative | ★★☆☆☆ |
| 4 | ASTM E96/E96M | Water vapor transmission through materials | Quantitative (permeance) | ★★★★☆ |
| 5 | ASTM F710 | Concrete prep for resilient flooring | Work practice | ★★★★☆ |
| 6 | ASTM C920 | Elastomeric joint sealants | Material specification | ★★★★☆ |
| 7 | RFCI Resilient Flooring Work Practices | Installation best practices | Guidance & criteria | ★★★★☆ |
Moisture testing you should treat as non-negotiable
– If you’re unsure what to measure: use ASTM moisture tests such as ASTM F1869 (MVER) or ASTM F2170 (in-situ RH), then compare to the flooring manufacturer’s limits.
According to ASTM F1869, moisture vapor emission rate (MVER) is reported as a moisture emissions value using standardized units (moisture loss rate over a time period). According to ASTM F2170, in-situ relative humidity is measured within the slab and expressed as RH%. And according to RFCI, work-practice moisture guidance is part of resilient flooring installations where moisture conditions can vary.
Plan the layout and account for expansion/temperature swings
You avoid the most visible outdoor problems by planning cuts, transitions, and expansion gaps before the first plank goes down. Outdoor temperature swings and rainfall change flooring dimensions, so layout and spacing are structural—not cosmetic.
Outdoor vinyl installation failures commonly trace back to skipped or incorrect perimeter expansion gaps rather than the wear layer.
A dry layout helps you avoid micro-cuts and positions joints away from high-traffic pivots that concentrate movement.
Dry lay and stress-proof the pattern
– Dry lay boards/tiles to map cuts around the walkway edges and any features (posts, steps, planters, drains).
– Set up your pattern so you don’t end up with tiny end pieces, and keep joints away from high-stress spots where people pivot or roll carts.
– Outdoor floors move with the seasons. Follow the required expansion gap/perimeter spacing for your specific vinyl. Skipping the gap is a common reason floors buckle or pull apart.
– In 2026, installers still run into the same practical issue: heat on sun-facing surfaces expands vinyl more than shaded areas. Your layout should account for that reality via the manufacturer’s gap rules and termination methods.
Expansion vs termination: don’t confuse the two
– Expansion gap is the space the floor needs to move.
– Termination (trim/edge profile/flashing detail) is what prevents water from using that space as an entry route.
Install vinyl floors on the outdoor walkway (step-by-step)
You get a reliable exterior result when you install using the manufacturer’s approved method exactly and keep boards/tile fully seated and aligned. The “how” matters outdoors because small installation deviations turn into seam openings and edge lift under wetting and freeze-thaw.
Exterior installations should follow the same adhesive choice, trowel/notch guidance, and open-time limits stated by the flooring manufacturer when glue-down systems are approved.
When a click-lock system is permitted outdoors, the locking profile must be fully engaged and the substrate must stay flat to prevent seam separation.
Step-by-step installation (method-specific)
– Acclimate (if required): Follow the manufacturer’s acclimation instructions for temperature/humidity. If your guide says not to acclimate, follow that instead.
– Install with the approved method:
– If it’s glue-down, use the specified adhesive and trowel size if provided in the installation instructions.
– If it’s not rated for the method you want (example: exterior + click-lock), don’t improvise—use the method the product calls for.
– Work to keep seams tight and flat:
– Stagger joints per the product pattern guidance.
– Ensure boards/tiles are fully seated so water pathways don’t form along uneven seams.
– Cut cleanly around edges and penetrations:
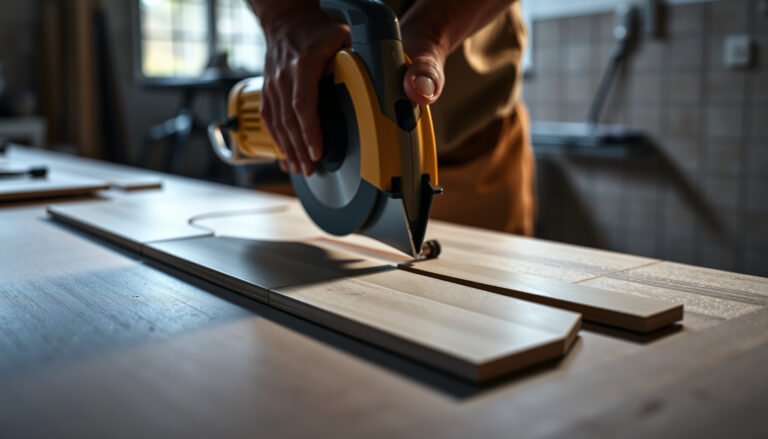
– Use the correct cutting tools so edges aren’t jagged and vulnerable to peeling.
– Keep the work surface clean during install:
– Tiny debris under seams can create voids that become water channels later.
Seal edges and protect transitions from water
You protect outdoor vinyl most effectively at terminations: the edges, thresholds, and any transition to other materials. Even “perfect” field installation can fail quickly when water can reach the sub-layer or adhesive bond.
Outdoor resilient flooring installations often fail first at terminations because that’s where water and freeze-thaw concentrate.
You typically can’t compensate for poor termination details with additional coatings or “spot sealing” if the manufacturer forbids sealing specific joints.
Use the correct termination detail (not improvisation)
– Terminate the floor with the manufacturer-approved trim/termination detail (thresholds, edge profiles, or flashing-style terminations). Outdoor floors usually fail at edges first.
– Use sealants only if the instructions call for them—and use the correct type. Some systems need perimeter sealing; others explicitly warn against sealing specific joints.
– Protect joints at transitions (to doors, steps, garage thresholds, or adjacent flooring) so wind-driven rain can’t get underneath.
Outdoor sealing: what to be careful about
– Don’t seal a joint that the manufacturer says must remain free to move.
– Don’t trap moisture under a termination piece by using an incompatible sealant/adhesive that blocks drying.
– If you’re unsure, follow the installation guide’s “sealants/finishes” section and keep documentation for future inspections.
What can go wrong (and how to avoid it)
You prevent most outdoor vinyl problems by matching the system to the environment: stable base, correct moisture limits, correct gaps, and correct edge protection. When any one of those fails, the floor often fails at seams or terminations first.
Vinyl lifting or buckling outdoors is usually linked to incorrect expansion gaps, an unsuitable substrate, or installing a system not approved for exterior thermal cycling.
Seams can open and admit water when the base isn’t flat enough or when planks/tiles aren’t fully seated during installation.
Common failure modes and their root causes
– Vinyl lifting or buckling: Usually caused by incorrect expansion gaps, unsuitable substrate, or installing a product not approved for exterior thermal cycling.
– Seams opening and water intrusion: Often from poor base flatness, improper seating, or skipping any seam/edge steps required by the manufacturer.
– Moisture problems under the floor: Pooling water, slab moisture, or failure to follow approved moisture testing guidance can lead to adhesive failure or mold/mildew risk (depending on materials).
– Wrong underlayment (or none when needed): Many vinyl products require “no underlayment” or require an underlayment only if the manufacturer specifies one.
– Freeze-thaw damage: If the walkway sees freezing temperatures, water getting trapped at edges (or sub-base) can cause lifting over time.
Quick pros/cons: exterior-rated vinyl vs switching systems
If your base and drainage are hard to control, consider alternatives (or a contractor) rather than forcing vinyl to perform where it wasn’t specified.
| Option | Pros | Cons |
|---|---|---|
| Exterior-approved LVP/LVT | Comfort underfoot, faster install, generally easier maintenance than many alternatives when properly terminated | Requires strict adherence to exterior approval, gaps, moisture limits, and termination details |
| Non-vinyl exterior flooring (tile/pavers/treated decking) | Often better engineered for freeze-thaw wetting paths, typically more straightforward water management | Can be more expensive, heavier, and may require different substrate prep and craftsmanship |
Verdict: when this is a good DIY job (and when to skip it)
This can be a solid DIY project only if your specific vinyl product is explicitly rated/allowed for outdoor installation and you can meet the base, moisture, and termination requirements without shortcuts. If you can’t verify exterior approval, can’t control drainage, or your substrate is uneven/rocky, it’s better to hire a flooring contractor or choose a different exterior flooring system.
DIY is realistic when the installation manual clearly permits exterior use and you can follow the required perimeter gaps and termination details exactly.
If the manual is “interior only,” no amount of seam caulk or coating is a substitute for an exterior-approved flooring system.
VS: exterior-rated glue-down vs exterior-allowed click-lock
Use this quick decision guide to avoid the two most common outdoor-installation mistakes: wrong system choice and wrong gap/termination execution.
| Criteria | Exterior-rated glue-down | Exterior-allowed click-lock |
|---|---|---|
| Manual explicitly allows exterior | Usually clear | Often limited—verify wording line-by-line |
| Perimeter gap requirement | Must follow guide | Must follow guide (critical outdoors) |
| Tolerance for minor base unevenness | Lower if adhesive doesn’t fully contact | Lower if locking can’t stay engaged |
| Edge wetting risk | Managed by termination and bond | Managed by termination and lock integrity |
| Freeze-thaw resilience | Improves with correct drainage + sealed terminations | Can be more sensitive if joints experience movement |
| Seam water intrusion path | Less likely when flat + seated | More likely if seams separate |
| Adhesive cure timing and conditions | Must follow open-time/cure guidance | Less adhesive-specific but needs strict fitting |
| Maintenance needs | Inspect termination/edges for gaps | Inspect locking edges for separation |
| DIY difficulty | Moderate (adhesive discipline required) | Moderate (fit discipline required) |
| Best-fit scenario | You can control moisture, drainage, and termination details | You have a tight plan and an outdoor-approved manual for your exact click system |
| Verdict | More forgiving when installed to specification; better match for wet outdoors when termination is correct | Only proceed when the manual permits true outdoor use and you can enforce flatness + expansion-gap rules |
Quick checklist (scan before you start)
| Step | Quick check |
|---|---|
| Product approval | Vinyl is explicitly approved for **outdoor/exterior** installation in the manual |
| Substrate | Smooth, stable, and properly drained; no soft spots or rocking |
| Moisture | Slab moisture tested per resilient flooring practice (compare to manufacturer limits) |
| Layout | Dry layout done; cuts planned; pattern staggered correctly |
| Expansion | Required perimeter gap followed exactly |
| Installation method | Adhesive/click-down method matches the product’s approved instructions |
| Edges/transitions | Approved trim/termination used; any required sealing done correctly |
| Cleanup | No debris trapped at seams; surface kept clean during curing |
Sources
– ASTM F1869: Standard Test Method for Measuring Moisture Vapor Emission Rate of Concrete Subfloor Using Anhydrous Calcium Chloride.
– ASTM F2170: Standard Test Method for Determining Relative Humidity in Concrete Floor Slabs Using in situ Probes.
– RFCI (Resilient Floor Covering Institute): Resilient flooring installation work-practice guidance (used broadly for moisture/installation best practices).
– Manufacturer installation instructions for your exact vinyl product: the governing requirements for exterior approval, moisture limits, adhesive/trim/sealant rules, and expansion gap details.
If you take one lesson from 2026 outdoor installs, make it this: vinyl can work outdoors when it’s truly specified for it and when your drainage, moisture testing, and edge termination are treated as core design steps—not finishing details.
Frequently Asked Questions
What type of vinyl flooring is best for an outdoor walkway?
For outdoor walkways, choose vinyl that is specifically rated for exterior use and is designed to handle moisture, temperature swings, and UV exposure. Look for options labeled “outdoor” or “exterior,” such as rigid core (WPC/SPC) vinyl plank with a wear layer rated for heavy foot traffic. Avoid standard indoor sheet vinyl or loose-lay products, since they can fail when exposed to rain, freezing conditions, or direct sun.
How do I prepare my subfloor before installing vinyl floors outdoors?
Start by ensuring the base is flat, clean, and dry, because outdoor subfloors often shift if water is allowed to pool. Remove debris, sand down high spots, and repair cracks or weak areas using a suitable exterior patch. It’s also important to confirm proper drainage and consider a moisture barrier where recommended for your specific outdoor vinyl system. A well-prepped base helps prevent gaps, lifting edges, and premature wear.
How do I install outdoor vinyl plank flooring so it can handle moisture and expansion?
Use an installation method meant for outdoor conditions, typically a floating or rigid-core system that allows for expansion and contraction. Leave the required perimeter gap around edges, posts, and transitions so the vinyl floor can move with temperature changes. Use the correct underlayment or leveling system if your manufacturer requires it, and follow the product’s instructions for sealing end joints if the system is designed to be water-resistant. Skipping expansion space is one of the most common reasons vinyl outdoor floors buckle or separate.
Which installation method works best for an outdoor walkway: glue-down or click-lock?
Click-lock (floating) rigid core vinyl is often favored for exterior walkways because it accommodates movement and helps reduce issues from minor substrate expansion and contraction. Glue-down vinyl can also work outdoors if it’s explicitly rated for exterior use and the adhesive system is compatible with temperature and moisture levels. The best choice depends on your walkway conditions, including whether water sits on the surface and how level the base is. Always match the method to the manufacturer’s outdoor rating and installation instructions.
What mistakes should I avoid when installing vinyl floors outdoors?
Don’t install vinyl over an uneven or poorly drained surface, since trapped moisture can lead to swelling and edge lifting. Avoid products that are only rated for indoor use, and don’t skip the recommended expansion gap or transition details at doorways and thresholds. Also, be cautious with extreme temperature exposure—direct sun and freeze-thaw cycles can stress vinyl if the system isn’t designed for it. Finally, use exterior-rated trims/sealers and maintain the walkway by removing debris and preventing standing water.
📅 Last Updated: October 27, 2026 | Topic: How to install vinyl floors in a outdoor walkway? | Content verified for accuracy and freshness.
References
- Vinyl flooring
- Vinyl composition tile
- Flooring
- F710 Standard Practice for Preparing Concrete Floors to Receive Resilient Flooring
- F1869 Standard Test Method for Measuring Moisture Vapor Emission Rate of Concrete Subfloor Using …
- F2170 Standard Test Method for Determining Relative Humidity in Concrete Floor Slabs Using in sit…
- F1482 Standard Practice for Installation and Preparation of Panel Type Underlayments to Receive R…
- https://scholar.google.com/scholar?q=outdoor+vinyl+floor+installation+walkway+moisture+subfloor Google Scholar
- https://scholar.google.com/scholar?q=luxury+vinyl+tile+outdoor+installation+weather+uv+freeze+thaw Google Scholar
- https://scholar.google.com/scholar?q=resilient+flooring+installation+moisture+vapor+ASTM+F710+F1869+F2170 Google Scholar