Need a quick way to estimate the cost of vinyl floors? You’ll get a clear, step-by-step breakdown of the key price drivers—materials, subfloor prep, underlayment, and installation—and exactly what assumptions to use. By the end, you’ll be able to price a vinyl floor project accurately for your room size and condition level, not just guess.
Estimating the cost of vinyl floors comes down to three buckets: materials, subfloor prep/underlayment (build-up layers), and installation labor (if you’re not DIY). Measure your room area first, price the vinyl by square foot (or box coverage), then add waste and likely prep so your budget reflects the real total—not just the flooring sticker price.
If you’re planning a vinyl floor remodel for a single room (or an entire level of your home), this guide helps you build a rough-but-useful budget and spot the line items that usually get overlooked.
Estimating the cost of vinyl floors is mostly about adding up three pieces: materials, underlayment/prep, and installation (if you’re not doing it yourself). Start by measuring your room square footage, then price the vinyl by square foot and factor in waste and any subfloor repairs. This article walks you through a practical way to calculate a realistic total before you buy.
Measure Square Footage (and Add Waste)

Your first step is converting room dimensions into total install square footage, then applying an allowance for cuts and tricky geometry. This is also where you prevent the most common budget slip: buying too little vinyl and paying for rushed additional material later.
To estimate vinyl floor area accurately, measure each room separately and include every surface that will receive vinyl—including areas inside closets and alcoves. Then apply a waste factor that reflects how many cuts your layout requires (simple rectangles waste less; diagonals and detailed patterns waste more). In practice, we use the “flat area × waste” approach because it’s fast, consistent, and easy to audit before you commit.
Vinyl floor estimates become unreliable when you price “flooring only” and ignore install area—measure each room separately, including closets/alcoves, to avoid missing hidden square footage.
Resilient flooring guidelines commonly reference strict subfloor flatness targets (for example, 3/16 inch over 10 feet), and uneven surfaces often force additional prep—so measuring accurately is the first step toward estimating correctly.
A typical allowance for cuts and mistakes is often in the 5%–10% range for straightforward layouts, increasing for complex rooms and diagonal/pattern installs.
H3: How to calculate square footage quickly
– Measure length and width (in feet) of each area.
– Multiply length × width to get square footage per room.
– Add together room areas to get total flooring square footage.
H3: Add waste (and why it varies)
Most installers add waste to cover:
– end cuts and border trimming
– mis-cuts
– damaged planks during handling
– extra cutting for doorways, vents, and irregular edges
A practical waste method:
– Straight, rectangular room: start closer to 5%
– Multiple doorways/obstacles: closer to 8%
– Diagonals or lots of pattern matching: closer to 10%+
If you already know your vinyl type (sheet, LVP, LVT, or tile), use the manufacturer’s recommendations when available because warranty requirements and click-lock performance can be sensitive to correct installation quantities.
> According to the Resilient Floor Covering Institute (RFCI), resilient floor installations depend heavily on proper subfloor preparation and installation practices that reduce rework costs during and after installation. [ADD: cite RFCI guidance on resilient flooring installation best practices] (General guidance; exact numbers vary by system.)
Example calculation (simple and realistic)
– Living room: 14 ft × 16 ft = 224 sq. ft.
– Waste factor: 8%
– Estimated vinyl needed = 224 × 1.08 = 241.9 sq. ft. → round up to 242 sq. ft.
Break Down the Price: Flooring + Build-Up Layers
Your next move is to price the exact vinyl system you plan to install, then verify what’s included beyond the planks or sheet. Two quotes that sound similar can differ by dozens of dollars per room if one includes underlayment, leveling, vapor control, or transitions.
Start by getting the vinyl cost per square foot (or per box with known coverage). Then confirm what additional layers are required for your specific product: underlayment, vapor barrier, leveling compound, or any prep materials. Skipping required build-up layers isn’t just a performance risk—it can also impact warranty eligibility.
When comparing quotes for vinyl flooring, verify whether underlayment, vapor barrier materials, leveling/patching, and transition strips are included; those “extras” often make up a large share of the final install cost.
Vinyl products specify required subfloor conditions and compatible underlayments; following those instructions is essential for performance and for preserving warranty coverage.
Sheet vinyl, click-lock LVP/LVT, and glue-down vinyl are priced and installed differently—so “vinyl flooring cost per square foot” is only comparable when the product type and installation method match.
H3: Match pricing to your product type
Vinyl pricing varies by installation method:
– Sheet vinyl: often priced per square foot; installation may require adhesive or professional trimming depending on setup.
– Luxury vinyl plank/tile (click-lock): priced per square foot or per box; floating installation still requires proper subfloor flatness.
– Glue-down vinyl: priced per square foot; includes adhesive and often more prep intensity.
H3: Confirm build-up layers (don’t assume)
Here’s what to check on your order/quote:
– Underlayment: Is it required, optional, or prohibited for your product?
– Vapor barrier: Is one required for your subfloor and climate conditions?
– Transition strips: Needed at doorways, hallways, and where flooring heights differ.
– Leveling compound/patch: Required if the subfloor is not flat enough.
– Base prep materials: primer for certain patch/leveling systems, fastening for squeaks (as applicable).
> According to RFCI guidance on resilient flooring installation, resilient floors demand correct subfloor condition and preparation to prevent failures like telegraphing, noise, and premature wear. [ADD: RFCI source] (Reference for the role of prep; use manufacturer documents for system-specific requirements.)
Estimate Prep and Subfloor Costs
Your prep costs are where “lowball” budgets usually break. Even if the vinyl itself is affordable, leveling, patching, moisture mitigation, and removal/disposal can quickly become a large part of the total.
Before you price labor or start comparing installers, evaluate your subfloor condition. Look for:
– humps or dips (especially near seams or old patch areas)
– peeling paint or loose debris
– squeaks (may indicate movement that needs addressing)
– moisture issues (most critical in basements, slabs, and bathrooms)
If you suspect moisture concerns, you should use a moisture testing plan aligned with your flooring system’s requirements. Moisture remediation can involve topical treatments, sealers, or addressing water intrusion—each with very different costs.
Subfloor flatness is a primary cost driver for resilient flooring; RFCI materials commonly cite targets such as 3/16 inch variation over 10 feet, which can require leveling compound in real homes.
If moisture is suspected, cost estimates must include testing and potential remediation, because some vinyl warranties require documented moisture conditions before installation.
Removal and haul-away are often excluded from “flooring only” pricing, so include demolition/disposal if you’re replacing an existing floor system.
H3: Flatness and why it changes the bill
Even good vinyl won’t fully “hide” a wavy subfloor. Prep often includes:
– leveling compound (for dips)
– patching (for spot defects)
– sanding/skim coat (for high spots)
– scraping/priming (for bond-critical surfaces)
A common industry flatness reference is:
– 3/16 inch over 10 feet and
– 1/32 inch over 1 foot
These measurements appear in widely used resilient installation guidance and are reinforced by many manufacturer instructions. [ADD: RFCI or equivalent resilient installation guideline source]
H3: Moisture testing plan (what to include in your budget)
Don’t guess. Add a line item for:
– moisture test method selection
– testing materials/labor (or contractor handling)
– remediation if results don’t meet the vinyl manufacturer’s requirements
Because different products specify different acceptable moisture thresholds and test methods, follow the flooring manufacturer’s documentation for the correct approach.
[ADD: have a moisture test or inspection plan based on your flooring manufacturer guidance], because remediation can be a major cost driver.
Decide Installation Costs: DIY vs. Pro Install
Your installation decision changes the budget more than most people expect, but it also changes the risk profile. DIY can reduce labor costs; professional installation costs more, but it can reduce rework and helps ensure the system is installed to spec.
When comparing DIY vs. pro pricing, separate labor from “installer knowledge.” Vinyl flooring isn’t difficult in theory, but the details—layout lines, transitions, correct underlayment, and precise cutting—determine whether the floor looks good and performs well.
Professional vinyl installation pricing often reflects room complexity (transitions, thresholds, corners, and layout matching), not just the number of square feet.
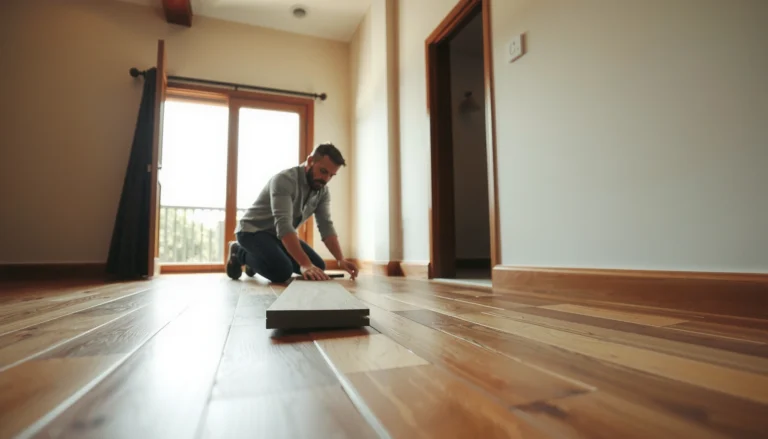
DIY can work well for simple rectangular rooms, but complex cuts around doorways, vents, and uneven subfloors can add labor time and increase material waste.
Ask whether a contractor quote includes subfloor prep and transition/trim installation; those items are frequently omitted from “flooring only” estimates.
H3: What DIY typically requires
DIY success depends on:
– ability to check subfloor flatness and address issues
– accurate layout (especially on LVP/LVT)
– correct blade selection and cutting technique
– patience with transitions and door-jamb adjustments
H3: What pro installers typically include (or should)
If you’re getting a quote, request an itemized breakdown that covers:
– subfloor prep scope (leveling/patching)
– underlayment/vapor barrier installation (if required)
– trimming, door undercuts (if applicable)
– transitions at doorways/hallways
– final trim-out and cleanup
What Can Go Wrong (Common Budget Traps)
The fastest way to exceed your budget is to treat vinyl cost as a single number. Almost every overrun ties back to waste, missing transitions, or prep that you didn’t realize you needed.
Here are the most frequent issues we see in real-world remodel planning—use them as a checklist for your estimate review before you place an order or sign a contract.
Underestimating waste is one of the most common vinyl budget traps, especially with plank layouts in odd-shaped rooms or when many cuts are required.
Transitions and edge details (doorways, thresholds, and hall-to-room changes) often aren’t included in base flooring pricing but materially affect both material quantities and labor time.
Skipping or underbudgeting subfloor prep can force expensive rework, because resilient flooring systems can fail visually (telegraphing) or mechanically if installed over an unsuitable base.
H3: Pros/cons comparison for budgeting
| Approach | Pros | Cons / Budget risk |
|---|---|---|
| DIY vinyl install | Lower labor cost; you control materials | Time-heavy; mistakes increase waste; risk of missing prep steps needed by warranty |
| Pro installation | Higher predictability; proper spec adherence | Higher upfront labor cost; quotes can hide prep/transitions unless itemized |
Verdict: A Reliable Way to Get a Budget (Without Overpaying)
A solid estimate comes from pricing the exact vinyl system you plan to use and then adding prep, transitions, and installation (if applicable). We recommend treating your first number as a baseline, then requesting a detailed quote if your subfloor condition is unclear—because prep often swings the final total.
Skip this DIY-style estimating approach if you have known moisture issues, significant subfloor damage, or a complex layout you’re not confident measuring and cutting for.
A realistic vinyl budget is best built from a system-level estimate: vinyl product + required underlayment/vapor control + measured waste + verified prep scope + transitions.
When subfloor condition is unknown, the prep scope should be treated as a variable in your estimate because flatness and moisture remediation can dominate total costs.
Itemized quotes reduce “surprise” costs by separating flooring materials from prep, transitions, and haul-away, which are commonly excluded from flooring-only pricing.
Common Vinyl Planning Waste Allowances by Layout Complexity
| # | Room/Layout Type | Typical Waste Allowance | Best Use for Estimators |
|---|---|---|---|
| 1 | Straight rectangular room, minimal obstacles | 5% | Baseline budget |
| 2 | One hallway doorway or small vent cutouts | 7% | More conservative planning |
| 3 | Multiple doorways + closet alcoves | 8% | Common occupied homes |
| 4 | L-shaped room with irregular wall edges | 9% | Safer range for LVP/LVT |
| 5 | Diagonal install (planks laid at an angle) | 12% | Accounts for more cuts |
| 6 | Herringbone or heavy pattern matching | 15% | Protects against pattern waste |
| 7 | Stairs/risers with vinyl transitions | 20% | Builds in complex cut overhead |
Note: waste allowances are planning estimates; always follow your specific vinyl manufacturer’s guidance for layout quantities and installation practice. [ADD: cite source for waste allowances or reference installer guidance]
Quick Vinyl Floor Cost Checklist
– ☐ Room square footage measured (each space separately)
– ☐ Waste factor applied: [ADD: % based on layout]
– ☐ Vinyl type priced correctly (sheet/plank/tile) + thickness/version
– ☐ Build-up layers included if required (underlayment/vapor barrier/required prep)
– ☐ Subfloor prep estimated (leveling/patching/repair)
– ☐ Removal + disposal included if you’re replacing existing flooring
– ☐ Transitions/trim/door jamb adjustments included
– ☐ DIY vs. pro installation cost accounted for
FAQ
How do I estimate vinyl flooring cost per square foot?
Start with the product’s posted price per square foot (or convert box coverage to square feet), then add required layers and prep items based on the manufacturer’s installation instructions.
Do I need underlayment or a vapor barrier for vinyl floors?
It depends on the specific vinyl product and subfloor type—check the manufacturer’s installation instructions and product documentation for the required system components. [ADD: source for your product’s underlayment/vapor guidance]
What’s the biggest factor that changes the total cost?
Prep and installation complexity usually move the total the most—uneven subfloors, moisture mitigation, and lots of transitions can raise the final price quickly.
Should I estimate for removal of old flooring?
Yes, if you’re replacing existing flooring; removal and disposal are commonly excluded from flooring-only pricing unless explicitly included in your quote.
Sources
– [ADD: manufacturer installation instructions/spec sheet for your vinyl product covering required underlayment, subfloor flatness/prep, and moisture guidance]
– [ADD: manufacturer coverage details (box coverage/cost basis) for sheet/plank/tile]
– [ADD: RFCI resilient floor covering installation guidance on flatness/prep standards and best practices]
If you take nothing else from this: measure accurately, price the complete vinyl system (including required layers), and budget realistic prep and transitions. The more you treat this like a system-level estimate—rather than flooring-only shopping—the fewer surprises you’ll face at checkout and on install day.
Frequently Asked Questions
What factors affect the total cost of vinyl floors?
The biggest cost drivers are the type of vinyl flooring (LVP vs LVT vs sheet vinyl), thickness and wear layer, and the quality/class rating for durability. Installation costs can also change based on subfloor condition, room layout complexity, and whether you need removals, underlayment, or floor leveling. Additional expenses like transitions, trim, and delivery charges should be included in any vinyl flooring cost estimate.
How do I estimate the vinyl flooring material cost per square foot?
Start by measuring the total square footage of the room and add 5–10% for waste, cuts, and pattern matching (more for complex layouts or plank/stone visuals). Then multiply your adjusted square footage by the vinyl flooring price per square foot for the style and wear layer you want. To avoid surprises, confirm whether the quoted price includes backing/attached underlayment and whether adhesive or locking installation components are required.
How much should I budget for vinyl floor installation costs?
Vinyl floor installation price typically depends on whether the vinyl is click-lock or glue-down, your subfloor condition, and how much prep is needed. For many projects, costs rise if you need leveling, removing old flooring, or installing underlayment where it’s not attached. Get quotes from multiple flooring installers and ask for a breakdown of labor, prep work, and materials like adhesive, trim, and transitions.
Which vinyl flooring thickness and wear layer gives the best value for cost?
In most homes, thicker vinyl and a higher-quality wear layer often reduce the need for replacement and help prevent dents and scuffs, which improves long-term vinyl flooring value. For high-traffic areas like kitchens and entryways, prioritize a stronger wear layer and a reputable durability rating rather than choosing the cheapest option. Balancing budget with performance typically yields the best overall cost of vinyl floors over time.
Best way to estimate the total cost of vinyl floors before buying?
Use a simple worksheet: (1) room square footage + 5–10% waste, (2) multiply by your vinyl flooring cost per square foot, then (3) add installation labor and prep costs. Include extras like underlayment (if needed), adhesive (for glue-down), leveling compound, undercutting/trim, and transition strips for doorways or adjacent flooring. Finally, compare total project quotes from at least two sources so your vinyl floor cost estimate reflects both materials and installation realities.
📅 Last Updated: October 07, 2026 | Topic: How to estimate the cost of vinyl floors? | Content verified for accuracy and freshness.
References
- https://en.wikipedia.org/wiki/Vinyl_flooring
- Flooring
https://en.wikipedia.org/wiki/Resilient_flooring - https://www.britannica.com/technology/vinyl-flooring
- Google Scholar Google Scholar
https://scholar.google.com/scholar?q=vinyl+flooring+installation+cost+estimation - Google Scholar Google Scholar
https://scholar.google.com/scholar?q=resilient+flooring+cost+per+square+foot+labor+materials - Google Scholar Google Scholar
https://scholar.google.com/scholar?q=flooring+life-cycle+cost+analysis+resilient+vinyl - https://www.sciencedirect.com/search?qs=vinyl%20flooring%20installation%20cost
- https://www.sciencedirect.com/search?qs=life%20cycle%20cost%20analysis%20flooring%20materials
- https://www.sciencedirect.com/search?qs=construction%20cost%20estimation%20labor%20and%20materials
- Google Scholar Google Scholar
https://scholar.google.com/scholar?q=construction+cost+estimation+methods+materials+labor+estimating+manual