
Removing bamboo floors without damage is possible—if you follow the right method for your installation type. This guide answers how to remove bamboo floors safely, minimizing splintering, subfloor harm, and costly mistakes. Get step-by-step instructions and the key do’s and don’ts that determine whether you end up with clean planks ready for reuse or unnecessary repairs.



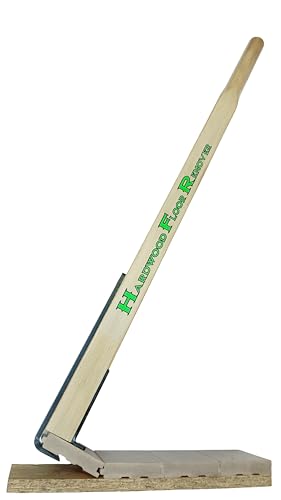
Removing bamboo floors without damage is mostly about identifying how they’re installed (nail/staple, glue-down, or floating/click-lock) and then using controlled pry points and surface-safe tools to protect the subfloor. Start by taking the trim off cleanly, remove boards seam-first, and only scrape adhesive/underlayment to the extent your next flooring install requires.
If you’re planning a remodel, swapping damaged boards, or converting to a different floor system, this guide is built for the “least damage” approach—especially if you want to reuse bamboo planks or keep the subfloor flat and intact.
Identify Your Bamboo Floor Installation Type
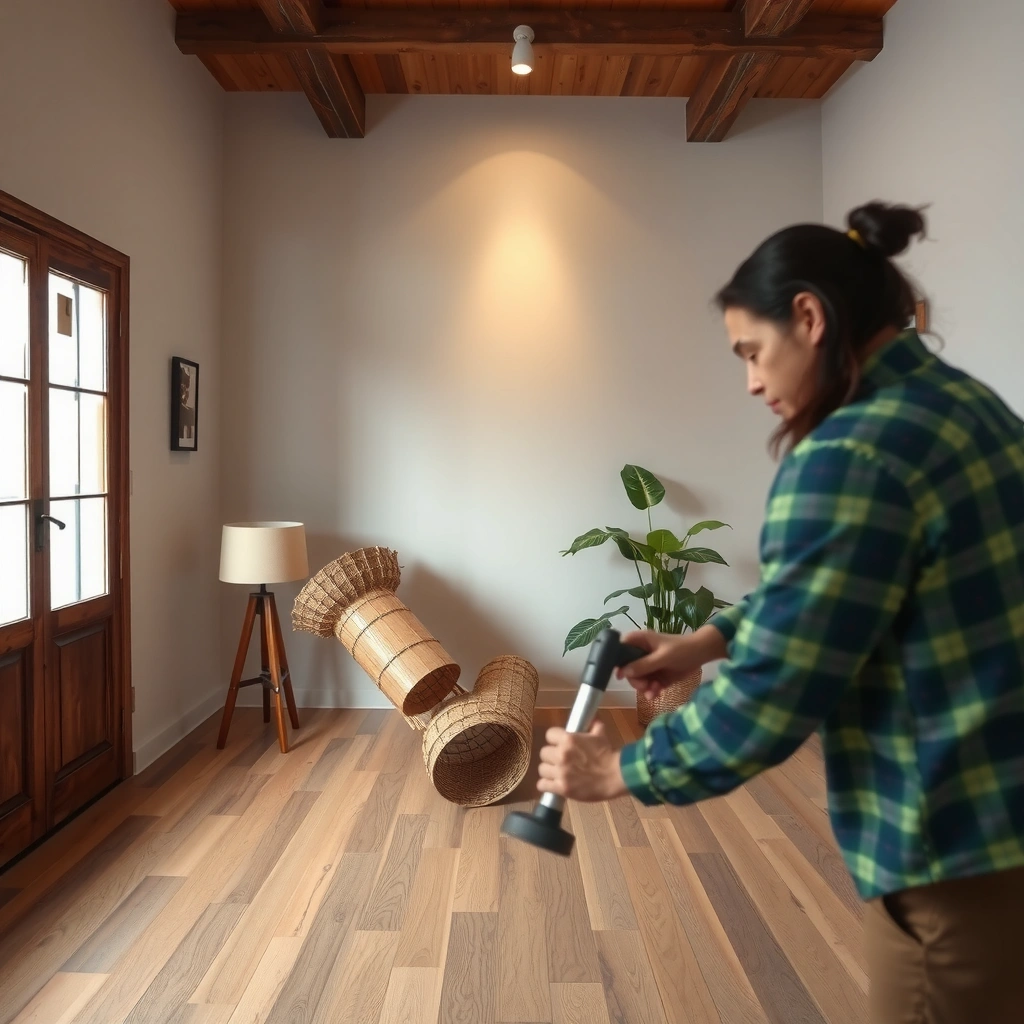
You can’t remove bamboo safely without damage if you guess the installation method—identify it first. Nail/staple, glue-down, and floating/click-lock behave very differently during removal, and the “wrong tool at the wrong seam” is what causes cracked boards and gouged subfloors.
Start with fast visual and functional checks, then confirm in a low-risk spot (like inside a closet or under a base shoe). Repeat the same quick inspection any time you encounter a transition area—doorways, hearths, and stair landings—because those zones often use different fastening or adhesive strategies than the main field of the room.
Wood floors are removed with different techniques depending on whether they’re fastened (nails/staples), adhered (glue-down), or assembled to a locking system (floating/click-lock).
Transitions like doorways and closet entries often reveal the true fastening method because they’re built with tighter clearances and may include extra adhesive or mechanical hold-down.
– Look for signs of fastening (nails/staples) along edges or at seams where boards meet walls. Many nailed bamboo installs show small fastener holes, pin marks, or staples embedded near board edges.
– Check whether the surface looks “sealed” by adhesive. Glue-down bamboo often has a more uniform bonded appearance and doesn’t show obvious gaps at board joints.
– Test for movement at seams: if the planks “click” apart when pressed in a pattern, it’s more consistent with floating/click-lock. If movement creates resistance and the surface feels stuck, it’s more likely glue-down.
– Inspect transitions (doorways, closets, under door trims). These areas often expose whether the boards are nailed through the tongue/groove or adhered to the subfloor.
– If you’re unsure, start in a hidden area and stop the moment you see what’s holding the boards—don’t commit to a technique until you’ve confirmed the installation type.
Prep the Room and Protect What Matters
Good prep prevents damage more than the actual demolition step does. Before you pry, control dust and remove trim in a way that preserves board edges and reduces the chance of splintering the bamboo face.
Bamboo removal can create fine wood dust and small splinters. Current safety guidance treats wood dust as an inhalation hazard, and you should plan for dust control even if you think the work is “small.” According to OSHA, the exposure limits for wood dust depend on the type (hardwood vs softwood), but wood dust is regulated because of respiratory risk; wood dust controls are commonly recommended for compliance and health protection. [ADD: OSHA wood dust standard/exposure limit source]
HEPA filtration is widely recommended for fine particulate dust because HEPA media is designed to capture extremely small particles.
Removing baseboards/trim reduces edge damage by letting the first row of flooring disengage without tearing the board surface or chipping the tongue/groove.
– Remove furniture from the work zone and cover anything you can’t remove.
– Cover vents and doorways with plastic sheeting; seal gaps with painter’s tape to reduce dust migration.
– Set up dust control:
– Use a HEPA vacuum for ongoing cleanup.
– Use plastic sheeting to contain debris and make daily cleanup more predictable.
– Wear protection appropriate to dust removal:
– Eye protection (safety glasses or goggles).
– Hearing protection if you’re cutting/prying.
– Respiratory protection rated for particulate dust (commonly N95/N100-class filtration for non-oily particulates).
– Remove or score baseboards/base trim carefully:
– If you plan to reuse trim, score the paint line with a utility knife before removing.
– If you don’t need trim, removing it still protects the floor edge from tearing.
Respirator Filtration Efficiency for Fine Particles (Wood Dust)
| # | Respirator class | Filtration rating (non-oily particles) | Typical fit use | Removal dust readiness |
|---|---|---|---|---|
| 1 | N95 | ≥ 95% | DIY dust tasks | ★★★☆☆ |
| 2 | N99 | ≥ 99% | Extended indoor work | ★★★★☆ |
| 3 | N100 | ≥ 99.97% | High-dust removal | ★★★★★ |
| 4 | P95 | ≥ 95% | Dust with oil nuisance | ★★★☆☆ |
| 5 | P99 | ≥ 99% | Longer sessions | ★★★★☆ |
| 6 | P100 | ≥ 99.97% | Max particulate protection | ★★★★★ |
| 7 | N/R (general dust mask) | Not standardized as “N95” | Low-control setups | ★☆☆☆☆ |
Remove the Baseboards/Trim and Start at the Right Edge
Start your removal from the best access point—usually an outer wall or an entry transition—so you can create a controlled gap without forcing the boards. Clean trim removal keeps bamboo edges from chipping and gives you a working “tool path” for pry bars and floor scrapers.
When you remove bamboo floors, the first few inches decide whether you’ll get clean planks or broken tongues. That’s why you should establish a consistent removal rhythm: lift seam-first, avoid prying against the face, and keep pressure near the joint line rather than across the board.
Baseboards can act like a lock on many bamboo layouts; removing (or scoring) trim reduces edge leverage that otherwise cracks planks.
Starting from an outer edge or doorway gap lets you control the first break and locate the real fastening/adhesive behavior early.
– Remove baseboards/base trim:
– Score paint lines before pulling if you plan to preserve trim.
– Use a thin pry tool and work slowly to avoid pulling splinters off the bamboo face.
– Find the “first workable gap”:
– Outer wall edges and doorways typically provide the clearest initial access.
– Use the right leverage points:
– A pry bar plus a floor scraper can reduce face damage—scrape first, pry second.
– Aim to lift at seam lines and board joints rather than ripping upward from a middle point.
– Save intact transition pieces:
– Thicker thresholds and transition moldings often require extra patience; removing them early reduces later board stress.
Lift Boards (Nail/Staple, Glue-Down, or Floating)
Lift technique should match the installation type; mixing methods is a fast path to cracked bamboo. For nail/staple, you break the seam hold; for glue-down, you expect adhesive resistance; for floating/click-lock, you disassemble the locking joints in the correct direction.
Repeat the installation-type decision as you work: bamboo flooring removal can change by room, section, or era of installation (for example, a later add-on room glued down while the original room is nailed).
Nail/staple bamboo removal focuses on freeing boards at seams first, because boards often crack when lifted with one aggressive pry.
Floating/click-lock floors come apart by releasing the locking joint directionally, not by prying across the tab.
Nail/staple installs
– Break the bond at seams first. Use the pry bar gently to start separation at the joint line.
– Work gradually—small lifts near the tongue/groove prevent splintering on the bamboo face.
– Remove boards in a “row” sequence rather than random pulls to keep force predictable.
Glue-down installs
– Expect more resistance. Your goal isn’t to yank—it’s to create separation without gouging.
– Use scraping that’s compatible with the subfloor:
– Don’t dig metal blades aggressively into wood subfloor.
– For concrete/masonry subfloors, control depth to avoid surface damage that affects flatness.
– Plan for adhesive residue:
– Adhesive removal is usually the time-intensive step, and residue can interfere with the next floor’s bonding or leveling.
Floating/click-lock installs
– Disassemble correctly:
– Release the locking joints in the direction they were assembled.
– Avoid prying across the grain or forcing tabs past their designed movement.
– If boards resist, stop and reassess. Resistance often signals nails/hidden glue points, or boards that are stuck under trim/underlayment overlap.
Remove Underlayment, Tack Strips, and Leftover Adhesive
Underlayment and leftover adhesive determine whether your next floor goes down smoothly without humps or gaps. Remove only what’s necessary for your new flooring system—and never assume “more removal” means “better results.”
This is where damage commonly happens: people scrape too deep, lever a tool against the subfloor, or remove a layer that the next installation actually requires.
Tack strips and exposed fasteners must be removed because they create high spots that telegraph through new flooring and can prevent flat installation.
Adhesive residue is a subfloor-flatness problem first, and a bonding problem second—flatness dictates the success of most floor transitions.
– Tack strips / nails:
– Pull metal fasteners carefully.
– Clean the subfloor so the next material sits flat.
– Underlayment:
– Remove only what your replacement flooring instructions allow.
– Some underlayments are required for moisture control or acoustics; removing them “by habit” can cause new issues.
– Adhesive residue:
– Smooth the surface without deep scoring.
– Stop when progress slows and reassess your method—different subfloor materials respond differently to scraping.
Install-type risk comparison (what causes damage most often)
| Bamboo install type | Most likely damage risk | Damage prevention focus | Typical work pace |
|---|---|---|---|
| Nail / staple | Cracked boards from aggressive seam lifting | Lift seam-first; avoid one big pry | Moderate |
| Glue-down | Subfloor gouges from scraping; adhesive interference | Controlled scraping; stop to reassess | Slow |
| Floating / click-lock | Broken locking tabs from wrong pry direction | Disassemble joint-directionally | Moderate–slow |
What Can Go Wrong (And How to Avoid It)
Common damage patterns are predictable: boards crack from force, subfloors gouge from leverage, and adhesive residue ruins flatness. If you treat each failure mode as a “control point” during removal, you’ll reduce rework.
In my experience, the most time-consuming surprises aren’t the obvious rows—they’re the hidden fasteners in transitions and the adhesive that spreads beyond the visible bonding line. Where documentation isn’t available, controlled inspection beats aggressive demolition.
Cracked bamboo boards typically come from applying leverage at the wrong edge or prying too forcefully before the seam is fully freed.
Scraping too deep and using metal tools as pry levers can damage wood or concrete subfloors, which then prevents a flat installation of the next flooring.
– Cracked bamboo boards:
– Cause: prying aggressively or starting from the wrong edge.
– Prevent: work seam-first and reduce pry force; use incremental lifts.
– Subfloor damage:
– Cause: scraping too deep or using metal tools as levers.
– Prevent: protect the subfloor surface and use controlled pressure and appropriate scraper geometry.
– Hidden fasteners:
– Cause: nails/staples behind trim lines or within seams.
– Prevent: inspect as you go; remove fasteners once exposed instead of ripping past them.
– Adhesive surprises (glue-down):
– Cause: residue remains and blocks flatness or interferes with bonding.
– Prevent: plan extra prep time; match adhesive removal to your subfloor material and the next flooring system.
Verdict / Tip: Go Slow, Especially If You Need the Boards
If your priority is minimizing damage—and especially if you want to reuse bamboo—go slow and match your technique to the installation type. You can move faster only when you accept that boards may not survive and that subfloor restoration may be needed.
Here’s an honest decision rule: if you find that adhesive removal will take more than [ADD: X hours] for your area, or if boards are brittle/warped (common signs include lifting edges, visible cupping, or widespread cracking), call a flooring professional. Glue-down bamboo and fragile boards are the most frequent “DIY time traps,” because adhesive and flatness prep scale dramatically with square footage.
Glue-down removal is often slower because adhesive residue and flatness requirements must be addressed before the next flooring goes in.
Floating/click-lock floors generally remove with less subfloor risk, but they still require correct joint-direction disassembly to avoid tab breaks.
Quick Removal Checklist (Save This)
– [ ] Confirm install type: nailed/stapled, glue-down, or floating/click-lock
– [ ] Remove/score baseboards and clear the work area
– [ ] Use dust control: HEPA vacuum + plastic sheeting
– [ ] Start demolition from the best edge/transition point
– [ ] Lift boards seam-first; avoid forcing prying points
– [ ] Remove fasteners/underlayment as needed (per what your next flooring requires)
– [ ] Scrape/smooth adhesive residue without gouging
– [ ] Clean and inspect the subfloor for flatness
FAQ
Can I remove bamboo floors without damaging the subfloor?
Often yes, as long as you correctly identify the installation type and control pry/scraper depth. Nail/staple removal is typically gentler than glue-down adhesive scraping, but any method can damage the subfloor if leverage is unmanaged.
Are bamboo floors easy to remove if they’re glued down?
They’re usually harder because glue-down installs often leave adhesive residue behind. That residue must be addressed for flatness and proper performance of the next floor.
Should I remove underlayment too?
Only if your next flooring system requires it. Underlayment can be necessary for moisture control, sound reduction, or joint protection, so follow the replacement flooring manufacturer’s instructions.
What’s the biggest mistake when removing bamboo flooring?
Starting the pry at the wrong seam/edge or using too much force before the joint is free. That mistake is what converts a “slow careful lift” into cracked boards and subfloor gouges.
Sources
– NIOSH (National Institute for Occupational Safety and Health) — guidance on respirator performance categories and particulate filtration efficiency (N/R/P and N95/N99/N100-style ratings).
– OSHA (Occupational Safety and Health Administration) — wood dust exposure regulation framework and recommended control approaches for workplace safety. [ADD: specific OSHA wood dust standard link/reference]
– EPA / filtration guidance — HEPA performance principles (commonly described as capturing 99.97% of particles at 0.3 microns). [ADD: specific EPA reference]
– For bamboo flooring removal/prep method specifics (fastening/adhesive behavior and approved removal tolerances): [ADD: your bamboo product manufacturer installation/removal guide]
– For underlayment/subfloor prep requirements for your next flooring type (moisture limits, flatness tolerances, and what layers may remain): [ADD: replacement flooring manufacturer instructions]
Removing bamboo floors without damage comes down to one core workflow: confirm the install type, prep the room to control dust and protect edges, remove boards seam-first with technique-matched force, and finish by restoring flatness for the next installation. If you encounter aggressive adhesive or brittle/warped planks, slow down and get help early—those situations are where “careful removal” most often turns into costly rework.
Frequently Asked Questions
How do you remove bamboo flooring without damaging the subfloor?
Start by identifying whether the bamboo planks are nailed, glued, or click-lock floating. For nailed or stapled bamboo, remove baseboards and use a pry bar to gently lift boards while working in rows from an edge. If the bamboo is glued, you’ll usually need to scrape and mechanically remove adhesive residue with a floor scraper or oscillating tool, then sand remaining high spots to protect the subfloor. Always wear PPE (gloves, eye protection, and a respirator) because sanding and scraping can create fine dust.
What’s the best way to remove glued-down bamboo flooring?
Begin by clearing the room and removing trim to expose the full edge of the flooring. Use a floor scraper to lift sections, then apply heat (such as a heat gun) carefully to soften adhesive and make boards easier to pry up. For stubborn glue, use a specialized adhesive remover or work methodically with a grinder/oscillating multi-tool to avoid gouging the concrete or plywood subfloor. Finish by scraping and vacuuming thoroughly so the subfloor is smooth and clean for the next installation.
Which tools and safety gear are needed to remove bamboo floors?
Common tools include a pry bar, floor scraper, oscillating multi-tool, utility knife, hammer, and a pry/spacer for leverage; for glued floors, you may also need an adhesive removal solution and a floor grinder. Safety gear should include safety glasses, heavy gloves, knee pads, and a respirator or dust mask rated for wood dust. Bamboo dust can irritate lungs and eyes, and adhesive residues can also create harmful fumes, so good ventilation is important. Having a heavy-duty vacuum with a fine filter helps control dust while you remove bamboo flooring.
Why should you remove bamboo flooring in the correct order and direction?
Removing bamboo flooring in the wrong direction can cause planks to splinter or pull up chunks of subfloor, especially with click-lock or tongue-and-groove boards. Work from an outer wall or doorway edge so boards release more easily and you can keep rows intact for disposal or reuse. Take your time around fasteners, and avoid prying directly near the tongue/groove where damage is most likely. A systematic approach reduces repairs, cleanup time, and the risk of uneven subfloor surfaces.
How long does it take to remove bamboo flooring, and what affects the timeline?
The time depends on whether the bamboo is floating, nailed, or glued down, plus the room size and subfloor condition. Floating bamboo floors are usually faster because individual boards lift and separate with less adhesive and scraping. Nailing/stapling typically takes moderate time due to careful prying and fastener removal, while glued-down bamboo flooring often takes the longest because of adhesive scraping and surface prep. Expect extra time for trimming edges, removing baseboards, controlling dust, and making the subfloor ready for a new floor.
📅 Last Updated: October 11, 2026 | Topic: How to remove bamboo floors? | Content verified for accuracy and freshness.
References
- Google Scholar Google Scholar
https://scholar.google.com/scholar?q=remove+bamboo+flooring+adhesive+scrape+pry+technique - Google Scholar Google Scholar
https://scholar.google.com/scholar?q=bamboo+flooring+disassembly+dismantling+end+of+life - Google Scholar Google Scholar
https://scholar.google.com/scholar?q=bamboo+flooring+removal+damage+subfloor+procedure - https://en.wikipedia.org/wiki/Bamboo_flooring
- https://www.cdc.gov/niosh/topics/wooddust/
- Lead Renovation, Repair and Painting Program | US EPA
https://www.epa.gov/lead/renovation-repair-and-painting-program - Asbestos | US EPA
https://www.epa.gov/asbestos - https://www.osha.gov/silica
- https://www.osha.gov/woodworking
- https://www.britannica.com/technology/flooring