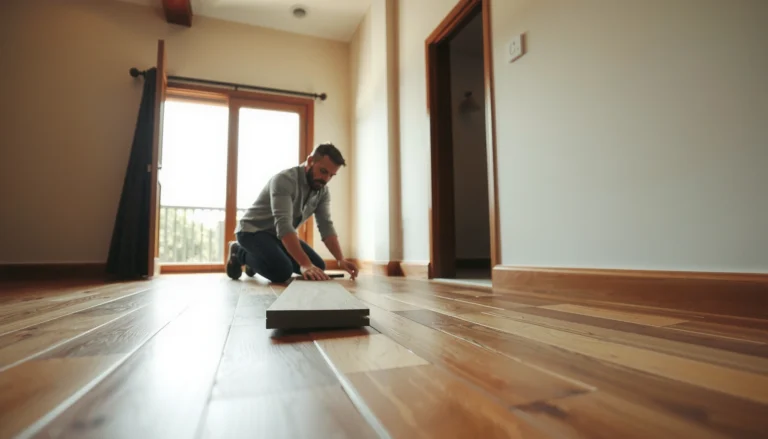
Install transitions around vinyl floors in a closet with the right trim choice—this is the fastest, cleanest way to get a professional edge that won’t lift. Follow the recommended step-by-step method for measuring the doorway reveals, prepping the subfloor, and locking the transition into place for a tight, water-resistant seam. If you want the best results, choose the correct transition type for the gap size and your vinyl’s thickness, then install it the same day you lay the floor.




Use the correct transition profile and fasten or adhere it to stable surfaces (subfloor/trim), while preserving the required vinyl expansion gap. If you prep the closet edge, dry-fit the strip, and verify the transition sits flat without pinching the vinyl, the doorway and hallway connections look crisp and feel solid even years later.
If your closet has vinyl plank/vinyl tile and you’re trying to finish the doorway area (or connect to carpet, laminate, tile, or a hallway floor), this will walk you through the measurement, cutting, and installation workflow. You’ll also get a short checklist for avoiding the most common mistakes, like skipping expansion clearance.
Gather materials and plan your transition type

The fastest way to avoid a wavy threshold or a “catchy” seam is to plan the transition type around the actual change in surfaces and heights. Match the profile to the floor thickness and the type of vinyl installation (floating click-lock vs glue-down), then choose the right attachment method.
A transition strip should bridge the exact flooring gap you have while maintaining the vinyl’s perimeter movement space (the expansion gap) rather than eliminating it.
Floating vinyl plank and vinyl tile assemblies are designed to move as temperature and humidity shift, so the transition system must be anchored to subfloor/trim—not to the floating vinyl core.
The most reliable “vinyl transitions” are the ones specifically engineered for the floor thickness and the type of joint movement your vinyl system uses.
Identify what you’re meeting
– Identify what the vinyl is meeting: carpet, tile, laminate, another vinyl run, or a different height subfloor.
– Choose the transition style that matches the change (commonly a T-molding, reducer, or threshold style—use the one designed for your floor thickness and heights).
– Confirm whether your vinyl is click-lock or glue-down, because the edge-prep and fastening approach can differ.
Why this matters in a closet: Closet doorways usually have tighter visual tolerances than hallways—if the profile is wrong, you’ll notice it every time the door opens.
Industry-grounded planning cues (quick but important)
– Click-lock / floating vinyl: plan for a transition that accommodates movement; treat the vinyl like a “floating platform.”
– Glue-down vinyl: you still need perimeter control, but edge fastening/adhesion decisions can differ because the vinyl is already bonded to the substrate.
Prep the closet floor edge (before any transition is attached)
Prepping the edge correctly is what makes the transition sit flat and look intentional. Before you attach anything, remove anything that prevents full contact and confirm you can clear the door jamb/trim without compressing the vinyl.
Transitions install best when the substrate is clean, debris-free, and flat so the strip base can sit flush without rocking or lifting.
Undercutting door jamb/trim is usually safer than forcing the transition into place, because pushing can reduce the required expansion space.
Dry-fitting during prep prevents “final cut regret,” especially on mitered closet corners where clearance is tight.
– Remove any old tack strips, leftover caulk, or debris so the transition sits flush.
– If the transition is for a doorway threshold area, plan to undercut door jamb/trim only enough to clear the transition lip—don’t compress the vinyl.
– Dry-fit pieces first so you can mark exact cut lines and check that the transition won’t interfere with baseboards/trim.
Substrate stability: what “flush” should feel like
In my own workflow, I treat “flush” as a physical check: the transition’s base should contact the substrate with no visible rocking when you press along the full length. If it rocks at one end, it’s almost always a high spot, debris, or an edge that wasn’t cleaned/trimmed evenly.
Measure carefully for a clean, flat fit
The right measurements prevent the two most common closet problems: (1) a visible step that catches feet and (2) buckling from violating the expansion gap. Measure with the transition temporarily in place, then confirm both height differences and movement clearance before final cutting.
Many resilient vinyl installation guidelines call for a perimeter expansion gap commonly around 1/4 in (6 mm) for floating installations, though you must follow your specific manufacturer’s requirement.
Flooring industry work practices commonly require subfloors to be flat within about 3/16 in over 10 ft (≈4.8 mm over 3 m) to avoid lip formation and telegraphing at transitions.
A reducer (instead of T-molding) is used when you need a smooth ramp across a height change; using the wrong profile can create a seam that moves or visibly steps.
– Measure the exact gap between flooring ends and where the transition will land; plan for the manufacturer-required expansion gap around the perimeter.
– Check the total height difference at the transition area (vinyl thickness + underlayment, if any) so you pick the correct reducer/height.
– Mark cuts with the transition installed “in place” (temporarily) so the finished seam lands where you want it, especially near the closet entry.
Reference data: choosing the right transition profile at a glance
Common Vinyl Transition Profiles for Closet Doorways (Use-Case Fit)
| # | Transition profile | Best closet doorway use | Height-change intent | Typical attachment method | Floating-friendly rating |
|---|---|---|---|---|---|
| 1 | T-molding (lock-in style) | Vinyl-to-vinyl at run breaks | Minimal to moderate step | Fasten to subfloor/track base | ★★★★★ |
| 2 | Reducer | Vinyl-to-carpet or vinyl-to-thicker hard surfaces | Create a ramp across height change | Fasten base; profile bridges top | ★★★★☆ |
| 3 | Threshold | Doorway entries where you want a sealed step | Moderate difference between floors | Fasten to subfloor/trim base | ★★★★☆ |
| 4 | End cap (straight edge) | Vinyl ends where you can’t ramp to another surface | Small change or single edge finish | Fasten to substrate; cover exposed edge | ★★★☆☆ |
| 5 | Carpet-to-hard reducer | Closet to hall transition when one side is carpet | Smooth ramp from soft to hard | Fasten base; ramp profile | ★★★★☆ |
| 6 | Adhesive-backed seam/transition strip | Where fasteners aren’t possible or recommended | Typically smaller height changes | Adhere to clean, dry subfloor/edge | ★★☆☆☆ |
| 7 | Track + top-piece transition | Doorways where you want a precise, replaceable top | Measured bridging via matched track depth | Secure track to subfloor; seat top piece | ★★★★★ |
Vinyl expansion gap: the non-negotiable measurement
Because closet environments can swing with HVAC cycles, the vinyl’s movement matters. Use your flooring manufacturer’s stated gap—many instructions commonly call for around 1/4 in (6 mm) perimeter clearance for floating products, but the only safe number is the one printed in your specific installation guide. Resilient Floor Covering Institute (RFCI) Recommended Work Practices for Resilient Flooring (latest edition)
Install transitions around vinyl floors (step-by-step)
The best-looking transition install happens when you seat the strip once, confirm it doesn’t pinch, then secure it to the stable layer. Follow the transition’s installation method (fasteners, adhesive, or track system) and always re-check levelness before you call it done.
Install transitions by anchoring them to subfloor/trim as required, because securing into floating vinyl can restrict movement and contribute to buckling.
A transition that “rocks” even slightly usually means a high spot, a contaminated surface, or an incorrect trim profile—level contact is the goal.
Before final cutting, test-fit the transition so the seam lands where it belongs at the closet doorway opening and doesn’t conflict with the door jamb.
– Position and test-fit the transition strip, then remove it to cut any final ends if needed; aim for snug contact without forcing the vinyl.
– Install using the method your transition expects:
– For screw or nail/fastener-backed styles: pre-mark holes and fasten to the subfloor/trim, not into the floating vinyl.
– For adhesive-backed styles: ensure the vinyl surface is clean and dry, then press firmly and evenly.
– For track-based systems: secure the track to the subfloor/joists first, then click/seat the top piece per the strip instructions.
– Finish by checking that the transition is level with the vinyl surface (no rocking) and that you haven’t pinched the edge of the flooring.
Step sequence that prevents rework
1. Dry-fit in place. Confirm door jamb clearance and seam placement at the closet entry.
2. Cut accurately. Re-cut if the first cut prevents full base contact.
3. Fasten/adhere to the right layer. Stable surfaces only (subfloor/trim/track), per instructions.
4. Final check for “pinch.” Run a fingertip along the vinyl edge under the profile—if you feel a clamp point, you’re likely reducing the expansion space.
What can go wrong (and how to avoid it)
The biggest failures happen when installers treat transitions like “glue the vinyl in place” pieces instead of movement-aware finishing profiles. If you respect the expansion gap, match the transition profile to the height change, and anchor to the stable layer, most issues disappear.
Pinched or buckled vinyl commonly traces back to violating the required expansion gap—so the transition must not eliminate that clearance.
Uneven transitions usually result from fastening to the wrong layer or installing over debris/high spots, which creates gaps and trip hazards at the closet doorway.
Using the wrong reducer/T-molding profile can leave a step that moves under foot traffic, especially where closet doors create frequent traffic patterns.
– Pinched or buckled vinyl: this usually happens when the transition is installed over (or too close to) the required expansion space—always follow your vinyl manufacturer’s expansion-gap requirement.
– Uneven transitions: if the subfloor isn’t flat or the transition is fastened to the wrong layer, you can get gaps or a “lip” that catches feet.
– Wrong transition profile: using a reducer where you need a T-molding (or vice versa) can leave a visible step or create movement at the seam.
– Bad cuts at the closet doorway: forcing mitered corners without confirming the door jamb clearance can lead to binding when the door closes.
Common mistake vs outcome (fast diagnosis)
| Mistake | Typical symptom at the closet doorway | Prevention |
|---|---|---|
| No expansion clearance | Vinyl edge lifts, buckles, or bows near the transition | Follow the exact gap from your vinyl guide (often ~1/4 in for floating, but verify your product) |
| Fastening into floating vinyl | Creaks, localized separation, or premature seam stress | Anchor transition to subfloor/trim/track per manufacturer method |
| Skipping dry-fit at door jamb | Door won’t close freely or transition binds | Undercut trim only as needed to clear the transition lip |
Verdict / tip + quick checklist
If you want the cleanest result, use a transition strip designed for vinyl and match it to your height change and flooring thickness. The biggest success factor is respecting the expansion gap and fastening the transition to the stable structure (subfloor/trim), not into floating vinyl.
Downsides / when to skip:
– If you’re unsure about your vinyl type (floating vs glued) or can’t confirm the correct expansion gap from your flooring instructions, pause and check the manufacturer guide first.
– If the closet doorway area has significant subfloor unevenness, you may need subfloor leveling before a transition will sit correctly.
Scan-and-save checklist
– [ ] Transition style matches the height change (T-molding/reducer/threshold)
– [ ] Expansion gap followed exactly per your vinyl instructions (see placeholder below)
– [ ] Closet door jamb clearance checked (transition lip won’t bind)
– [ ] Transition fastened to subfloor/trim (not through/into floating vinyl)
– [ ] Dry-fit done before final cutting and fastening
– [ ] Transition sits level (no rocking) and seams look centered
Sources
The most reliable way to finish closet doorway transitions on vinyl—whether you’re connecting to carpet, laminate, tile, or another vinyl run—is to plan the profile first, measure for height and movement clearance, then install the strip using its specified attachment method. If you keep the expansion gap intact and anchor the transition to the stable layer, you’ll get a smooth, level seam that won’t pinch the vinyl or create a trip hazard over time.
Frequently Asked Questions
What transition pieces work best when installing transitions around vinyl floors in a closet?
The most common options are metal or vinyl transition strips for hard stops, such as a threshold/entry transition where the vinyl meets tile, laminate, or carpet. If the closet door opens to a room with a different flooring height, choose a reducer or T-molding to smooth the step and protect edges. For vinyl-to-vinyl or vinyl-to-LVP surfaces at the same level, a flat transition strip can look cleaner while still covering the cut edge and expansion gap.
How do I measure and plan the transition gap for vinyl flooring in a closet?
Start by measuring the closet width and the exact flooring stop point where the transition will land, including any undercut spaces at door jambs. Leave the required expansion gap around the vinyl perimeter—typically at least 1/4 inch—so the planks or sheets can move seasonally. Mark a straight, level line across the closet opening or along the doorway and confirm the transition profile height matches the adjacent floor so the strip doesn’t bind or create a visible hump.
How do I install a threshold or reducer transition when transitioning from vinyl in a closet to another room?
Dry-fit the transition strip first and check that it sits flush without rocking; adjust by trimming if needed. If you’re using a metal threshold, align the screw holes, drill into the subfloor, and then set the strip so it covers the vinyl edge and expansion gap. For click-lock vinyl, avoid locking the transition under planks—only attach the strip to the subfloor and keep the vinyl’s expansion space free.
Which tools and materials do I need to cut vinyl flooring transitions neatly for a closet doorway?
You’ll typically need a measuring tape, straightedge, utility knife (for sheet vinyl), or a vinyl/LVP saw or fine-tooth blade for planks. Use a jamb saw or oscillating tool with a flush blade to undercut door casing so the transition can slide under cleanly. For installation, keep a pull bar or tapping block handy, use construction adhesive or manufacturer-recommended fastening for transitions, and have a drill/driver and appropriate screws if the strip requires anchoring.
Why do transitions around vinyl floors matter in closets, and how can I prevent buckling at the doorway?
Transitions protect the vinyl floor edges from lifting and help manage height differences at thresholds—especially in closets where doors, foot traffic, and temperature swings can be more pronounced. Most buckling issues come from skipping the expansion gap or trapping the vinyl edge under the transition, so always maintain the manufacturer’s spacing. Install the transition onto the subfloor, keep it aligned with the adjacent flooring, and ensure the closet doorway area stays level so the vinyl can expand and contract without stressing seams.
📅 Last Updated: October 26, 2026 | Topic: How to install transitions around vinyl floors in a closet? | Content verified for accuracy and freshness.
References
- Threshold
- https://www.armstrongflooring.com/support/flooring-installation-guides.html
- https://scholar.google.com/scholar?q=install+transition+strip+vinyl+floor Google Scholar
- https://scholar.google.com/scholar?q=resilient+floor+transition+molding+installation+instructions Google Scholar
- https://scholar.google.com/scholar?q=vinyl+flooring+threshold+transition+strip+installation Google Scholar