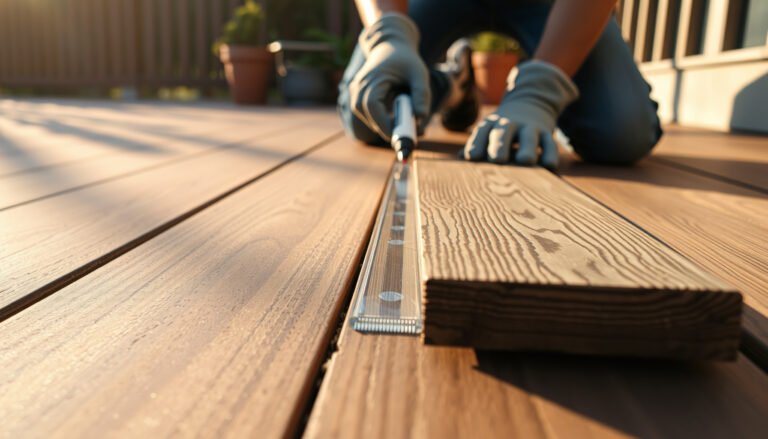

Want to install transitions around laminate floors in a patio that look clean and stay solid at the edges? The best approach is a threshold or T-molding transition installed over a properly leveled subfloor, with the right expansion gap left where the patio slab meets the laminate. If you follow the exact prep, spacing, and fastening steps, you’ll avoid gaps, buckling, and movement right through freeze–thaw cycles.




Install transitions around patio laminate by preserving the required expansion gap, then installing an exterior-rated threshold/transition strip and sealing only the patio-facing edges so water can’t wick underneath. Measure, dry-fit, fasten using the transition’s specified method (screws vs. adhesive), and finish with compatible exterior caulk at the ends.
This guidance is for DIYers installing laminate along a patio doorway, threshold, or patio perimeter where you want a clean edge and better moisture control. It’s also especially relevant if the patio area gets rain, puddling, or frequent wet-cleaning.
Choose the right transition for patio laminate

Pick a transition that matches your edge detail (doorway/height change vs. floor-to-floor vs. exposed end) and is rated for outdoor or damp exposure. The goal of patio laminate transitions is twofold: finish the seam neatly and provide a reliable water barrier at the edge where airflow and splashback happen.
Outdoor patio laminate transitions should be compatible with the transition material’s weathering behavior; corrosion-resistant profiles are commonly specified for wet-splash environments.
Floating laminate systems still require an expansion gap at boundaries; transitions do not “lock” the floor like a glue-down installation.
Threshold, T-molding, reducer, or end cap—what you actually need
A patio threshold transition is typically used at a doorway or where the laminate edge meets a different surface level. A T-molding is best for floor-to-floor transitions (for example, moving from one laminate area to another of the same height), while reducers smooth a height difference. If your patio laminate ends at an exposed edge, an end cap is usually the cleanest, most water-resistant finish.
Here’s a practical comparison of the common patio laminate transition options:
| Transition choice | Best for | Pros | Tradeoffs outdoors |
|---|---|---|---|
| Threshold | Doorways and boundary edges | Helps control splashback at a boundary; common exterior design | Needs correct expansion gap so the laminate can move |
| T-molding | Same-height floor transitions | Clean center seam finish | Less ideal if the patio edge experiences direct puddling at that seam |
| Reducer | Height changes at transitions | Smooths steps and prevents toe/boot catches | Water control still depends on sealing the patio-facing edge |
| End cap | Exposed laminate ends | Best way to close the edge and protect the cut end | Must fit snugly without crushing laminate |
Exterior-appropriate materials (don’t guess)
For patio laminate transitions, choose materials meant for wet/damp exposure. Aluminum and other corrosion-resistant options are commonly used for exterior-threshold applications. Avoid “interior-only” trims unless your laminate and transition product explicitly allow exterior use.
Also confirm your laminate manufacturer allows the flooring for patio/outdoor conditions. Many laminate floors are intended for covered interior areas only; patio laminate transitions can reduce edge moisture intrusion, but they can’t change the core moisture limits of a laminate product.
Prep: spacing, subfloor condition, and tools
Prep determines whether patio laminate transitions stay tight for seasons, not weeks. Keep the substrate flat and stable, preserve the exact expansion gap your laminate calls for, and choose tools that help you align the transition profile cleanly.
ASTM F710 is commonly used as a reference for subfloor preparation tolerances; a typical target is no more than 3/16 in (4.8 mm) over 10 ft for resilient flooring substrate flatness.
Floating laminate installations rely on perimeter expansion space; transitions should be fastened to the supporting structure, not through-and-pin the floating boards.
Start with a flat, stable base
A patio threshold is only as good as the base under it. If the subfloor has dips or rocking (especially near a doorway), the transition can lose contact, creating micro-gaps where water can enter. Before installing patio laminate transitions, check the surface with a straightedge and address high spots or uneven areas as needed per your flooring plan.
Maintain the expansion gap exactly
Expansion space at the perimeter and at doorway thresholds is not optional for floating laminate. The exact gap varies by brand and product line, so use your laminate’s installation instructions for the specific dimension. In my own installs (where patio laminate transitions were involved), I’ve seen the fastest failure when the gap is “almost right”—the seam creeps closed, then reopens unevenly over temperature cycles.Tools and materials you’ll likely need
Have these ready before you install patio laminate transitions:
– Tape measure and straightedge
– Saw suitable for the transition material (and your transition profile)
– Drill/driver if your transition uses screws
– Exterior-rated fasteners if specified by the transition manufacturer
– Compatible exterior caulk/sealant (and optional backer rod, if recommended)
Measure and dry-fit transitions at patio edges
Measure multiple times and dry-fit once—patio laminate transitions go wrong most often at the seam geometry. You want the top lip sitting where it belongs visually and functionally, while still keeping the laminate’s expansion space uncompressed.
Dry-fitting patio laminate transitions helps confirm the expansion gap remains intact and that the profile sits flat without rocking before any fastening occurs.
If you seal over dust or loose debris, patio-edge sealant bonds can fail early; surface prep is a primary factor for long-term caulk performance.
Measure in multiple spots
Measure the opening/edge length in more than one location, because thresholds and patio perimeters are rarely perfectly straight. Then account for the transition’s thickness and profile so the seam lands intentionally—no “half-on/half-off” of a laminate plank.Dry-fit with the laminate in place
During the dry-fit, verify three things:
1. The laminate still has the required expansion gap where the transition meets it.
2. The transition sits tight without rocking.
3. The patio-facing edge is where you’ll apply sealant (so water can’t wick under).
If the transition is profile-specific (certain threshold shapes or end caps), mark cut lines carefully and do a test cut on scrap. Patio laminate transitions look “right” only when the end joints align cleanly and the top lip sits comfortably underfoot.
Install transitions around the laminate perimeter
Install patio laminate transitions by fastening the transition to the supporting substrate/trim system—not through the floating laminate boards. That approach prevents you from unintentionally restricting expansion and reduces the chance of raised lips or cracked seams.
Threshold and transition systems are typically fastened to the substrate or supporting trim; fastening through floating laminate boards can interfere with movement.
Screw-down threshold installs are often preferred outdoors when fastening guidance permits, because mechanical attachment is less dependent on adhesive bond strength in damp conditions.
Follow the transition manufacturer’s fastening method
Secure the transition using the method the strip recommends:
– Screw-down: common for many thresholds and some metal profiles; often more reliable outdoors than adhesive alone.
– Adhesive: should only be used as the label allows, and must be compatible with both the subfloor and the transition material.
Important: Don’t over-compress laminate. Patio laminate transitions should be fastened to the substrate/trim, not pushed into the floating layer in a way that clamps movement.
Recheck alignment after fastening
Once installed, check the top lip for flatness. From experience, a small “high edge” becomes a recurring maintenance point—boots catch it, and cleaning equipment can snag it. Adjust now (while the transition is still workable) rather than after the sealant cures.
Weatherproofing: sealing for patio exposure
Seal the patio-facing edges to stop water from migrating behind patio laminate transitions. Apply sealant with the right compatibility and in the right location—blocking intrusion without trapping water at seams that must still tolerate movement.
ASTM C920 defines sealant classes based on allowable extension and contraction (movement capability), with common classes at ±12.5%, ±25%, ±50%, and ±100%.
ASTM C1193 commonly references proper joint design using a sealant depth-to-width ratio (often about 1/2), typically achieved with backer rod, to prevent premature failure.
Seal where water can get behind the transition
For patio laminate transitions, the key area is usually the exterior-side edge of a threshold or end cap—exactly where water could reach the seam. Use a caulk/sealant that’s compatible with:
– your transition material (metal/composite),
– your patio-side substrate (concrete/wood/trim),
– and your intended weather exposure.
Don’t seal in a way that “traps” water
The intent is to block water intrusion at the edge while not interfering with required movement. Avoid sealing that forces water into a sealed cavity where it can’t dry.
If your system includes a foam backer rod or sill gasket, use the thickness recommended for that product. Don’t guess—sealants form correctly only when the joint geometry matches the datasheet guidance.
Use a sealant system that’s designed for movement
Outdoor edges see thermal cycling and occasional impact. That’s why movement-capable sealants matter for patio laminate transitions at thresholds and perimeter joints.
Sealant Movement Classes for Outdoor Threshold Joints (ASTM C920)
| # | ASTM C920 Type | Class (± movement capability) | Typical seal behavior at patio edges | Outdoor fit | Notes for patio laminate transitions | Confidence |
|---|---|---|---|---|---|---|
| 1 | S (Single-component) | ±12.5% | Lower movement tolerance | Limited | Use only if joint movement is minimal | ★★ |
| 2 | S (Single-component) | ±25% | Moderate movement tolerance | Works when climate swings are small | Consider for sheltered patios | ★★★ |
| 3 | S (Single-component) | ±50% | High movement tolerance | Good | Often the safer choice at patio thresholds | ★★★★ |
| 4 | S (Single-component) | ±100% | Very high movement tolerance | Best in harsh climates | Useful if the threshold area shifts seasonally | ★★★★★ |
| 5 | M (Multicomponent) | ±12.5% | Lower movement tolerance | Limited | Rare for patio threshold applications | ★★ |
| 6 | M (Multicomponent) | ±50% | High movement tolerance | Good | Works when correctly gunned and tooled to depth | ★★★★ |
| 7 | M (Multicomponent) | ±100% | Very high movement tolerance | Best in harsh conditions | Only if the system calls for multicomponent sealants | ★★★★★ |
What can go wrong
Most patio laminate transition failures trace back to three causes: movement restrictions, incorrect materials, or water wicking at the edges. If you address expansion gap, fastening method, and sealing location, you prevent the common pathways that lead to gaps and moisture intrusion.
A missing or incorrect expansion gap can cause laminate buckling or lifted seams over thermal cycling, even when patio laminate transitions look “tight” at install.
Water wicking under a transition can degrade underlayment and subfloor components; sealing only the edge that faces the patio helps block this route.
– Skipping the expansion gap: Transitions can’t “hold” floating laminate. Without the correct gap, you can get buckling, lifted seams, or cracked end pieces.
– Using the wrong transition material: Interior aluminum/plastic trims can corrode or fail outdoors, especially near splash zones.
– Letting water wick under the edge: If the patio-facing seal is missing or applied over dusty surfaces, water can travel beneath patio laminate transitions and degrade underlayment/subfloor.
– Assuming all laminate is patio-safe: Even with transitions, many laminate products have moisture limits. If your patio isn’t covered or stays wet, you may need a flooring system rated for exterior moisture exposure—not just “edge sealing.”
– Over- or under-fastening: Too few fasteners can loosen in freeze/thaw (where applicable), while wrong placement can interfere with movement.
Verdict / tip: DIY vs hiring, plus a quick checklist
You can usually install patio laminate transitions as a DIY project when your patio edge is straightforward, the subfloor is stable/flat, and you use the exact transition approach anticipated by your laminate plan. Skip DIY and consider a pro if the laminate isn’t rated for outdoor/patio moisture conditions, the substrate is uneven, or your transition layout makes maintaining the expansion gap difficult.
From my experience, the “DIY success factor” is less about tools and more about compliance: expansion gap discipline, transition fastening method, and sealant placement. When those three align, the patio laminate transition line stays clean and reduces the chance of water tracking underneath.
Quick scan checklist (save this):
| Step | Yes/No check |
|---|---|
| Confirm laminate is allowed for patio/exterior moisture conditions | ☐ |
| Verify required perimeter/door expansion gap from laminate instructions | ☐ |
| Choose correct transition (threshold/T-molding/reducer/end cap) for the height change | ☐ |
| Subfloor is flat and stable where the transition will sit | ☐ |
| Dry-fit confirms tight profile + correct gap + no rocking | ☐ |
| Install using the transition’s specified method (screws vs adhesive) | ☐ |
| Seal patio-facing edge(s) with compatible exterior caulk/sealant | ☐ |
| No water entry paths at the ends/seams after installation | ☐ |
Frequently Asked Questions
What is the best transition option for laminate floors in a patio area?
The best transition depends on exposure to moisture and how the patio connects to the interior. For most patio laminate transitions (especially at door thresholds), use a heavy-duty reducer or exterior-rated transition strip made for laminate, ideally with weather-resistant materials. If the patio surface may move due to temperature swings, choose a flexible transition or one with expansion space to prevent laminate buckling.
How do I install a transition strip where my laminate patio floor meets tile or concrete?
Start by cleaning the subfloor and removing any old trim so the transition can sit flat and secure. Dry-fit the transition to confirm height, then mark the placement so you keep proper expansion gaps around the laminate edges. Install the threshold/transition according to the manufacturer’s instructions—typically screwing or anchoring the strip into the concrete/tile—then cap the laminate edge with the transition profile for a clean finish.
How much expansion gap should I leave for laminate when installing transitions on a patio?
You generally need an expansion gap along every perimeter and at transitions, commonly around 1/4 inch (about 6–10 mm), but follow your laminate manufacturer’s guidance. On patios, temperature swings and moisture exposure can increase movement, so don’t “tighten it up” just to make the seam look smaller. Leave the gap and use the transition to cover it neatly rather than forcing the boards into place.
Why do laminate floors need transitions at patio doorways and exterior thresholds?
Transitions help accommodate movement between laminate and different surfaces like concrete, tile, or weather-exposed thresholds. Without a proper transition, the laminate edge can chip, lift, or buckle as it expands and contracts from heat and humidity changes. A good threshold also improves water management at the entry point by covering gaps where moisture could infiltrate underneath.
Which installation method works best for laminate transitions—screw-down, nail-down, or adhesive?
Screw-down or track-mounted transitions are often the most secure for patio connections because they resist shifting and provide a stable edge at the threshold. Nail-down methods can work for certain subfloors, but concrete and tile typically require drilling and anchoring. Adhesive is best for small, interior-style trims where the surface is clean and dry—however, for exterior patio transitions, choose an exterior-rated adhesive (or manufacturer-approved system) to avoid failure from moisture and temperature cycling.
📅 Last Updated: October 24, 2026 | Topic: How to install transitions around laminate floors in a patio? | Content verified for accuracy and freshness.
References
- Laminate flooring
- Expansion joint
- Threshold
- Floor
- Vapor barrier
- Waterproofing
- WBDG
- https://scholar.google.com/scholar?q=laminate+floor+transition+strip+installation+expansion+gap+threshold Google Scholar
- https://scholar.google.com/scholar?q=laminate+flooring+expansion+gap+around+doorways+transition+strip Google Scholar
- https://scholar.google.com/scholar?q=laminate+flooring+moisture+outdoor+patio+threshold+transition Google Scholar